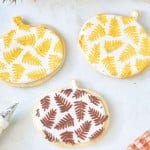
Fall Sugar Cookie
This is the best recipe for cut out sugar cookies. They won't spread and they keep their shapes.
Servings 30 medium size cookies
Calories 165kcal
Equipment
- 1 Pumpkin Cookie Cutter
Ingredients
- 2 cups unsalted butter room temperature
- 2 cups granulated sugar
- 2 eggs large
- 5 cups all-purpose flour
- 3 tsp vanilla extract
- 1 tsp salt
Instructions
- Cream the butter and sugar together until light and fluffy. This takes about one minute on low speed.
- Add eggs and vanilla and mix well.
- Mix flour and salt in a separate bowl.
- With your mixer on the lowest speed, slowly add flour mixture to the butter. Mix for 30 seconds until the dough is thoroughly incorporated.
- Divide dough into two parts. Place each between two pieces of parchment paper.
- Roll out each set of dough. I rolled mine out to a 6 mm thickness, but it is whatever thickness you prefer.
- Transport each cookie dough to a cookie sheet.
- Refrigerate the cookie doughs for 1 hour.
- Preheat oven to 350°
- Take chilled cookie dough and cut out cookie shapes and place the cookies on a parchment lined cookie sheet.
- Place cut out cookies back in the fridge for about 10 minutes.
- Reroll extra dough and place cut out cookies back in the fridge for 10 minutes.
- Remove chilled cookies from fridge and bake for 8-10 minutes.
- With the extra dough reroll and chill for 10 minutes. The colder the cookies the better they keep their shape when baking. I hope this makes sense.
Icing and Decorating
- To make the icing, follow the icing recipe below.
- Fill The Pastry BagPlace your tip (#2 round tip) and piping coupler on one of your pastry bags. On another pastry bag, do the same, but add a pastry tip with a larger opening, like a #4 round tip. Then, place each bag in a tall drinking glass and fold the bag on the outside of the glass. Fill the bag with icing.If you don’t have pastry tips, you can cut a small hole at the tip. The smaller your opening, the easier it is to control. But if it’s too tiny, you’ll have difficulty squeezing out the frosting. I think I cut about 1/4 inch or less at the tip.
- Start PipingUsing your smaller tip, outline your cookie with a single line of icing.
- Flood the IcingFill in the outline with icing from your larger pastry tip bag. Go around the inside of the outline until the whole area is flooded with icing. Don’t worry if you have a few empty spots. Hold your cookie on the sides and jiggle it back and forth. This will spread the icing and create a smooth surface. I did shake one of my cookies too much, and it seeped out of the outline. So, while the icing was soft and malleable, I took my finger and cleaned up the outline.
- Stencil CookiesMix your frosting (I use store-bought white icing) with food dye in a small bowl and set it aside. Once the icing on the cookies has fully hardened, which takes about two hours, ensure it’s firm by lightly pressing with your finger (it shouldn’t leave an indent). Place your stencil over the iced cookie, then spread a layer of the dyed frosting evenly over the stencil. Cover the entire stencil area, and use a pastry scraper to remove any excess frosting gently.
- Allow the stenciled frosting to harden before serving.
Nutrition
Serving: 1cookies | Calories: 165kcal | Carbohydrates: 13g | Protein: 1g | Fat: 13g | Saturated Fat: 8g | Trans Fat: 1g | Cholesterol: 43mg | Sodium: 84mg | Potassium: 9mg | Sugar: 13g | Vitamin A: 394IU | Calcium: 6mg | Iron: 1mg