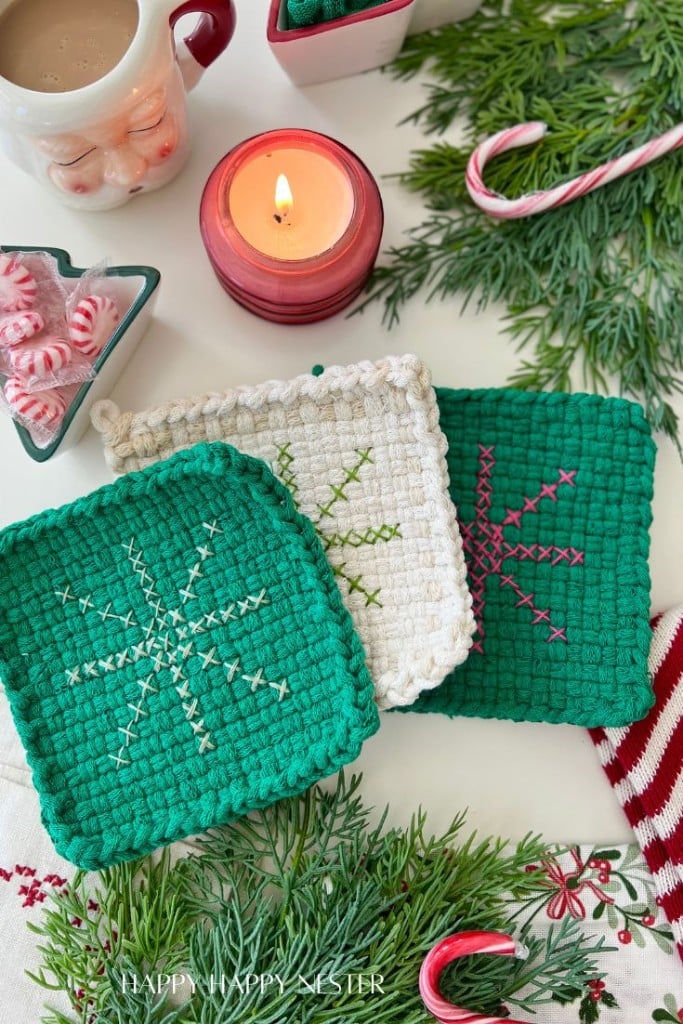
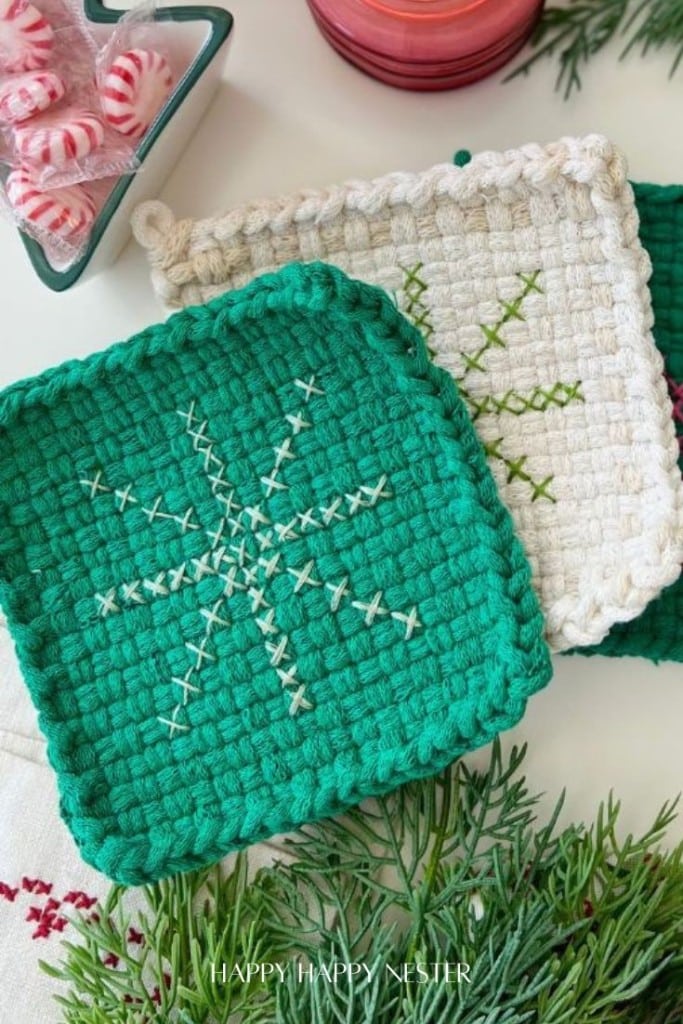
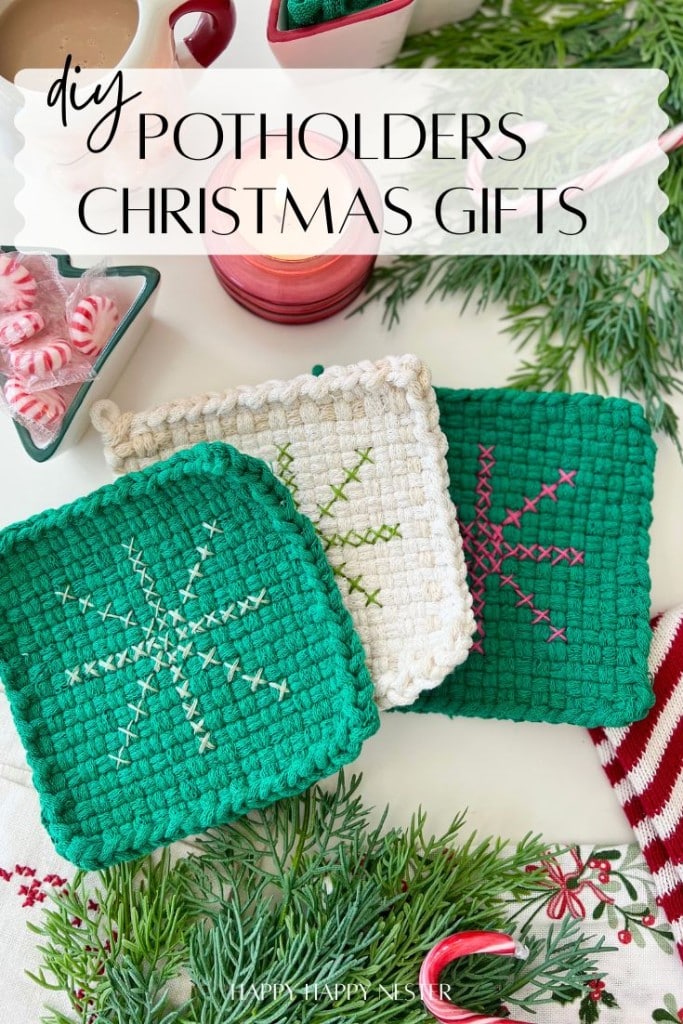
Potholders Christmas Gifts DIY projects are some of my favorite holiday crafts because they’re simple, nostalgic, and totally customizable. I’ve been making loom potholders since I was little, so it only felt natural to turn them into adorable Christmas gifts this year. To make them extra festive, I stitched little snowflakes onto them using colorful embroidery thread. It’s such a small detail, but it turns a classic potholder into something truly charming for the holidays.
These cute holiday potholders are perfect to use around your own kitchen, and they also make thoughtful handmade gifts for friends, neighbors, teachers, and family. Everyone loves something cozy and handmade this time of year, and the bright embroidered snowflake really sets them apart from your everyday potholder. They feel special, personal, and full of holiday cheer.
Do you remember those classic loom potholders from childhood? I sure do. I used to sit on the floor weaving loop by loop, feeling very accomplished once I tied off the last edge. My mom actually kept and used those potholders for years. They’re surprisingly sturdy — thick enough to protect your hands, but not so bulky that they fold over or get awkward to use.
The fun part now? The loops come in an incredible range of colors, so you can match them to your kitchen, your holiday theme, or even just your mood. I’ve been making a bunch lately and our family loves them. They feel nostalgic, handmade, and just a little bit charming in the kitchen.
It’s one of those simple crafts that never really gets old
More Crafts!
If you enjoy crafting, you’ll definitely want to check out some of my other easy and fun DIY projects! I’ve got a whole collection that’s perfect for adding a personal touch to your home, celebrating the seasons, or just enjoying a relaxing creative moment. Whether you’re crafting solo or with friends and family, there’s something for everyone. Take a peek and see what inspires you next!
- How to Finish a Potholder Loom
- How to Hand Knit a Pillow
- Make a Chunky Knit Wreath in Under 30 Minutes
- Quick and Easy Arm Knitted Wreath

Ok, let’s get started on this potholders Christmas gifts DIY!
Here are the supplies you’ll need for your potholder weaving project.
- Harrisville Loom Kit – 7-inch loom (This loom is a metal one rather than a plastic loom. And it contains enough loops to make two potholders)
- Potholder Pattern (you can design your own or use one in the booklet that comes with the kit)
- A Bag of Cotton Loops ( But if you want to make potholders with pastel colors, this is what I used)
- Weaving Tool – Comes with the kit
- Crochet Hook – Comes with the kit
- Embroidery Thread
- Embroidery Needles
Directions on how to make your potholder
Step 1 – Choose Your Design
Before you begin, choose your design. If you choose the standard classic designs, you can change the two or 3-color pattern to your favorite colors. Harrisville has them online and in the booklet with your loom kit. For this project, I kept things simple and classic. I made a solid-colored potholder and added a cute embroidered snowflake right in the center. It’s a subtle detail, but it adds a lovely, handmade touch—and the snowflake really pops against the solid background!
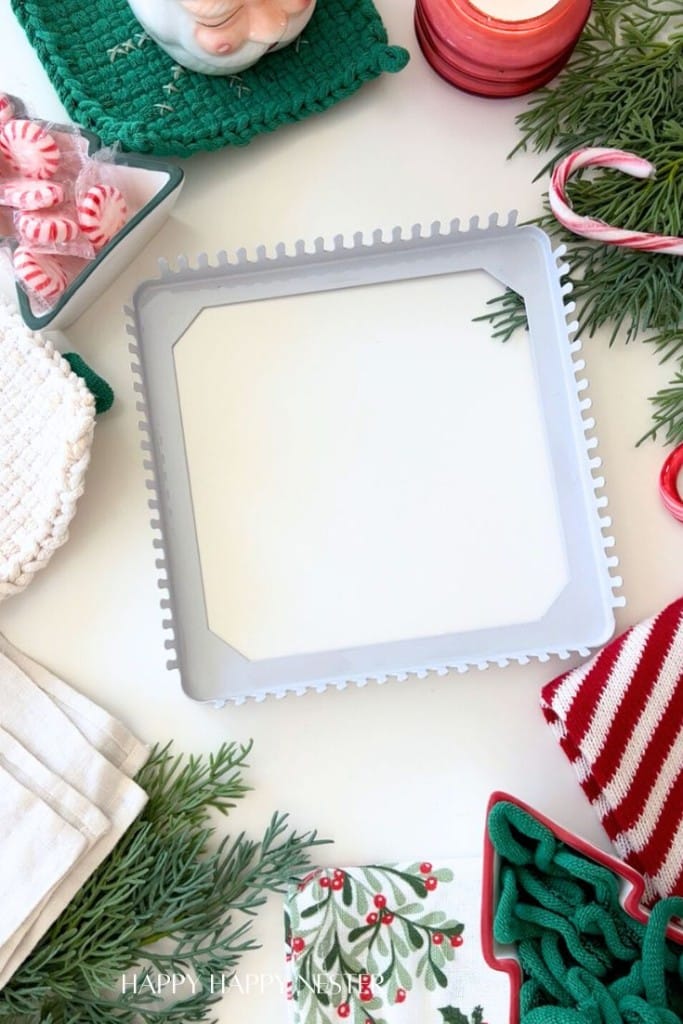
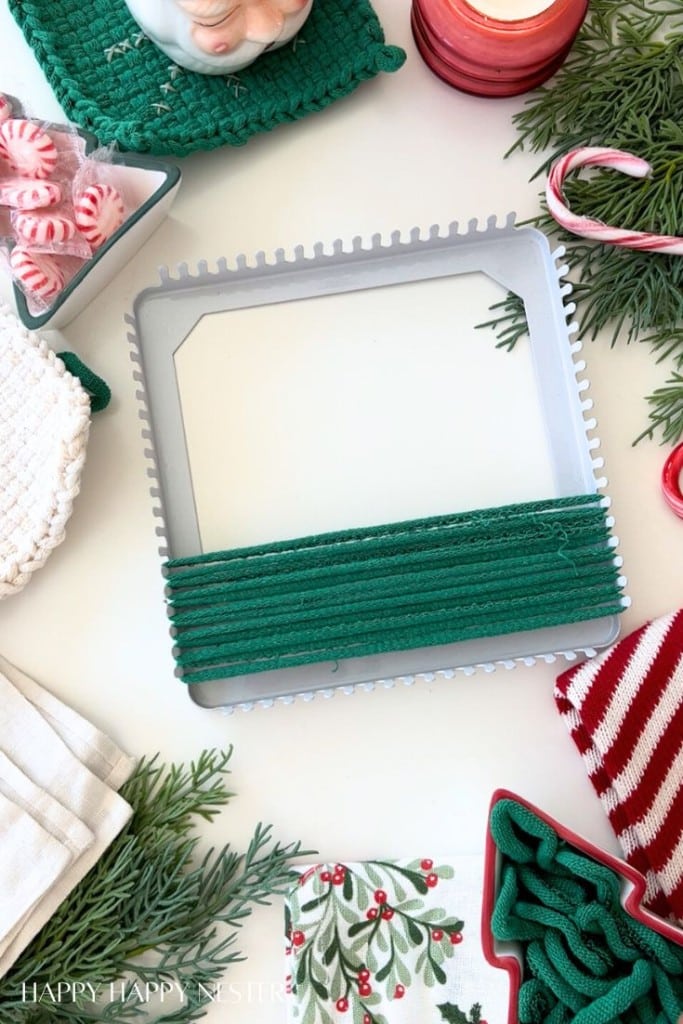
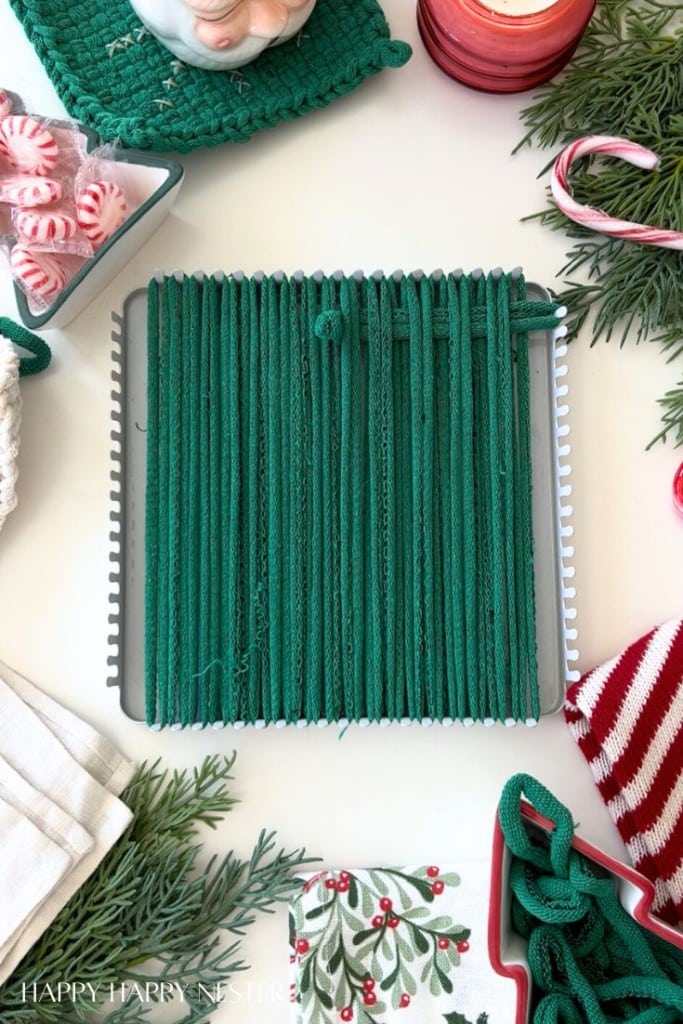
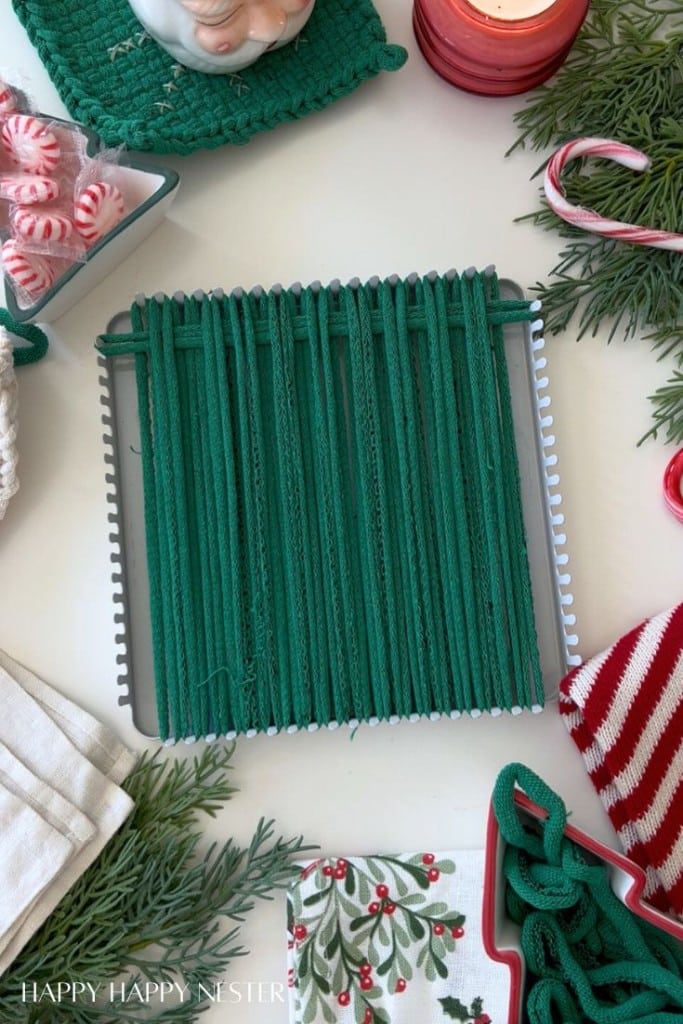
Step 2 – Warp the Loom
Warp the loom, which means tying the end of the loop to one peg and wrapping it around to the corresponding peg on the opposite side, ensuring the yarn is taut. You’ll attach the loop to the first peg and then stretch it down to the bottom peg. Then, moving to either the right or left, place the second loop on the next row of pegs. Once the loops are attached, you’re ready to weave the other loops through these established loops. Repeat this process until you have the desired number of warp threads.
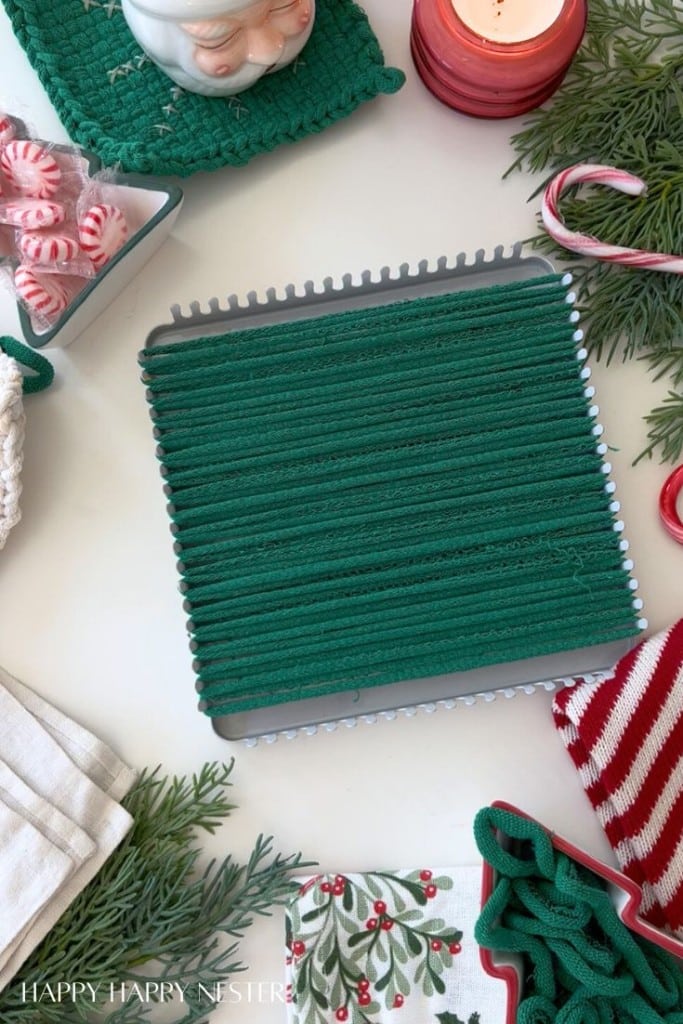
Step 3 – Weave the Pot Holder
Metal Weaving Tool: You can use the metal weaving tool, which features a hook on each end. One hook is small, and the other is big. The instructions from Harrisville say to weave the metal tool with the small hook in front, and once you have threaded the device through the loops, attach your cotton loop to the big hook. And finally, pull it all through the potholder and attach both ends to the corresponding pegs. You can see that version in my ‘How to Finish a Loom Potholder DIY‘ tutorial.
Your next loop or row will be woven in the opposite fashion to the last loop. So, instead of going over a loop, this row goes under and continues in the opposite manner. Each row will alternate from the previous row.
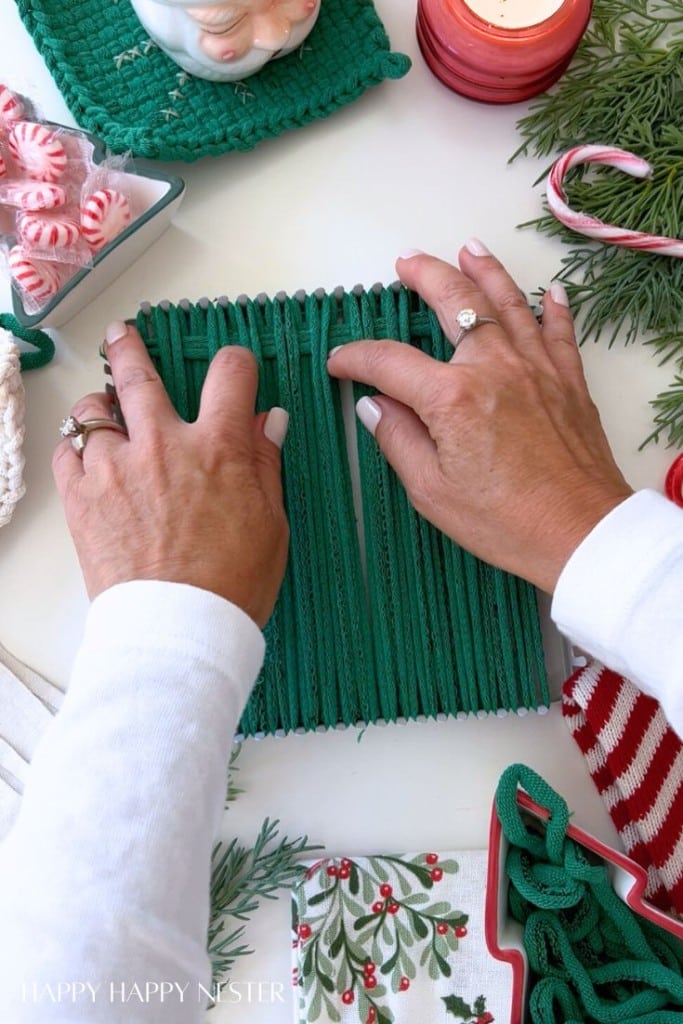
Finger Weaving: If you use your fingers, start weaving the pot holder by inserting the yarn under the first loop, then over the second, under the third, and so on. Secure one end on the loom peg while you weave the loop through. Once you reach the other side of the loom, attach the end of the loop to the corresponding peg.
Your next loop or row will be woven in the opposite fashion to the last loop. So, instead of going over a loop, this row goes under and continues in the opposite manner. Each row will alternate from the previous row. I like using my fingers instead of the metal weaving tool—it just feels easier and more intuitive. The tool is a bit large and awkward to maneuver with this small loom, so finger weaving gives me way more control and makes the process a lot more enjoyable.
Also, push it up after you add a loop, so the loop is in a straight horizontal line on the loom. You can do this with your fingers or use your crochet hook to move the loop into place.
Step 4 – Repeat the Weaving Process:
Continue the weaving process until you have attached all the loops to the loom. To switch colors, use a new loop of a different color.
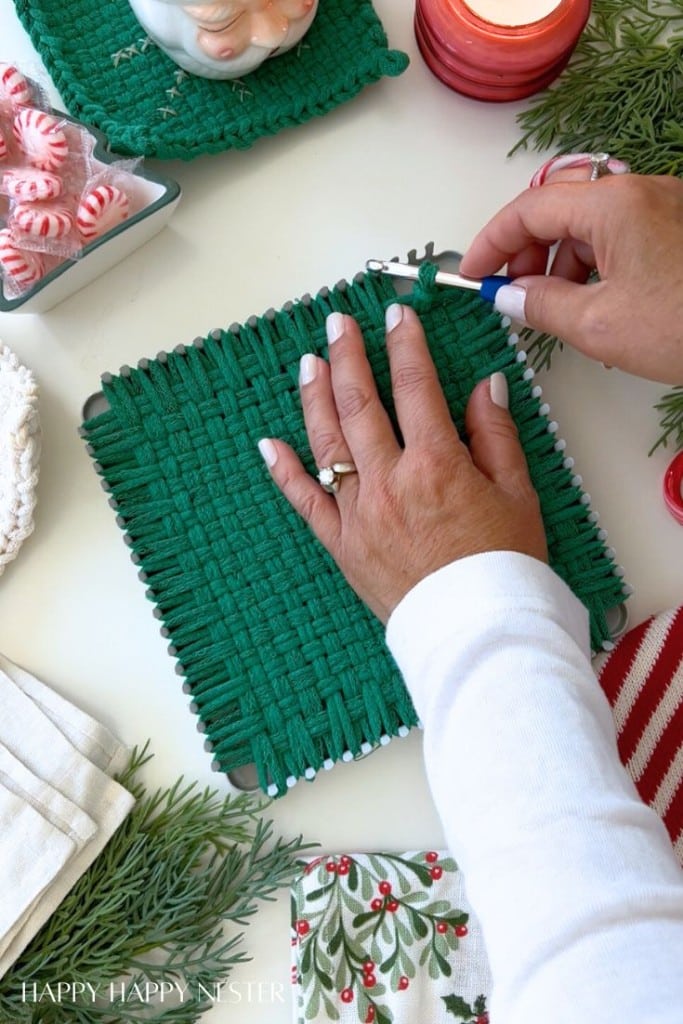
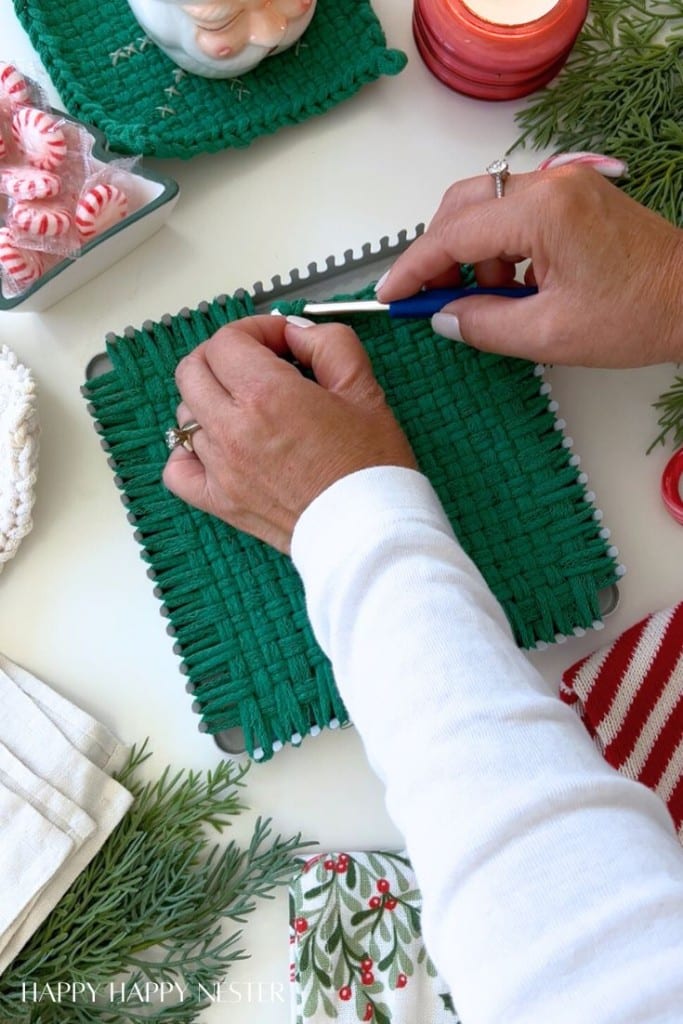

Step 5 – How to Finish The Potholder Off the Loom
Once you have filled the loom, you should start on a corner of the loom. Take your crochet hook (using your dominant hand) and pull off the corner loop by going under the loop and through the middle. Add the next loop by going under the loop and through the middle. At this point, you should have two loops on your crochet hook.
I found that the loops were pretty tight, so I used my hands to lift the top loop over the bottom loop. Now you’ll pull the top loop over the bottom loop, and it will go off the hook. So you are back to one loop on your crochet hook.
Repeat the first step by adding the next loop by going under the loop and through the middle. Then pull that loop through the second loop like you did earlier. Repeat this until you have crocheted your way across each side.
When you reach the last loop, secure it tightly, and this is the loop from which you’ll hang your potholder.
Step 6 – Embroidered Snowflake
If you hold the potholder by the loop and it forms a diamond shape, you’ll be creating your snowflake with eight spokes.
Embroidered Snowflake Potholder (Step-by-Step)
What you’ll need
- Finished woven potholder
- Embroidery needle with a blunt tip (tapestry needle)
- Cotton yarn or thick embroidery floss
- Scissors
- Disappearing fabric pen or a small straight pin (optional, for marking center)
Before you start
- Your snowflake has eight spokes: horizontal, vertical, and four diagonals.
- Each spoke is built from simple cross (X) stitches.
- I did not separate the thread into three strands; I wanted the image to stand out, so I made the thread thick.
Steps

Find the center
Find the middle of your potholder by counting equally from the outside into the middle. Lightly mark it or place a pin.
Thread & secure
Thread your needle and place a knot on the long end of your thread. From the back, bring the needle up at the center point corner.
Make the first center cross
Stitch one small “X” right in the center. You’ll have your threaded needle come up the right bottom of the loom square. Then, down in the top left of the square. Next, the needle will come through the right top and go down to the bottom left corner.
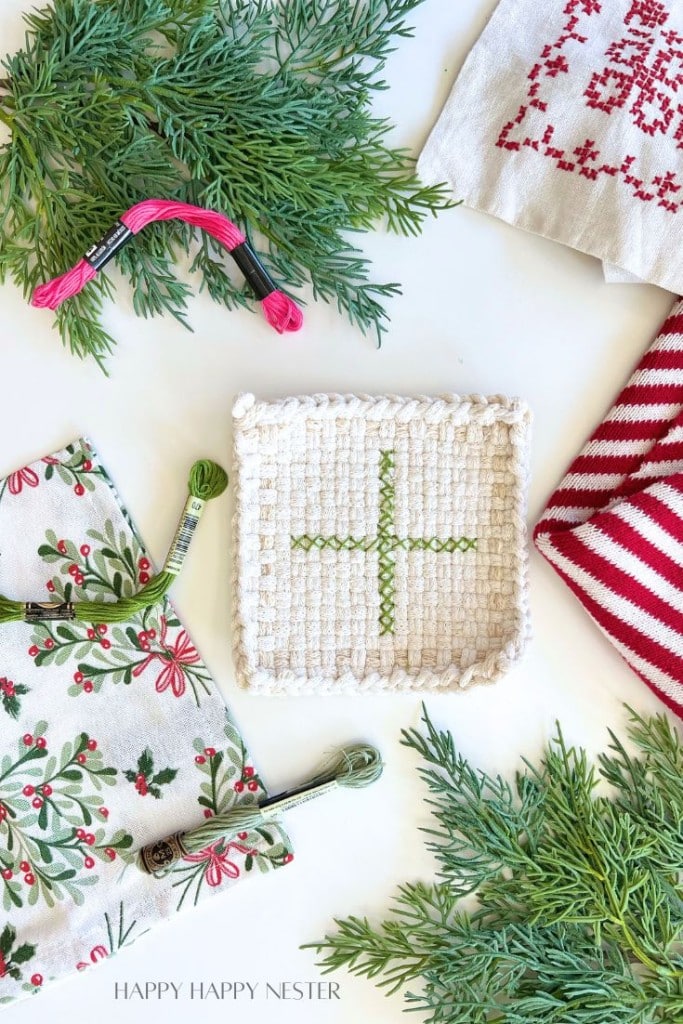
Build the horizontal spoke
From the middle “X,” work straight to the right: add six evenly spaced cross stitches in a row.
Return to center and repeat to the left: add six cross stitches.
Build the vertical spoke
From the center, work up: add six cross stitches.
Return to center and work down: add six cross stitches.
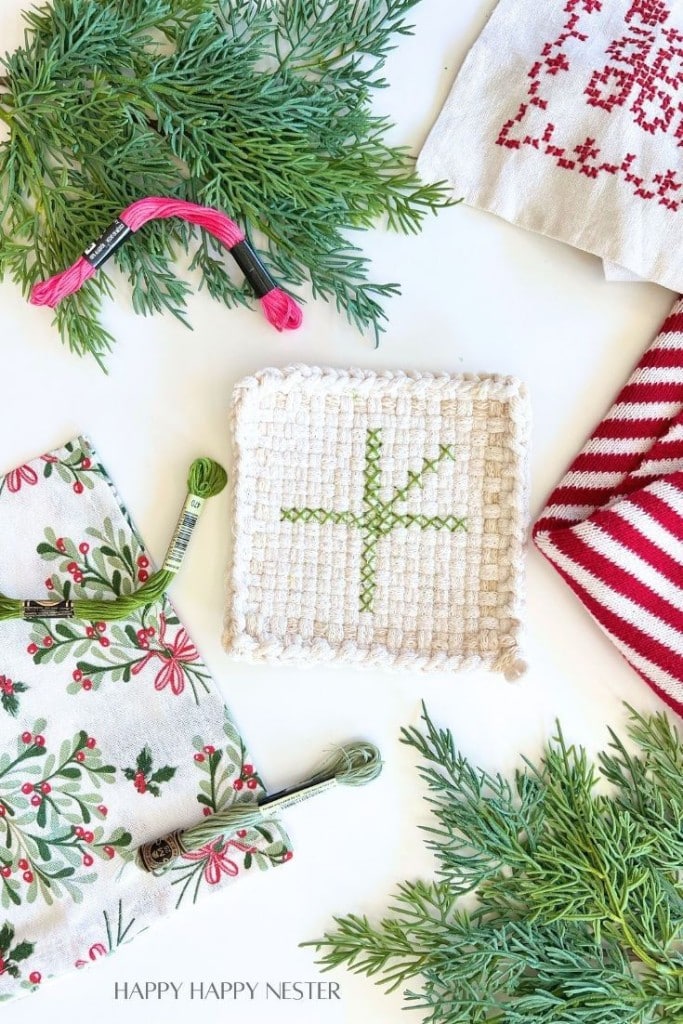

Build the first diagonal (↗︎/↙︎)
From the center, stitch diagonally right top: add six cross stitches, each positioned one step up and one step over.
Build the second diagonal (↖︎/↘︎)
From the center, stitch diagonally right bottom: six cross stitches.
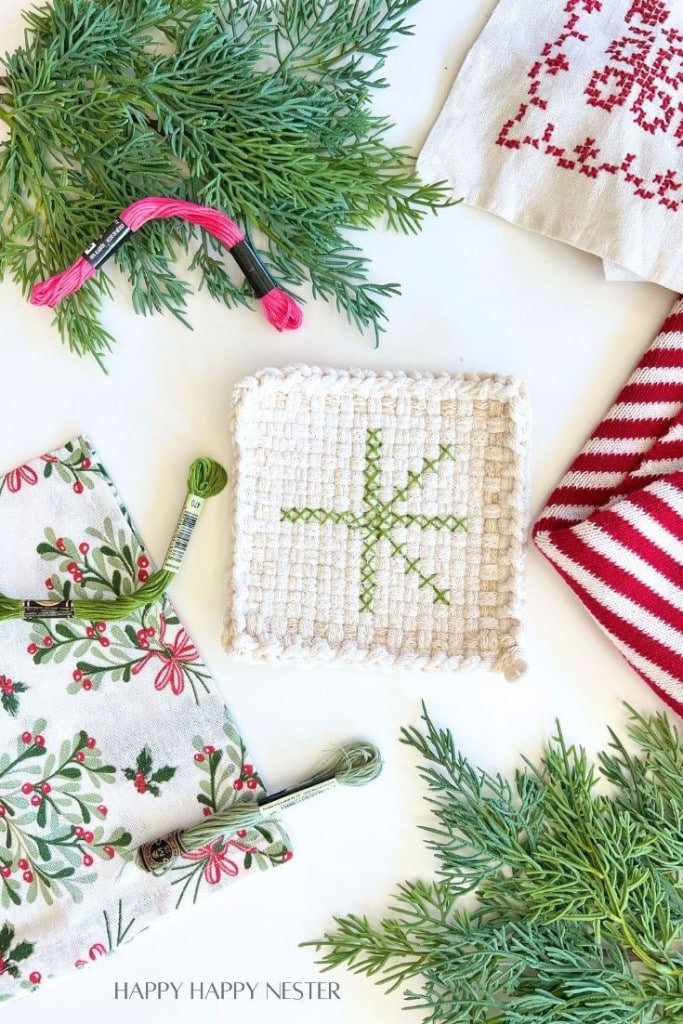
Build the third diagonal (↖︎/↘︎)
Return to center and stitch diagonally left bottom: six cross stitches.
Build the fourth diagonal (↖︎/↘︎)
Return to center and stitch diagonally left right: six cross stitches.
Tension check
As you stitch, lay the potholder flat and keep a gentle, even tension so the potholder doesn’t pucker.
Secure the back
When finished, flip to the back and weave the working yarn tail under several stitches. Do the same with the starting tail. Trim.
Optional detailing
For extra sparkle, use metallic embroidery thread, or create a French knot at in between the spokes of the snowflake for accents and design.
Quick tips
- If your weave is loose, use slightly thicker yarn so the X’s read clearly.
- Keep stitches consistent: each new X should “sit” on the same grid so the spokes look crisp and snowflake-sharp.
Thanks so much for stopping by and crafting with me today! I hope this potholders Christmas gifts DIY adds a cozy, handmade touch to your holiday season. Whether you’re making them as gifts or keeping a few for yourself, it’s such a sweet and simple way to spread some cheer. Wishing you a fun, relaxing, and crafty Christmas filled with joy, creativity, and a few too many cookies. See you back here soon for more festive ideas!
Cheers,


- Ai Kitchen Remodel - June 12, 2026
- Lemon Aioli Sauce Recipe - June 5, 2026
- Ginger Beer Mocktail Recipe - May 28, 2026


Leave a Reply