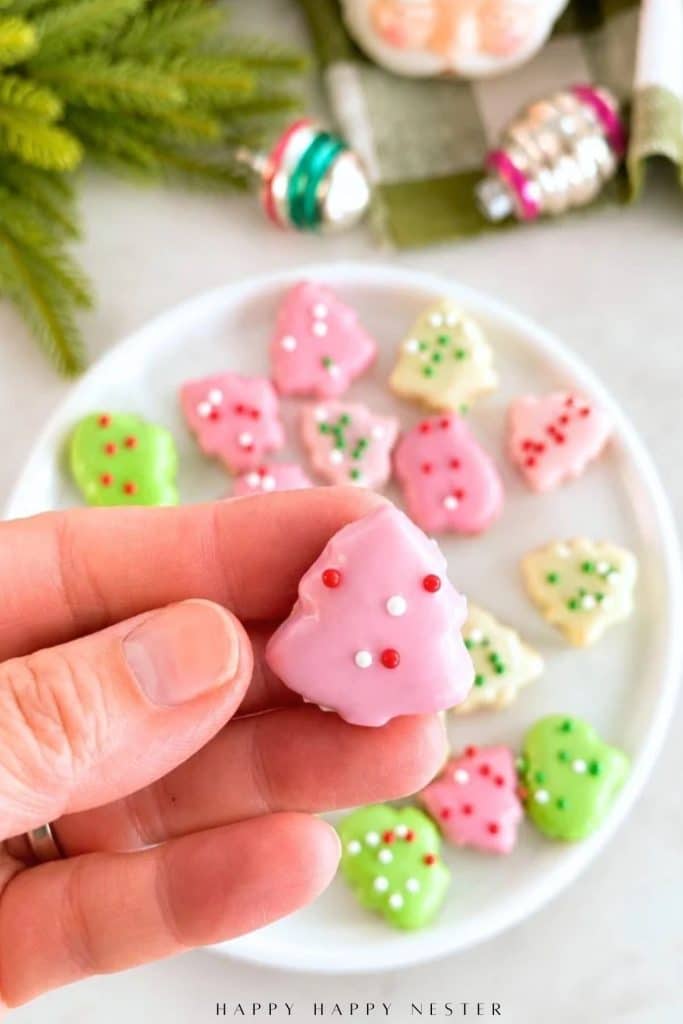
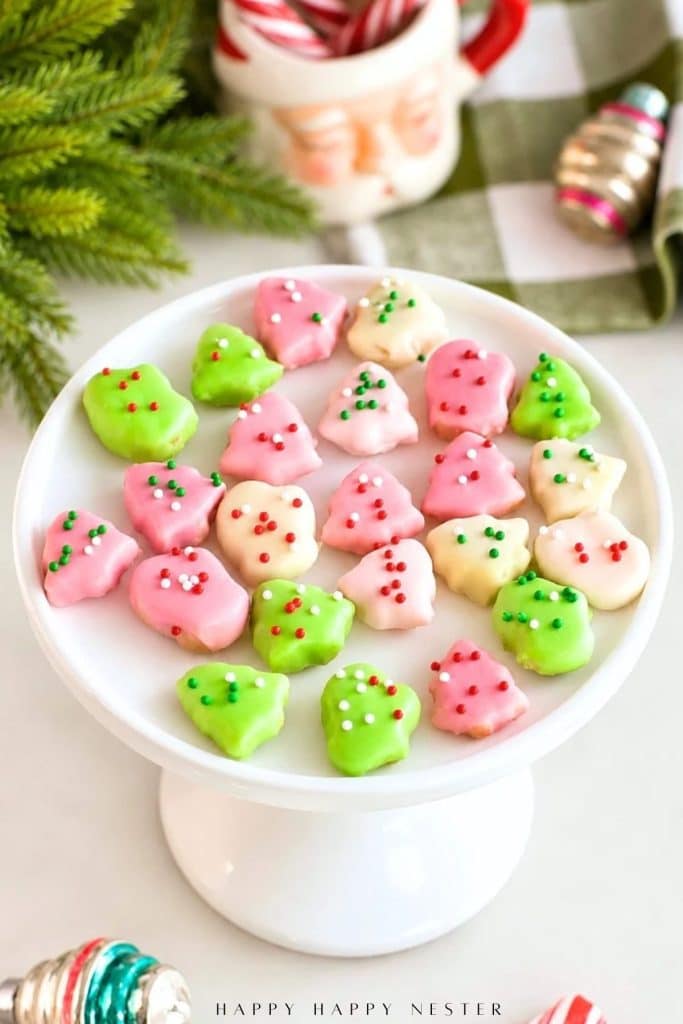
I’ve been seeing Mini Christmas Cookies all over Instagram this winter, and I couldn’t resist making a batch of my own! I’ve also always loved those cute Mother’s Circus Animal Cookies, and since my husband is a big fan of them, I thought it would be fun to make a homemade version with ingredients I could choose myself. I used my favorite sugar cookie recipe and tiny Christmas tree and mitten cookie cutters to create these adorable bite-sized treats.

Instead of traditional icing, I dipped the cookies in pastel pink, green, and white almond bark and finished them with festive Christmas sprinkles. I had so much fun decorating these little cookies, and I love how cheerful they look all piled together on a plate. They’re perfect for Christmas cookie trays, holiday parties, or packaging up as sweet homemade gifts.
Why You’ll Love These Mini Christmas Cookies
There’s something so charming about these tiny Christmas cookies! They’re made with my favorite buttery sugar cookie recipe, which holds its shape beautifully when baked. And because the cookies are so small, you can make a whole bunch from one batch of dough.
One of my favorite Christmas traditions is filling cookie tins with homemade treats to share with family and friends. I can already picture these little pink, green, and white cookies tucked in alongside our other Christmas favorites! I also love that the almond bark sets up firm, making them easy to package without smudging the decorations. And choosing the colors and sprinkles is half the fun. I think these would be especially cute served with hot cocoa on a cozy December afternoon.
Ingredients for Mini Christmas Cookies
I used my favorite sugar cookie dough for these little Christmas treats, the same recipe I use for my Peeps Cookies. I made a half batch, which still makes plenty of these tiny cookies! For decorating, I skipped the usual icing and used melted almond bark in pretty Christmas colors, along with lots of festive sprinkles.
For the Mini Sugar Cookies
- 1 cup unsalted butter: Make sure the butter is softened to room temperature so it creams easily with the sugar.
- 1 cup granulated sugar: Adds sweetness and gives these little cookies their classic sugar cookie flavor.
- 1 large egg: Helps hold the dough together.
- 2½ cups all-purpose flour: Creates a sturdy dough that holds the tiny Christmas tree and mitten shapes while baking.
- 1½ teaspoons vanilla extract: Adds a lovely buttery vanilla flavor.
- ½ teaspoon salt: Balances the sweetness of the cookies.
For the Almond Bark Coating
- 12 ounces white almond bark (six 2-ounce squares): This is what gives the mini cookies their smooth, sweet coating. I used Great Value Vanilla Almond Bark, which comes in a 24-ounce package. You’ll need half the package for this recipe. I love how the coating hardens nicely, making the cookies easy to package in Christmas tins.
- 2 tablespoons vegetable shortening (Crisco): I add 1 teaspoon of shortening to each 2-ounce square of almond bark before melting. This helps thin the coating and makes dipping these tiny cookies much easier.
- Pink and green oil-based candy coloring: I used pink and green coloring to create pretty pastel shades and left some of the almond bark white. Be sure to use oil-based coloring rather than regular liquid food coloring, which can cause the almond bark to seize.
- 2 tablespoons Christmas nonpareil sprinkles (approximately): I chose tiny red, green, and white sprinkles for a festive look. These little round sprinkles are especially cute on miniature cookies and add a bit of crunch.
How to Make Mini Christmas Cookies
Making these mini Christmas cookies is a fun holiday baking project, especially if you enjoy decorating cookies as much as I do! I start with my favorite sugar cookie dough, cut out tiny Christmas shapes, and bake them until they’re just lightly golden. Once they’ve cooled, it’s time for my favorite part—dipping them in colorful melted almond bark and adding Christmas sprinkles.
I’ve broken the process into five easy steps, with photos to help you along the way.
Step 1 — Prepare the Sugar Cookie Dough
Start by creaming the softened butter and sugar together until light and fluffy. Add the egg and vanilla extract, mixing until everything is well combined.
Next, add the flour and salt, mixing just until a soft dough forms. Avoid overmixing the dough, since you want your little sugar cookies to stay tender.
Roll the dough out to about ¼-inch thickness between sheets of parchment paper. Place the rolled dough in the refrigerator for about an hour to chill. This helps the cookies hold their cute little shapes when you cut and bake them.
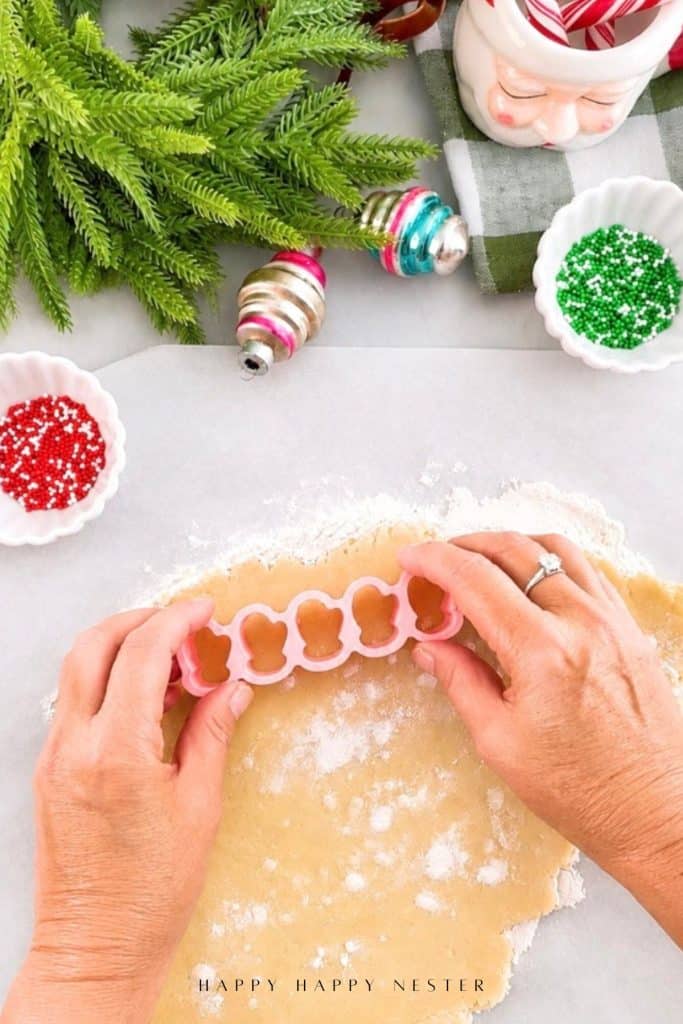
Step 2 — Cut Out the Mini Cookies
Once the dough has chilled, remove it from the refrigerator and use your mini Christmas cookie cutters to cut out the shapes. I used a tiny Christmas tree cutter that measures just 1 inch by 1¼ inches, along with a little mitten cutter. I love how adorable these miniature shapes are!
Carefully transfer the cookies to a parchment-lined baking sheet, leaving a little space between each one. Gather the leftover dough, roll it out again, and continue cutting until you’ve used all the dough. Place the cutout cookies in the refrigerator for about 10 minutes before baking to help them keep their shapes.
Step 3 — Bake and Cool the Cookies
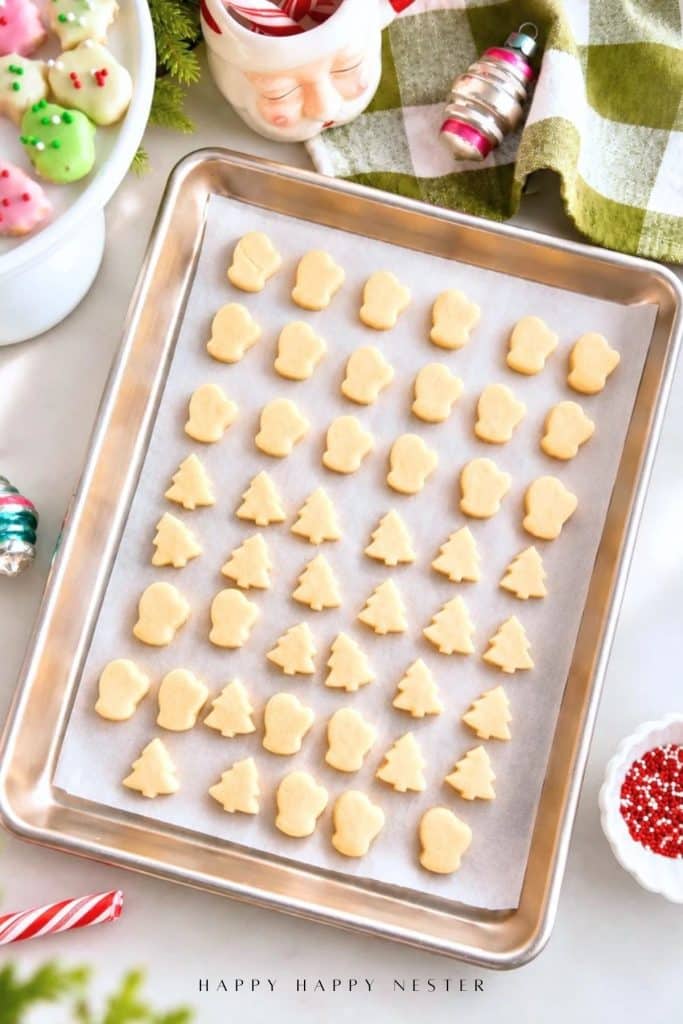
Preheat your oven to 350°F. Once the mini cookies have chilled, place the baking sheet in the oven and bake for 10 minutes, or until the edges are just beginning to turn lightly golden.
Since these cookies are so tiny, keep an eye on them toward the end of baking. You don’t want them to get too brown! Let the cookies rest on the baking sheet for a few minutes before carefully transferring them to a wire cooling rack. Allow them to cool completely before dipping them in the melted almond bark.
Step 4 — Melt the Almond Bark
I found that melting the almond bark in small batches works best for these tiny cookies. I used just one square of white almond bark for each color, which gave me enough time to dip and decorate the cookies before the coating started to harden.
Place one 2-ounce square of almond bark in a microwave-safe bowl and add 1 teaspoon of vegetable shortening (Crisco).
Microwave in 30-second intervals, stirring between each one, until the almond bark is melted and smooth. The shortening helps thin the coating and makes it easier to dip the little cookies without the almond bark becoming too stiff.
Once melted, add a little oil-based candy coloring to create your desired shade. I used pastel pink, green, and plain white for my Christmas cookies.
I recommend working with one color at a time and melting another cube as needed. Almond bark can thicken as it cools, so smaller batches are much easier to manage. This also gives you plenty of time to add the sprinkles before the coating sets.
Step 5 — Dip the Cookies in Almond Bark and Decorate
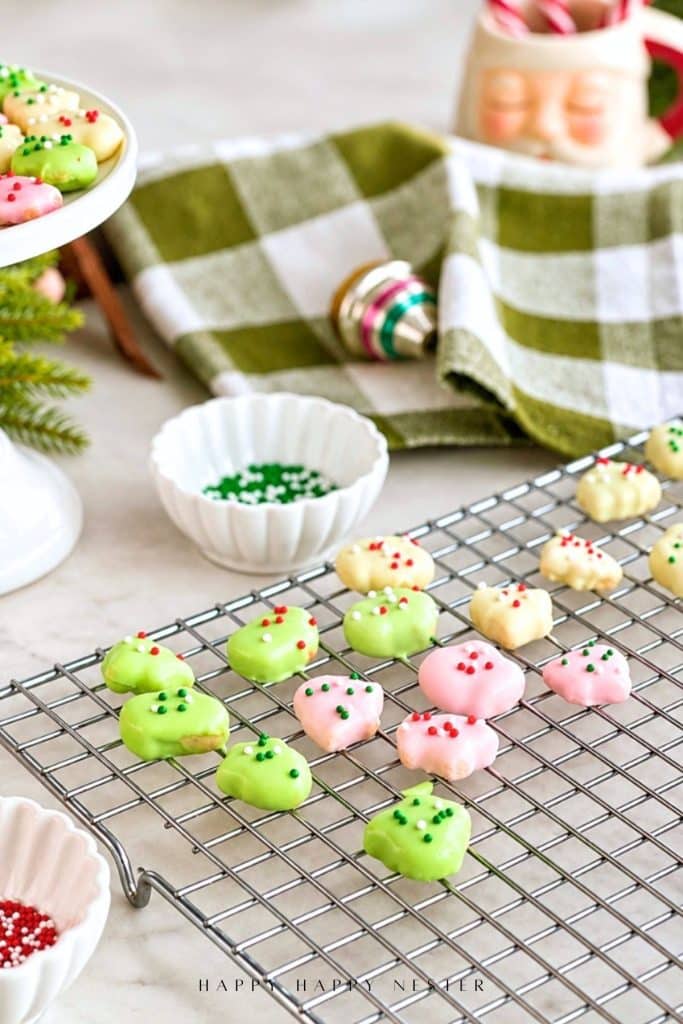
Now comes my favorite part, decorating these tiny Christmas cookies! Once the cookies have cooled completely, use a fork to gently dip each one into the melted almond bark. Turn the cookie over to coat both sides, then lift it out with the fork and gently tap off any excess coating against the side of the bowl.
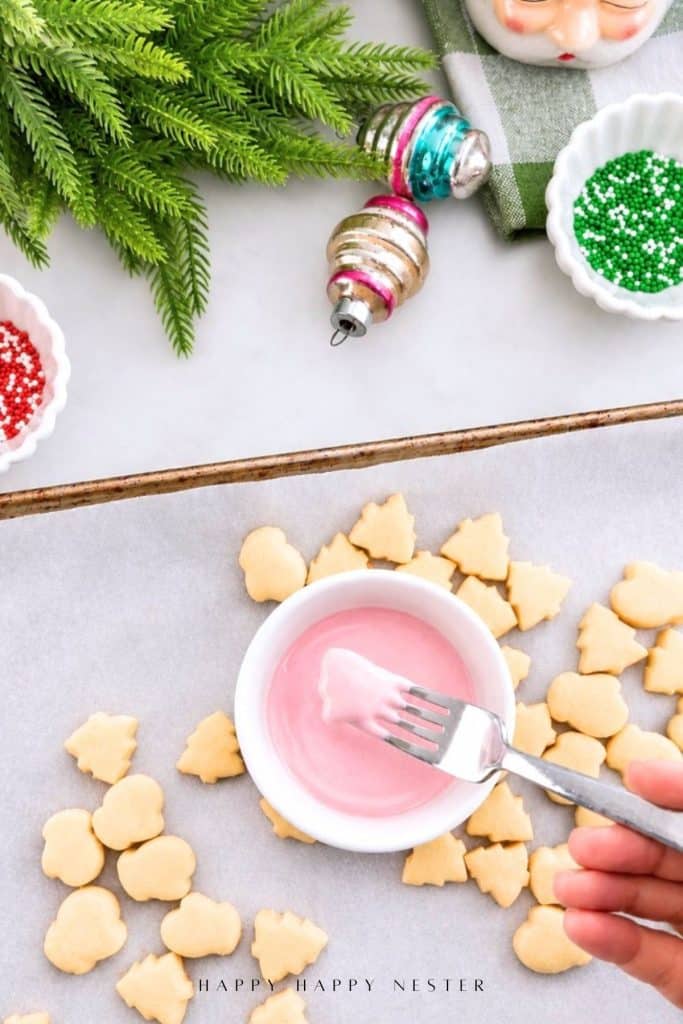
Carefully place the dipped cookie on a wire cooling rack and immediately add your Christmas sprinkles while the almond bark is still wet. I used a combination of red, green, and white nonpareils, which look so cute against the pastel pink, green, and white coatings.
Continue dipping and decorating a few cookies at a time, melting another cube of almond bark as needed. Let the finished cookies sit at room temperature until the coating has completely hardened. Once they’re set, they’re ready to arrange on a Christmas cookie platter or tuck into little holiday gift tins!

Mini Christmas Cookies with Almond Bark
Ingredients
Sugar Cookie Dough
- 1 cup unsalted butter softened to room temperature
- 1 cup granulated sugar
- 1 large egg
- 2½ cups all-purpose flour
- 1½ tsp vanilla extract
- ½ tsp salt
Almond Bark Coating
- 12 oz white almond bark 6 squares (½ of a 24 oz package)
- 6 tsp vegetable shortening (1 tsp per square)
- Pink and green oil-based candy coloring As needed
- 2 tbsp Christmas nonpareil sprinkles approximately
Instructions
Sugar Cookie Dough
- Cream the butter and sugar together until light and fluffy. This takes about one minute on low speed.
- Add egg and vanilla and mix well.
- Mix flour and salt in a separate bowl.
- With your mixer on the lowest speed, slowly add flour mixture to the butter. Mix for 30 seconds until the dough is thoroughly incorporated.
- Divide dough into two parts. Place each between two pieces of parchment paper.
- Roll out each set of dough. I rolled mine out to a 6 mm thickness, but it is whatever thickness you prefer.
- Transport each cookie dough to a cookie sheet.
- Refrigerate the cookie doughs for 1 hour.
- Preheat oven to 350°
- Take chilled cookie dough and cut out cookie shapes and place the cookies on a parchment lined cookie sheet.
- Place cut out cookies back in the fridge for about 10 minutes.
- Reroll extra dough and place cut out cookies back in the fridge for 10 minutes.
- Once the mini cookies have chilled, place the baking sheet in the oven and bake for 10 minutes, or until the edges are just beginning to turn lightly golden.Since these cookies are so tiny, keep an eye on them toward the end of baking. You don't want them to get too brown! Let the cookies rest on the baking sheet for a few minutes before carefully transferring them to a wire cooling rack. Allow them to cool completely before dipping them in the melted almond bark.
Almond Bark Coating
- Melt the Almond Bark: Place one 2-ounce square of white almond bark and 1 teaspoon of vegetable shortening (Crisco) in a microwave-safe bowl. Microwave in 30-second intervals, stirring between each interval, until smooth.
- Add Color: Stir in a few drops of oil-based candy coloring to create your desired shade. Leave some almond bark white.
- Dip the Cookies: Using a fork, dip each completely cooled cookie into the melted almond bark, coating both sides. Gently tap off any excess coating.
- Decorate: Place the dipped cookies on a wire cooling rack and immediately add Christmas sprinkles while the coating is still wet.
- Work in Small Batches: Continue dipping and decorating, melting another 2-ounce square of almond bark with 1 teaspoon of shortening as needed. Repeat with the remaining colors.
- Let Set: Allow the cookies to sit at room temperature until the almond bark has completely hardened before serving or packaging.
Notes
Nutrition
Tips for Perfect Mini Sugar Cookies
After making these little Christmas cookies, I picked up a few helpful tricks that make the baking and decorating process much easier. Since the cookies are so tiny, a few small details can make a big difference!
- Chill the dough before cutting. Cold dough is much easier to work with, especially when using miniature cookie cutters. I also like to chill the cutout cookies for another 10 minutes before baking so they hold their shapes.
- Keep the dough thickness even. Roll the dough to about ¼ inch thick so all your little cookies bake evenly. This is especially important when you’re making several different Christmas shapes.
- Watch the baking time. My mini cookies baked for 10 minutes at 350°F. Since they’re so small, check them toward the end so the edges don’t become too brown.
- Melt the almond bark in small batches. This was one of my biggest discoveries! Using just one cube at a time keeps the coating from cooling and thickening before you’ve finished dipping your cookies.
- Don’t forget the shortening. Adding about a teaspoon of Crisco to each cube of almond bark helps keep the melted coating thinner and easier to work with. It makes dipping these tiny cookies so much easier!
- Add the sprinkles immediately. Almond bark sets up fairly quickly, so sprinkle each cookie right after dipping rather than waiting until you’ve coated several cookies.
- Let the coating harden completely. Before stacking or packaging your cookies, make sure the almond bark has fully set. This helps keep your pretty Christmas decorations intact.
Fun Ways to Decorate Mini Christmas Cookies
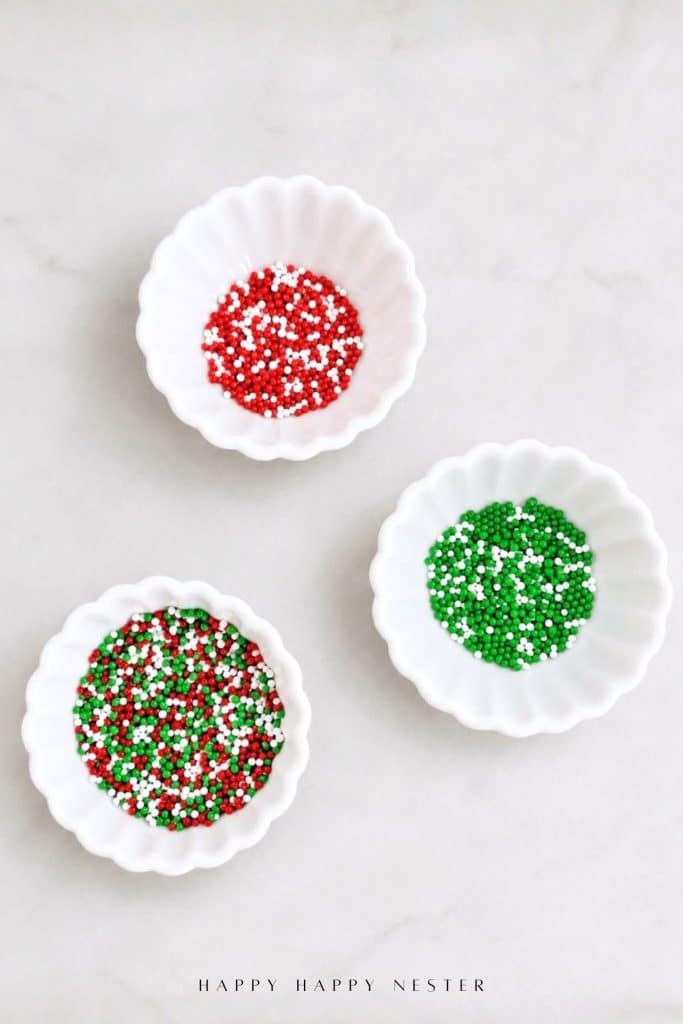
One of the things I love most about these mini Christmas cookies is playing around with the colors and sprinkles! I chose soft pink, pastel green, and white almond bark for a slightly different take on traditional Christmas colors. The little red, green, and white sprinkles add just the right amount of holiday cheer.
You can have so much fun creating different combinations. I especially love the pink Christmas trees with red and white sprinkles, while the green and white cookies look pretty with a mixture of all three sprinkle colors. And because these cookies are so tiny, you don’t need much decoration to make them look adorable.
You could also try crushed candy canes, sparkling sanding sugar, or tiny snowflake sprinkles. I think a whole platter of these miniature cookies in coordinating colors would look so pretty on a Christmas dessert table. You can even change the colors for other holidays throughout the year!
How to Store Mini Christmas Cookies
One of the nice things about these mini Christmas cookies is that you can make them ahead of time, which is always helpful during the busy holiday season! Since the almond bark hardens into a firm coating, they’re also easy to package and share with family and friends.
Storing at Room Temperature: Once the almond bark has completely hardened, place the cookies in an airtight container and store them at room temperature in a cool, dry place for up to one week. I like to separate the layers with parchment paper to keep the decorations looking pretty.
Refrigerating: There’s no need to refrigerate these cookies. In fact, I prefer keeping them at room temperature since moisture from the refrigerator can sometimes affect the appearance of the almond bark coating.
Freezing: You can freeze the undecorated sugar cookies for up to three months in an airtight, freezer-safe container. When you’re ready to decorate, let them thaw completely before dipping them in melted almond bark.
Packaging for Christmas Gifts: These little cookies would be so cute tucked into clear treat bags, small Christmas tins, or pretty holiday boxes. Just make sure the coating has fully set before packaging them. I love the idea of mixing all three colors together for a cheerful homemade Christmas gift!
Frequently Asked Questions
Can I Make Mini Christmas Cookies Ahead of Time?
Absolutely! I love getting a head start on Christmas baking, especially when there’s so much going on during the holidays. You can bake the mini sugar cookies a day or two ahead and store them in an airtight container until you’re ready to decorate. This makes the dipping and decorating process much more relaxing!
Can I Use Candy Melts Instead of Almond Bark?
Yes! Candy melts are a great alternative to almond bark, especially if you want to use different colors without adding candy coloring. Just follow the melting instructions on the package and work in small batches. I personally like using almond bark because it creates a smooth coating that sets up nicely on these tiny cookies.
How Do I Keep Almond Bark Smooth for Dipping?
My favorite trick is adding about one teaspoon of vegetable shortening (Crisco) to each square of almond bark before melting it. This helps thin the coating so it’s easier to dip the miniature cookies. I also recommend melting just one cube at a time and stirring frequently. If the coating starts to thicken, gently reheat it for a few seconds until it’s smooth again.
Can I Freeze Mini Sugar Cookies?
Yes! I recommend freezing the baked cookies before decorating them. Once they’ve cooled completely, place them in a freezer-safe container with parchment paper between the layers. They’ll keep for up to three months. Let them thaw at room temperature before dipping them in almond bark. This is a wonderful way to spread out your Christmas baking over several days!
More Christmas Cookie Recipes
Christmas baking is one of my favorite parts of the holiday season, and I always love trying a few different cookie recipes each year! If you’re filling a Christmas cookie tin, planning a holiday cookie exchange, or just looking for something sweet to make with family, here are a few more recipes from Happy Happy Nester that you might enjoy.
- Snow Globe Cookies – These pretty Christmas cookies are such a fun holiday baking project and look adorable on a dessert platter.
- Peeps Cookies Recipe – This is the original sugar cookie dough I used to make my mini Christmas cookies. It’s a wonderful recipe for cutout cookies that hold their shape.
I hope these little Christmas cookies bring some extra cheer to your holiday baking! I had so much fun making them, and I especially love how the pastel colors and tiny sprinkles turned out. I’m already thinking about making another batch to tuck into Christmas cookie tins for friends and family.
Cheers,


- Mini Christmas Cookies with Almond Bark - November 6, 2026
- Trader Joe’s Sheet Cake Hack: Easy Fall Decorating Ideas - October 22, 2026
- Halloween Popcorn Recipe - October 5, 2026



Leave a Reply