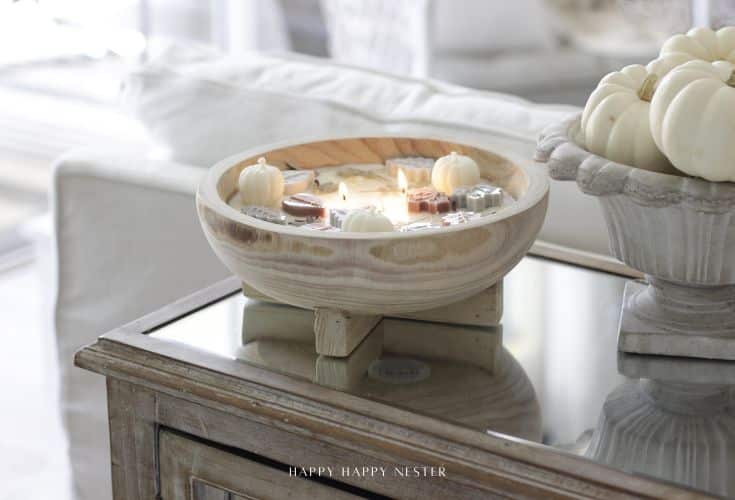
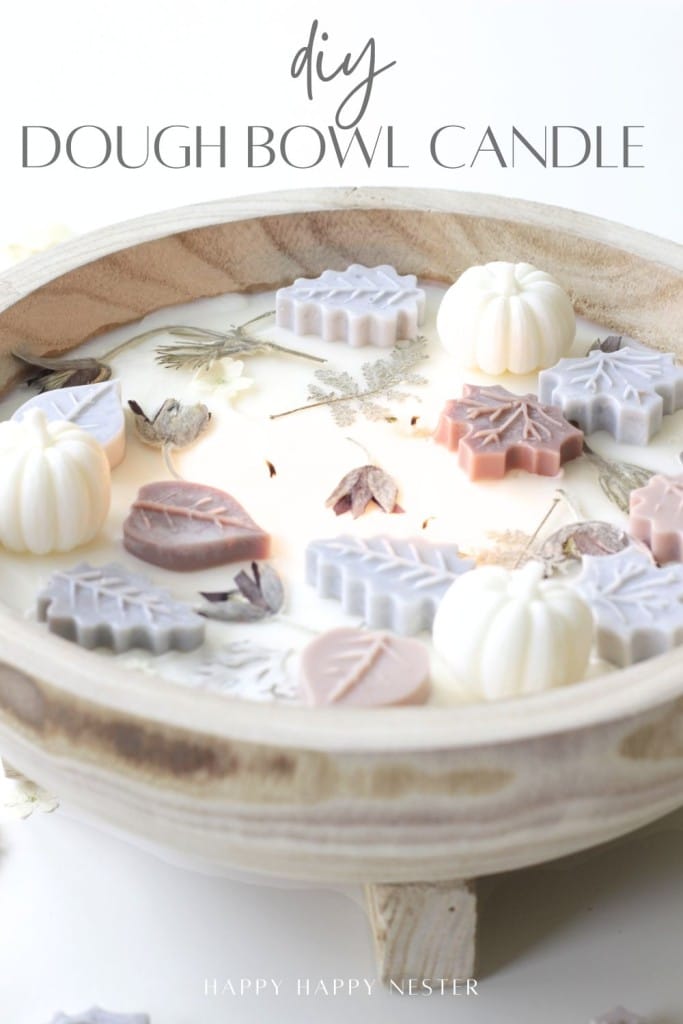
Creating a dough bowl candle DIY is an easy and beautiful way to add handmade charm to your home décor. These rustic candles not only bring a cozy glow to any space but can also be customized with seasonal details to match your style. For mine, I used a whitewashed wooden bowl and decorated the top of the wax with mini wax pumpkins, delicate leaves, and a sprinkling of dried flowers. The result is a light, airy candle that looks just as stunning on a coffee table as it does as a centerpiece for fall table.
I’ve always wanted to make one of these pretty candle bowls, and this project did not disappoint! What I love most is how customizable it is — from the wax colors and seasonal molds to the dried flowers you add on top, every candle can be completely your own. It’s such a fun way to get creative while making something both beautiful and useful.
Dough Bowl Candles
Dough bowl candles have become so popular because they combine rustic farmhouse style with the soothing warmth of a handmade candle. Unlike store-bought candles, a dough bowl candle DIY lets you control the scent, colors, and decorative touches so each one feels personal and unique. The natural wood bowl can be reused again and again, making this project both sustainable and budget-friendly. Whether you display it as part of your seasonal décor or give it as a thoughtful handmade gift, a dough bowl candle is the perfect blend of cozy and creative.
With their charm and versatility, it’s easy to see why they’ve become so loved. Here’s how you can make your own dough bowl candles DIY at home.
Candle Making Supplies
Candle Making Supplies
- Pot for melting wax: A heat-safe pot makes it easy to melt your candle wax evenly and safely.
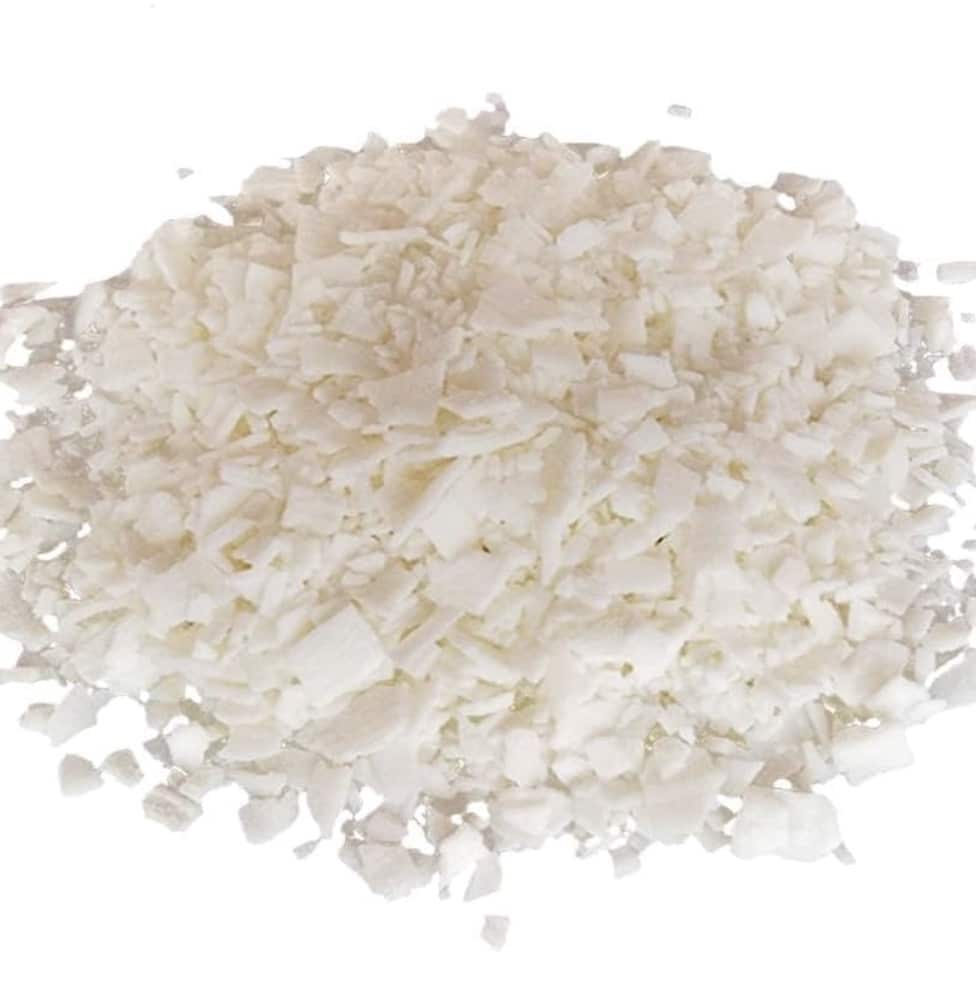
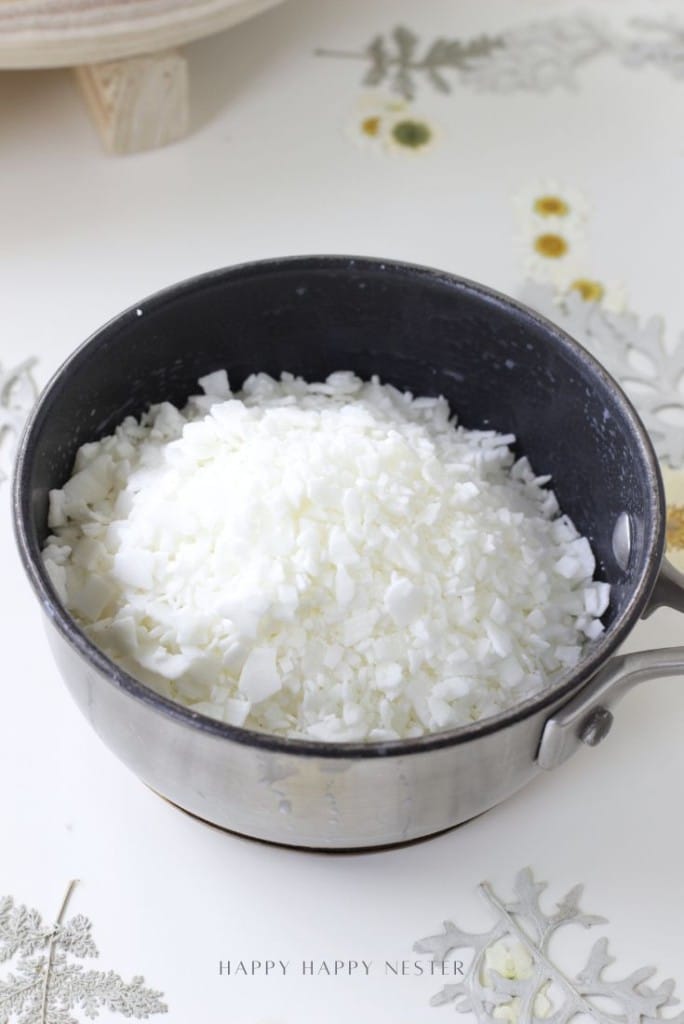
- Soy wax (bulk amount): Soy wax is clean-burning, natural, and perfect for filling your dough bowl.
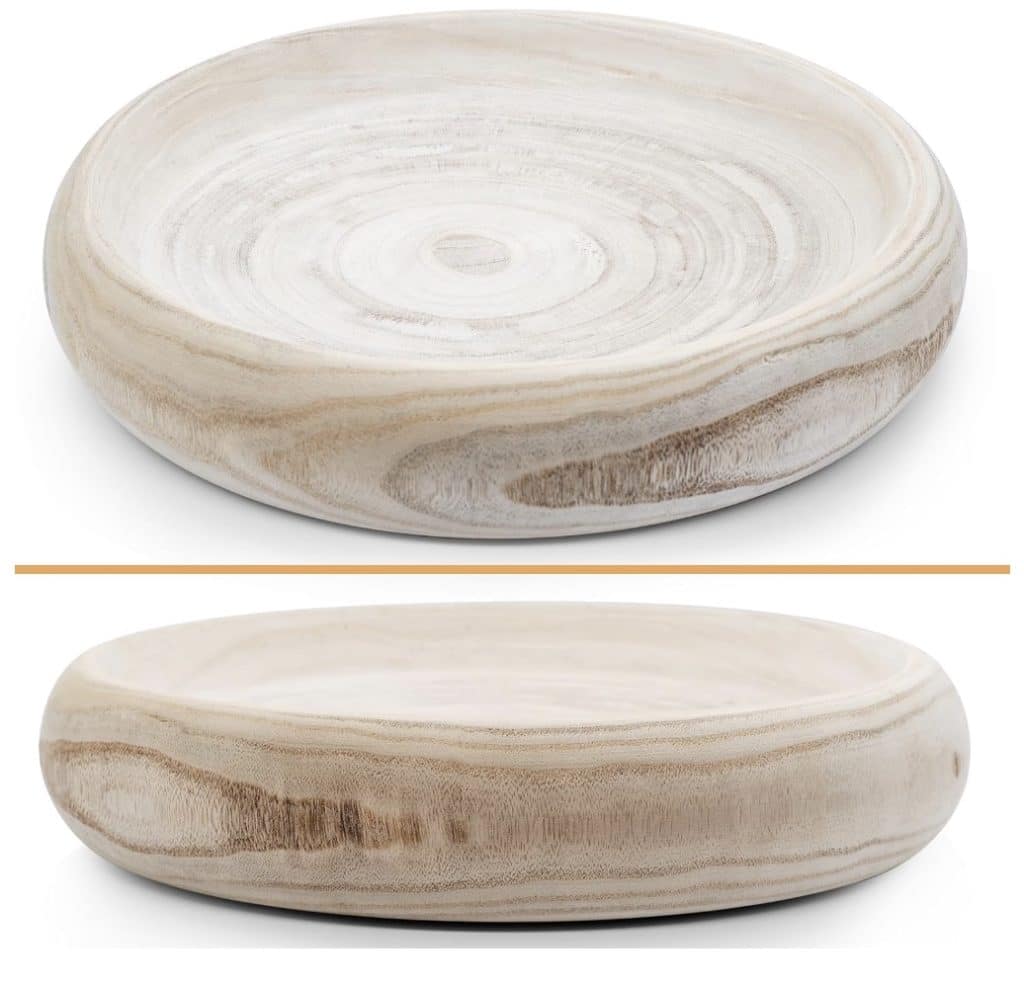
- Wooden dough bowl: The rustic wooden bowl adds charm and doubles as a reusable décor piece.
- Candle wick: A sturdy wick ensures your candle burns evenly from start to finish.
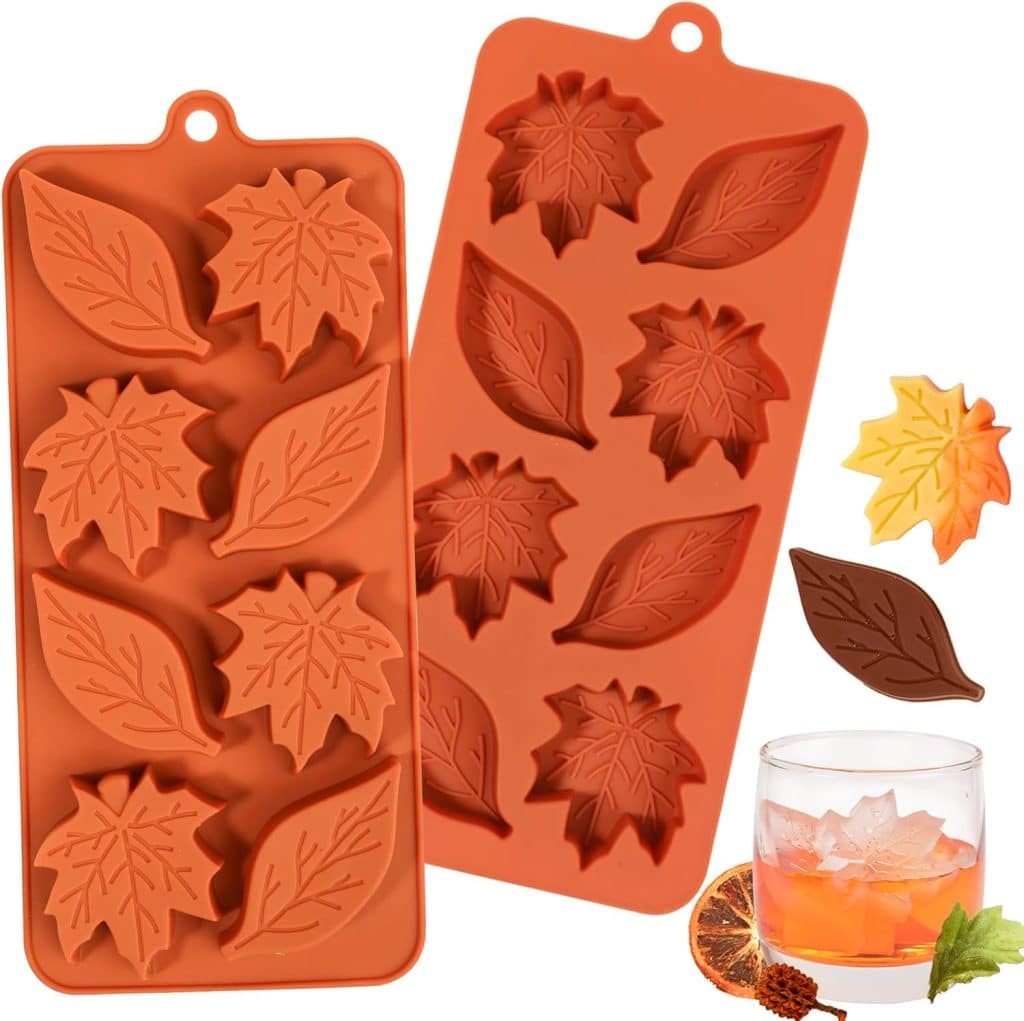
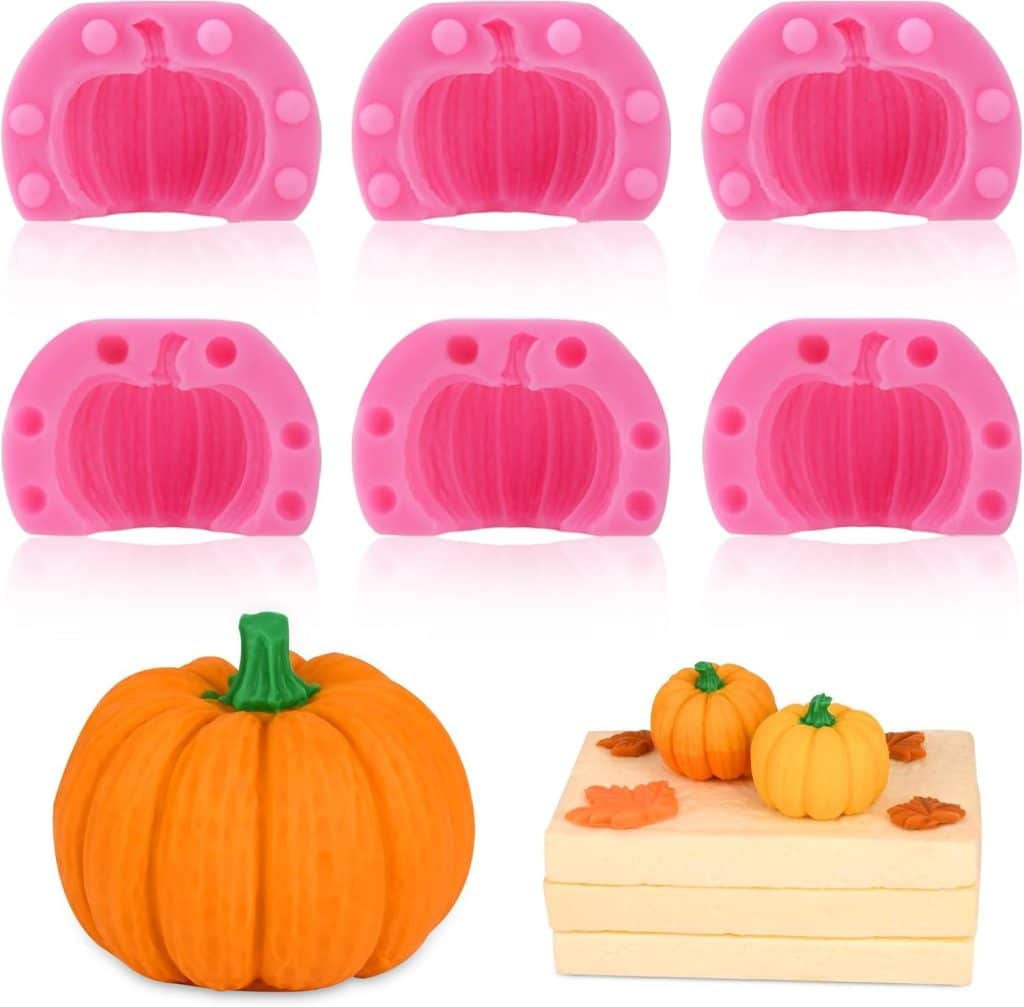
- Leaf and pumpkin mold: These molds let you create seasonal wax shapes to decorate the top.
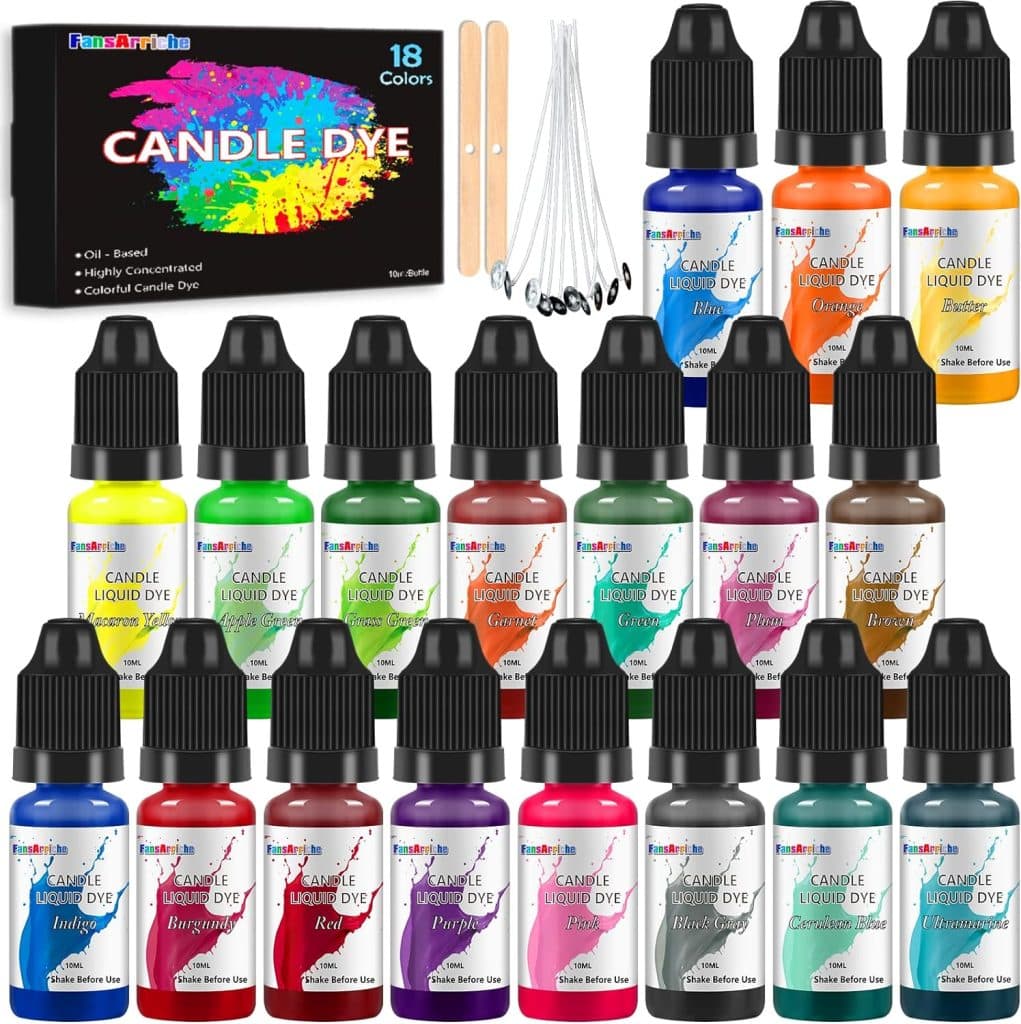
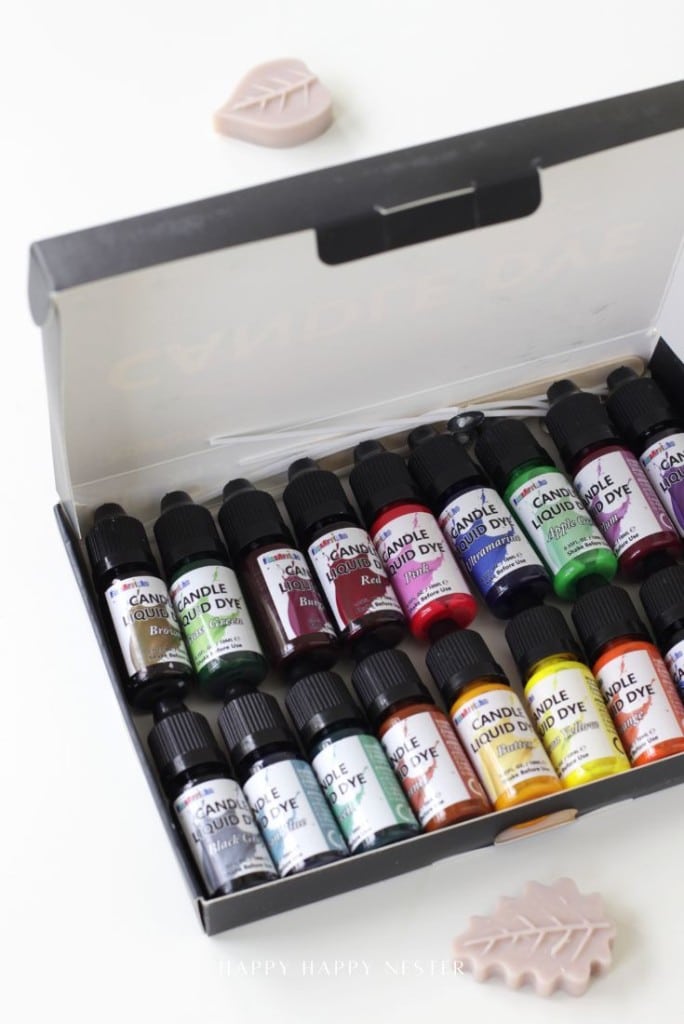
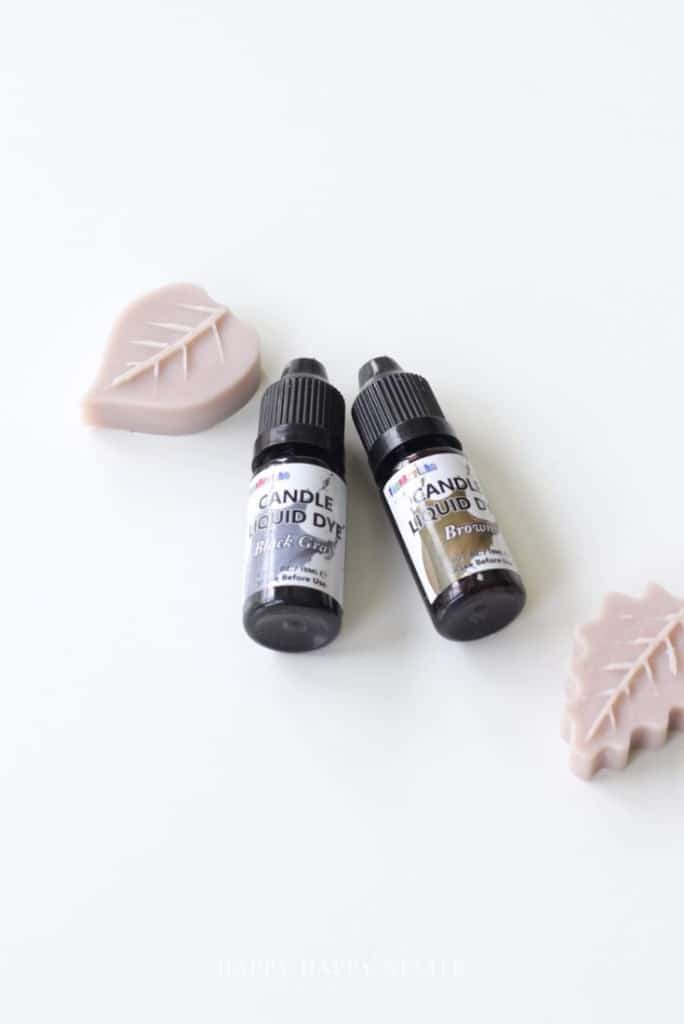
- Candle dye: A touch of dye adds beautiful, customized color to your candle wax.
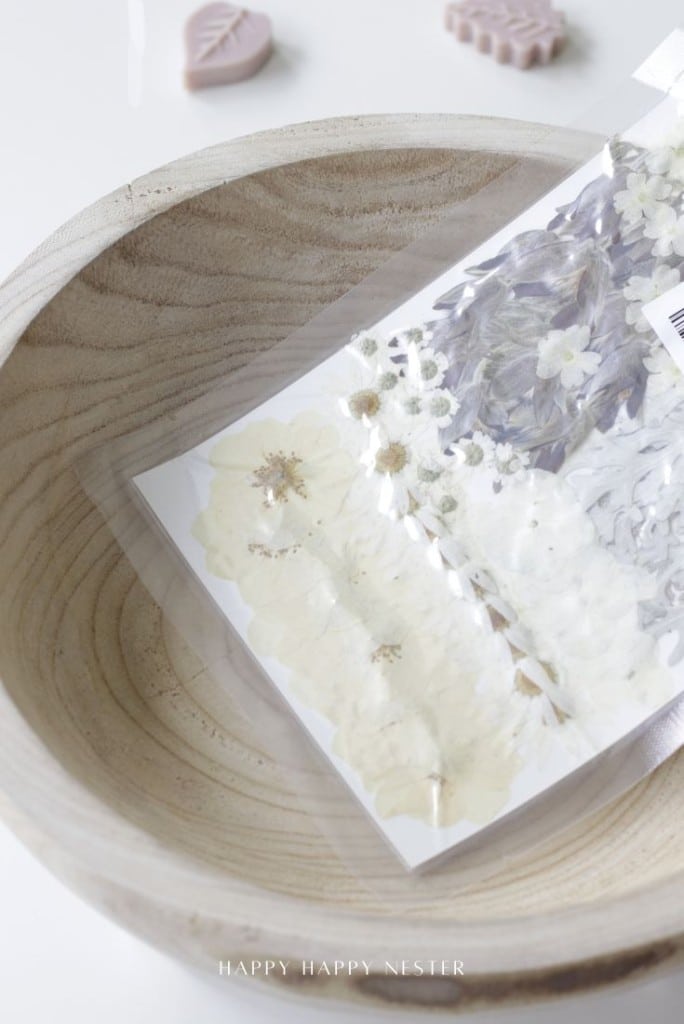
- Dried flowers: A sprinkling of dried blooms gives the finished candle a soft, delicate look.

Tap on the image or text to shop!

How to Make Dough Bowl Candles DIY
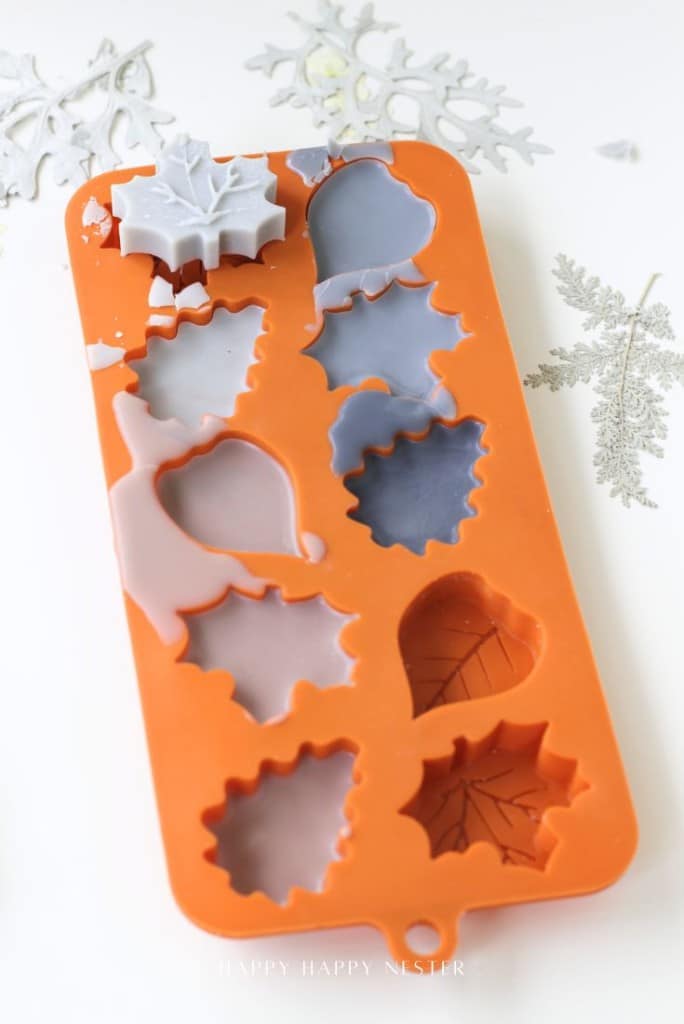
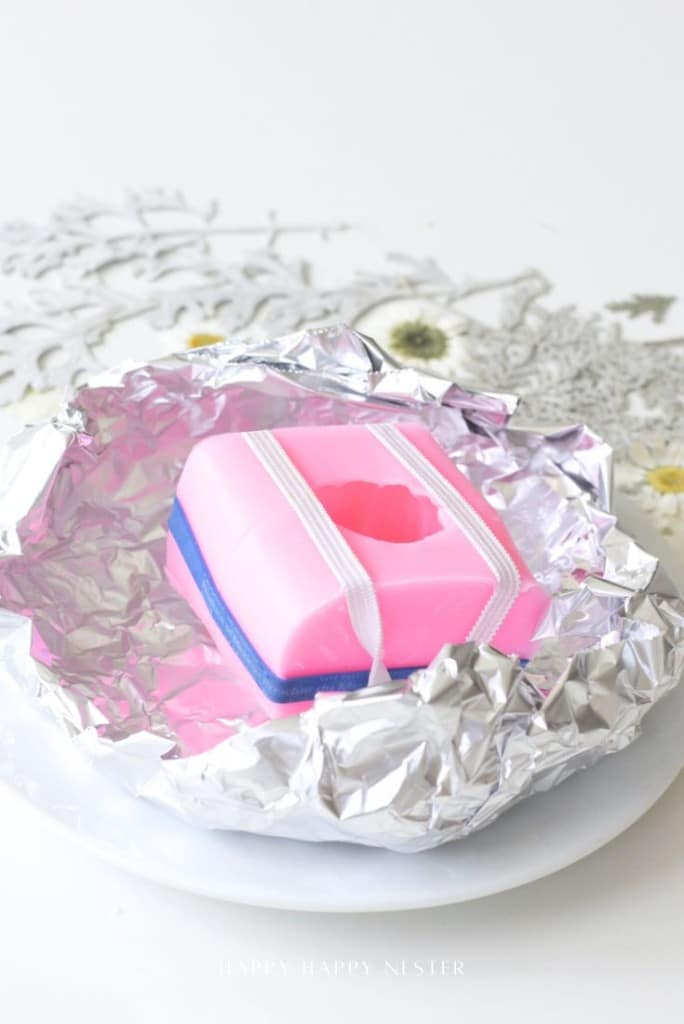

- Create the decorative wax pieces
Use a flat mold for the leaves and tint the wax with candle dye for a soft, seasonal look. For the pumpkins, use a two-piece mold—secure the sides tightly with rubber bands before pouring in the melted wax to prevent leaks. I also place the mold on a tin foil bowl and placed it on a plate so I could catch any wax. Also, placing it on the plate allowed me to place it in the fridge to set up the candle wax faster. Once hardened, remove the shapes from the molds and set them aside. - Plan your arrangement
Before melting the main batch of wax, place the dried flowers, wax leaves, and pumpkins inside the wooden dough bowl. This helps you visualize the final design and ensures everything fits.
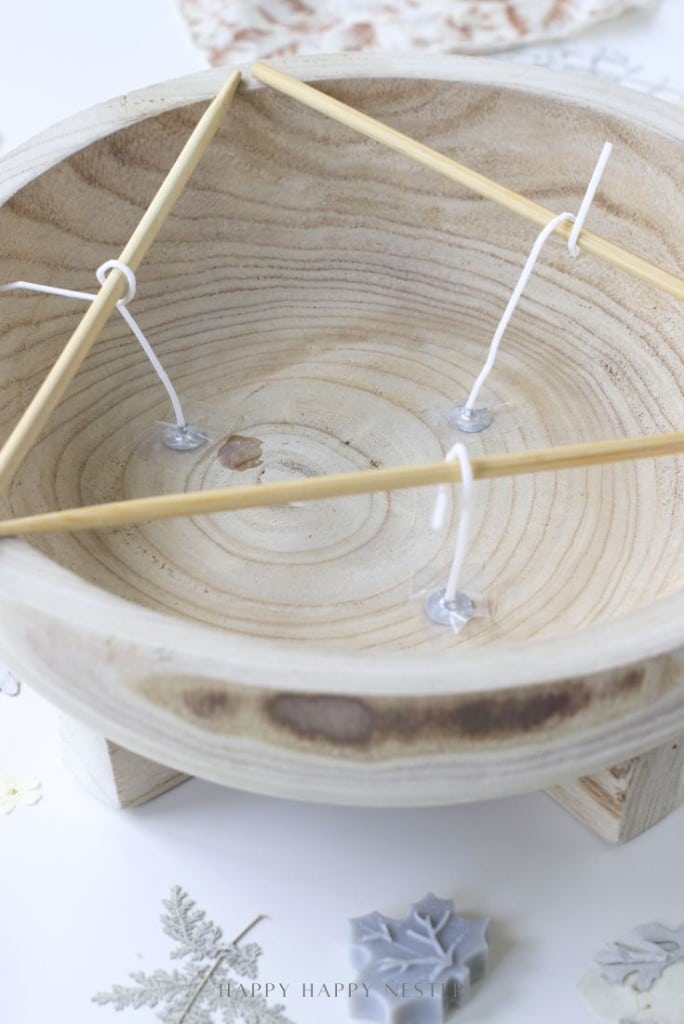
- Melt and pour the base layer
Melt your soy wax in a heat-safe pot and pour a thin base layer into the dough bowl. While it’s still warm, position the candle wicks in the center. Keep them standing upright by laying a dowel or chopsticks across the bowl to hold the wicks in place. Let the base layer harden. - Fill the dough bowl with wax
Add more melted soy wax to fill the bowl to your desired level. Allow it to set slightly so the surface is soft but not fully hardened.
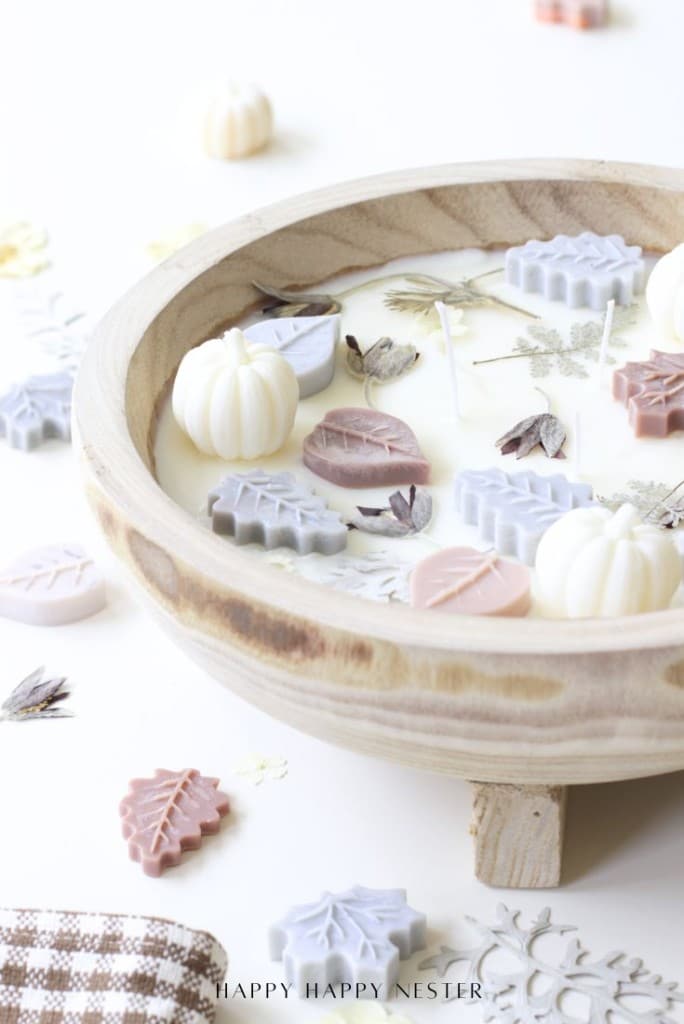
- Add decorative touches
Gently press your wax leaves and pumpkins into the surface of the candle wax, arranging them in a natural pattern. Scatter a few dried flowers across the top for a delicate, airy finish. - Let the candle set completely
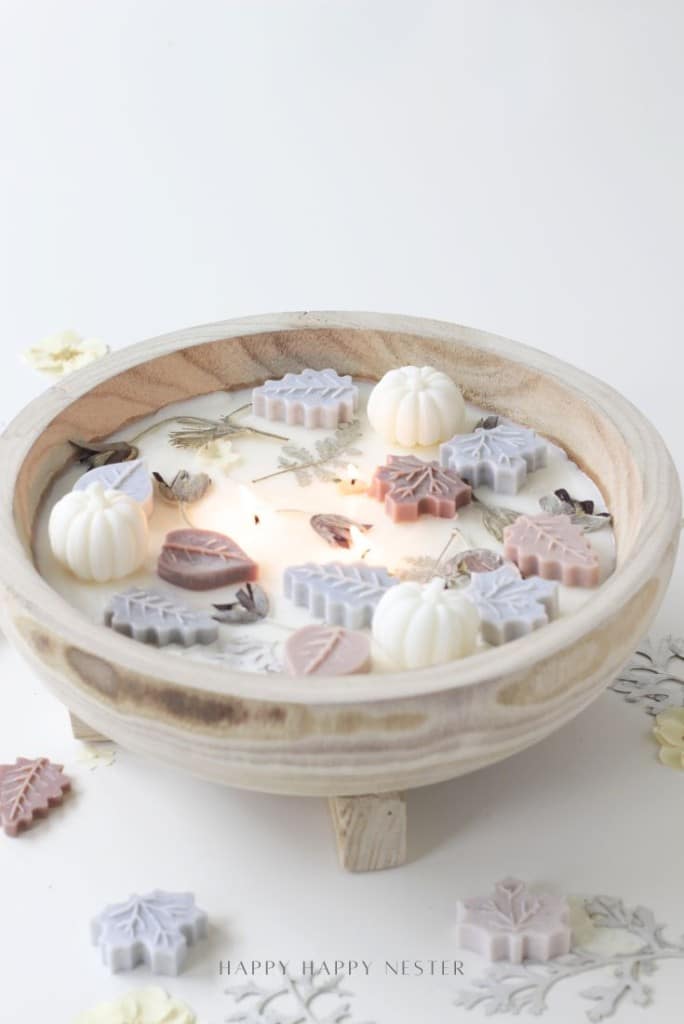
Allow the candle to cool and harden fully before trimming the wicks. Your handmade dough bowl candle DIY is now ready to display or give as a thoughtful gift.
Tips for Success When Making Dough Bowl Candles DIY
- Secure the wicks well: Use dowels, pencils, or chopsticks to keep wicks straight and centered. This ensures the candle burns evenly.
- Prevent wax cracks: Pour the wax slowly and allow each layer to cool gradually. If cracks appear, you can top off the candle with a thin layer of melted wax to smooth it out.
- Avoid overheating the wax: Soy wax should be melted between 165–185°F (77–85°C) and never go over 200°F (93°C), or it can discolor. Use a thermometer for best results.
- Choose the right bowl: Always use a wooden dough bowl that is fire-safe and treated for candle making. Line it with a thin layer of sealant if needed to prevent leaks.
- Experiment with colors and scents: Candle dye and fragrance oils let you customize your candle for the season or occasion.
- Add decorations at the right time: Place dried flowers and wax shapes while the wax is still slightly soft so they adhere without sinking.
- Trim the wicks before lighting: Keep wicks about ¼ inch long to avoid excess smoke and ensure a steady flame.
Creative Ways to Enjoy Your Dough Bowl Candles DIY
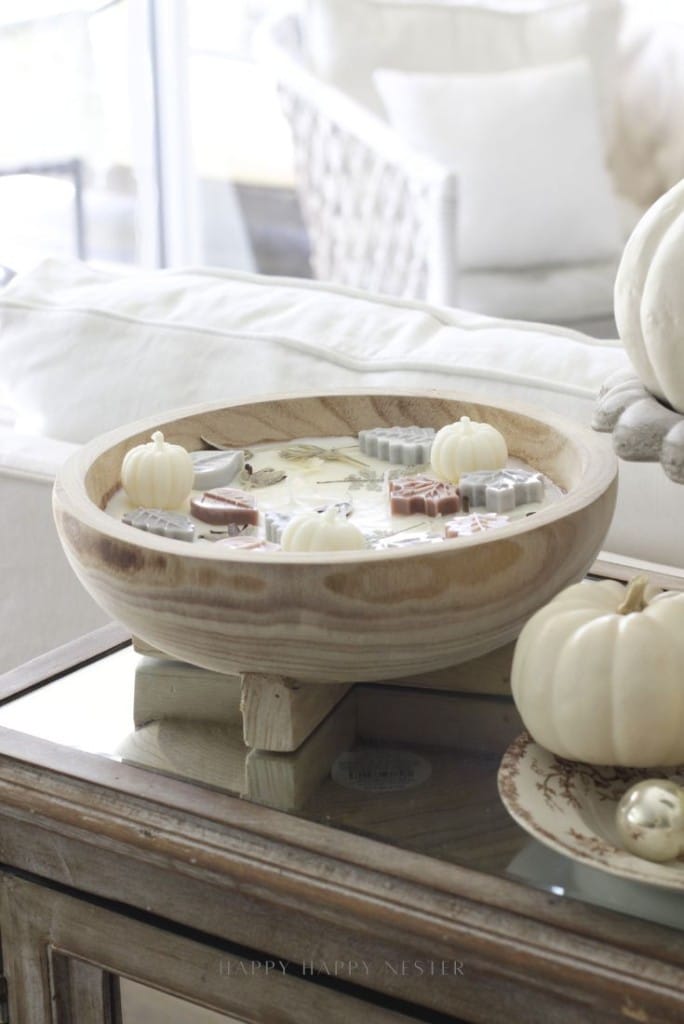
- Use as a centerpiece: Place your dough bowl candle in the middle of a dining table, coffee table, or mantel for a warm, rustic focal point.
- Give as a handmade gift: These candles make thoughtful presents for birthdays, holidays, or housewarmings. Wrap them in clear cellophane or kraft paper with a ribbon for a charming touch.
- Personalize with your favorites: Customize each candle with your preferred scents, wax colors, or seasonal decorations like wax leaves, pumpkins, or dried florals. When adding dried flowers, be sure to place them a safe distance from the wick so they don’t burn while the candle is lit.
- Style for the seasons: Swap out the decorative touches — think lavender and herbs in spring, shells in summer, pumpkins in fall, or pine sprigs for winter.
- Reuse the bowl: Once the candle has burned down, clean out the wax and repurpose the dough bowl for décor, storage, or another round of candle making.
⚠️ Candle Safety Tip: Always burn candles on a heat-safe surface, keep them away from drafts, and never leave them unattended while lit.
If you enjoyed this dough bowl candle DIY project, you might also enjoy these other simple and creative projects to try at home.
- Cement Pumpkins DIY (with candle holders)
- Gel Wax Candle Making
- How to Make Candles with Dried Flowers
Making your own dough bowl candles DIY is such a rewarding project — not only do you end up with a beautiful, rustic candle, but you also get to personalize it with seasonal touches that reflect your style.
Whether you use it as a centerpiece, give it as a heartfelt handmade gift, or simply enjoy the cozy glow at home, this craft is the perfect mix of creativity and charm. I hope you feel inspired to gather your supplies and create one of these airy, delicate candles for yourself. If you do, I’d love to see your finished project — share it with me over on Instagram!
If you enjoyed this dough bowl candle DIY project, you might also enjoy these other creative projects I’ve shared. And don’t miss checking out my friends’ fall décor projects too — I love everything they came up with, and you’ll find their ideas linked below!
Cheers,

Blogger’s Best Fall Decor Ideas
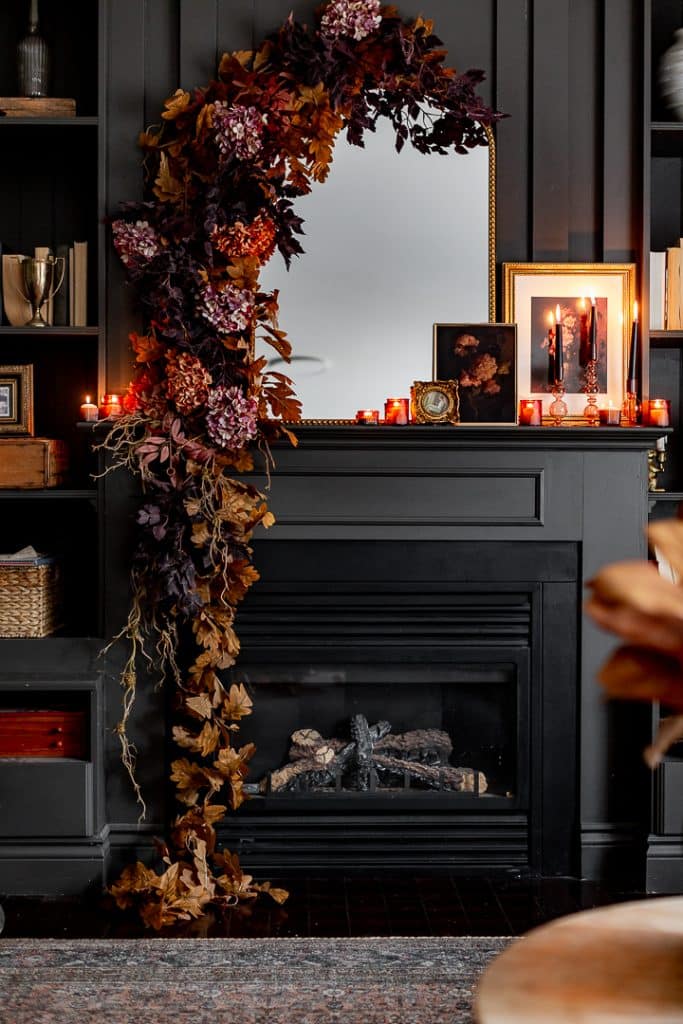
Fall Mantel Decor | Craftberry Bush
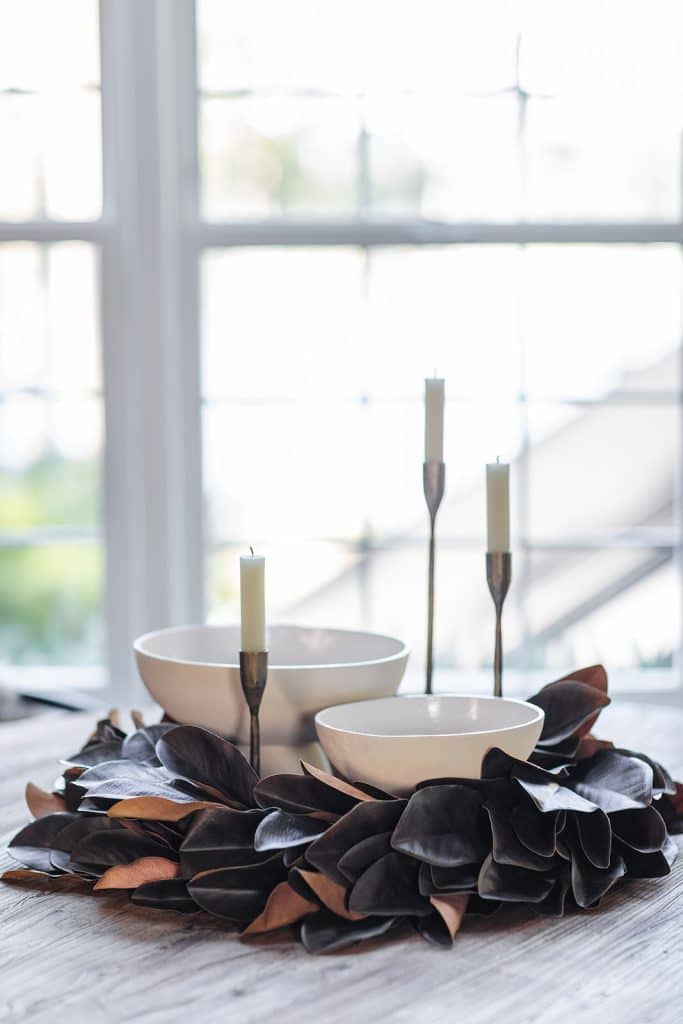
Fall Wreath Table Setting | My Sweet Savannah
A simple fall wreath table setting that works for Thanksgiving, seasonal gatherings, or everyday autumn decor. Using a wreath as the centerpiece with bowls and candlesticks creates a versatile and timeless look.
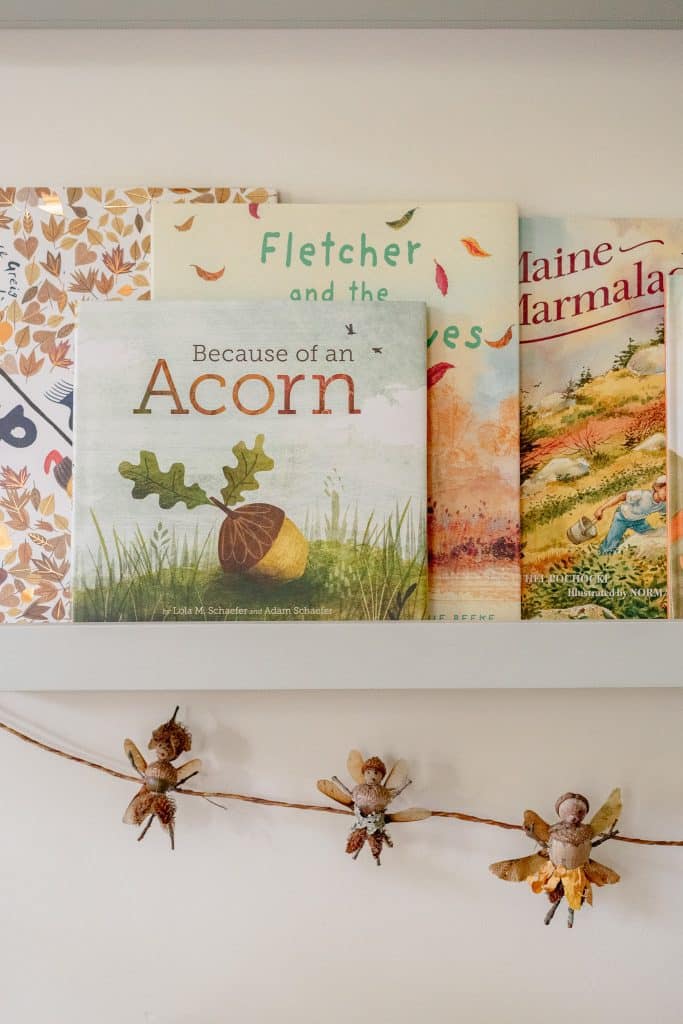
Acorn Fairies Fall Garland | Finding Lovely
This Acorn Fairies Fall Garland is a sweet, whimsical craft project to celebrate fall and made with acorns and treasures you can find on a walk.
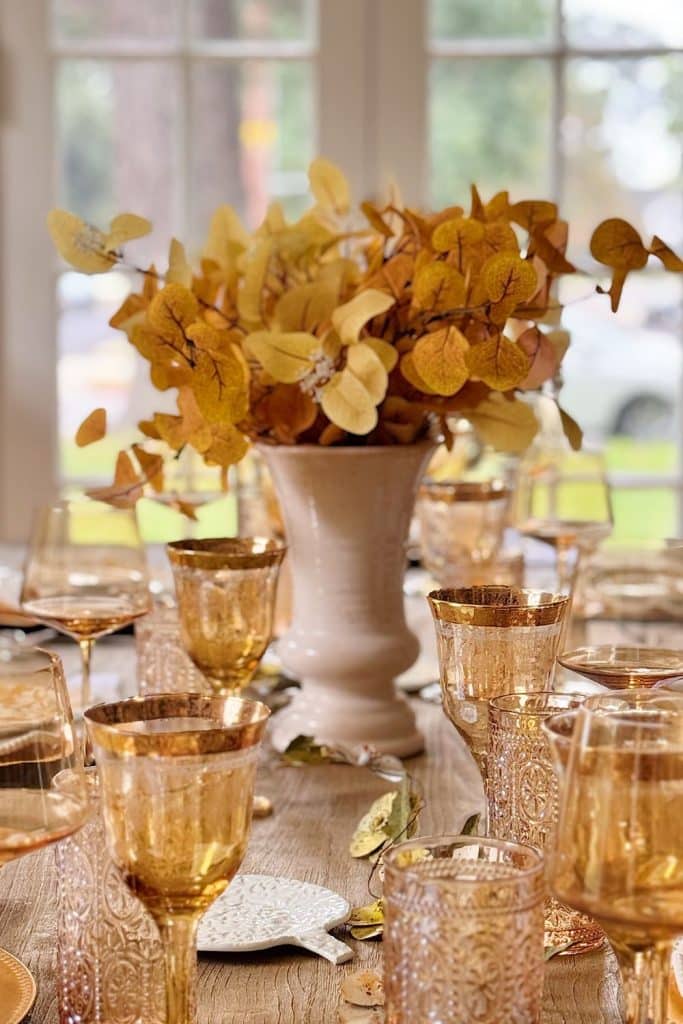
Fall Decor Ideas in the Dining Room | My 100 Year Old Home
Today, I’m sharing how I decorated our dining room for fall. This year’s dining room design combines my fall color palette of warm gold and soft orange with a mix of my handmade pottery and purchased dinnerware.


- Faux Nails from Walmart - March 11, 2026
- Easter Bundt Cake Recipe (Mini Lemon Bundt Cakes with Glaze) - March 6, 2026
- Indoor Faux Flowers from Pottery Barn - March 4, 2026


Janine Waite
Hey! Thanks for the kind comment. I am so glad you are just as obsessed with this craft as I am! Have a great day!