Happy Happy Nester

Weekly Inspiration for Your Nest

  • About
    • Contact
  • Recipes
    • Appetizers
    • Breakfast/Brunch
    • Desserts
    • Dinners
    • Drinks
  • Crafts
  • Decor
  • Shop My Favorites
    • Fall Decor
    • Kitchen
    • Pillows
    • Holiday Decor
  • Boutique of the Week
  • Saturday Chitchat

Home » DIY » DIY Etched Glass

DIY

DIY Etched Glass

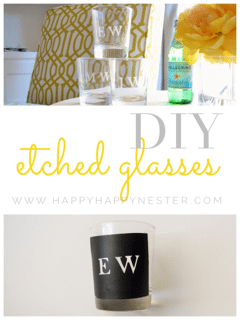
Etched Glass: Personalized Drinking Glasses

If you have followed my blog over the last couple of years, you know that I have tried to figure out our drinking glass dilemma. You see, on any given weekend, my family of four will use all our glasses in our cupboard. You can say, a few family members use a glass only once and then proceed to place it in the sink. Of course, this is the reason we have a pile-up of dirty dishes by the end of the day. As a result, I have become a mom on a mission who is determined to solve this problem.
~ A Note About the Nester ~
When my son was a toddler, he had some funny idiosyncrasies. When eating a meal, he would insist on a new fork for every different type of food on his plate. I went along with this for a bit and hoped that this stage of his life would be short lived. Like everything in life, he passed through it and is currently a relatively well-adjusted young teenager.

If you have been following this funny obsession of mine, you know that I started off buying four different colored drinking glasses. It worked for a bit, but then the color slowly came off the glasses. Hmm, I’m not sure how that happened, but I eventually came up with my second great idea. 🙂

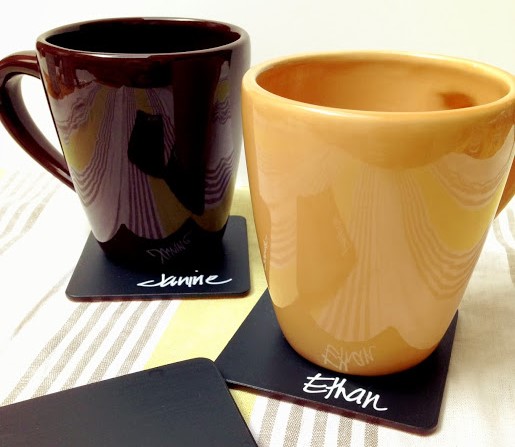
I made some chalk paint coasters that that we could initialize with our names. Here is the link to that post: Chalk Board Coasters It worked for a few of the family members, but not all participated. Their names will remain anonymous.


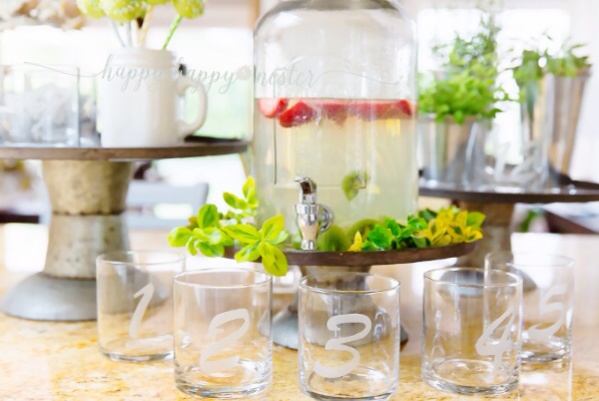
My third idea involved a set of Painted Fox number drinking glasses. These numbered 1-12 glasses are beautiful. This system would work, but it quintessential that we all remember our numbers for the day. I would be concerned about my aging memory, but my kiddos couldn’t remember their numbers either. Here is the blog post link for the above photo: Summer Home Tour


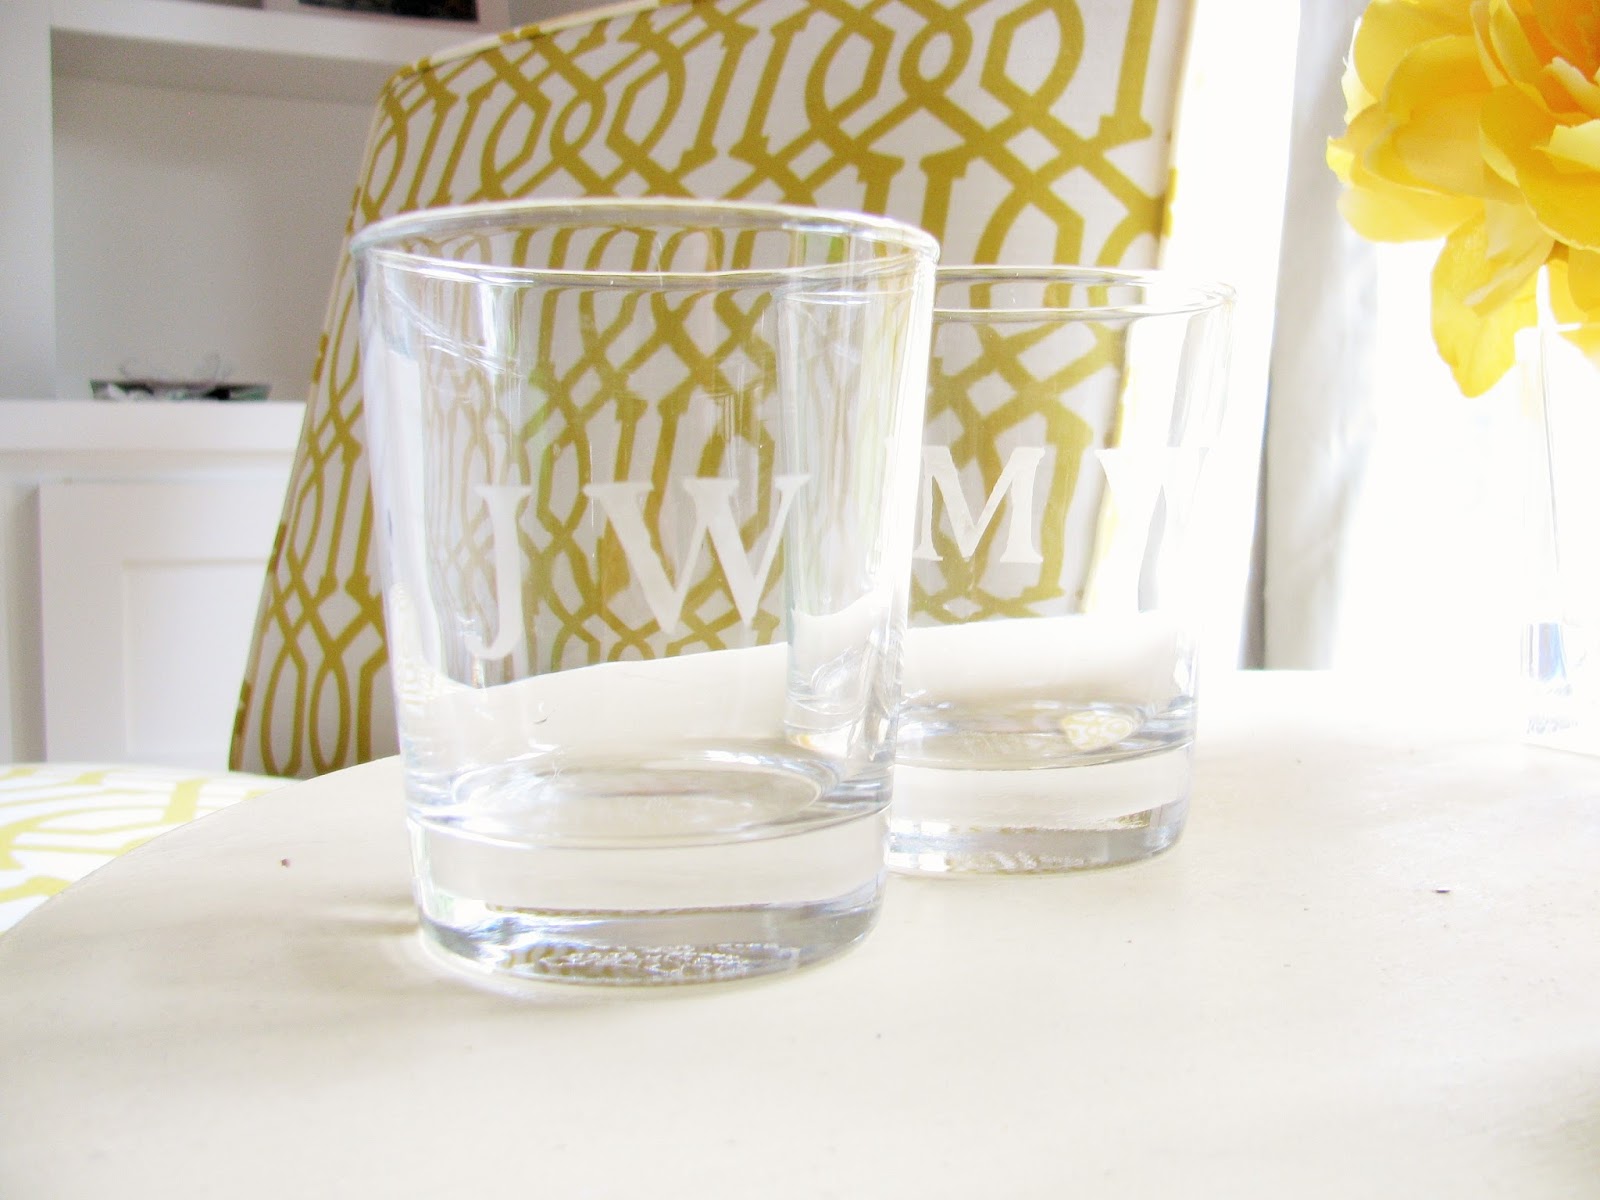
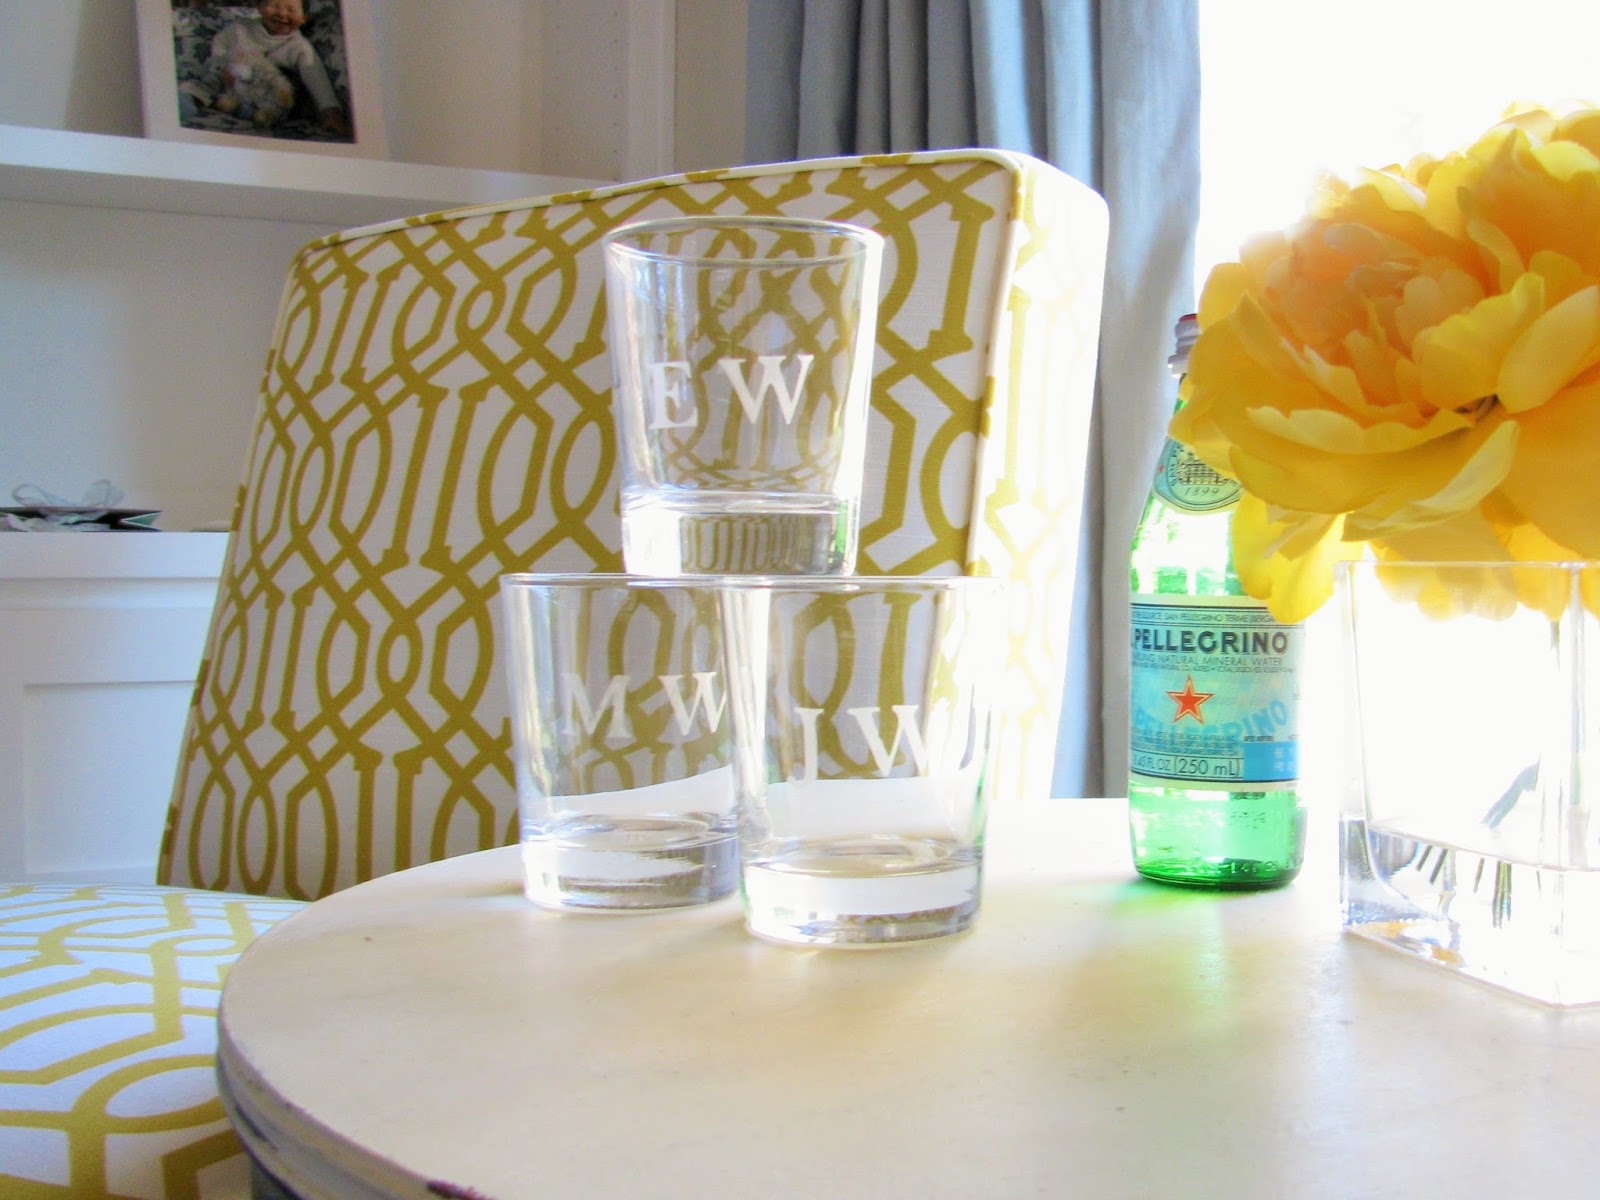
Enter my current solution, DIY etched glasses with our initials! Surely, we cannot forget our names (or initials), and if we do, please send for help! Well, this is a pretty easy DIY project that will inspire you to etch all your glassware and more. My brain quickly thought of many ways this could easily become wedding gifts, hostess gifts, and housewarming gifts.


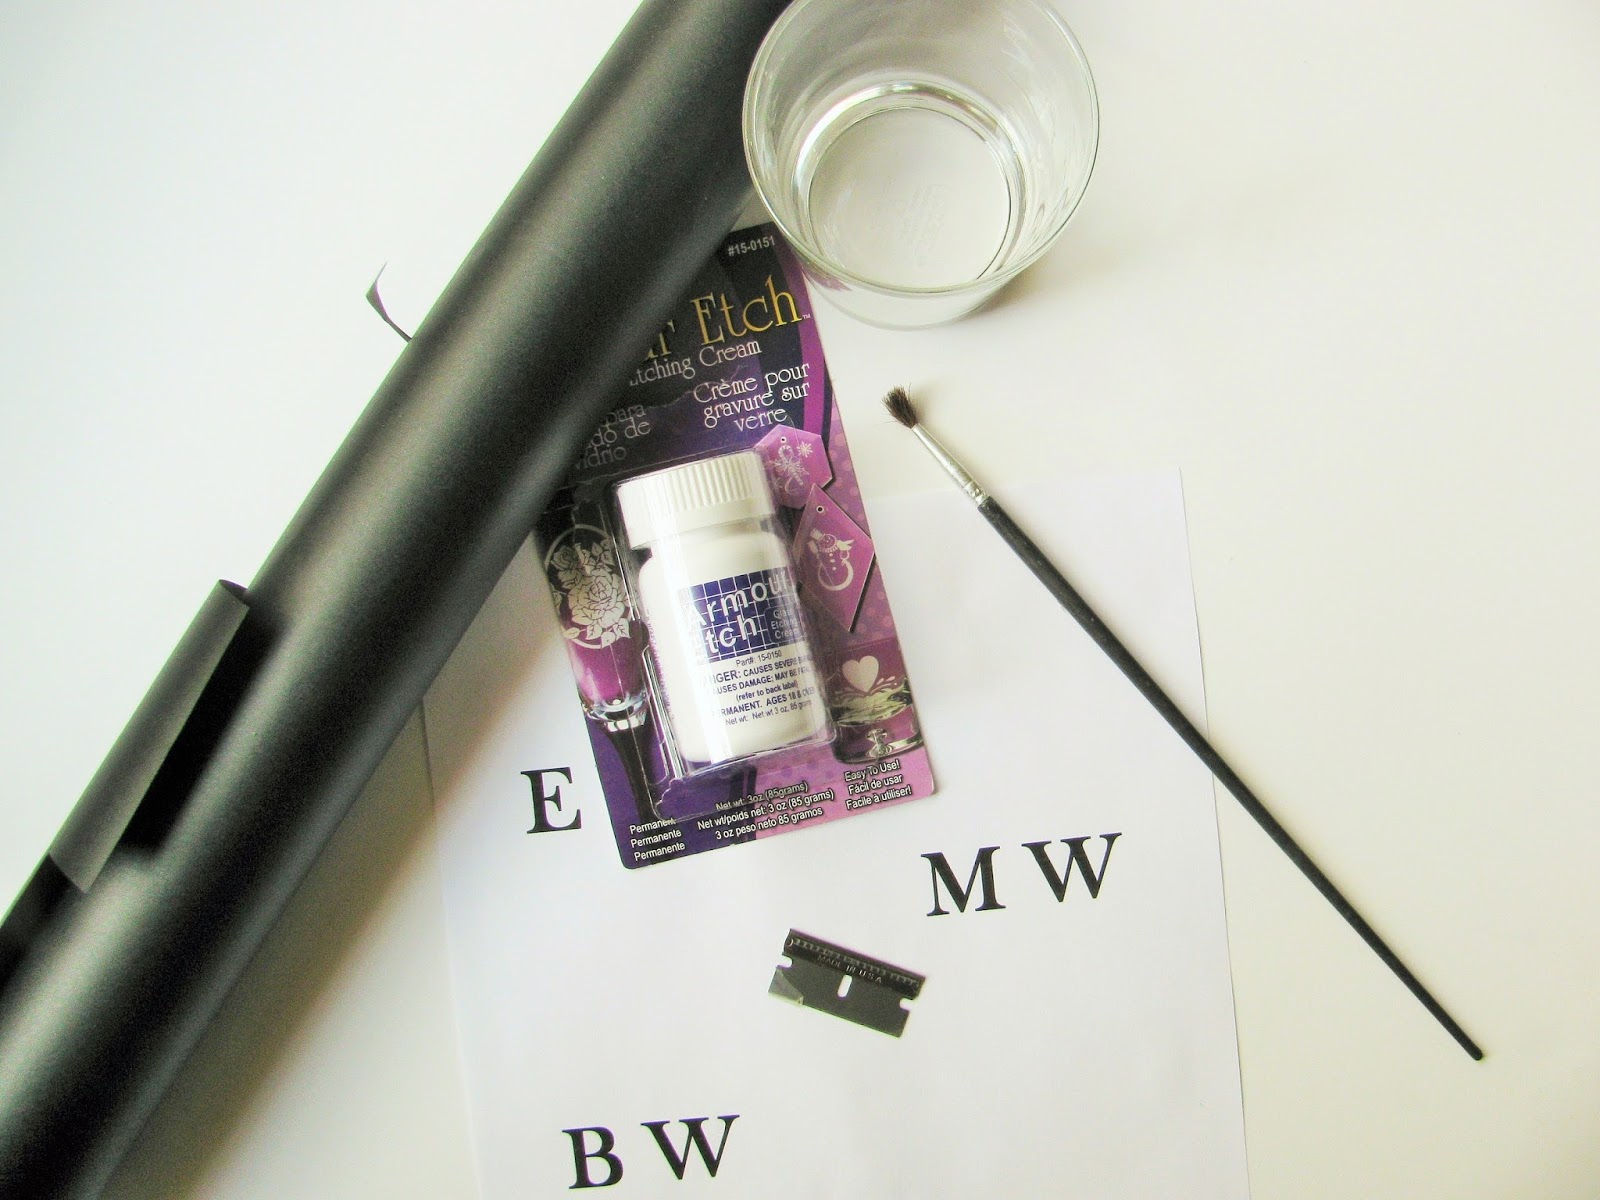
Here is what you’ll need.

1. Etching Cream

2. A design of your choice. Print out an image or type. My type is 72 point which is roughly 3/4 inches high.

3. Chalk Board Label Paper or Sticker Paper  (if you use this, you can skip steps 2 and 4)

3. Razor blade  or x-acto knife

4. Tape

5. Cutting board or glass surface (one that you don’t mind scratching)


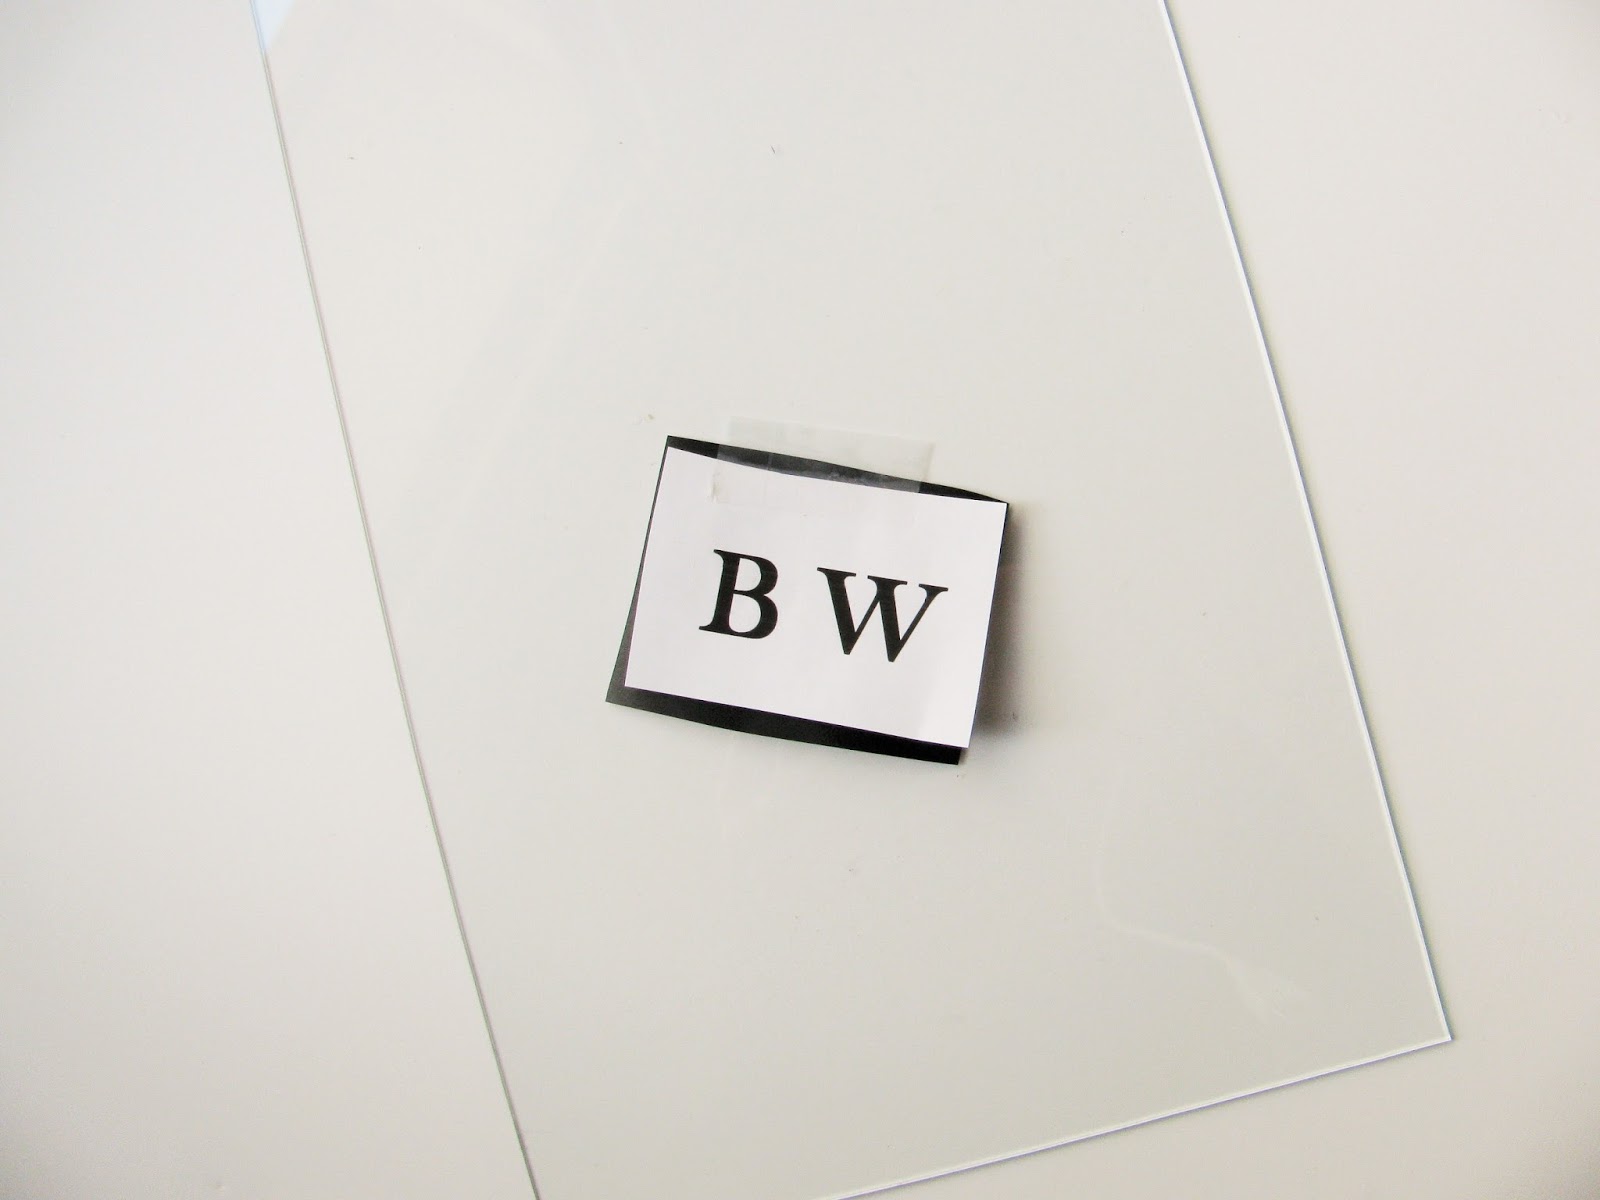
1. Print out your image from your computer. Place the image on top and adhesive paper (I used Chalk Board Labeling paper) on the bottom. Tape them together and place on a cutting surface.

2. For cutting the image, I use a razor blade that I bought from Home Depot. The reason I prefer razor blades over the x-acto knives is that they are firm and less flimsy and less likely to cut you accidently. But, use whichever blade works for you. 🙂
3. Clean your glasses before the next step. I bought these nice drinking glasses from Ikea. They were cheap and exactly what I wanted for this project.

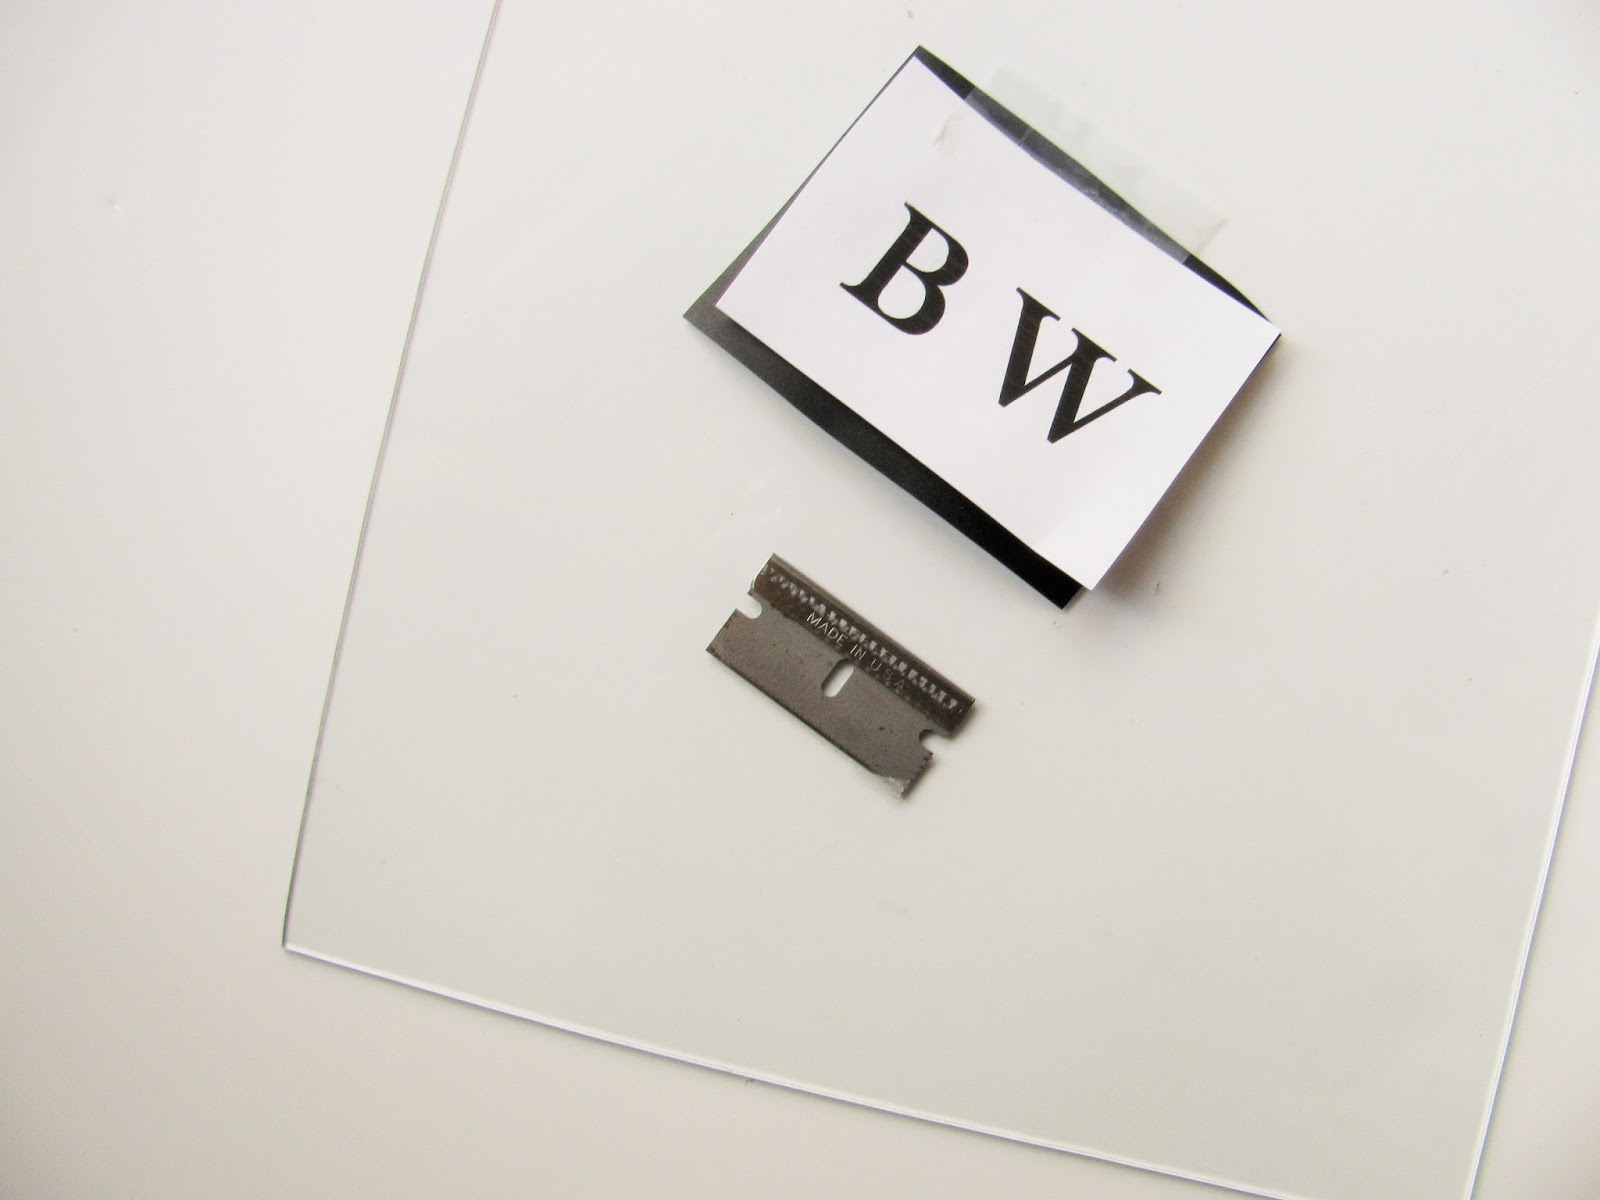
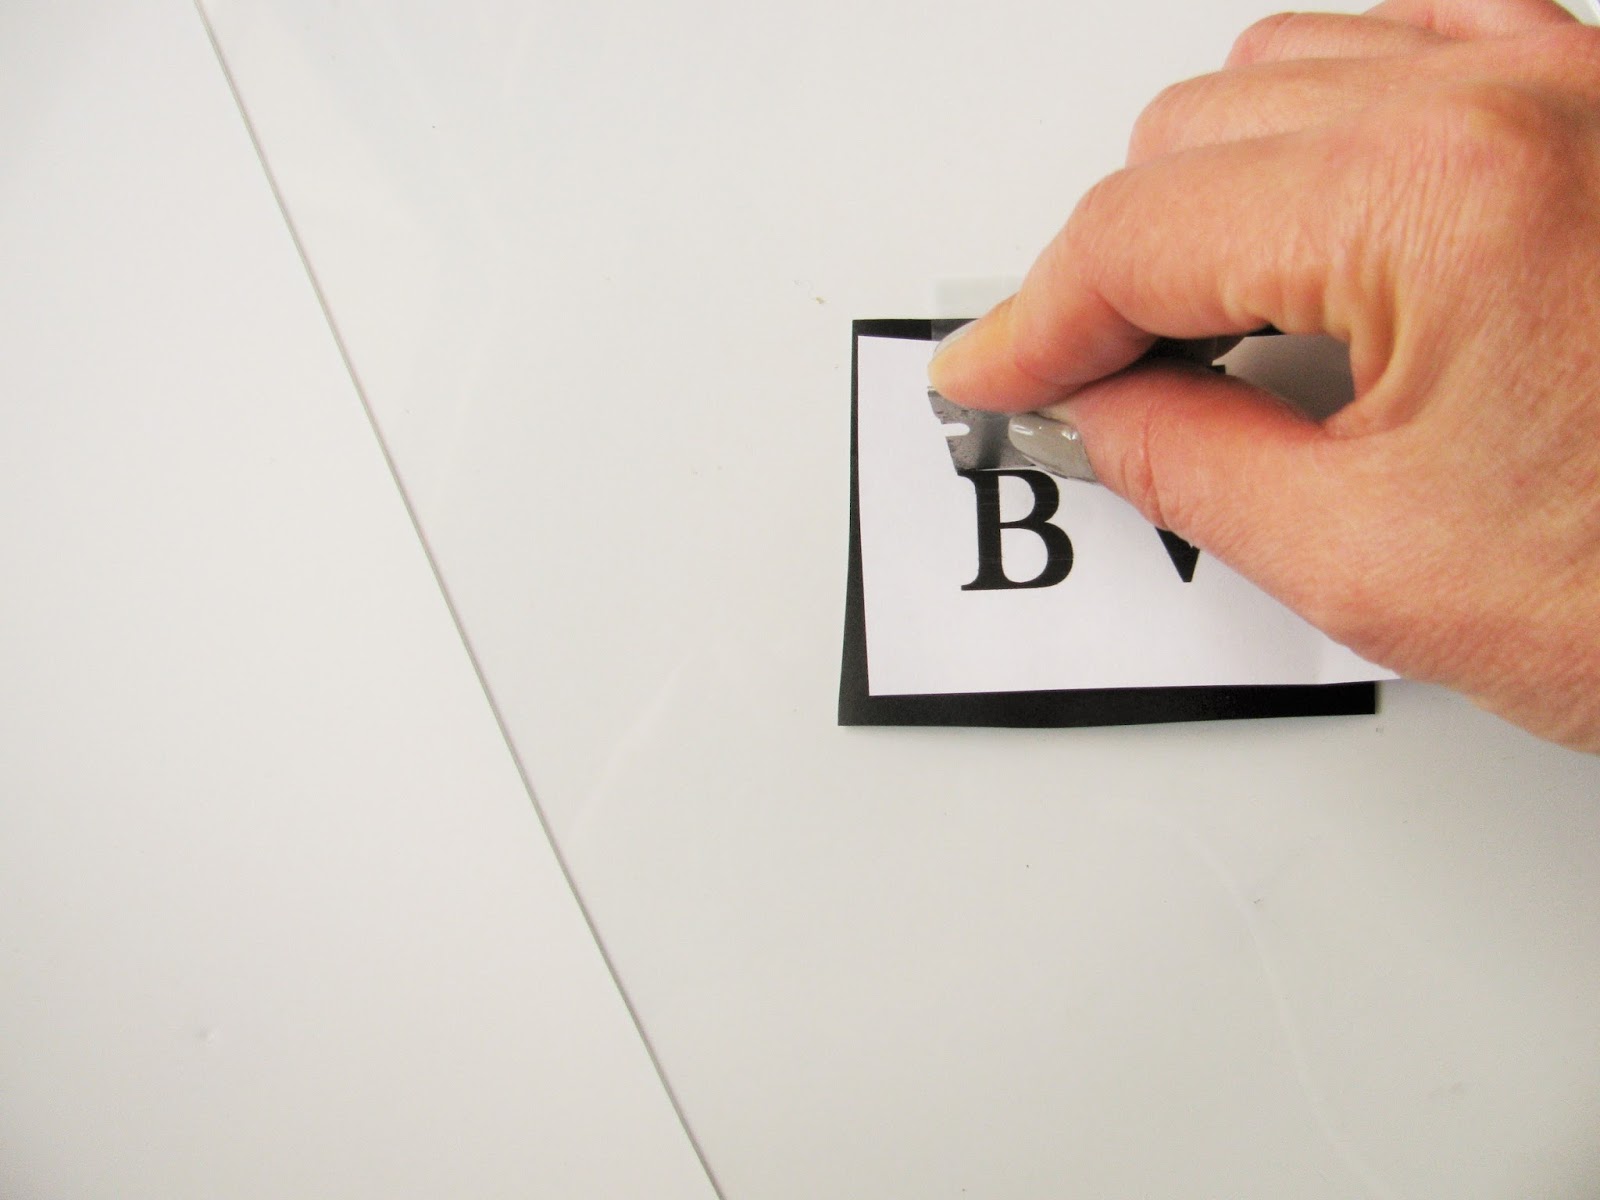
4. Cut out the image. For my project, I wanted to etch the letters into the glasses, so I cut out the letters. When you are all done, remove the adhesive paper backing.


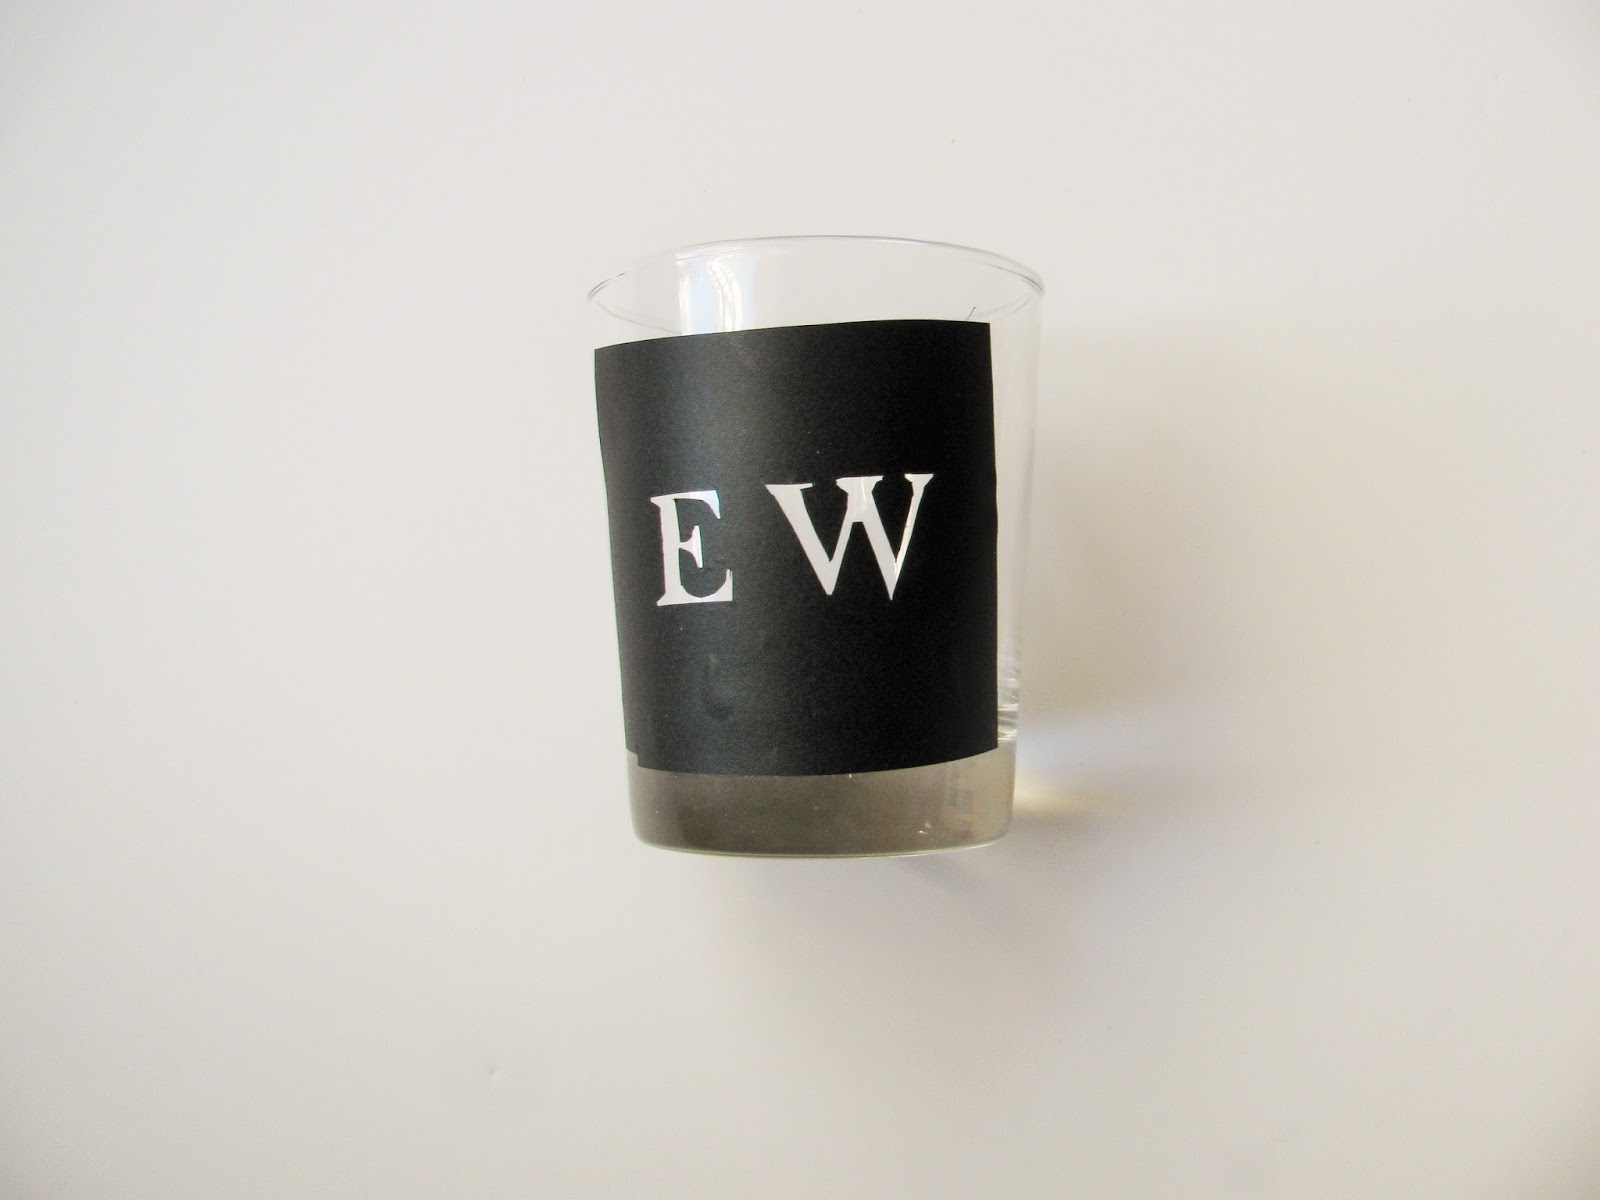
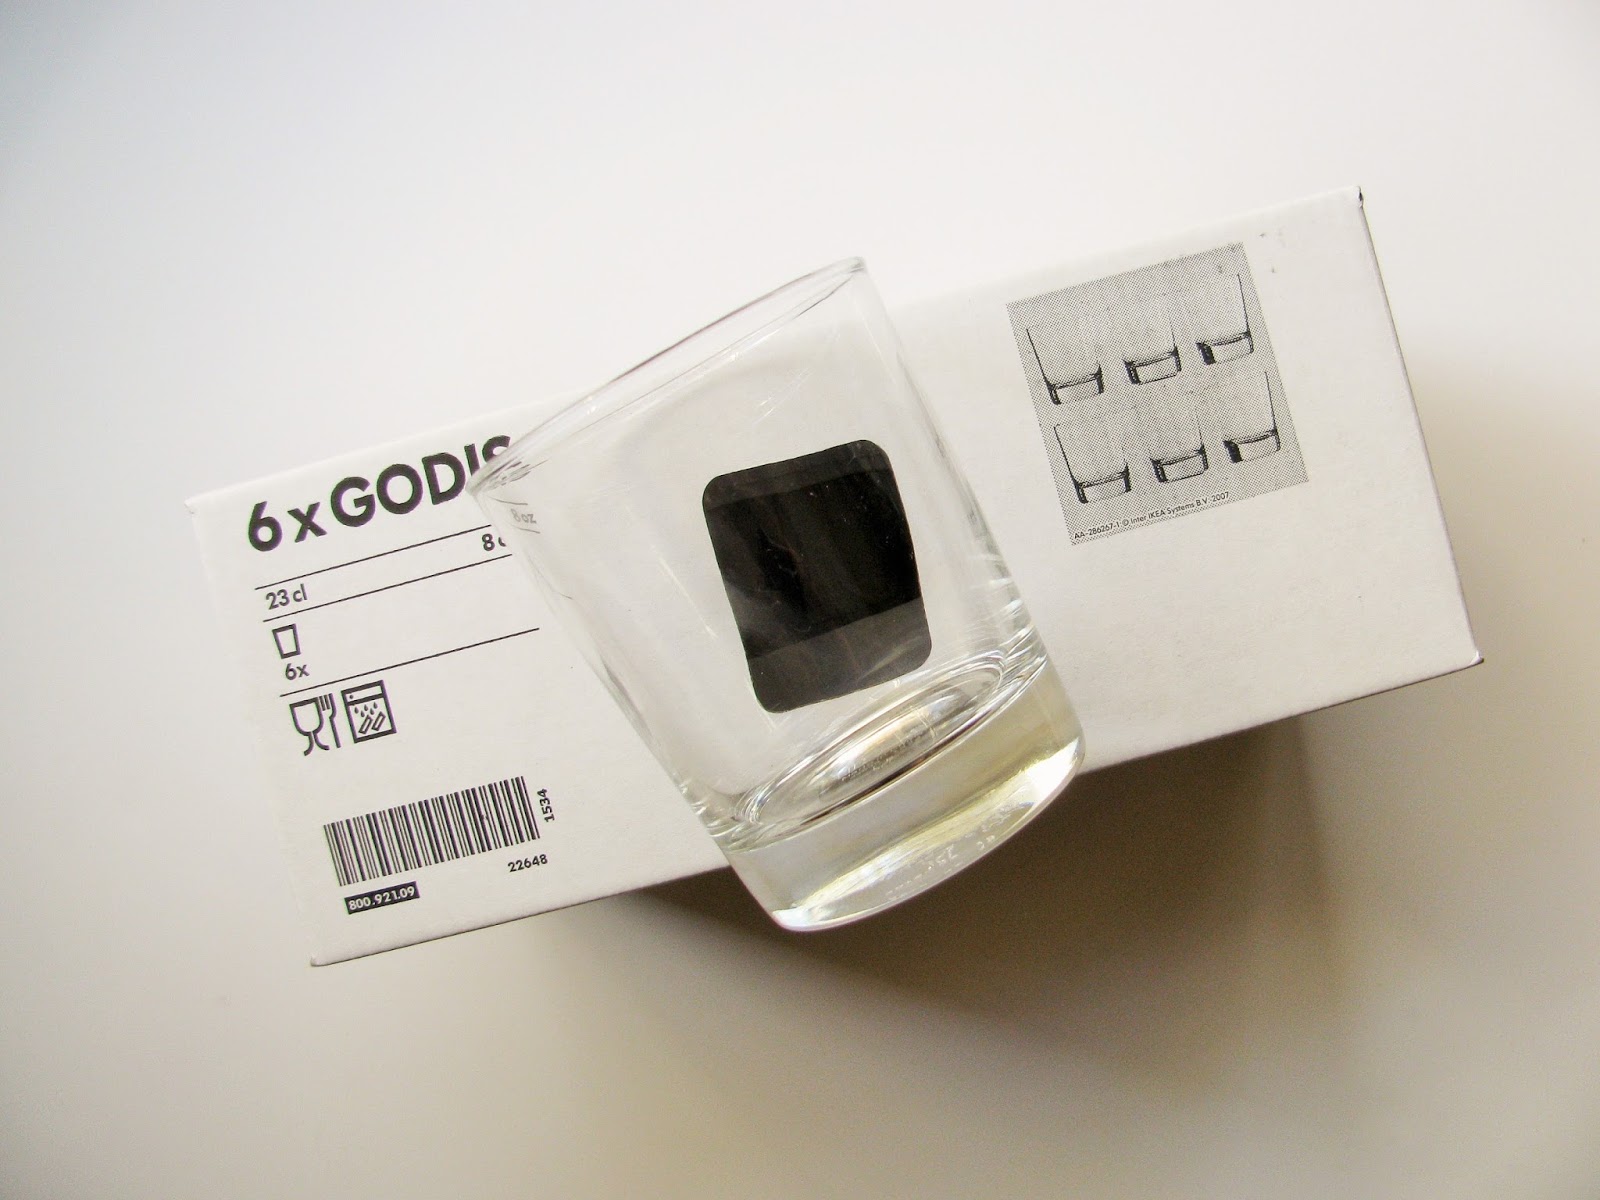
5. Place the adhesive tape on your glass surface. This step can be tricky if you don’t get it positioned correctly. If you have to reposition your sticker, you’ll find it can be difficult. Just be careful when pulling it up that you don’t tear the stencil. When you have it exactly where you want the stencil to be, make sure to squeeze any air bubbles out that are near the area you are going to etch. Also, be sure to rub the stencil thoroughly to create a good seal. This will prevent etching areas that you didn’t intend to etch.


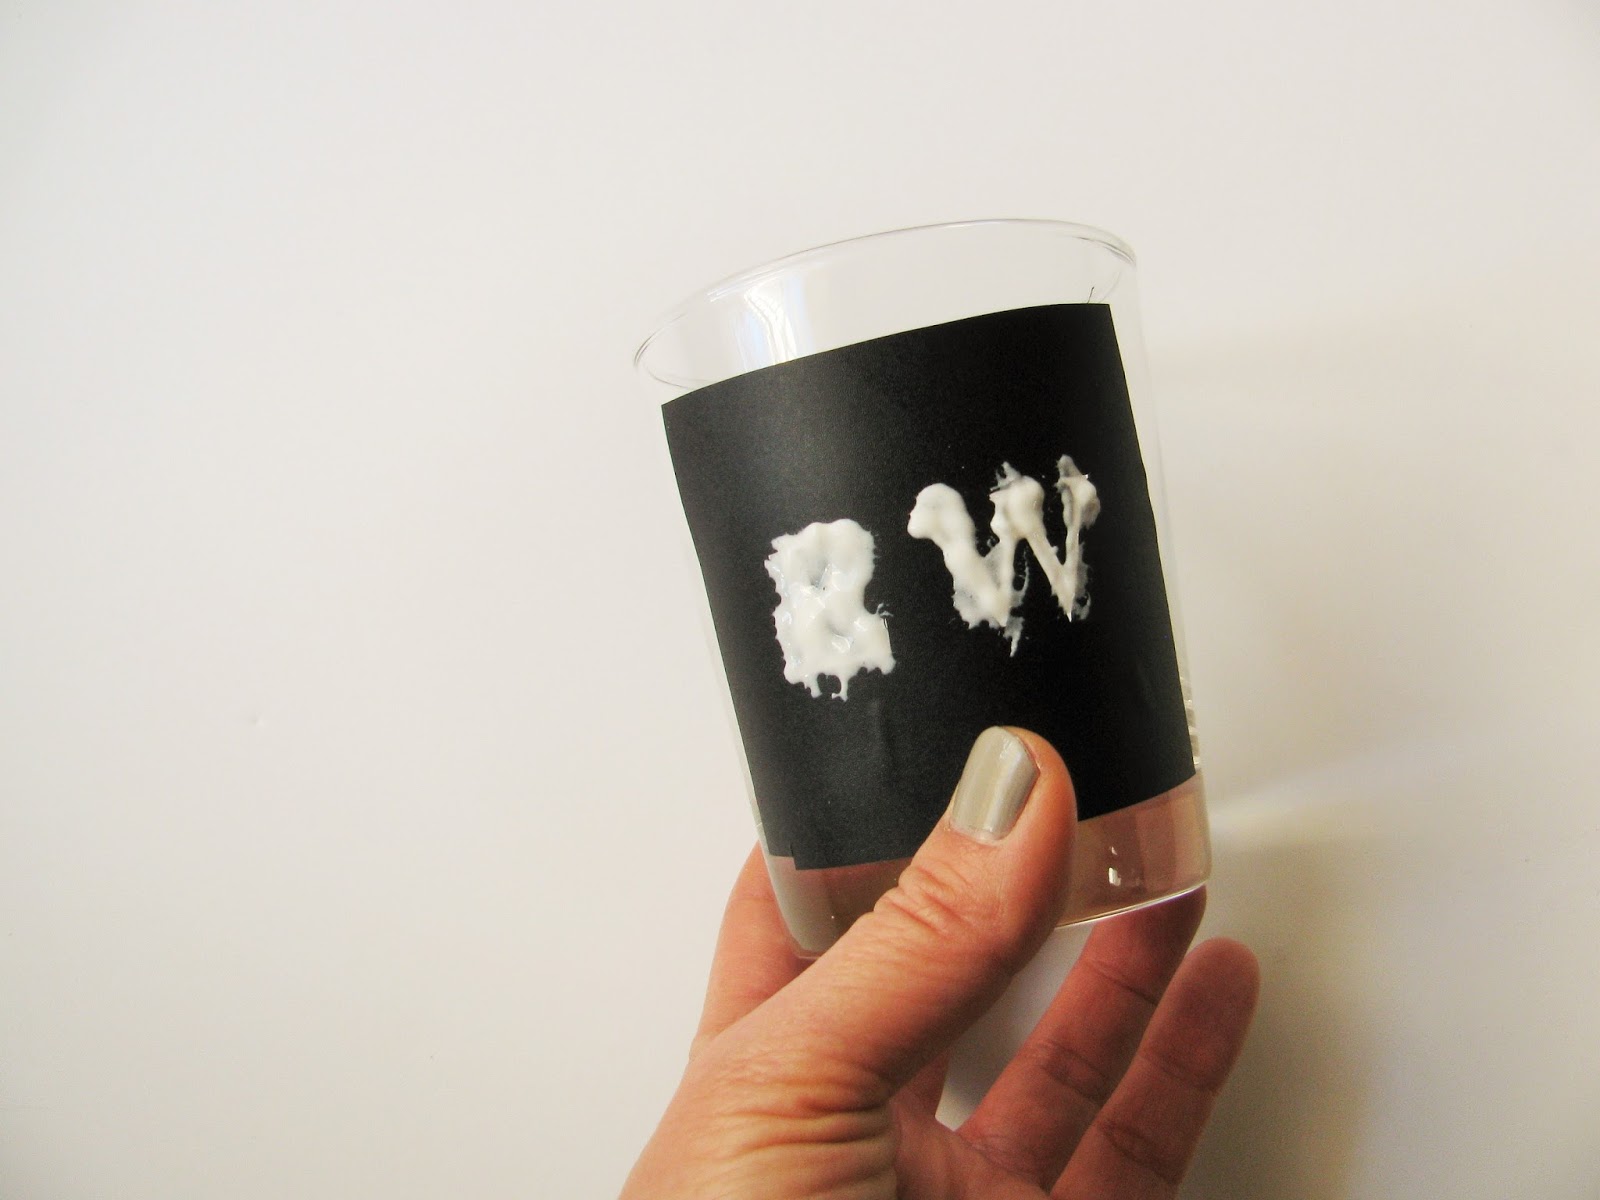
6. Apply the etching cream onto your image. Make sure you cover it with a thick layer of cream. You don’t want to have any clear and unpainted areas.

The instructions on the etching cream container said to let it sit for 60 seconds. I did this on my first attempt, and it totally didn’t work. I found letting the solution soak for 15 minutes does the job quite nicely. When the 15 minutes is complete, wipe the surface clean and make sure not to get any the cream on your hands since the solution is acid. Peel away the paper and rinse off the cream. Clean the glass with soap and water.


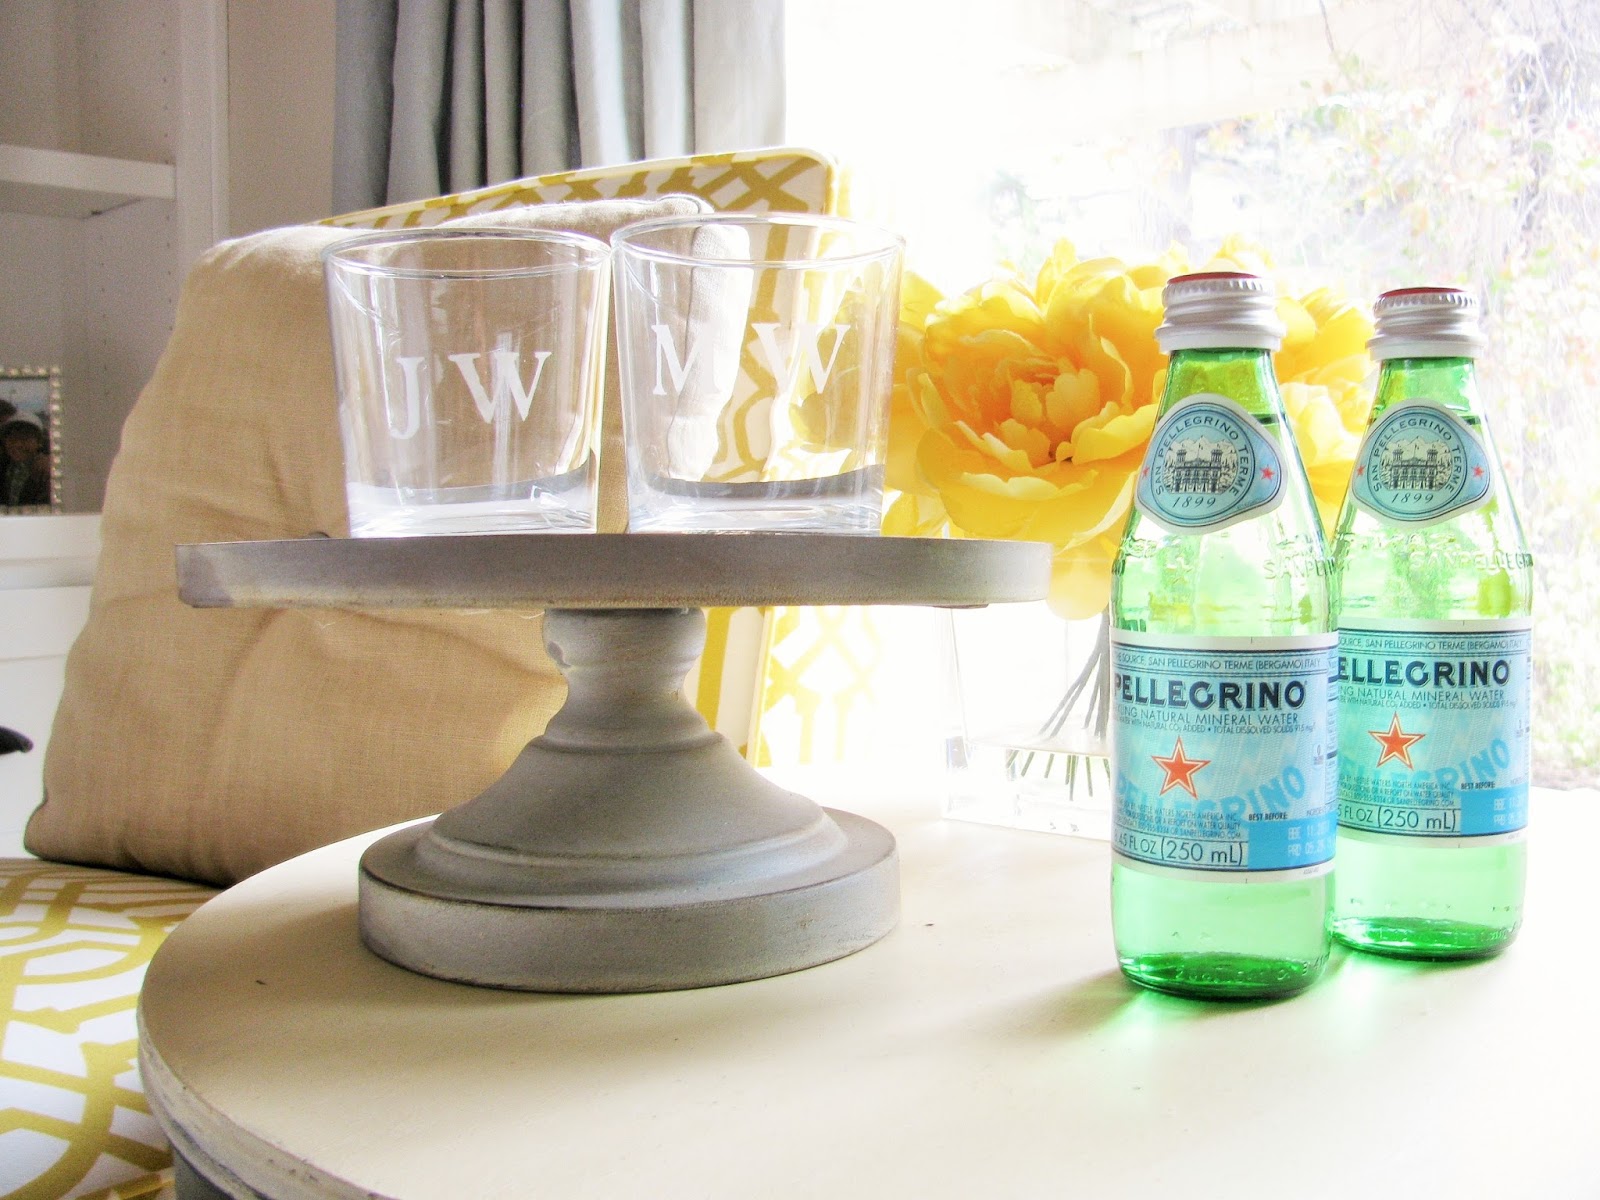
By the way, the etching solution has a reaction with the glass, and the results are permanent. So thankfully our new glasses can be put in the dishwasher.

Now, everyone in my family has their own personalized drinking glasses and I am a happy mommy. Glass etching is easy and fun and possible projects are limitless. For instance, homemade candles in an etch glass container with a word or a friend’s name. It would make a lovely personalized gift. Have fun with the project and let me know if you enjoyed this post. Or just comment and say, “hello!”

Cheers,


The above post was sponsored by an Amazon affiliate program

  • Author
  • Recent Posts
happyhappynester
Follow me
happyhappynester
I named my blog Happy Happy Nester because I love everything related to the home. I’ve always enjoyed decorating my surroundings. Get cozy and stay for a bit, thanks for visiting!
happyhappynester
Follow me
Latest posts by happyhappynester (see all)
  • Stuffed Italian Pizza Bread Recipe - February 25, 2021
  • The Best Cooking Utensils for the Kitchen - February 24, 2021
  • Homemade Cinnamon Rolls – From Scratch - February 22, 2021

MORE FROM HAPPY HAPPY NESTER

Subscribe To Our Newsletter

Join our mailing list to receive the latest news and updates from Happy Happy Nester!

You have Successfully Subscribed!


8 Comments

« Tips
Tips: Cuisinart Tea Kettle »

Comments

  1. Anonymous says

    January 18, 2016 at 10:48 pm

    I love this! Definitely need to do this at my house with kids and grandkids. Great idea. Thank you for the step by step!

    Reply
    • Janine Waite says

      January 19, 2016 at 4:32 am

      Ah, thanks so much for your visit and your lovely comment. It is such a fun craft that is beautiful and practical! I'm happy you liked this post.

  2. Colette Joseph says

    January 19, 2016 at 7:05 pm

    You really are the Craft Bombdiggity!

    Reply
    • Janine Waite says

      January 20, 2016 at 12:29 am

      You're so funny! You are the best to visit and comment! I love all your support!

  3. Lindsay Butler says

    January 26, 2016 at 4:50 pm

    I really love these! I think they would make such an awesome wedding shower or even Christmas gift for people!

    You could buy inexpensive glasses, and customize a whole bunch of them. Paired with the adorable coasters and you have an awesome (and affordable) gift!

    Reply
  4. Claire says

    September 28, 2017 at 3:09 am

    What a lovely personalised gift idea.

    Reply
  5. Carolann says

    September 28, 2017 at 5:35 am

    I love etched glass and can’t wait to try some too. They also make a lovely personalized gift too!

    Reply

Trackbacks

  1. 25 Gift Ideas That Cost Under $20 - Happy Happy Nester says:
    April 22, 2016 at 11:30 pm

    […] Happy Happy Nester | DIY Etched Drinking Glasses […]

    Reply

Leave a Reply Cancel reply

Your email address will not be published. Required fields are marked *

Recipe Rating


Home, Craft & Cooking Circle Membership

portrait
hello from the nester We love everything related to home, so get cozy and stay for a bit. Thanks for visiting our blog.
  • Bloglovin
  • Facebook
  • Instagram
  • Pinterest
  • Twitter

Holiday Printables eBook

search

Most Popular Posts

Home for the Holidays Blog Tour: White Christmas

December 2, 2016 By happyhappynester 115 Comments

Almond Cookies are my family's favorite cookie. This recipe comes from my mom. It is easy to make and is a delicious and light cookie.

Amy’s Almond Cookies (Super Easy Recipe)

October 6, 2012 By happyhappynester 72 Comments

Organizing Kitchen Labels That You’ll Love!

January 17, 2018 By happyhappynester 72 Comments

DIY Paper Flowers Tutorial | How to Make Paper Flowers

January 11, 2019 By happyhappynester 59 Comments

If beautiful linens and comfort are important, then Hallstrom Home is for you. Rhonda creates gorgeous linens that are comfy and perfect for your home.

Linens and More: Interview with Hallstrom Home

October 29, 2016 By happyhappynester 57 Comments

Join Our Newsletter

Join our mailing list to receive the latest news and updates from our team.

You have Successfully Subscribed!

Affiliate Disclosure:
I am grateful to be of service and bring you content free of charge. In order to do this, please note that when you click links and purchase items, in most (not all) cases, I will receive a referral commission. Your support in purchasing through these links enables me to keep my design and customization prices ridiculously low and empower more people worldwide to blog with less worry and less hassle. Happy Happy Nester is a participant in the Amazon Services LLC Associates Program, an affiliate advertising program designed to provide a means for sites to earn advertising fees by advertising and linking to amazon.com.
Thank you! :)
- Happy Happy Nester

Categories

Archives

you might also like

Shop Our House and Home Decor

The Best Decorating Pumpkin Ideas

Easy and Cute Halloween Ideas You’ll Not Want to Miss

Summer Home Tour

5 Simple Tips You Need to Know About My Room Color

Copyright © 2021 · Happy Happy Nester by Janine Waite

Copyright © 2021 · Divine Theme on Genesis Framework · WordPress · Privacy Policy · Log in