• Skip to main content
  • Skip to header right navigation
  • Skip to site footer
  • About
  • Contact
  • Boutique of the Week
    • Facebook
    • Instagram
    • Pinterest
    • Twitter

Happy Happy Nester

Weekly Inspiration for Your Nest

  • Recipes
    • Appetizers
    • Breakfast/Brunch
    • Desserts
    • Dinners
    • Drinks
  • Crafts
  • Decor
  • Shop
    • Fall Decor
    • Kitchen
    • Pillows
    • Holiday Decor
  • Amazon Store
  • Recipes
    • Appetizers
    • Breakfast/Brunch
    • Desserts
    • Dinners
    • Drinks
    • Snacks
  • Crafts
  • Decor
  • Shop
    • Fall Decor
    • Kitchen Favorites
    • Pillows
    • Holiday Decor
  • Saturday Chitchat
  • Boutique of the Week
  • About
  • Contact
  • Facebook
  • Instagram
  • Pinterest
  • Twitter

See What’s Trending…

Cakes

Cookies

Dinners

Wreaths

Drinks

A blue candle is set in a Mason jar adorned with pressed flowers and tied with a checkered gray and white ribbon. The candle is lit, and the background is softly blurred, creating a cozy ambiance. The words "HAPPY HAPPY NESTER" are visible in the bottom right corner.

Home › Crafts › Mason Jar Luminaries

Mason Jar Luminaries

Crafts Decor
By Janine Waite · Published on Aug 16, 2024
Affiliate Disclosure: This Post May Contain Affiliate Links.

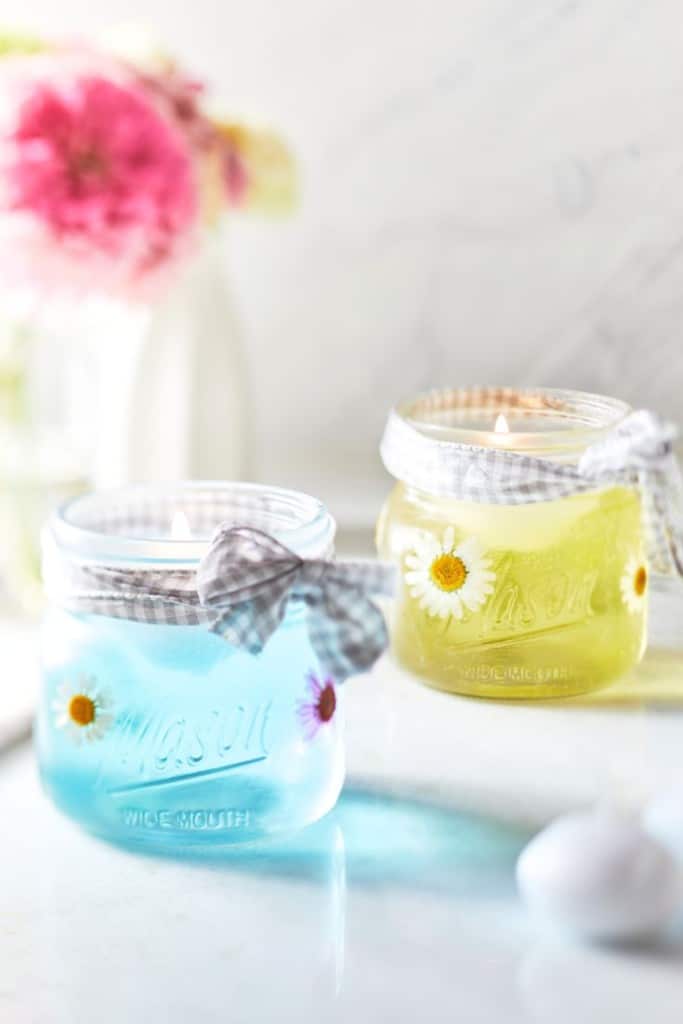
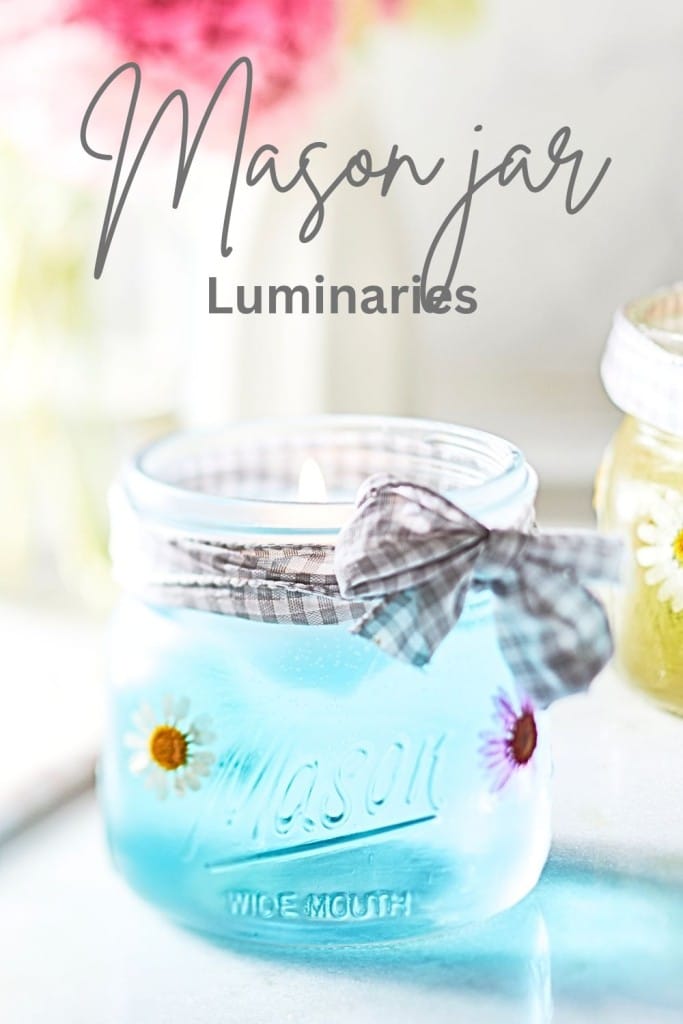
The other day, I picked up a box of canning jars and turned them into charming Mason Jar Luminaries. I added a few drops of citronella, lavender, and cinnamon oils to make them double as insect repellents. With a bit of water in the jar and a floating candle on top, they make the perfect outdoor summer candle.

A blue candle is set in a Mason jar adorned with pressed flowers and tied with a checkered gray and white ribbon. The candle is lit, and the background is softly blurred, creating a cozy ambiance. The words "HAPPY HAPPY NESTER" are visible in the bottom right corner.

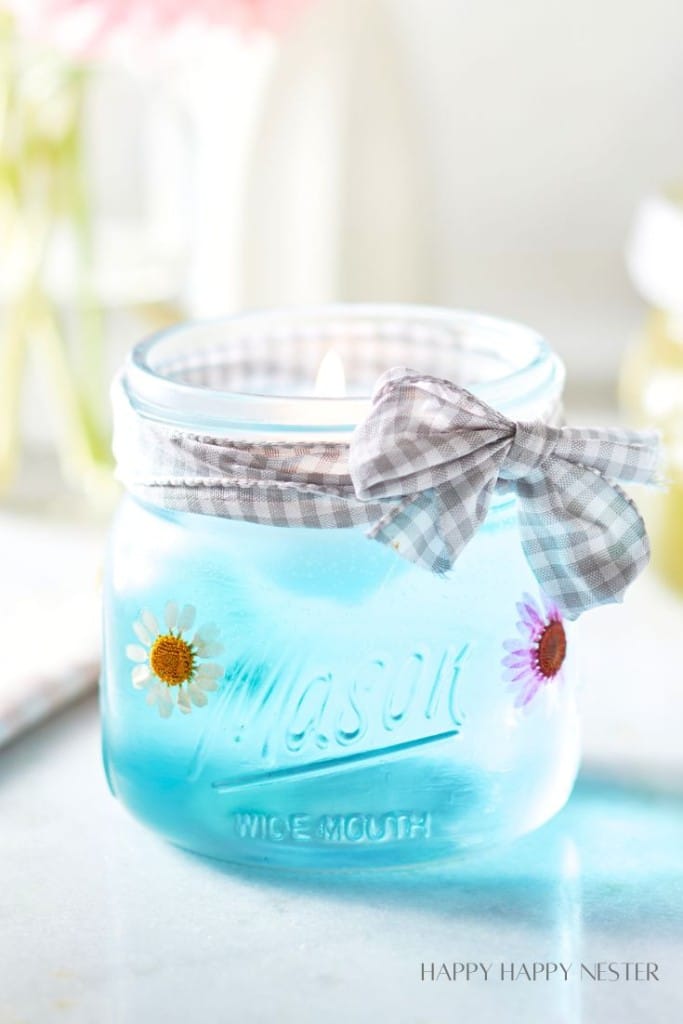
Decoupage the outside of the jar with some adorable dried flowers, and you’ve transformed them into delightful candles. It’s a simple craft that anyone can make, and when you add the oils, you have a pretty insect repellent for your outdoors.

When summer arrives, we love spending evenings dining on our back patio, enjoying the warm weather and fresh air. However, the bugs and critters have been more abundant this year.

To make our outdoor dinners more enjoyable, I decided to create these fun Mason jar luminaries that add a charming touch to our table and help keep the flies at bay while we eat. They’re practical, easy to make, and add a delightful ambiance to our summer nights!

This fun decoupage craft is so simple to create. And I’ve created a few candle tutorials. Check them out here!

  • Gel Wax Candle Making
  • DIY Glass Candle Holder Decoration
  • Cement Pumpkins DIY (with Candleholders)
A close-up of two mason jars filled with yellow and blue liquids, respectively. Each jar is decorated with a checkered ribbon at the top and features a daisy flower inside. The jars sit on a patterned tablecloth with soft-focus background elements.

Supplies You’ll Need

  • Mason Jars – These serve as the base for your luminaries, providing a sturdy and stylish container.
  • Mod Podge – This adhesive is perfect for attaching dried flowers to the jars, giving them a smooth, sealed finish.
  • Brush – Use a brush to apply the Mod Podge evenly, ensuring a neat and polished look.
  • Dried Flowers – These add a decorative touch to the jars, bringing a natural and rustic charm to your luminaries.
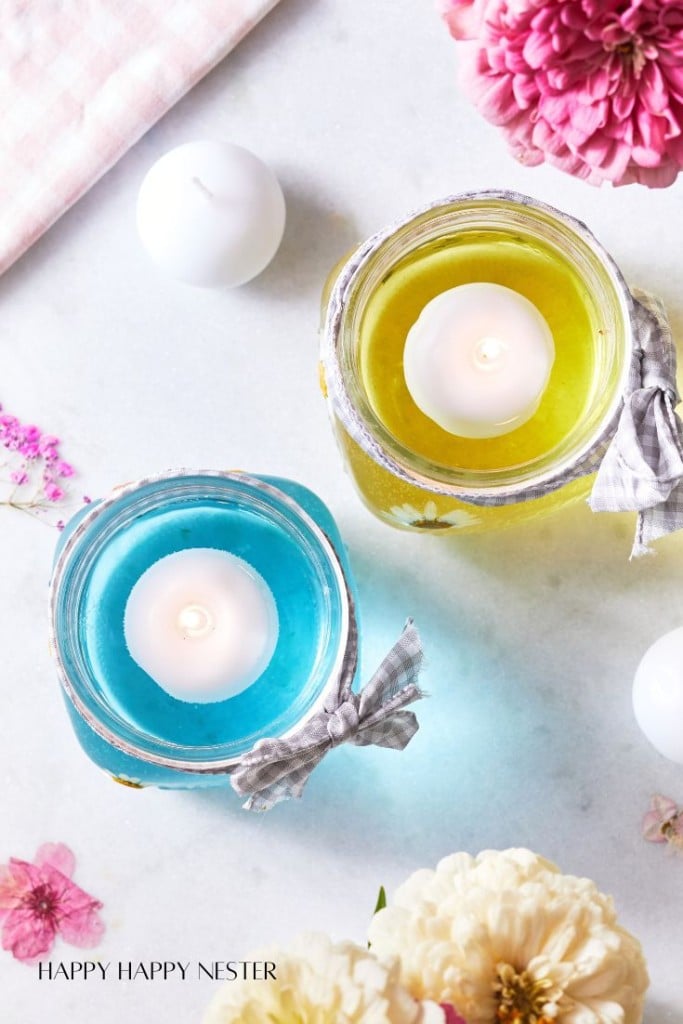
  • Floating Candles – These candles float on water inside the jar, creating a soft, ambient glow.
  • Citronella Oil – This oil acts as a natural insect repellent, making your luminaries both functional and fragrant.
  • Lavender Oil – Add a calming scent to your luminaries with a few drops.
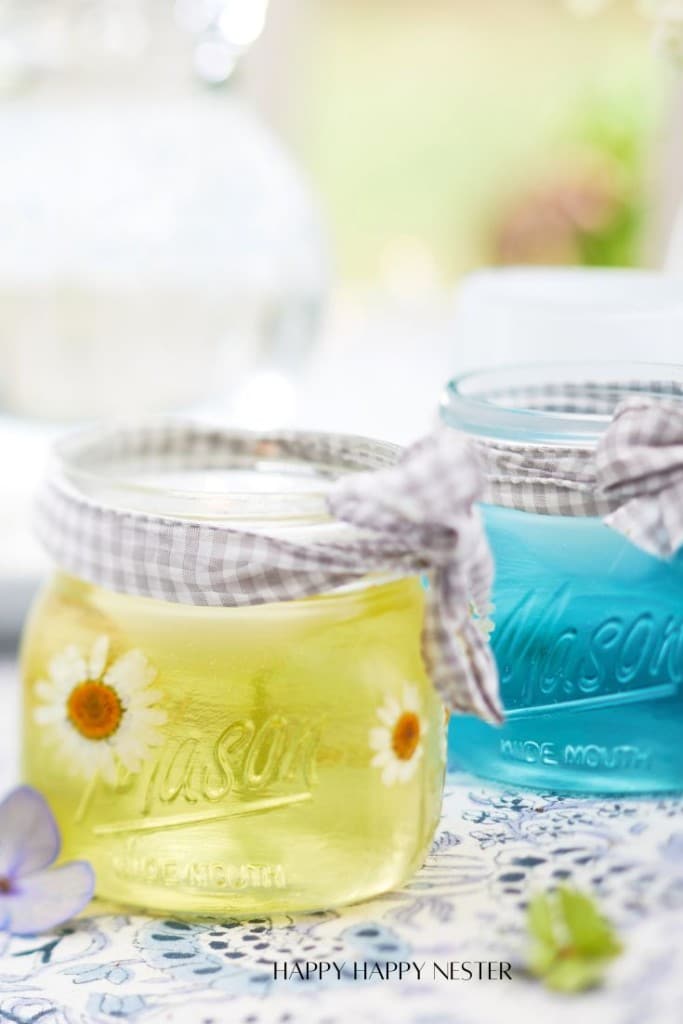
  • Food Coloring Dye – Use this to tint the water inside the jars, adding a pop of color to your luminaries.
  • Water – Fill the jars with water to float the candles and help disperse the essential oils.
Four clear, empty Mason jars with metal lids are shown in a 2x2 arrangement. The word "Mason" is embossed on the front of each jar. These versatile jars can easily be transformed into charming mason jar luminaries for any occasion.

Directions to Making Your Candle Holders

Step 1 – Clean Mason Jar
Start by thoroughly cleaning your Mason jars to remove any dust, dirt, or residue. Ensure they are completely dry before proceeding to the next step.

Step 2 – Apply Mod Podge
Using a brush, apply a thin, even layer of Mod Podge on the outside of the Mason jar where you want to place the dried flowers.

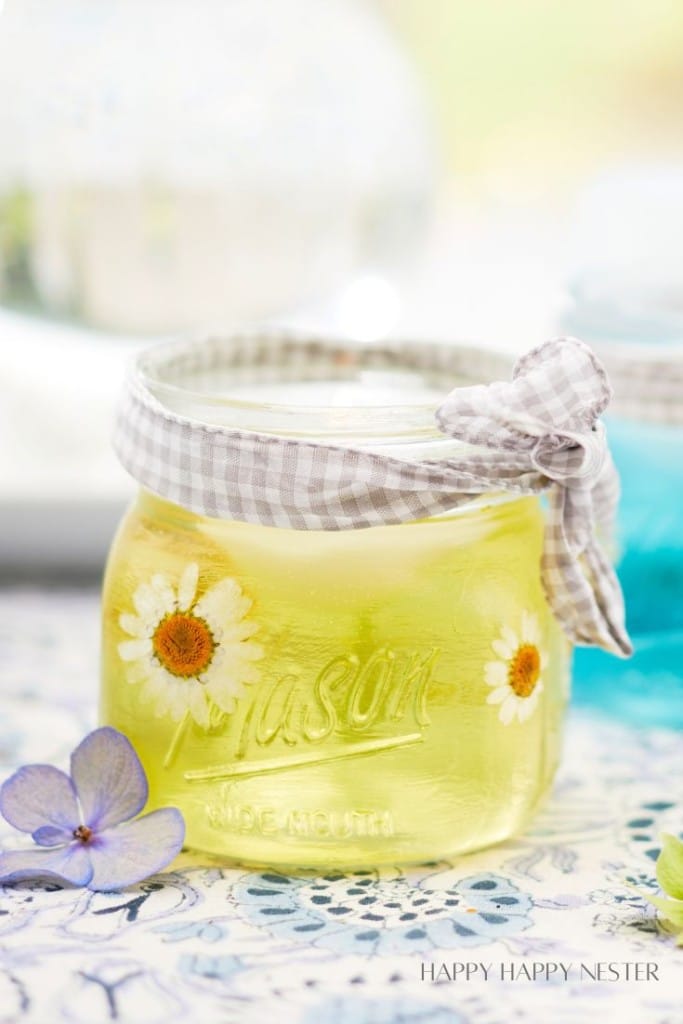
Step 3 – Add Dried Flowers
Carefully place the dried flowers into the Mod Podge-coated jar. Press them down gently to ensure they stick well, and then apply another layer of Mod Podge over the flowers to seal them in place.

Step 4 – Allow to Dry
Let the jar sit for a few hours for the Mod Podge to dry completely. This will ensure the flowers are securely attached and the jar has a smooth finish.

Step 5 – Add Water and Oils
Fill the jar with water, leaving some space at the top. Add a few drops of insect-repellent essential oils, such as citronella, lavender, or eucalyptus.

Step 6 – Add Food Coloring (Optional)
If you want to add a touch of color to your luminary, mix in a few drops of food coloring into the water and stir gently.

Step 7 – Insert Floating Candle
Carefully place a floating candle on top of the water. Make sure it is centered and stable.

Step 8 – Light the Candle
Once everything is set up, light the floating candle and enjoy the warm glow and insect-repelling benefits of your beautiful Mason jar luminary.

Overhead view of a blue and yellow candle in glass jars, each with a lit tealight inside. The jars are decorated with gray checkered ribbon bows. Surrounding the candles are white and pink flowers, and white round candles on a white surface.

A few tips

  • Wet Mod Podge: Try not to get it wet, but if it doesn’t, wipe it and allow it to dry.
  • Gloss or Matte Mod Podge: I used the Matte Mod Podge because I wanted a frosty look. If you want it clear, use the Gloss Mod Podge.
  • Experiment with Flower Placement: Before applying Mod Podge, arrange the dried flowers on the jar to find the most visually appealing design.
  • Translucent Flowers: If you want your flowers vibrant, don’t drown them in Mod Podge. I did that to one of my jars, and the petals became translucent.
  • Use a Soft Brush: A soft brush helps apply the Mod Podge evenly and reduces the chance of damaging the delicate dried flowers.
  • Layer the Mod Podge: Applying two or three layers of Mod Podge over the flowers ensures they are well-sealed and protected.
  • Customize the Scent: Mix different essential oils to create a custom scent that’s both pleasant and effective against insects.
  • Choosing Floating Candles: Make sure the candle will fit your size jar.
A Mason jar filled with a yellowish liquid, decorated with small white daisies. The jar is covered with a gingham cloth tied with a bow. The jar is placed on a floral-patterned surface, and a purple hydrangea flower is in the foreground.

Oils You Can Add to Your Luminaries

Tap on Items to Shop

  • Citronella Oil – A well-known natural insect repellent, especially effective against mosquitoes.
  • Lavender Oil – Not only does it have a calming scent, but it also repels flies, mosquitoes, and other pests.
  • Eucalyptus Oil – This oil has a strong, fresh scent that helps keep mosquitoes and other insects at bay.
  • Peppermint Oil – The refreshing aroma of peppermint oil is great for repelling ants, spiders, and mosquitoes.
  • Tea Tree Oil – Known for its antibacterial properties, tea tree oil also helps deter mosquitoes and other biting insects.
  • Lemongrass Oil – With its citrusy fragrance, lemongrass oil effectively repels mosquitoes and bugs.
  • Cedarwood Oil – This oil has a warm, woody scent that naturally repels mosquitoes, moths, and other insects.
  • Rosemary Oil – Rosemary’s strong herbal scent is great for repelling mosquitoes and other flying insects.
Two mason jar candles, one with blue wax and the other with pale yellow wax, are decorated with daisy flowers and tied with checkered ribbons. A blurred bouquet of pink flowers is in the background.

Create a few of these Mason jar luminaries to charm your outdoor table. They’re beautiful and great at keeping those summer bugs at bay!

Happy Crafting!

Cheers,

wente tour signature

Photo Credits: MyPhotography.com

pin it button
A mason jar luminary with a lit candle inside, decorated with a piece of checkered fabric tied around its neck and small daisy flowers on its surface. The background is softly blurred, and the text "Mason jar Luminaries" is written at the top.


  • Author
  • Recent Posts
Janine Waite
Follow me
Janine Waite
I named my blog Happy Happy Nester because I love everything related to the home. I’ve always enjoyed decorating my surroundings. Get cozy and stay for a bit, thanks for visiting!
Janine Waite
Follow me
Latest posts by Janine Waite (see all)
  • Casual Summer Dresses for Women - June 11, 2025
  • My Favorite Summer Decor to Make - June 7, 2025
  • My Favorite Side Dishes - May 31, 2025

You May Also Like

  • A collage of four of my favorite summer crafts: Top left is a floral lantern, top right showcases pressed flowers in an embroidery hoop, bottom left features lavender stalks woven with ribbon, and bottom right is a jar decorated with pressed flowers.
    My Favorite Summer Crafts
  • yank
    Yankee Candle Outdoor Collection
  • host gift vintage candles
    Pretty Vintage Candles for the Home
  • how to make candles
    How to Make Your Own Personalized Candles

Sharing This!

  • Facebook
  • Twitter
  • Email

Reader Interactions

Leave a Reply Cancel reply

Your email address will not be published. Required fields are marked *

Recipe Rating


Sidebar

Janine the Nester

Hello from the Nester

We love everything related to home, so get cozy and stay for a bit. Thanks for visiting our blog. Learn More...

Reader Favorites

The Best Crunchy Crispy Chocolate Chip Cookie

This Italian Cream Cake has a pumpkin cream cheese frosting that makes this a winning combination. This dessert is perfect for the holidays.

Italian Cream Cake with a Twist of Pumpkin

French Apple Custard Tart with Puff Pastry

DIY Paper Flowers Tutorial (Tissue Paper)

Upcycling Tin Cans with Scrapbooking Paper

How to Make a Paper Flower Wreath DIY

Popular Categories

  • Cakes
  • Cookies
  • Dinners
  • Wreaths
  • Organizing

Join Our Newsletter

Join our mailing list to receive the latest news and updates from our team.

You have Successfully Subscribed!

AFFILIATE DISCLOSURE:
I am grateful to be of service and bring you content free of charge. In order to do this, please note that when you click links and purchase items, in most (not all) cases, I will receive a referral commission. Your support in purchasing through these links enables me to keep my design and customization prices ridiculously low and empower more people worldwide to blog with less worry and less hassle.
Happy Happy Nester is a participant in the Amazon Services LLC Associates Program, an affiliate advertising program designed to provide a means for sites to earn advertising fees by advertising and linking to amazon.com.
Thank you! :)
-Happy Happy Nester

Our Guide

Join Our Newsletter

Join our mailing list to receive the latest news and updates from our team.

You have Successfully Subscribed!

  • Facebook
  • Instagram
  • Pinterest
  • Twitter

Recipes

Appetizers
Breakfast/Brunch
Desserts
Dinners
Drinks

Crafts & Decor

DIY
Gardening
Holiday
Wreaths

About

About The Nester
Contact
Privacy Policy

Copyright © 2025 · Happy Happy Nester by Janine Waite · Privacy Policy

↑ BACK TO TOP