Happy Happy Nester

Weekly Inspiration for Your Nest

  • About
    • Contact
  • Recipes
    • Appetizers
    • Breakfast/Brunch
    • Desserts
    • Dinners
    • Drinks
  • Crafts
  • Decor
  • Trips
  • Shop My Favorites
    • Fall Decor
    • Kitchen
    • Pillows
    • Holiday Decor
  • Boutique of the Week

Home » Crafts » DIY Home Decor. Paper Garland

Crafts Decor DIY Holiday

DIY Home Decor. Paper Garland


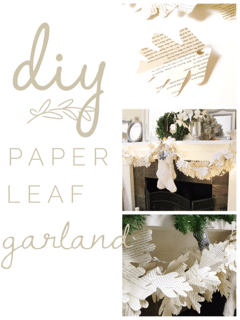
DIY Paper Garland

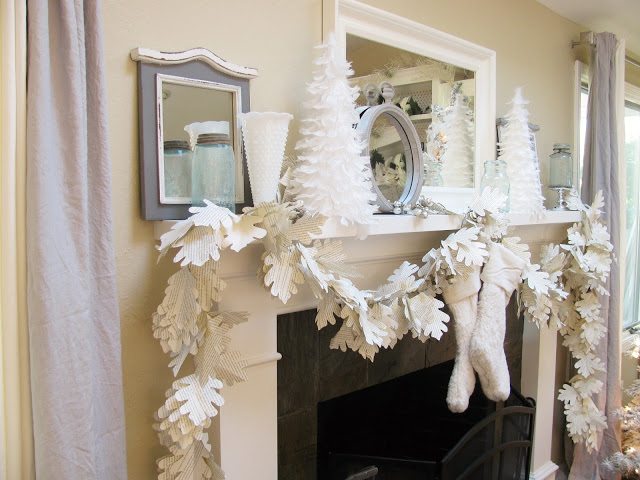
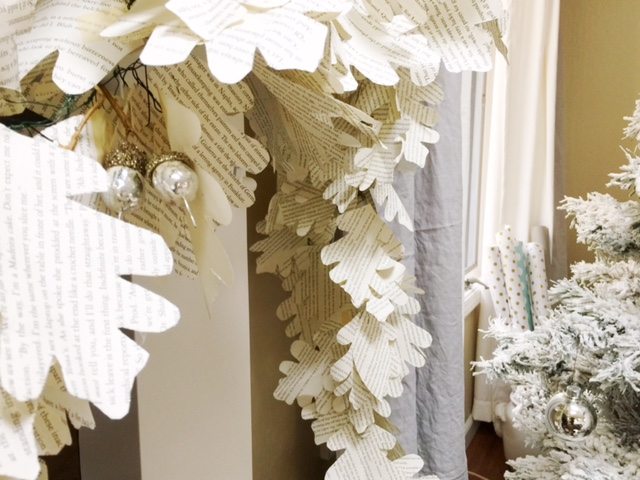
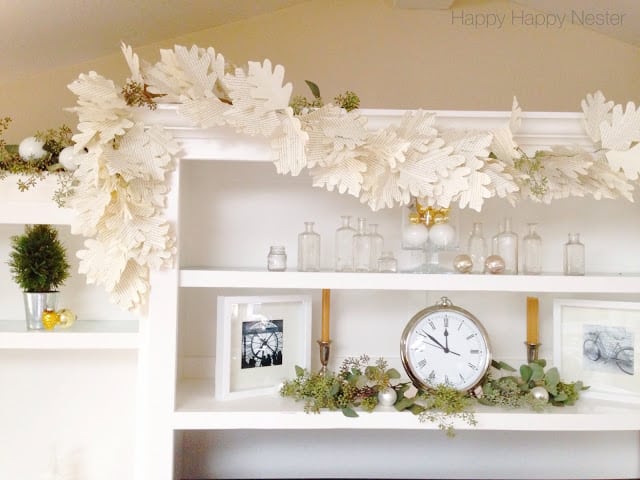
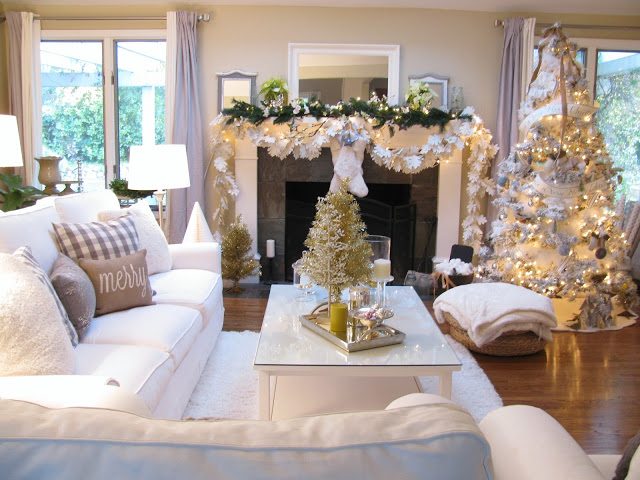
Home decor for the holidays can be expensive, and this DIY paper garland craft is so inexpensive to make. If you have the time and love paper as much as I do, you’ll want to try this beautiful paper garland. I must warn you that it is a time-consuming DIY project, but the results are breathtaking. Add a few white twinkle lights and it’s festive holiday decor for your mantel. I love paper, and paper projects make me happy! So, it made sense that I would create a paper garland out of pages from a book. Last year, I made two long garlands that I placed on our mantel and entertainment center. I did store them so I can use them every year during the holidays.

I have finally figured out a way to make this garland so that it will last for many years. I found it all came down to the best way to attach the leaves to the wire. And by George, I’ve got the solution. I’m so happy to share this DIY paper garland project with you.


~ A Note About the Nester ~
Whenever I visit San Francisco and all its fabulous boutiques, I always frequent paper stores. I must admit that I have a big drawer full of craft paper!

Supplies:

Leaf Template

Book

Scissors

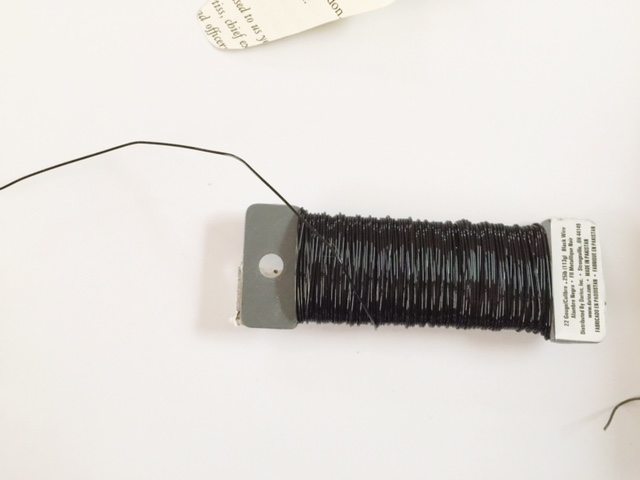
2 spools of wire

~ leaf wire is 26 gauge (lighter)

~ main garland wire is 22 gauge (heavier)

Wire cutters

Pencil for tracing

Silver, gold or white colored brads (the amount you get depends on the length of your garland)

3M temporary hooks

Paper Garland: 10 steps

1. Pick out your book that you want to use.

Not all paper is created equal. Do you want a real old look with almost brown paper? Or do you want the paper that is creamy? I spent a long time at Goodwill checking out all their books!

2. Figure out your garland length and cut you wire about a couple of feet longer.

This wire is the structure of the garland. This wire should be a little bit heavier (22 gauge), so it can support all the weight.

3. Carefully pull out all the pages out of your book.

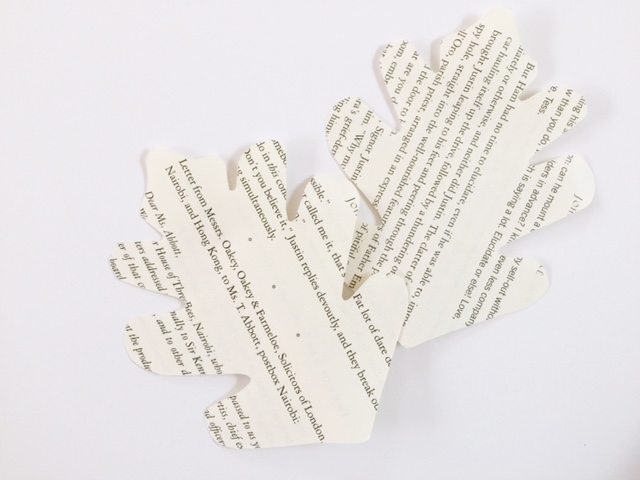
4. Trace the leaf onto your paper.

You only need to trace it out on the top page.

5. You can cut out many pages at a time.

I think I cut out about 10-15 pages at a time. The more you can cut out the quicker the project will go. Just a note that you don’t have to be very precise when it comes to cutting out your leaves, so try not to spend too much time on this section.


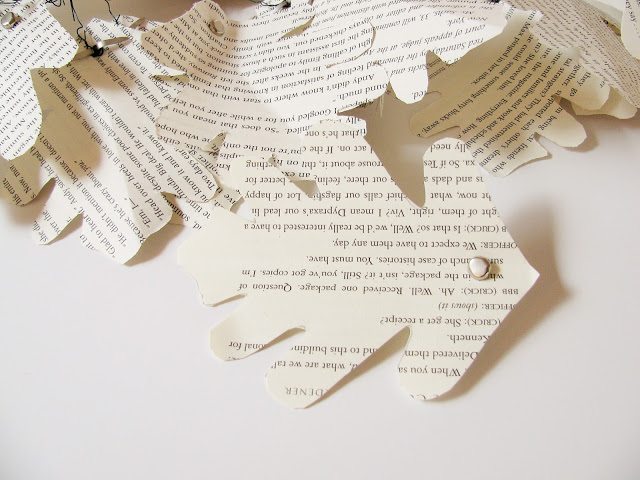
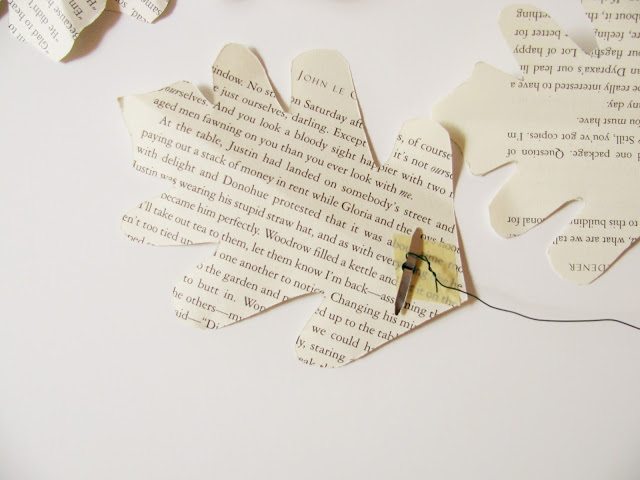
6. Now attach the brads through the paper leaf.


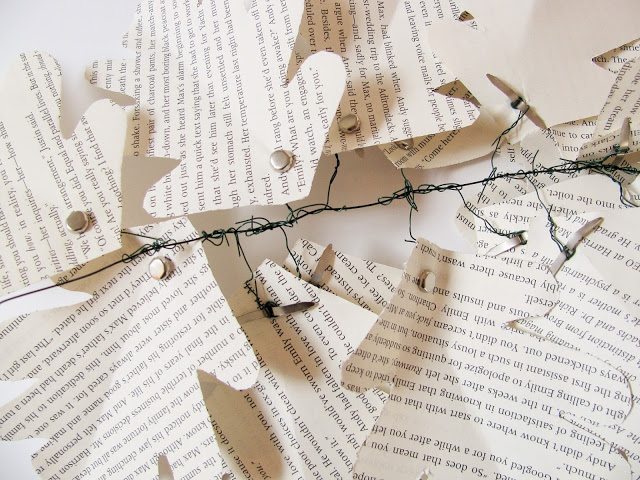
7. Turn the leaf over to the backside. Take your leaf wire (26 gauge wire) and attach the end to the base, leave about 1/2 inch at the top. Rotate the wire about three times and then bring the end down and twist it around the wrapped wire. *  Leave a 1 1/2 -inch stem.

8. Spread the brad  open on the leaf. Do this to all your leaves. Once you have all your leaves ready with their wires, you are now ready to attach them to the main branch. Here is the fun part since you are going to see your garland start to take shape.


9. Attach the leaves with a pattern. Try to place them on the two outsides of the branch as well as the middle. You should try and imitate how a natural vine would grow.

10. At both ends of the garland, make a loop. You will use these loops to hang the garland to some temporary 3M hooks.


The electronic age has reduced our exposure to paper, and I feel it is such a beautiful resource for crafts. Peruse books and find one that will inspire you to make this garland. Our hope is that this post has inspired you to make this paper garland. It has a timeless beauty and every fall and winter I love how it makes our mantel festive.  Savor this holiday season!

Cheers,

* If you want to have the site where the brad goes into the paper, you can place masking tape down before you attach the brad. Also, if you don’t want the silver or gold brad to show, you can also, cover with beige masking tape on both the back and the front of the leaf.

  • Author
  • Recent Posts
happyhappynester
Follow me
happyhappynester
I named my blog Happy Happy Nester because I love everything related to the home. I’ve always enjoyed decorating my surroundings. Get cozy and stay for a bit, thanks for visiting!
happyhappynester
Follow me
Latest posts by happyhappynester (see all)
  • 7 Winter Decorating Ideas - January 14, 2021
  • Rifle Paper Co Beautiful Pillows - January 13, 2021
  • Rifle Paper Company: Books, Pillows and More - January 12, 2021

MORE FROM HAPPY HAPPY NESTER

Subscribe To Our Newsletter

Join our mailing list to receive the latest news and updates from Happy Happy Nester!

You have Successfully Subscribed!


18 Comments

« Interview: Twelve on Main
Holiday Traditions with Pottery Barn »

Comments

  1. Kathleen says

    August 17, 2017 at 1:19 pm

    Where did you find the leaf template or did you freehand? Thanks

    Reply
    • happyhappynester says

      August 17, 2017 at 2:53 pm

      Hi Kathleen,

      I’m happy for your visit to my blog. The leaf template is in the post. You’ll see the link under the supplies. Hope this helps, let me know if you need more help.

      Thanks,
      Janine

  2. Mary says

    August 18, 2017 at 12:23 pm

    That is really a gorgeous project and one I can easily see doing, since I hate to get rid of old books.

    Reply

Trackbacks

  1. Shop Our House and Home Decor - Happy Happy Nester says:
    April 8, 2016 at 10:16 pm

    […] Book Page Garland […]

    Reply
  2. Boll and Branch: Best Organic Bedding - Happy Happy Nester says:
    June 30, 2016 at 8:23 am

    […] Boll and Branch bedding is the perfect fit for this girl. Here is another look at the Banded White/Shore Duvet Cover and Banded Shams-White/Shore and the Hemmed Euros White.    I love the classic style of the Banded White/Shore Sheet Set. I immediately fell in love with this soft, comfy Antique White Cable Knit Throw. I spy my DIY paper garland, and I love how beautiful it coordinates with the classic bedding. If you want to learn how to make a paper garland, check out this post: Book Page Garland […]

    Reply
  3. Fall Home Tour 2016: 17 Talented Bloggers - Happy Happy Nester says:
    September 12, 2016 at 5:23 am

    […] I have a tutorial… […]

    Reply
  4. Free Fall Printable for Your Autumn Decor - Happy Happy Nester says:
    September 15, 2016 at 10:38 am

    […] DIY Home Decor. Paper Garland […]

    Reply
  5. Styling a Coffee Table for Fall - Happy Happy Nester says:
    October 15, 2016 at 9:43 am

    […] I’m a little worried that every inch of our home will eventually be covered in paper. Take a look at where my obsession all began: Paper Garland […]

    Reply
  6. Halloween Wreath - free tutorial to make your own wreath says:
    October 17, 2016 at 5:48 am

    […] Leaf Garland […]

    Reply
  7. Restyle, Refresh 2017: 7 Great Living Room Design Ideas - Happy Happy Nester says:
    January 15, 2017 at 8:40 am

    […] I made this pale pink peony flower from Italian Crepe paper. I promise to write a future blog post on this DIY craft. If you would like to see another of my paper projects, here is the link to my book pages Paper Garland post. […]

    Reply
  8. DIY Paper Flowers Tutorial | How to Make Paper Flowers - Happy Happy Nester says:
    January 24, 2017 at 10:02 am

    […] Book Pages Paper Garland […]

    Reply
  9. Make Sure to Welcome Fall in with this Cute Leaf Garland - Happy Happy Nester says:
    September 20, 2017 at 7:26 am

    […] Happy Craft for the day is a Cute Leaf Garland. Of course, this is one of my many garlands on my blog, so don’t miss out on my other fall […]

    Reply
  10. Paper Garland DIY - Rosettes and Leaves - Happy Happy Nester says:
    February 27, 2018 at 7:58 am

    […] the practical part of me thought I could just place my book page paper leaf garland back up over our bed. But then my hairdresser, Chaska was mentioning a fun rose garland she was […]

    Reply
  11. Coastal Spring Tour: Pottery Barn Style - Happy Happy Nester says:
    April 12, 2018 at 9:02 am

    […] our mantel was a hot mess, and can you believe that I still had my leaf garland and Christmas ornaments from the holidays on […]

    Reply
  12. My Prince Flock King of Christmas Tree Review - Happy Happy Nester says:
    November 12, 2018 at 8:22 am

    […] so beautiful that I was reluctant to add much in the way of decorating. As you can see, I placed my book page leafed garland on both trees as well as a few ribbons. I am a bit obsessed with all ribbon and paper […]

    Reply
  13. Christmas Home Night Tour - Happy Happy Nester says:
    December 26, 2018 at 12:00 pm

    […] will be different, but I’m always crafting my holiday decor project, a couple years it was my book page paper garland. My husband insists on calling me Buddy the […]

    Reply
  14. DIY Paper Stars for 4th of July Garland - Happy Happy Nester says:
    June 6, 2019 at 2:01 am

    […] I loved origami and anything to do with paper. Well, I still love paper projects (check out my other leaf garland DIY), and this DIY paper stars for 4th of July is right up my alley. Just a few folds and you have a […]

    Reply
  15. Decorating Like the Movie Elf - Happy Happy Nester says:
    December 4, 2020 at 5:01 am

    […] year, I decorated our living room with some paper book leaf garlands, and last year I decorated our mantel with a paper leaf garland. If you look closely, you can see […]

    Reply

Leave a Reply Cancel reply

Your email address will not be published. Required fields are marked *

Recipe Rating


Home, Craft & Cooking Circle Membership

portrait
hello from the nester We love everything related to home, so get cozy and stay for a bit. Thanks for visiting our blog.
  • Bloglovin
  • Facebook
  • Instagram
  • Pinterest
  • Twitter

Holiday Printables eBook

search

Most Popular Posts

Home for the Holidays Blog Tour: White Christmas

December 2, 2016 By happyhappynester 115 Comments

Organizing Kitchen Labels That You’ll Love!

January 17, 2018 By happyhappynester 72 Comments

DIY Paper Flowers Tutorial | How to Make Paper Flowers

January 11, 2019 By happyhappynester 58 Comments

5 Simple Tips You Need to Know About My Room Color

May 28, 2018 By happyhappynester 57 Comments

If beautiful linens and comfort are important, then Hallstrom Home is for you. Rhonda creates gorgeous linens that are comfy and perfect for your home.

Linens and More: Interview with Hallstrom Home

October 29, 2016 By happyhappynester 57 Comments

Join Our Newsletter

Join our mailing list to receive the latest news and updates from our team.

You have Successfully Subscribed!

Affiliate Disclosure:
I am grateful to be of service and bring you content free of charge. In order to do this, please note that when you click links and purchase items, in most (not all) cases, I will receive a referral commission. Your support in purchasing through these links enables me to keep my design and customization prices ridiculously low and empower more people worldwide to blog with less worry and less hassle. Happy Happy Nester is a participant in the Amazon Services LLC Associates Program, an affiliate advertising program designed to provide a means for sites to earn advertising fees by advertising and linking to amazon.com.
Thank you! :)
- Happy Happy Nester

Categories

Archives

you might also like

Felt Flowers Wreath For Spring

Tip: Wallpaper

The Hill Collection Candles have a wooden wick that crackles like a wood fire when lit. The candles have heavenly fragrances that beautifully fill a room.

Hill Collection: Twine and Cotton Candles

A refreshed home is a happy home and a happy family. A house needs a fresh look from time to time. Add decor or new furniture, and you will have a new perspective and home. I'm sharing my latest addition to our dining room as well as shopping blog post that will give you a new look.

Friday Friends Parade Linky Party – #1

Decorating Like the Movie Elf

Copyright © 2021 · Happy Happy Nester by Janine Waite

Copyright © 2021 · Divine Theme on Genesis Framework · WordPress · Privacy Policy · Log in