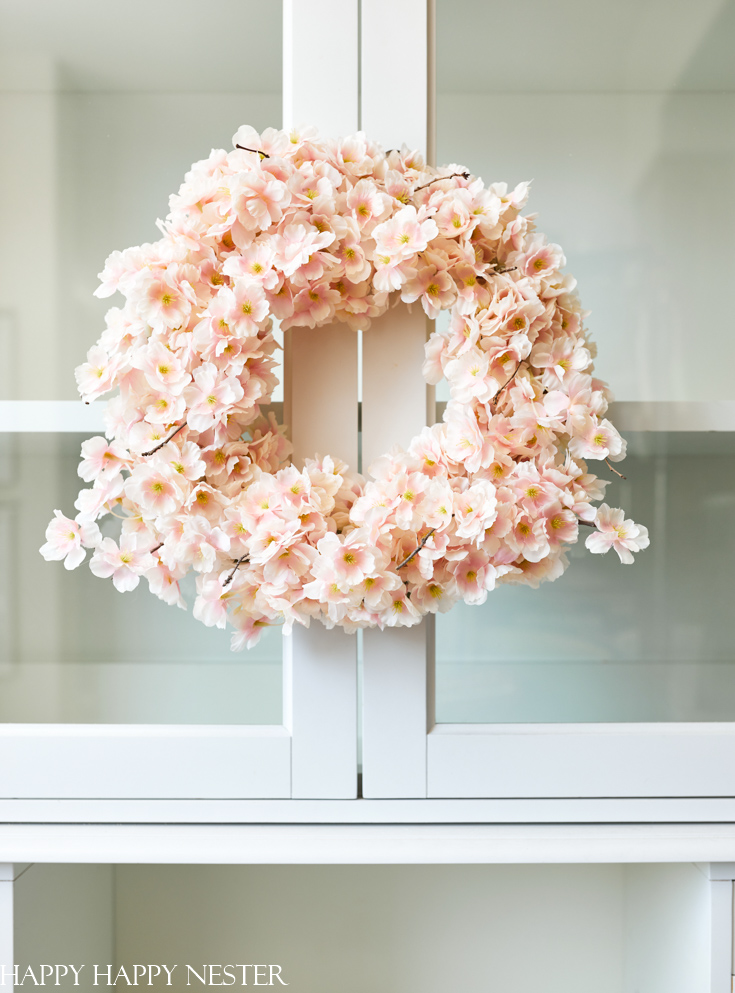
Make this DIY Spring Wreath for a front door, mantel, bookshelf, or walls. It’s an easy floral wreath that you can make in under 60 minutes.
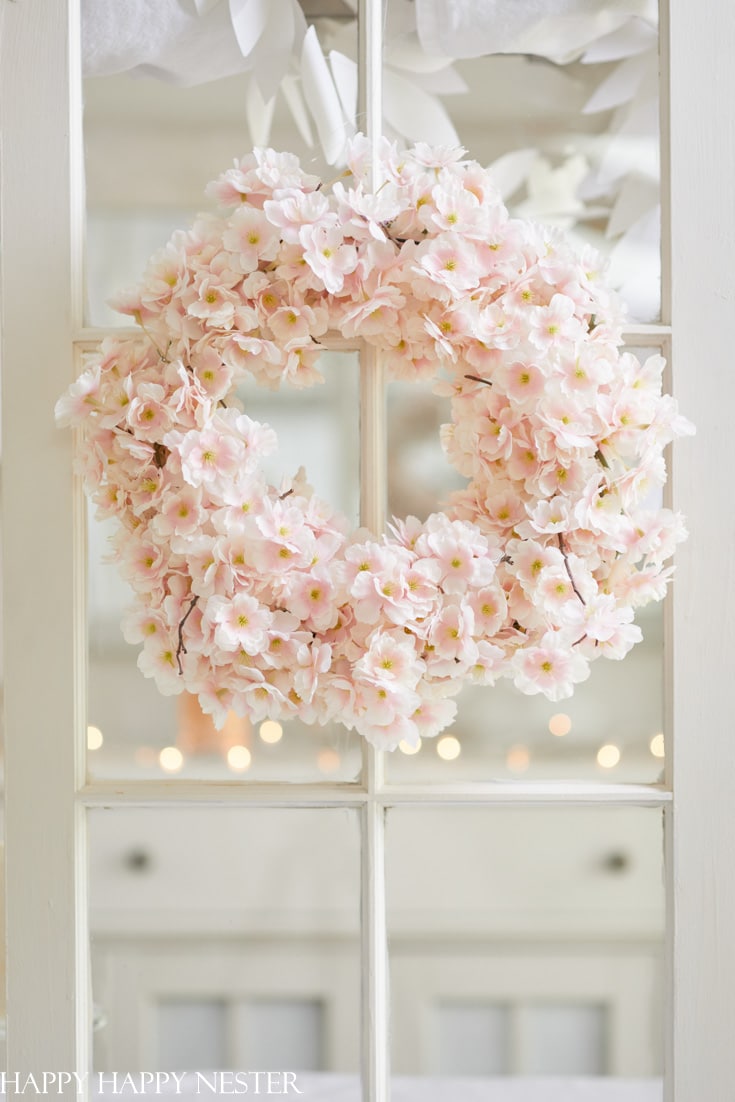
This wreath is perfect for spring decorating if your home needs some refreshing. It’s a pretty and straightforward wreath to make and is a beautiful addition to a wall, mantel, or door.
There is no more straightforward way to decorate your home than a seasonal wreath. And if you are like me, you probably have a hard time finding one you like.
I love this homemade wreath because it requires very few supplies. And the cool thing is that you can make it in about 30 minutes. All you’ll need is a wire wreath form, wire and wire cutters, and a few natural twigs.
Making this wreath comes in around $30, but it looks like it cost a ton more. If you were to buy one on Etsy, I’m sure it would cost way more than $30!
An Easy DIY Spring Wreath
You’ll need just a few things to make this cheerful wreath.
Wreath Supplies
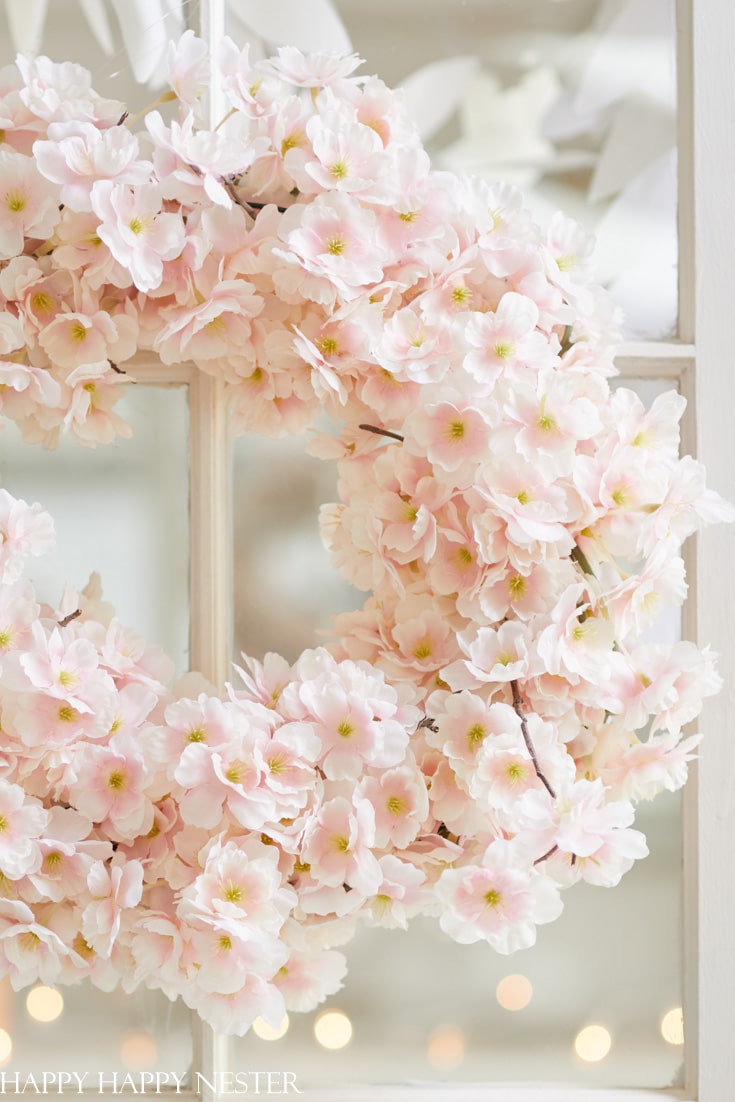
Faux Cherry Blossoms Garlands
I bought these cherry blossom garlands, and I love these faux flowers look. I feel that they’re the perfect shade of pink. By and btw, my order included four strands of garland for this project, but you’ll only need three.
Wire Wreath Form
I always have a bunch of these wreaths around among my craft supplies. I love that they don’t take up much room. They are perfect for attaching the flower garland to the wire rows. If you don’t have a wire wreath, then a foam wreath form will work as well. No need to attach the blossoms with wire. Just wrap the cherry blossom garland around the wreath.
Floral Wire
Floral wire is a must to have among your wreath supplies. There are different gauges of wire. The term gauge is a fancy word for thickness. And I find the thickness rating counterintuitive—the bigger the number, the small the thickness. Yeah, now that makes total sense. 🙂

Real Twigs
Tuck small twigs among the flowers. I love how they stick out, and some have a few blossoms attached to them. It adds a nice touch to the wreath.

Let’s Make the Wreath!
*The following post contains affiliate links
Supplies
Faux Cherry Blossom Garlands (two bags and each contains two garlands)
Wire Wreath ( I used a 12″ wreath)
Craft Wire/Wire Cutters (I used 22 gauge wire)
Real Twigs
Instructions:
Step 1 – Cut Wire
You’ll want to cut about 30 or so 4-inch pieces of wire.
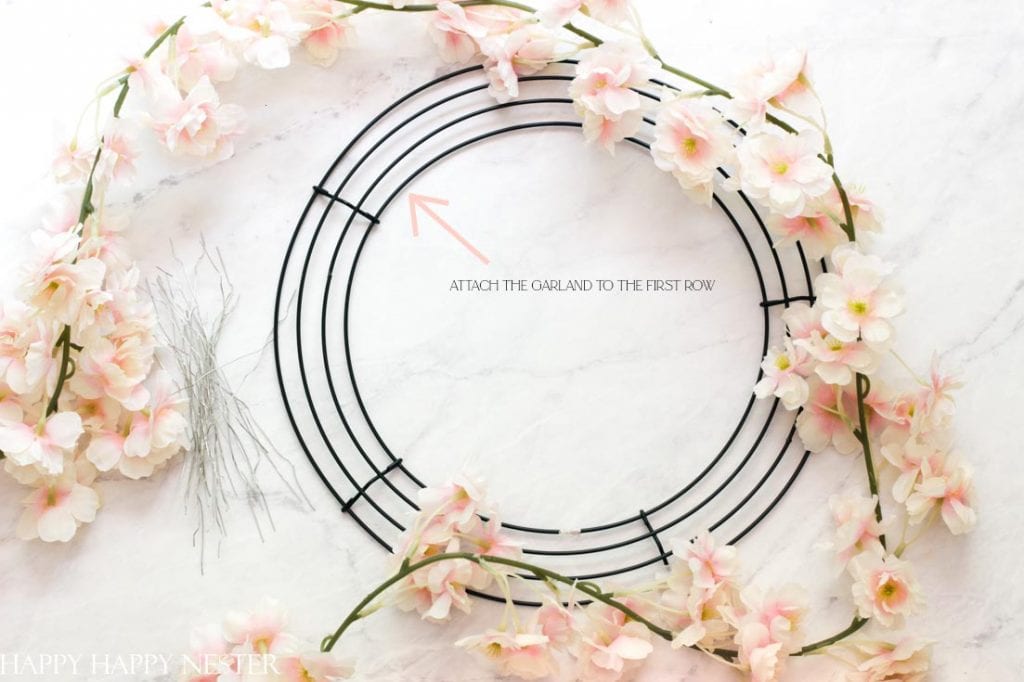
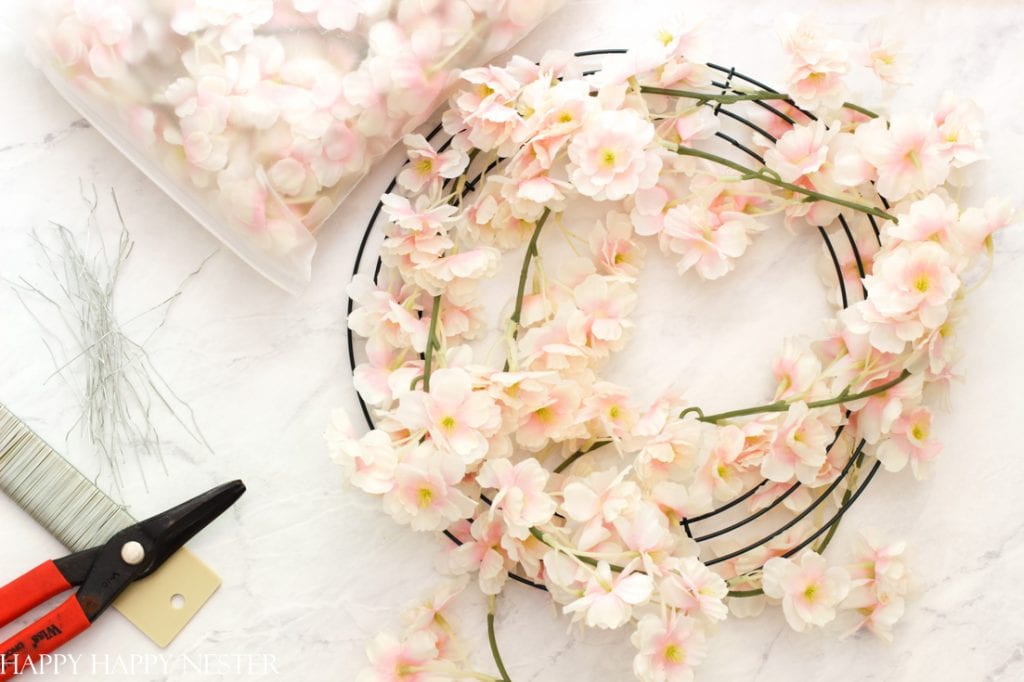
Step 2 – Attach Cherry Garland
So to make this cherry wreath, you’ll eventually go around the wreath four times. In the innermost row, attach the flower garland on top of this row (refer to the above photo). Use your pre-cut pieces of wire to secure the garland in the back.
Once you place a row of flowers on the innermost row, attach more garland to the next row of your wreath, securing it with wires. Finally, connect a row to the outermost wire of the wreath. You’ll probably only use three of the four flower garlands.
If you find you have empty spots, cut off some of the fourth garland’s blossoms and hot glue the extra flowers into place.
Step 3 – Insert Twigs (optional)
Just place a few twigs around the wreath. Try and make it look as organic as possible. Finally, attach a wire to the back to hang the wreath. You can also tie a bow or ribbon too!
I love how this wreath turned out, and I’m excited to place it on my front door. I know I have a cranberry door, so I hope they look good together!
I must have about 50 wreaths stored in my garage. But I love bringing them throughout the year to welcome in the new seasons. If you eventually have a few in your repertoire, you can also decorate with them.
It’s always nice to freshen up your home with a new look now and then.
Here are some more Spring Wreaths from Happy Happy Nester!
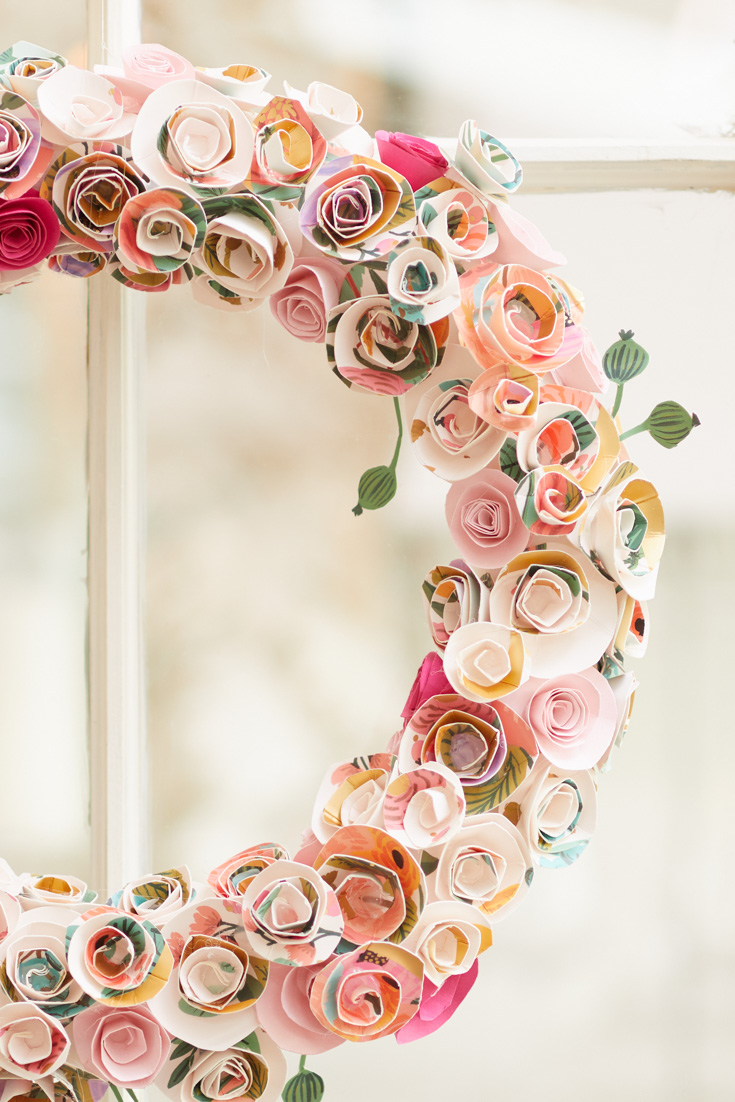
How to Make a Paper Rosette Wreath
This rosette wreath is so fresh and perfect for spring and summer. Can you believe I made these rosettes from paper plates? I love the texture that this beautiful paper creates on this wreath. Also, it doesn’t take a lot of crafting skills to make this wreath, although it requires time.
But, if you love this pretty Rifle Paper-inspired wreath, make sure to check out the tutorial!
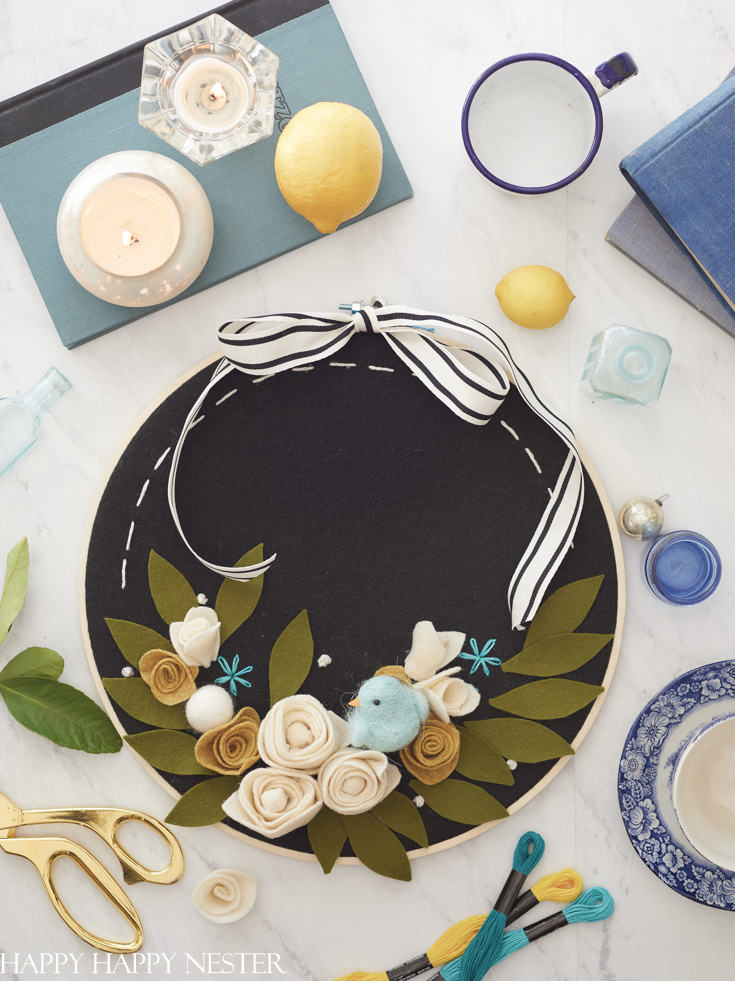
If you like making felt flowers, learn how to make four different flowers. The embroidery hoop makes such a unique wreath. The felt flowers and felt backing add a vintage and cozy flair to this embroidery hoop. I love this fun spin on a spring wreath!
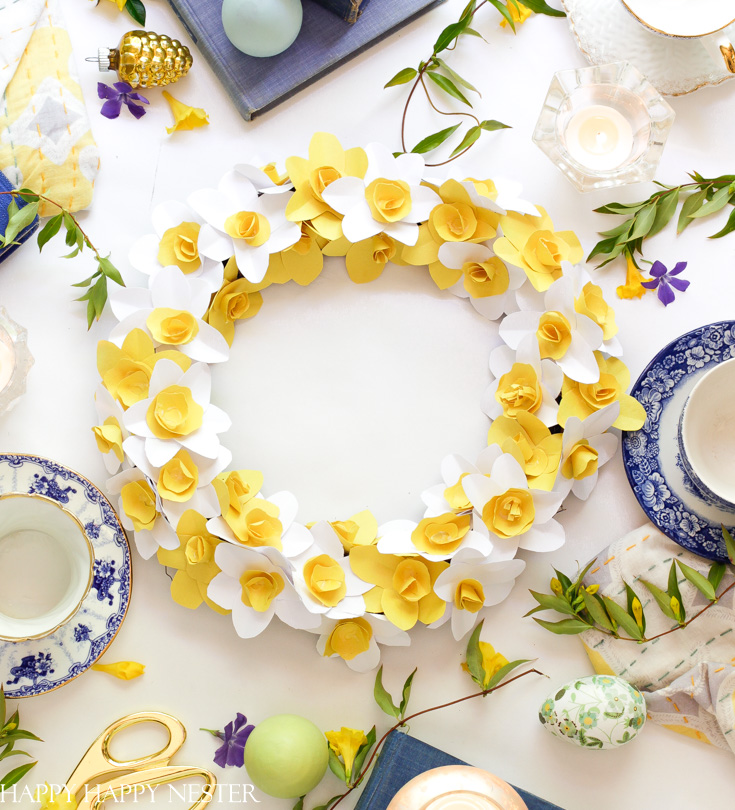
Construction Paper Daffodil Wreath
Make this wreath if you have some construction paper among your supplies. To make this wreath, you’ll need to make a paper rosette and attach it to a daisy-like flower. In this tutorial, I provide the templates you’ll need to make these flowers.
I want to say a big thanks for stopping by for my DIY Spring Wreath tutorial. Creating new crafts and sharing them here on the blog is my passion.
Until my next blog post,
Cheers and Happy Crafting!


- Best Recipes for Breakfast - April 11, 2026
- Overnight Oats Recipe with Yogurt - April 10, 2026
- Springtime Throw Pillows - April 8, 2026
")


ASHLEY STRINGFELLOW
I love how easy this looks! stunning! pinned.
Jackie
Adorable Janine! I love the color of these cherry blossoms. The perfect pink!
Tanya
So pretty Janine, I love the soft pretty colors!
happyhappynester
Hi Tanya,
Thanks so much! I’m glad you like it!
Sarah @ The DIY Mommy
Love your spring wreath, you make it look so simple and beautiful!