This project is a simpler version of How to Make a Vintage Ornament Wreath. Over the years, I made an ornament wreath and wasn’t too excited to sacrifice my precious ornaments. So, I came up with a new way to attach them without glue. Also, the fantastic thing about this wreath is that you can change the ornaments each year to match your holiday decor!

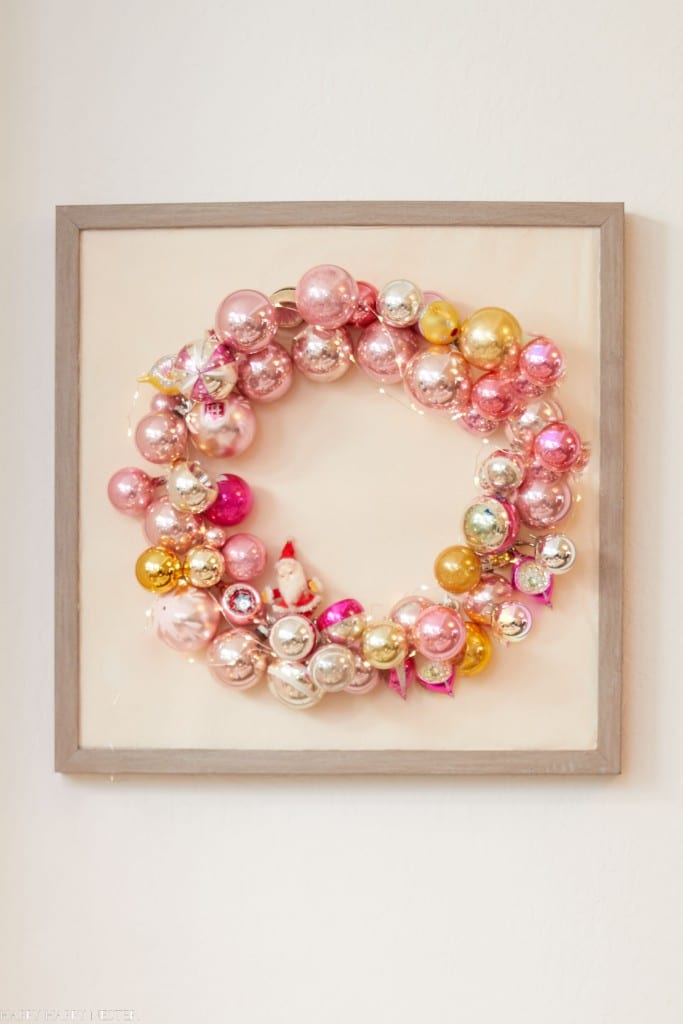
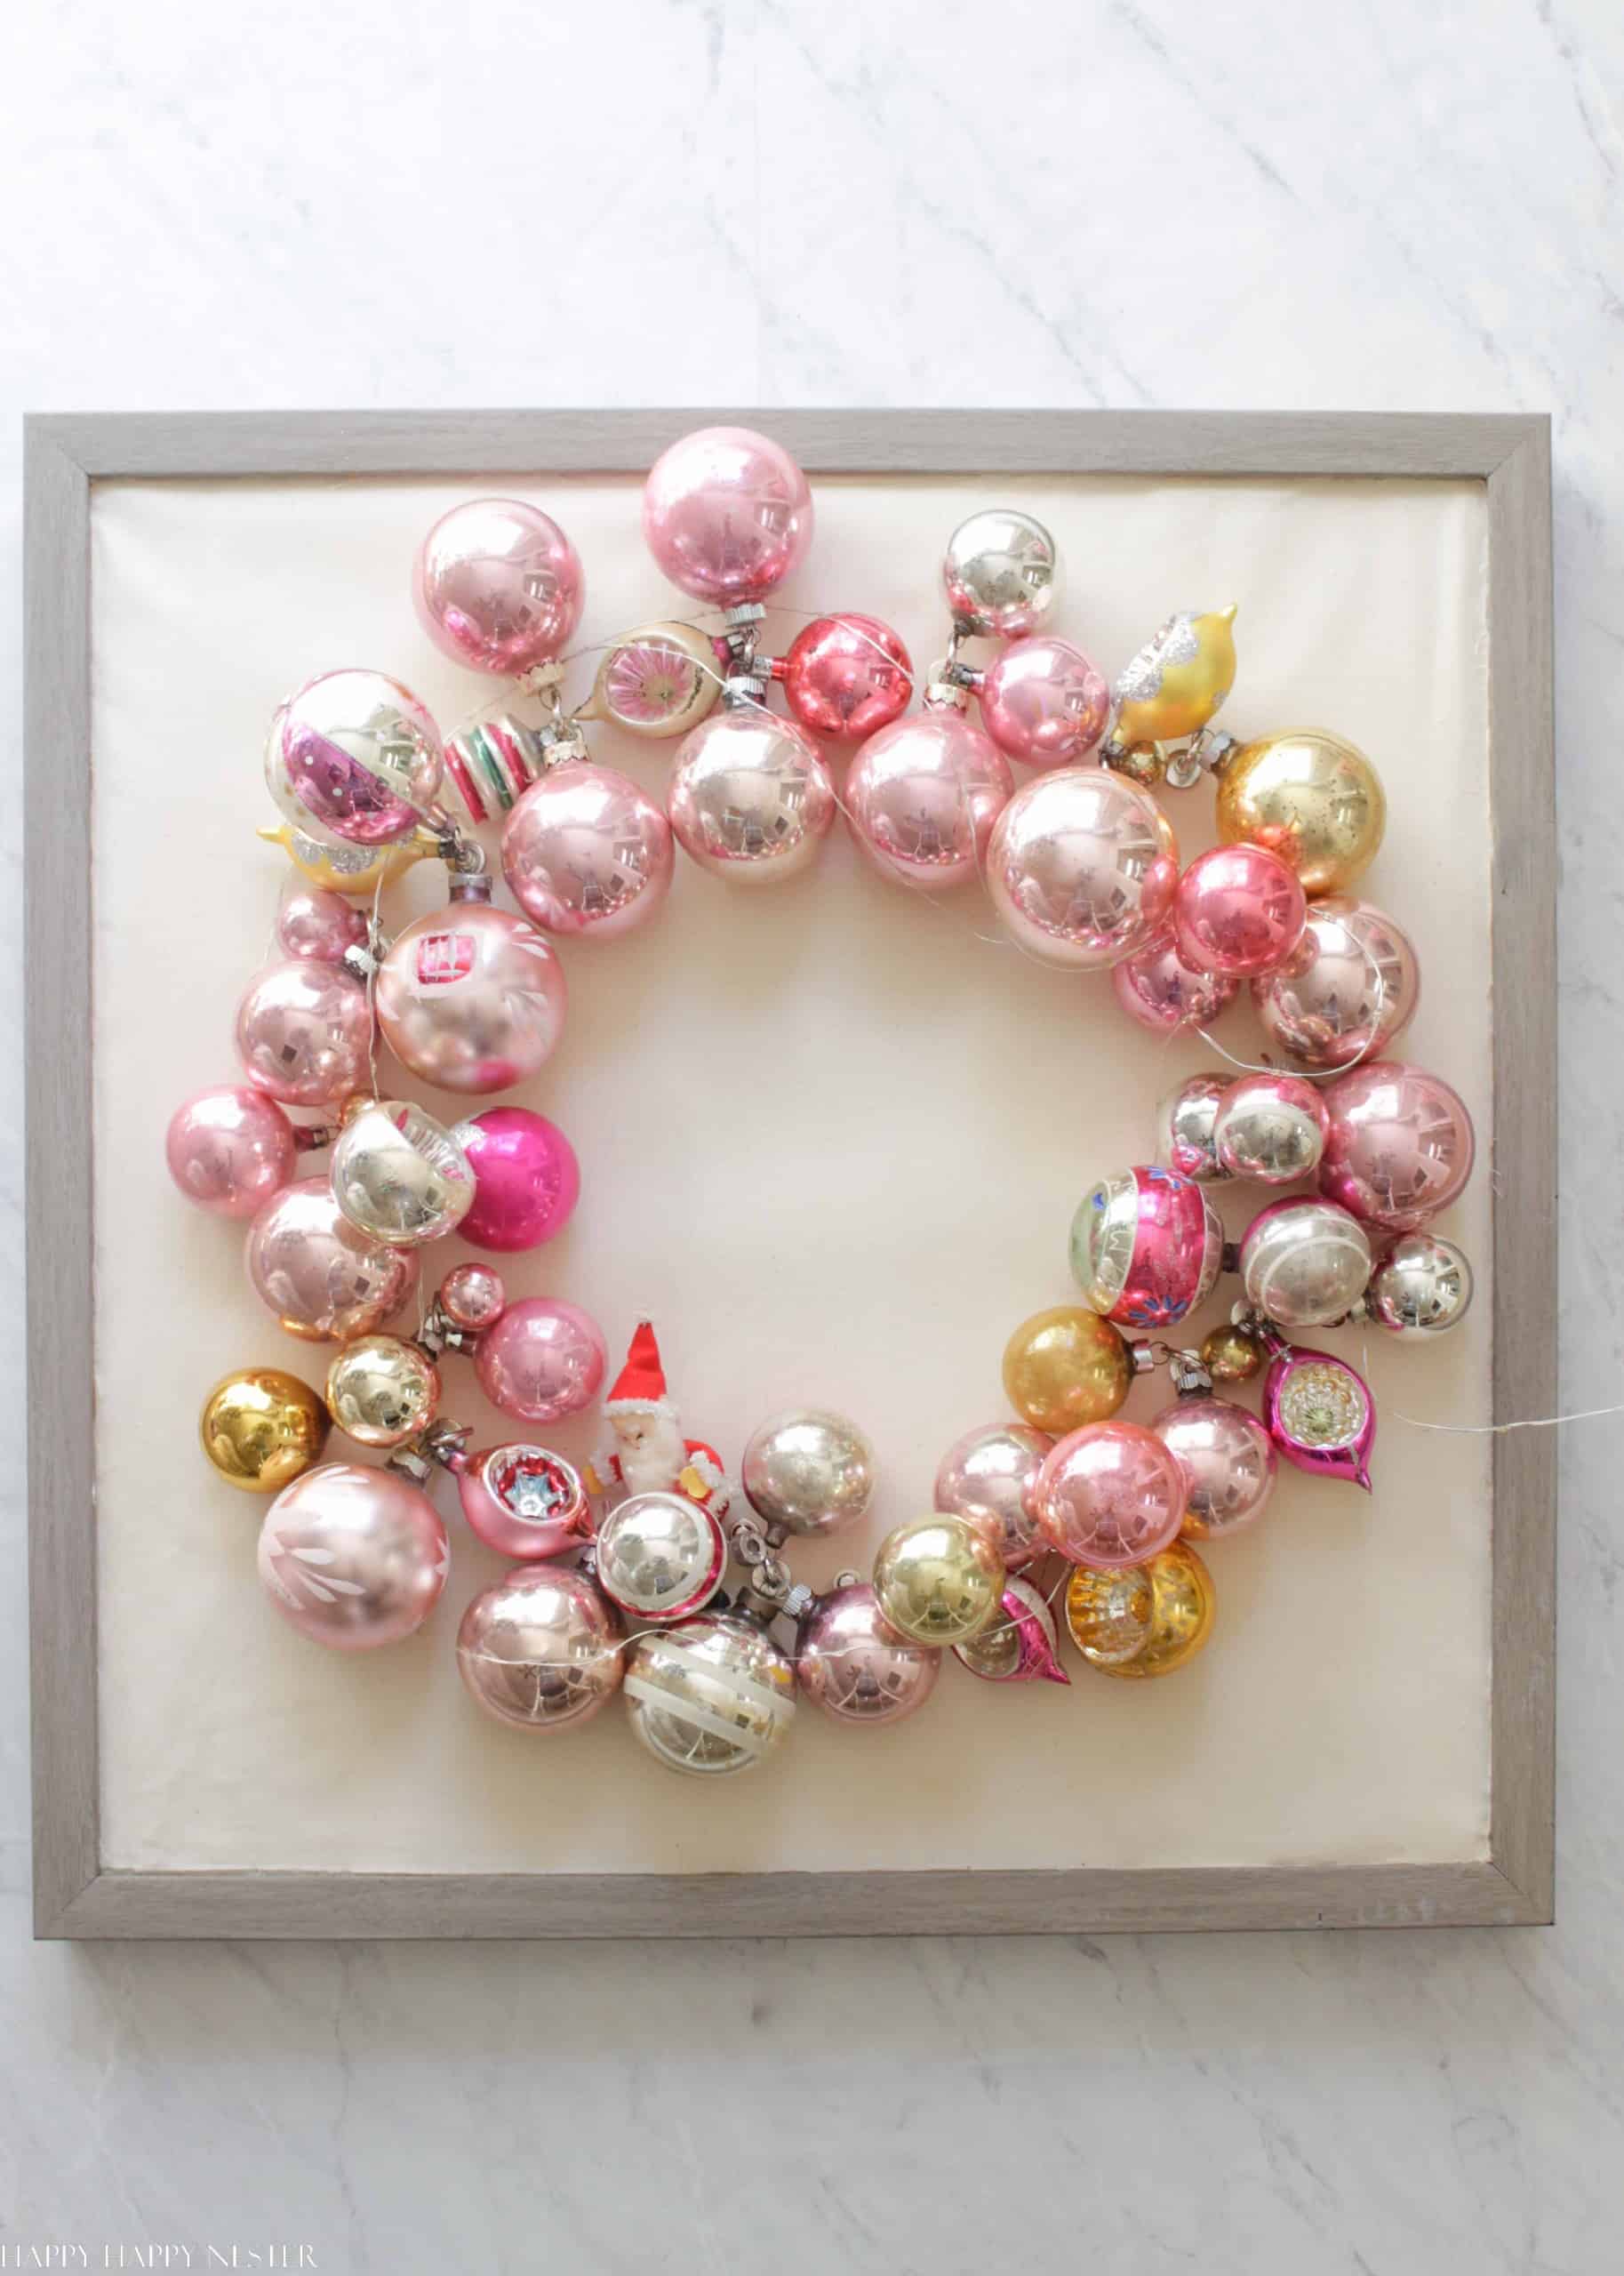
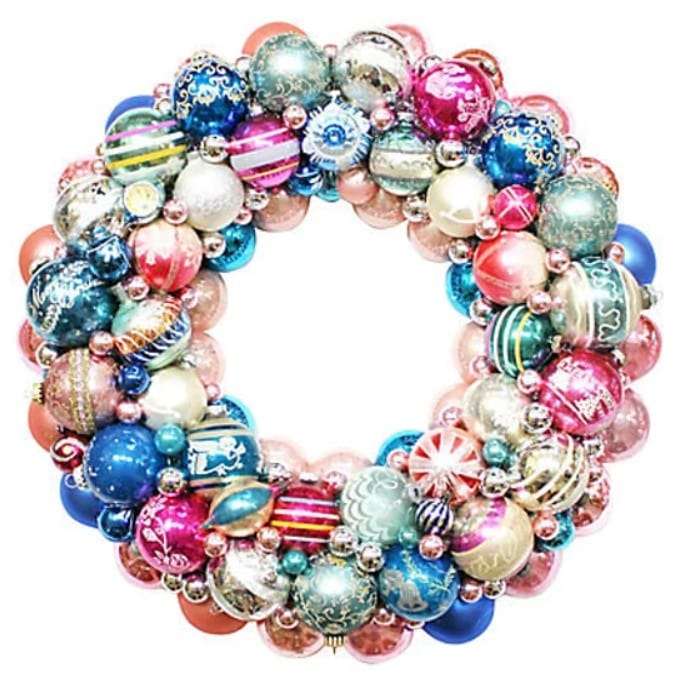
Decorate your walls this Christmas with my easy glass ornament wreath. The beauty of this holiday craft project is that you can use vintage or new ornaments to make this wreath. Let’s get crafty.
Today’s post is part of a blog hop of Christmas Wreaths! So make sure to check out my wreath and all my friend’s wreaths below.
I know I have lots of wreaths on the blog, and our house is never without one. Last year, I made a silver Christmas Wreath that has a few of my vintage ornaments. And I created another wreath that combines chunky yarn with ornaments.
But today, let’s talk about today’s wreath.


With the holidays upon us, I’m busy unearthing all my Christmas ornaments. I love to unwrap my vintage ornaments and fall in love with them all over again.
You might say I have a bit of an obsession with these beautifully tarnished glass balls. I love them so much that I have difficulty gluing them together to make a vintage ornament wreath. So, after a month of deliberation, I came up with a new system for creating a wreath!
I think my version of making a vintage ornament wreath with magnets is excellent since the ornaments don’t get damaged, and if you like, you can change the ornaments.
How to Make a Vintage Ornament Wreath
This project probably takes about 30 minutes or less to create. It looks like an involved craft, but it’s a pretty easy and quick wreath project.
First, as I mentioned, you can make this wreath with your supply of vintage ornaments or new ones. But, if you want to make the wreath with old ornaments and don’t have a plentiful supply, here are a few ideas of where to find them. You’ll want about 50 to 70 ornaments ranging in large to small sizes. Read my notes at the bottom of the post.
Supplies You’ll Need to Make This Wreath
Battery Twinkle Lights (optional)
Wreath Directions
Make sure to read these project notes.
Magnetic Board
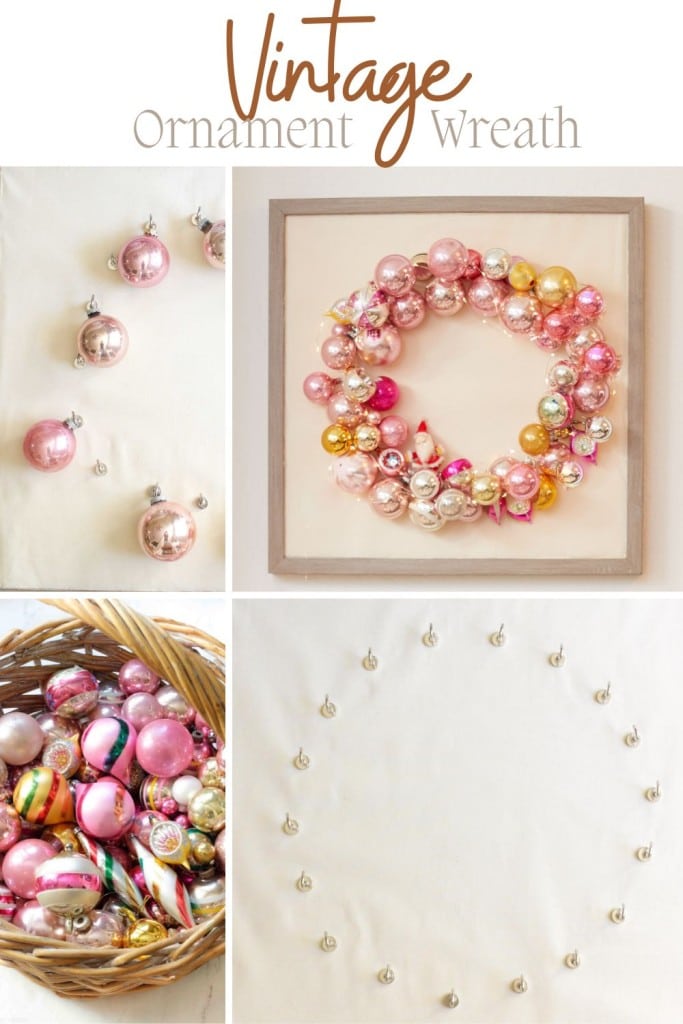
So before we dig into how to make an ornament wreath, let’s talk about the magnetic frame. I had a magnetic bulletin board (24″x24″) and covered it with linen fabric. If you choose to make your own, take your board and glue down that linen fabric with either a hot glue gun or a crafter’s glue.
But I’ve included a link to a linen-covered bulletin board for your convenience. It’s a bit smaller than mine but large enough for this project.
Magnets
I bought two kinds of magnets for this project. If you don’t want to buy both types, I will buy the hook magnets. I mostly used them for attaching the ornaments, but they are a bit more visible. So, to hide them, I used a few pin ones with ornaments attached at the very end. These ornaments could be placed anywhere among the hooks, and I used them to cover them. I hope this makes sense!
Where You Should Make Your Wreath
I created my wreath on a flat surface, not hanging on the wall. I found that moving the magnets and ornaments around unhooked some of them. And if it were hanging from the wall, the ornament would’ve broken when it crashed to the ground.
Also, when I was all done making the wreath, I propped it upright on a soft surface like my bed. Once the wreath is upright, everything will hang differently than on a flat surface. I wanted to see how the ornaments were hanging so I could rearrange them.
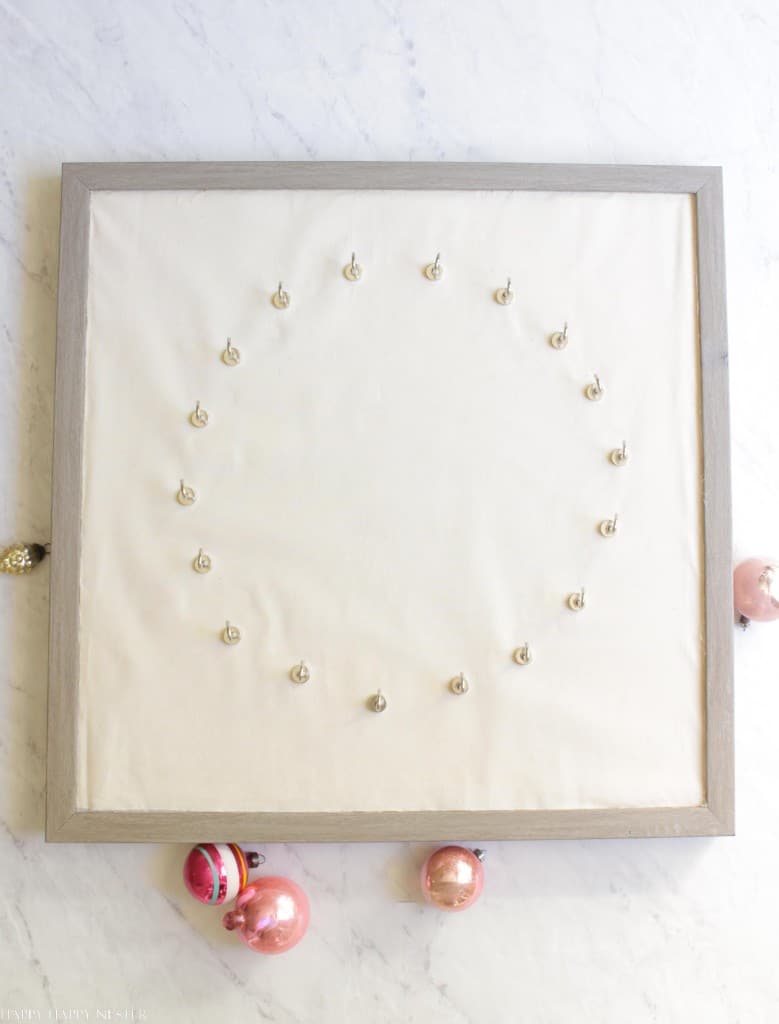
Step 1 – Place the Magnets on the Board
Do not hang it on the wall when working on your board. Things will move, and ornaments will fall off and break. Ornaments tend to roll and could roll off a table. I recommend working on a carpeted floor or a bed.
Place all your hooks in the shape of a wreath. Note that the hooks are all facing up. I ended up using 18 magnetic hooks and about five pin hooks.
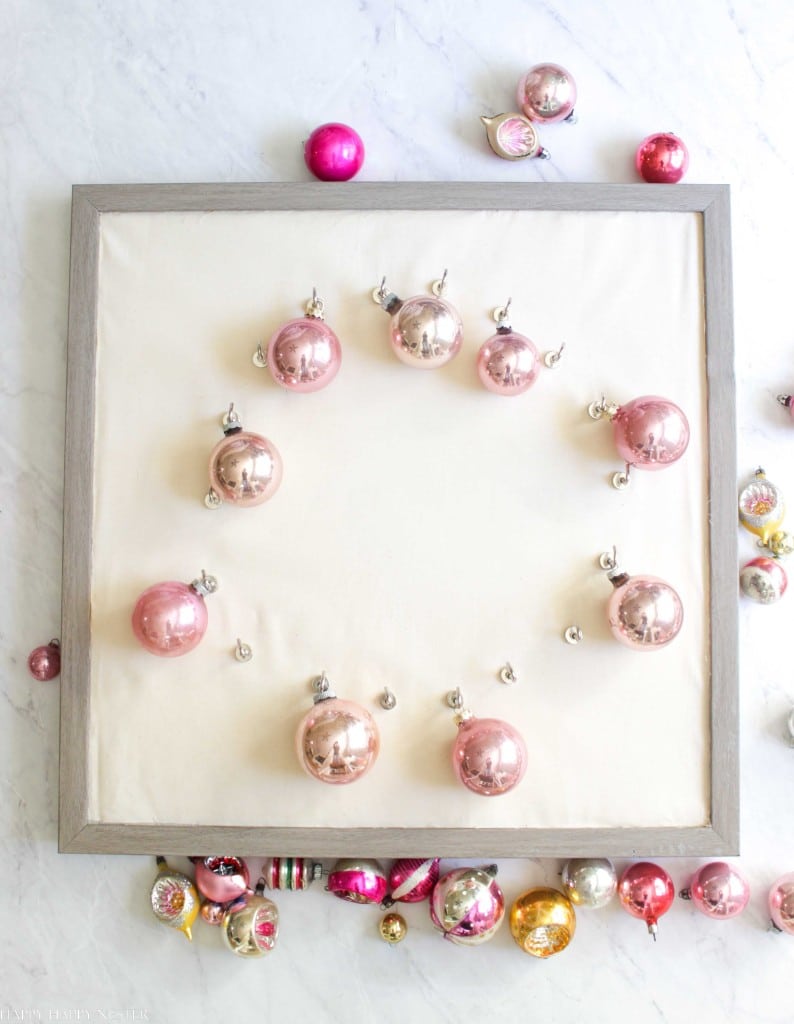
Step 2 – Place Ornaments on the Hooks
Gather all your ornaments and place the biggest ones (solid-colored round ones) on the hooks first. I spread mine out and attached an ornament to every other hook. The next layer consisted of medium-sized ornaments, and the third layer included my prettier ornaments that I wanted to be seen. The fourth layer was my most miniature ornaments.
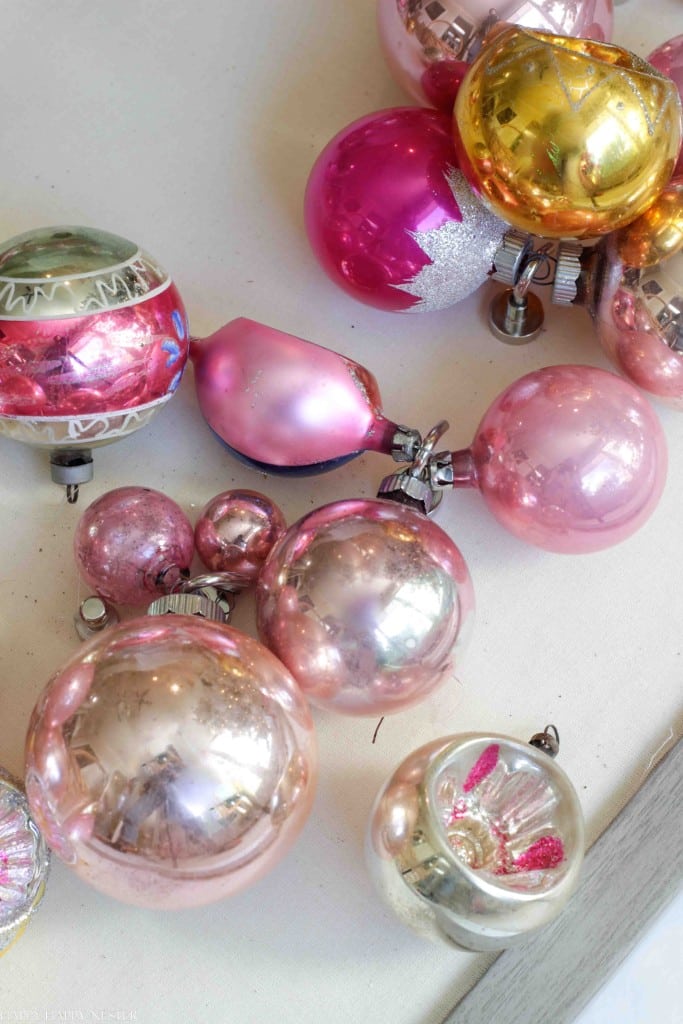

Step 3 – Place More Layers of Ornaments
I placed about three ornaments on each hook, as shown in the left photo.
Then once I finished the wreath, I located the areas where the hooks were showing. I then attached my fishing line to the pin magnet and tied the other end to the ornament. I made sure to attach a small enough fishing line so that the ornament held tight to the wreath.
I placed these ornaments in areas where I wanted to cover the hooks.
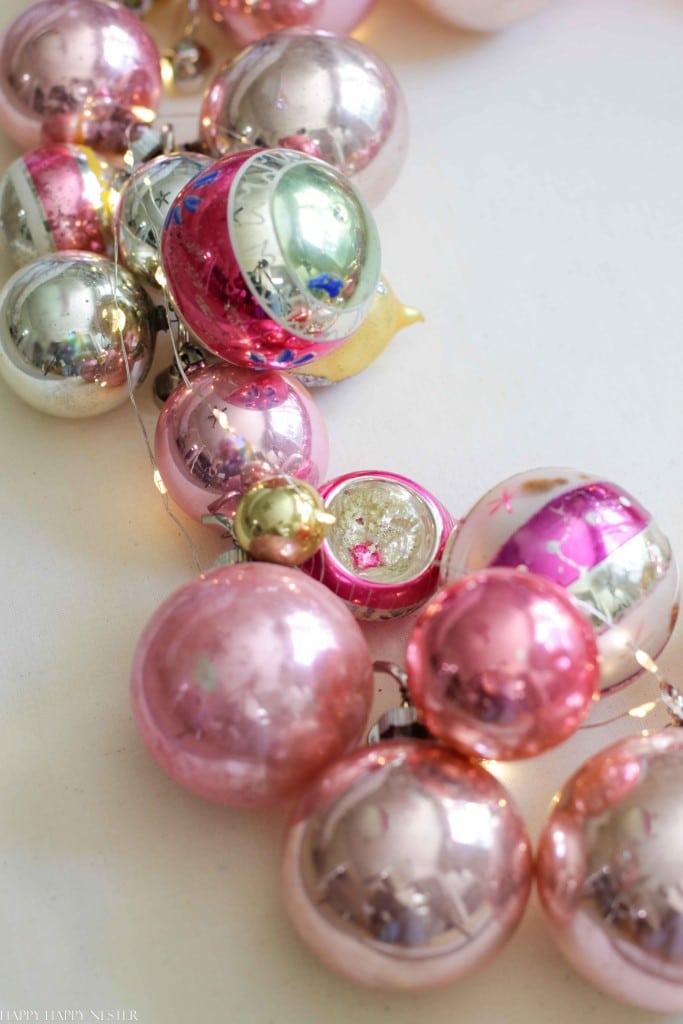
You’ll want to create a wreath with ornaments stacked up on each other like a regular ornament wreath. It made me nervous about stacking them for fear that they would fall, but I didn’t have one break.
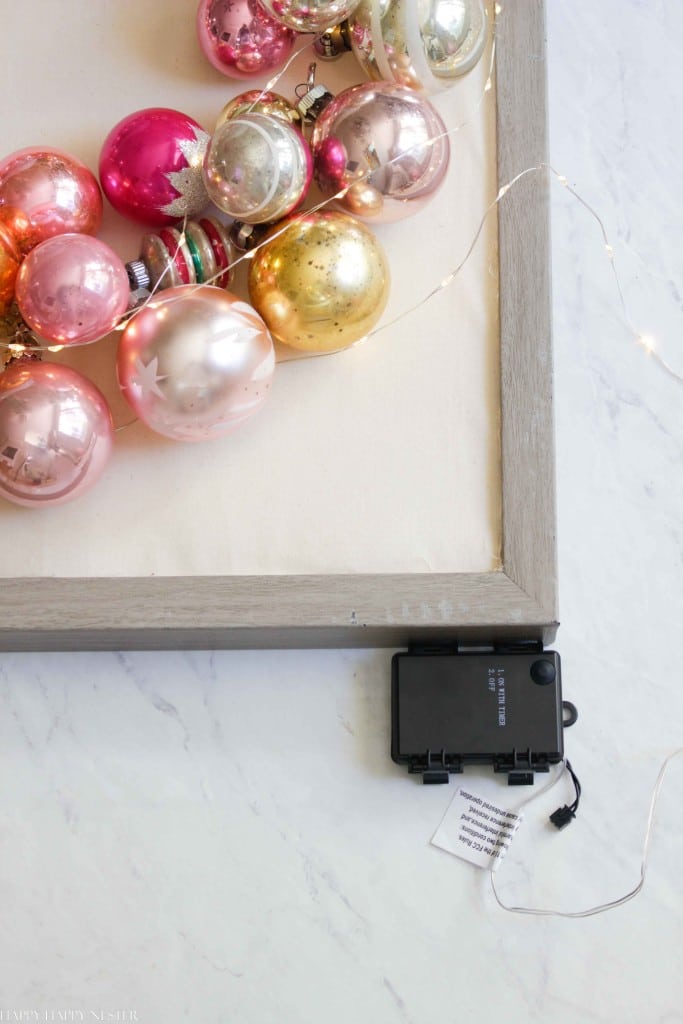
Step 4 – Attach Lights
Weave the battery-operated light string throughout the ornaments. If you don’t mind the string lights, let them hang. But make sure they don’t get pulled since they are wrapped around the ornaments. Once I was done, I tucked the battery pack behind the bulletin board and taped them.
Step 5 – Prop the Wreath on a Soft Surface
I propped my wreath/bulletin board against a pillow on my bed. Then I rearranged the magnets and ornaments once they were hanging upright. The ornaments will move when you go from flat to upright. At this stage, add more ornaments if you have empty spaces or the wreath is a bit uneven.
Once you’re done, you can add a bow or not and then hang it on your wall.

Frequently Asked Questions
How do you attach ornaments to a wreath?
Most ornament wreaths are attached with a hot glue gun, but this wreath uses magnetic hooks. The magnets allow you to move your ornaments around to form the wreath shape and not damage your vintage ornaments.
How many ornaments do you need for an ornament wreath?
So I used a variety of ornaments that were different sizes. So here are the specs on what I used to create a wreath for my 24″x24″ bulletin board.
50 – 60 large to medium-sized solid-colored ball ornaments
10 – 20 smallish and detailed ornaments
10 mini ornaments
Can you hot glue ornaments to a wreath?
When making a traditional ornament wreath, you will use hot glue to attach the ornaments to a frame. But, with this wreath, you’ll use magnets and a magnetic bulletin board.
If you want to buy your wreath here are some beauties!
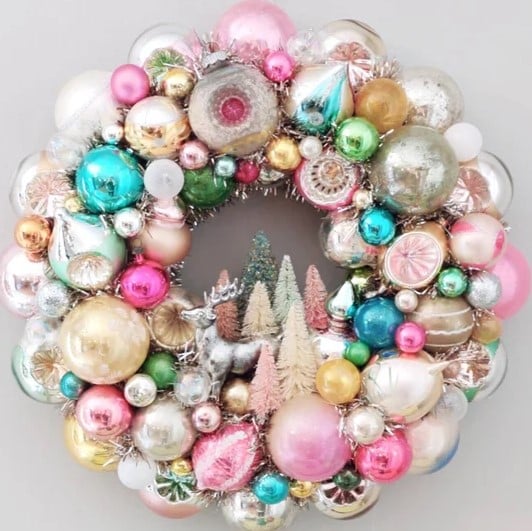
It was worth weeks trying to reinvent how to make a vintage ornament wreath! I’m happy it was a successful project and didn’t flop. I love that I can switch out the wreath with a new set of ornaments each season. I’ve already made another for my blue-themed holiday living room!
So, happy crafting, and if you’re over on Instagram, I’ll be sharing something pretty special starting December 1st! If you don’t want to miss out, follow me on my Instagram account.
Happy Crafting!
Cheers,

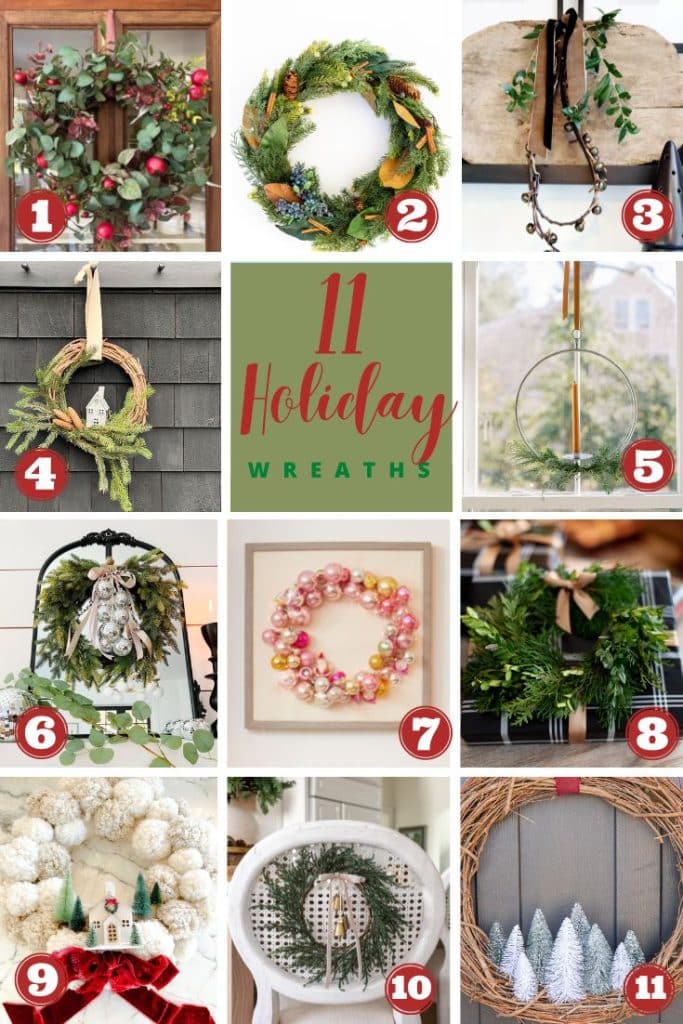
Blogger’s Best Holiday Wreaths
- Ten Minute Christmas Eucalyptus Wreath | My 100 Year Old Home
- Berry and Cinnamon Stick Wreath | Zevy Joy
- DIY Sleigh Bell Wreath | My Sweet Savannah
- Scandinavian Inspired Wreath | Most Lovely Things
- Candle Wreaths | Finding Lovely
- Holiday Evergreen Disco Ball Wreath | Tatertots and Jello
- How to Make a Vintage Ornament | Happy Happy Nester
- Small Wreath Gift Topper | Craftberry Bush
- DIY Christmas Wreath Ideas | Modern Glam
- Mini DIY Christmas Wreaths | Jennifer Maune
- Easy Bottlebrush Christmas Tree Wreath | Twelve on Main


- Red and White Christmas Tree - July 9, 2026
- Tori Karaage Don (Japanese Chicken) - July 2, 2026
- Fluffy Japanese Pancake Recipe (Souffle) - June 24, 2026
")
")


Annie Diamond
Janine,
A great idea to use magnets. No mess and it protects your vintage Christmas bulbs. I love how it turned out!
xx
Karolyn
This is genius, Janine!! Definitely would never thought of using magnets!! Thank you so much for sharing….Have a wonderful Christmas Holiday!!
Janine Waite
Hi Karolyn,
Thanks so much for your lovely message! I’m so happy that I could share an easy way to make this pretty ornament wreath! It’s the best if you don’t want to sacrifice your vintage ornaments. I hope you have an inspiring weekend!
jennifer hadfield
I LOVE your pink wreath, Janine!! It’s so pretty! I pinned it to my holiday board to share 🙂
xoxo