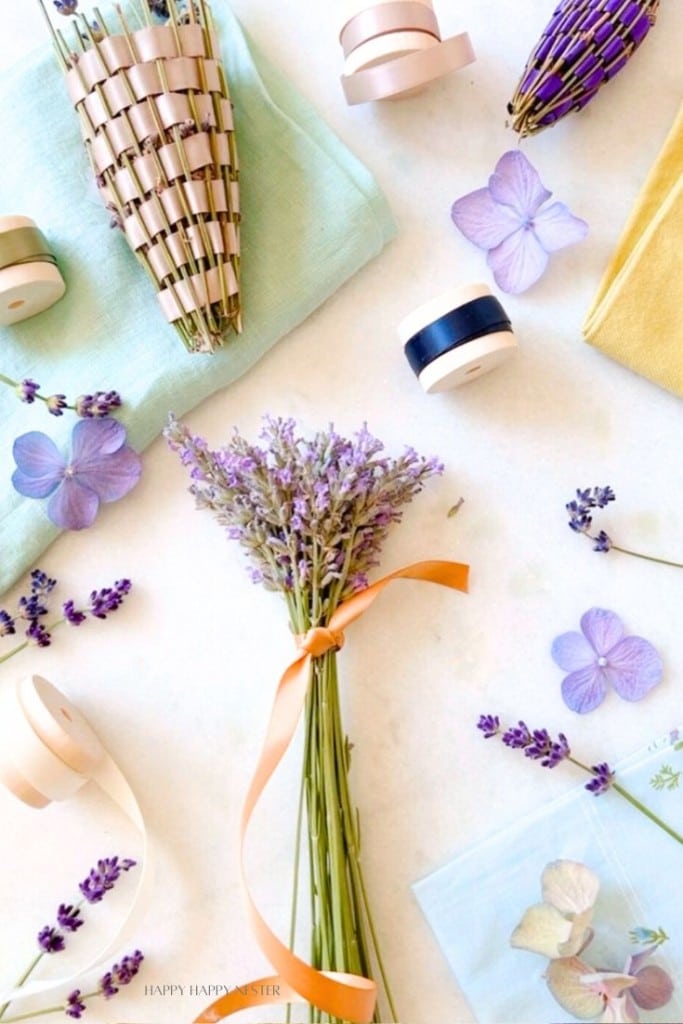
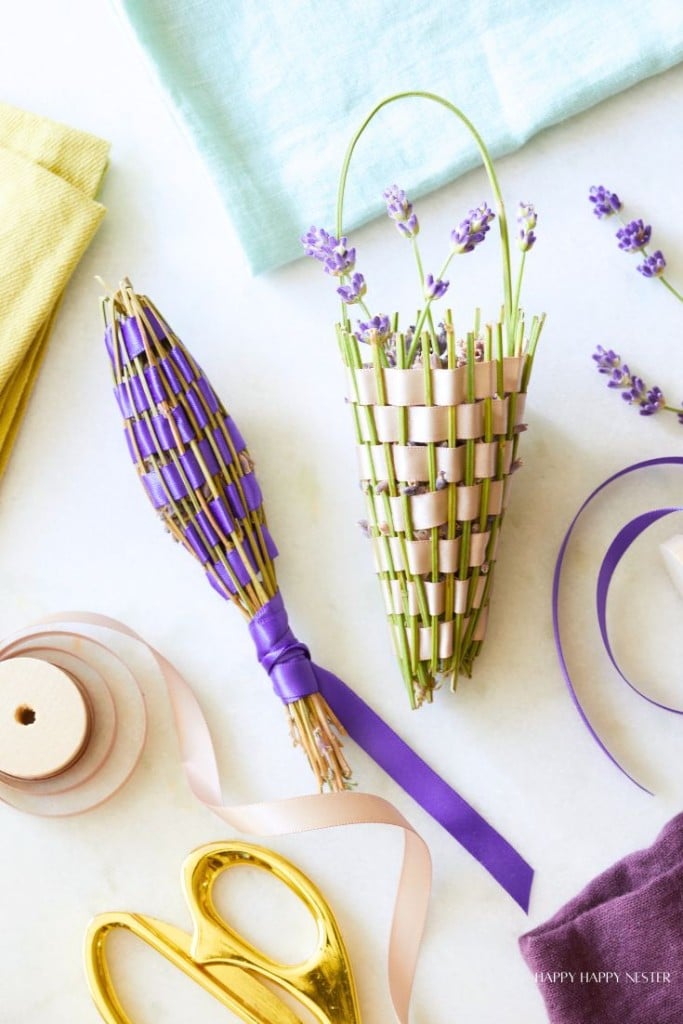
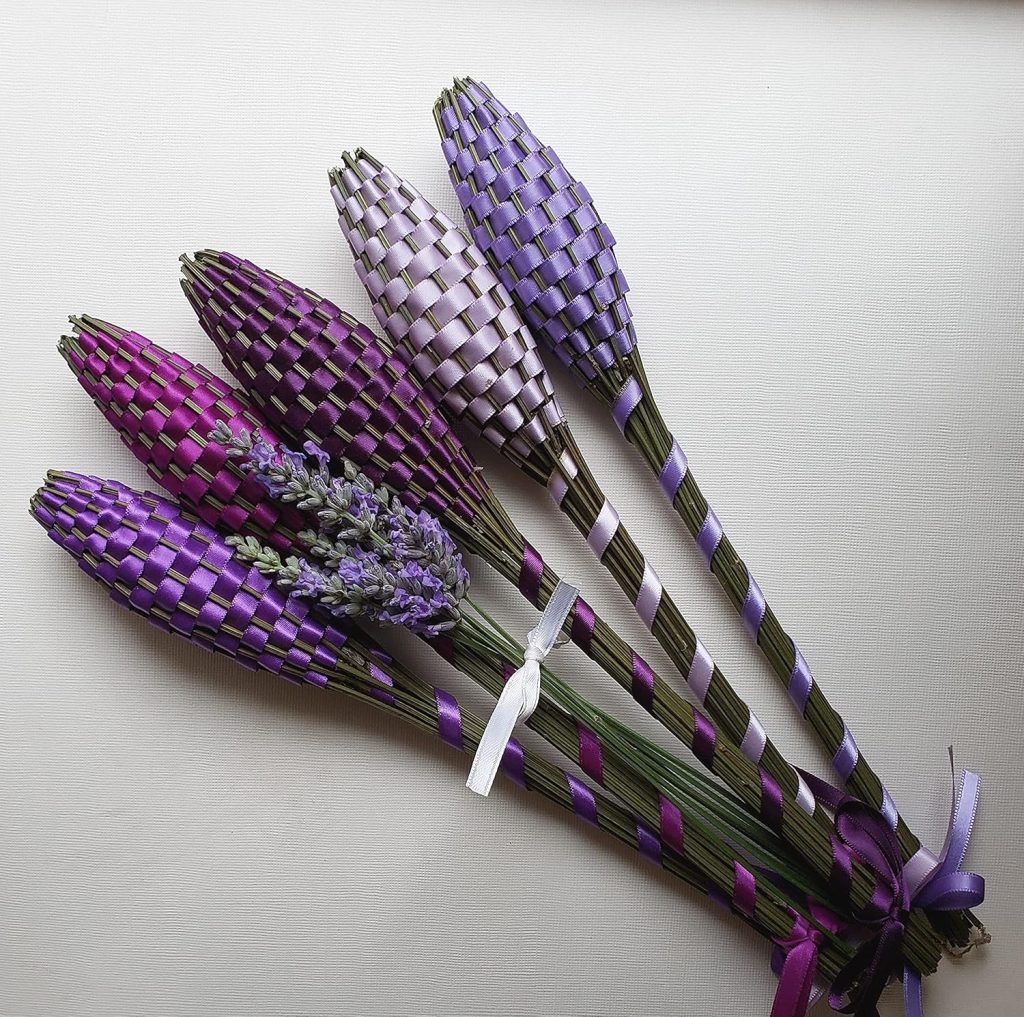
Let’s get crafty with this Lavender Wands Tutorial. In this easy DIY, I’ll walk you through the steps to make these cute, fragrant bundles, perfect for adding natural fragrance to your home. Grab your lavender, and let’s get started!
You might enjoy my new twist if you’re familiar with these cute little sachets! I’ve made the classic lavender wands and lavender baskets, and I’ll show you how to make them, too.
I remember my mom introducing me to lavender wands, and during one summer visit, we made a bunch together. We were always busy making fresh berry pies, jams, and crafts whenever she visited. Those times were so special and full of creativity! She was my inspiration. Now, making them is bittersweet since she passed away a couple of years ago. However, I know she’d be thrilled that I’m sharing them today, keeping her memory and our traditions alive.
What is the purpose of lavender wands?
Lavender wands are perfect for adding a lovely lavender scent to your home. Just tuck them into drawers, closets, or anywhere you want to keep clothes fresh and bugs away. Plus, they’re super cute and make great handmade gifts!
Which country did this fun craft originate from?
Lavender wands are believed to have originated in France, where lavender has long been cultivated for its fragrance and used in various forms to freshen linens and repel insects. The tradition of crafting these wands has been passed down through generations, making them a beloved part of French heritage.
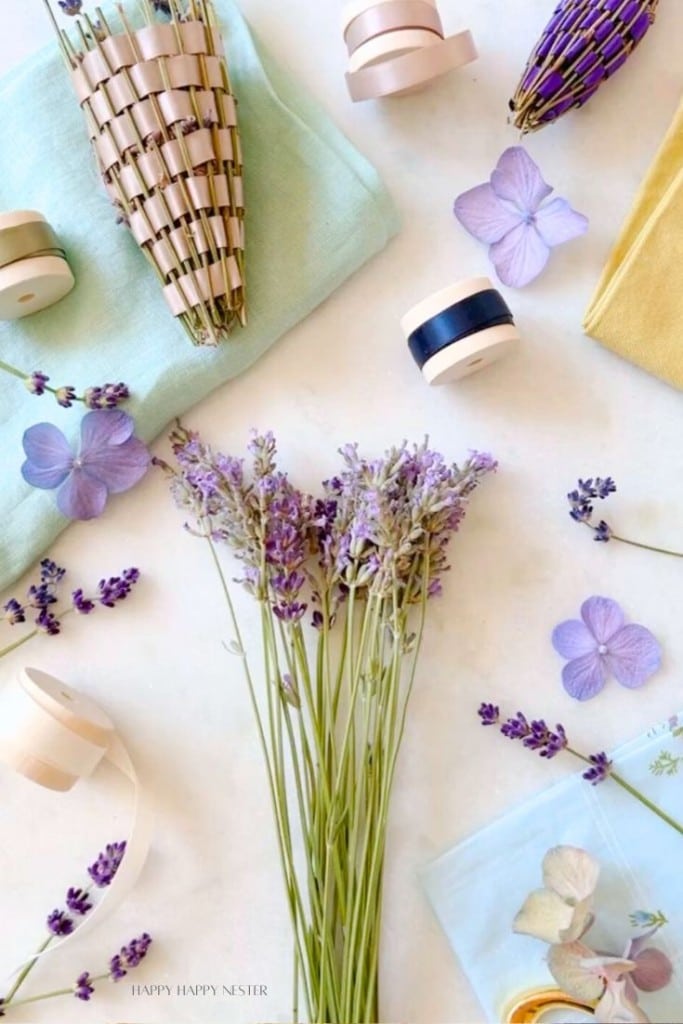
Gathering Lavender Stems
You’ll want to pick fresh lavender when the blooms open, usually when the essential oils peak in the morning.
Collect about 15 to 25 stems, each around 8 inches long below the flower. The younger the blossoms, the less likely they are to fall off and the more flexible the stems will be.
You’ll want to use an odd number of stems to make creating a basket weave with the ribbon easier.
Supplies You’ll Need
Lavender Stems (about 10 inches or longer – including the blossom)
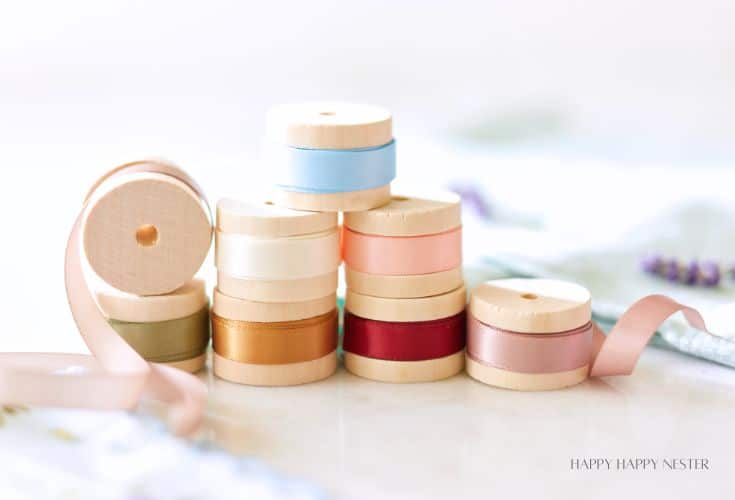
*Ribbon (about 3/8 inch wide and 50 inches or 1 1/2 yards long)
Scissors
*I love this collection of ribbons!!!!
How to Make Lavender Wands
Step 1: Gather Fresh Lavender
Pick about 15 to 25 fresh lavender stems, each around 8 inches long, when the blooms start to open.
Step 2: Remove Leaves
Strip the leaves off each lavender stem, leaving only the flower heads and stems.
Step 3: Bundle the Stems
Group the stems together, aligning the flower heads at the same level, and secure them with a small rubber band or string just below the flower heads.
Step 4: Prepare the Ribbon
Cut a long piece of ribbon, around 2-3 yards, depending on the length of your stems.
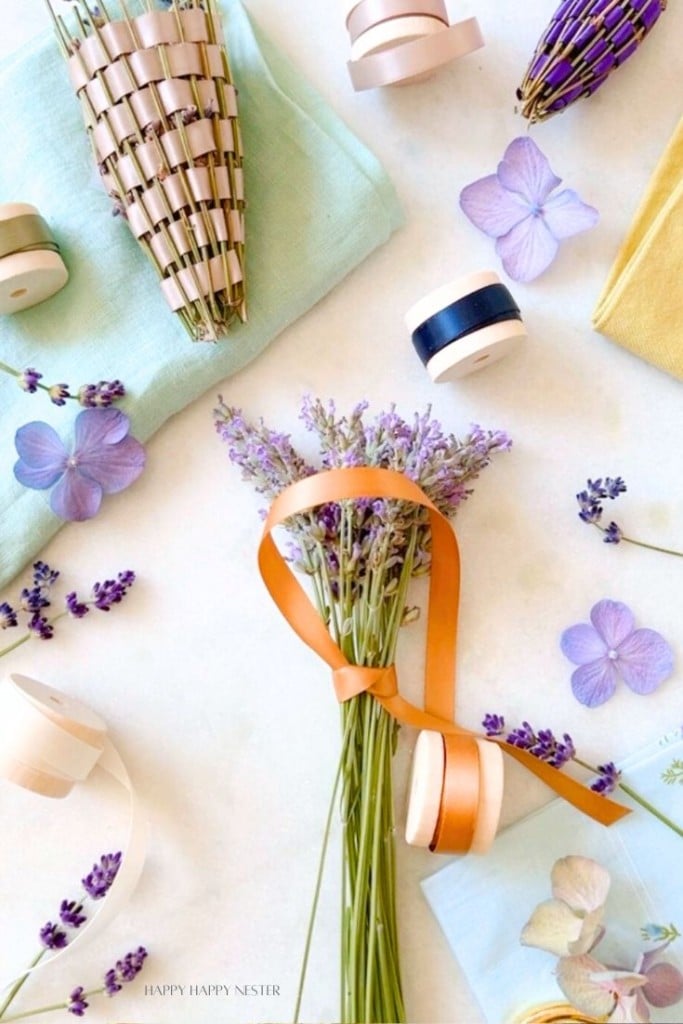
Step 5: Attach the Ribbon
Tie one end of the ribbon securely around the bundled stems, just below the bottom of the lavender blossoms.
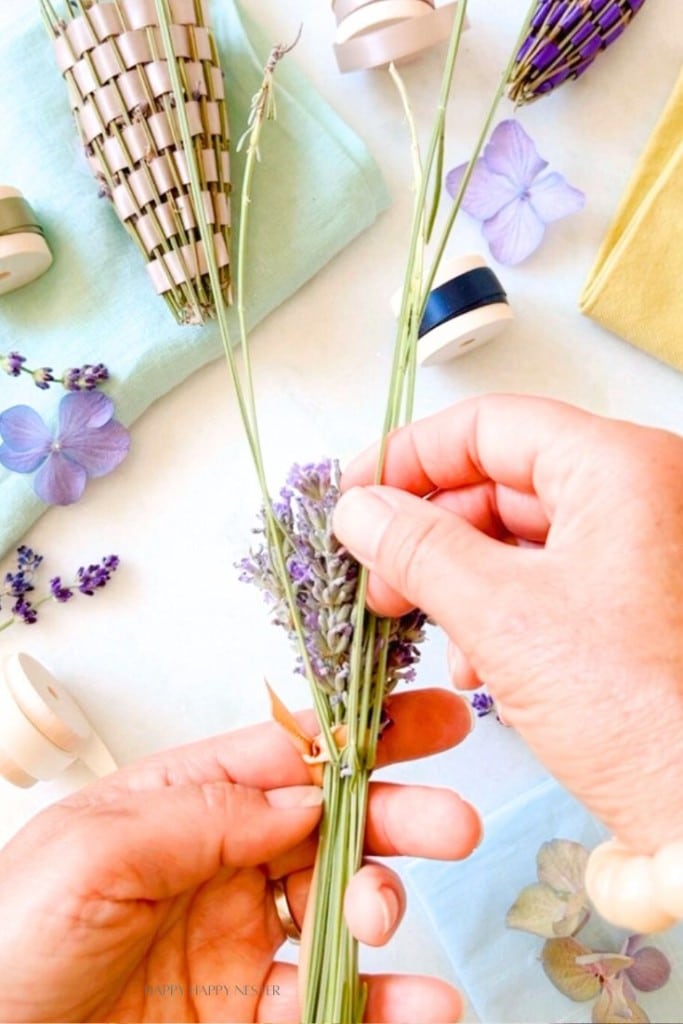
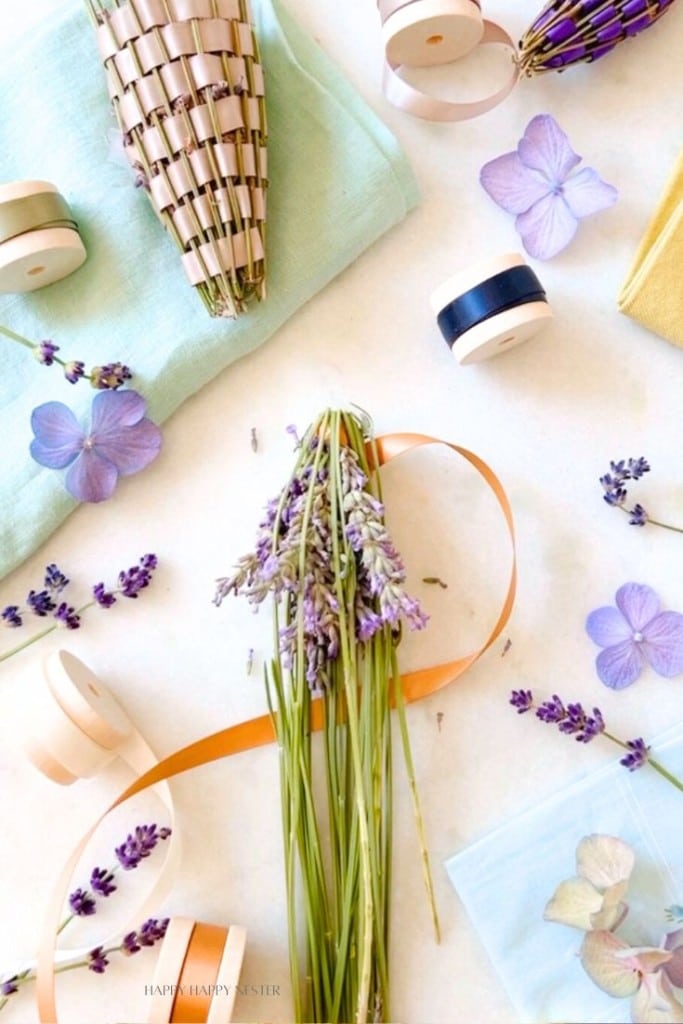
Step 6: Fold and Bend the Stems
Gently fold the stems over the flower heads, creating a cage-like structure around the flowers.
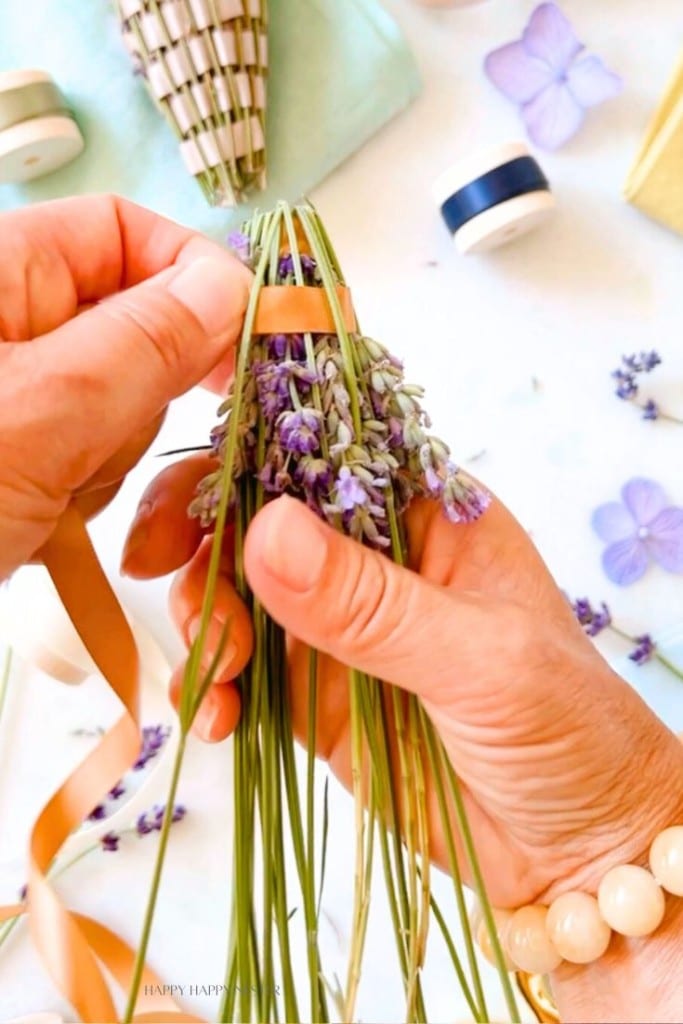
Step 7: Start Weaving the Ribbon
Begin weaving the ribbon in and out of the folded stems, creating a basket weave pattern. Ensure that the ribbon is taut but not too tight. If bits of flower stick out between the stems and ribbon, use a toothpick to poke them back into place gently.
Step 8: Continue Weaving
Continue weaving the ribbon until you reach about five to seven inches (plus or minus) of stems and ribbon. Adjust the ribbon as needed to maintain an even pattern.
Step 9: Secure the End
Once you finish weaving, wrap the remaining ribbon around the stems several times to secure it, then tie it off in a knot or bow.
Step 10: Trim the Ends
Trim any excess ribbon and the bottom of the stems to make them even.
Step 11: Let It Dry
Hang the finished lavender wand in a cool, dry place to allow the lavender to dry completely.
Note: The weaving can be tricky for the first few rows. Don’t hesitate to take it apart and start over if needed. If you find it challenging, making a few mistakes is perfectly okay.
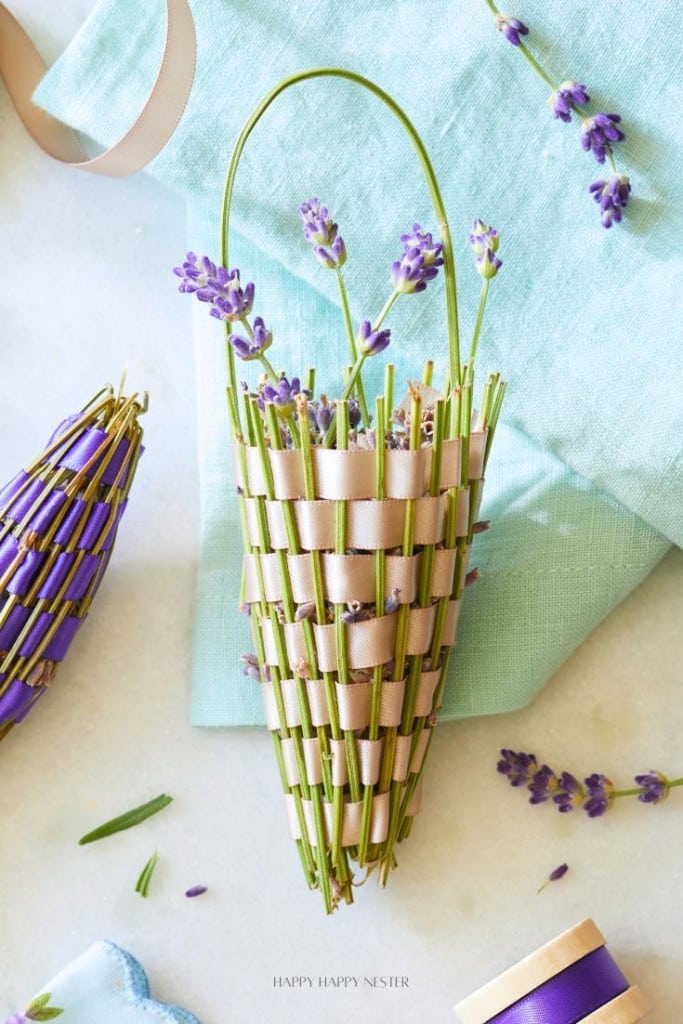
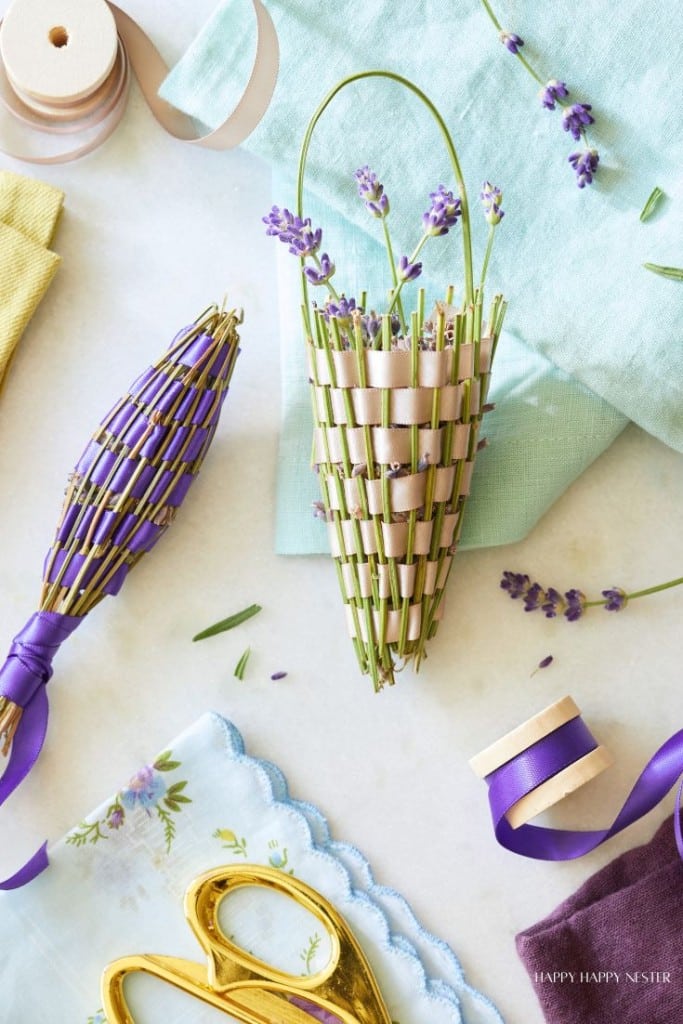
How to Make Lavender Baskets
Step 1: Gather Fresh Lavender
When the blooms are just starting to open, pick about 15 to 25 fresh lavender stems, each around 10-12 inches long.
Step 2: Remove Leaves
Strip the leaves off each lavender stem, leaving only the flower heads and stems.
Step 3: Bundle the Stems
Group the stems together, aligning the flower heads at the same level, and secure them with a small rubber band or string just below the flower heads.
Step 4: Prepare the Ribbon
Cut a long piece of ribbon, around 3-4 yards, depending on the length of your stems and desired basket size.
Step 5: Attach the Ribbon
Tie one end of the ribbon securely around the bundled stems, just below the rubber band.
Step 6: Fold and Bend the Stems
Gently fold the stems over the flower heads, creating a cone basket-shape
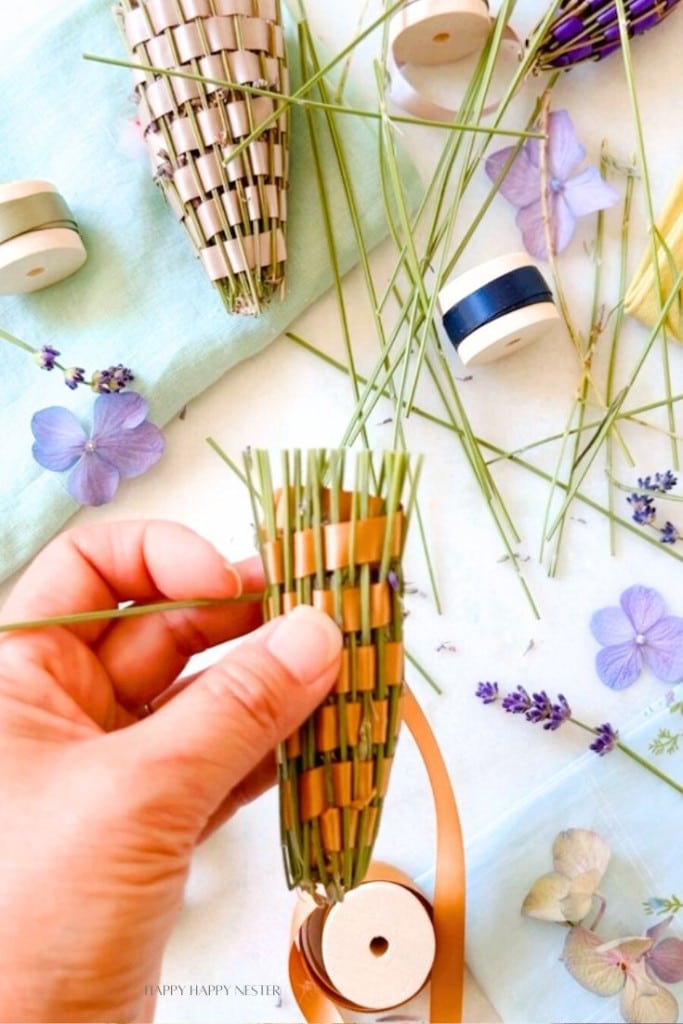
Step 7: Start Weaving the Ribbon
Begin weaving the ribbon in and out of the folded stems, creating a basket weave pattern. Keep the ribbon taut but not too tight. If bits of flower stick out between the stems and ribbon, use a toothpick to poke them back into place gently.
Step 8: Continue Weaving
Continue weaving the ribbon around the basket shape, ensuring that it covers all the flower heads and maintains an even pattern.
Step 9: Secure the End
Once you finish weaving, make sure to end the ribbon opposite the stem you’ll use for the handle.
Step 10: Trim the Ends
Trim the stems to make them even. Make sure not to trim one chosen as the basket handle.
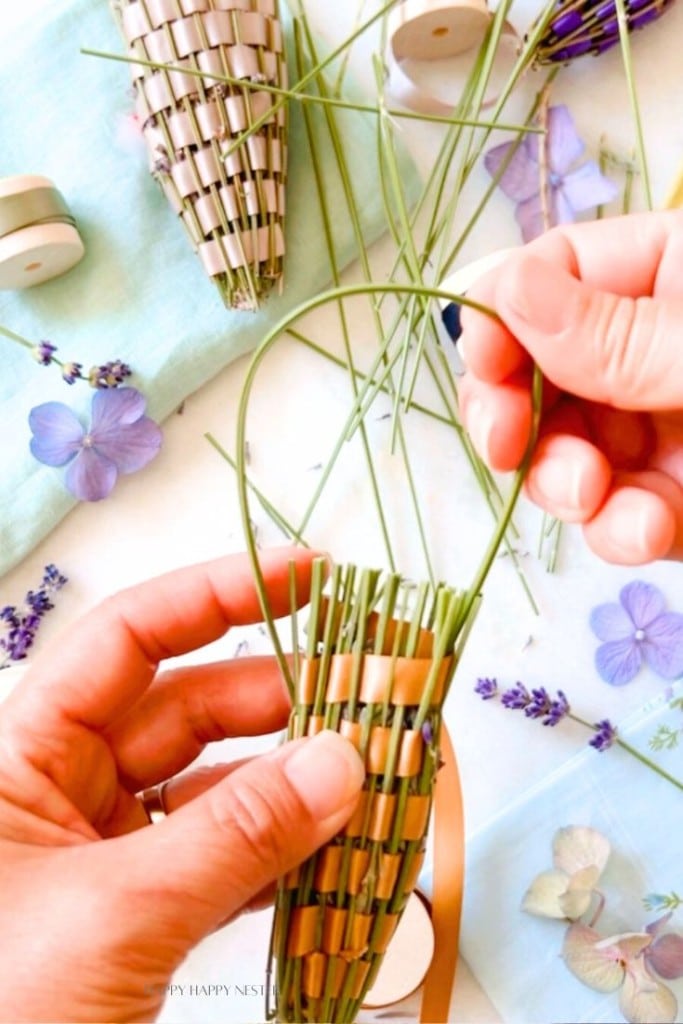
Step 11: Form the Handle
Take one of the stems and bend it to form a handle over the top of the basket. Secure it to the other side of the basket with the ribbon.
You can place more lavender with short stems inside the top of the basket.
Step 12: Let It Dry
Hang the finished lavender basket in a cool, dry place to allow the lavender to dry completely.
Frequently Asked Questions About Lavender Wands
Lavender wands add a pleasant lavender scent to closets, drawers, and other small spaces, helping keep clothes and linens fresh. They also serve as natural insect repellents and make charming, handmade gifts.
used ribbon that is 3/8 inch wide and 50 inches (or 1 1/2 yards) long. Remember that for smaller wands, it’s best to use a narrower ribbon.
The best time to harvest lavender for wands is when the blooms are just starting to open, typically in the early morning when the essential oils are most concentrated. This ensures the lavender is fresh and fragrant for crafting.
You’ll need about 1 1/2 yards, depending on how big a wand you make.
Tips for Making Lavender Sachets
- Use Fresh Lavender: Freshly picked lavender is easier to work with and retains its fragrance longer.
- Keep the Ribbon Taut: Maintaining tension on the ribbon ensures a neat and secure weave.
- Choose an Odd Number of Stems: An odd number of stems makes creating a balanced basket weave pattern easier.
- Be Gentle with the Stems: Lavender stems can be delicate, so handle them gently to avoid breaking.
- Use a Toothpick for Adjustments: A toothpick is perfect for tucking in any stray bits of flower that stick out between the stems and ribbon.
- Work in a Calm Environment: Find a quiet and comfortable space to work, as a relaxed environment helps with focus and precision.
- Practice Makes Perfect: Don’t worry if your first few attempts aren’t perfect; practice will improve your technique.
- Experiment with Different Ribbons: Try using ribbons of various colors and textures to add a unique touch to each lavender wand.
If you love these lavender wands but don’t have any fresh lavender, here’s a link where you can purchase them instead.
Here are more summer crafts you may enjoy as well.
Thanks so much for stopping by today!
Happy crafting, and be sure to check out my friends’ summer flower crafts too!

Photo Credits: MyPhotography.com
Blogger’s Best Summer Flower Crafts
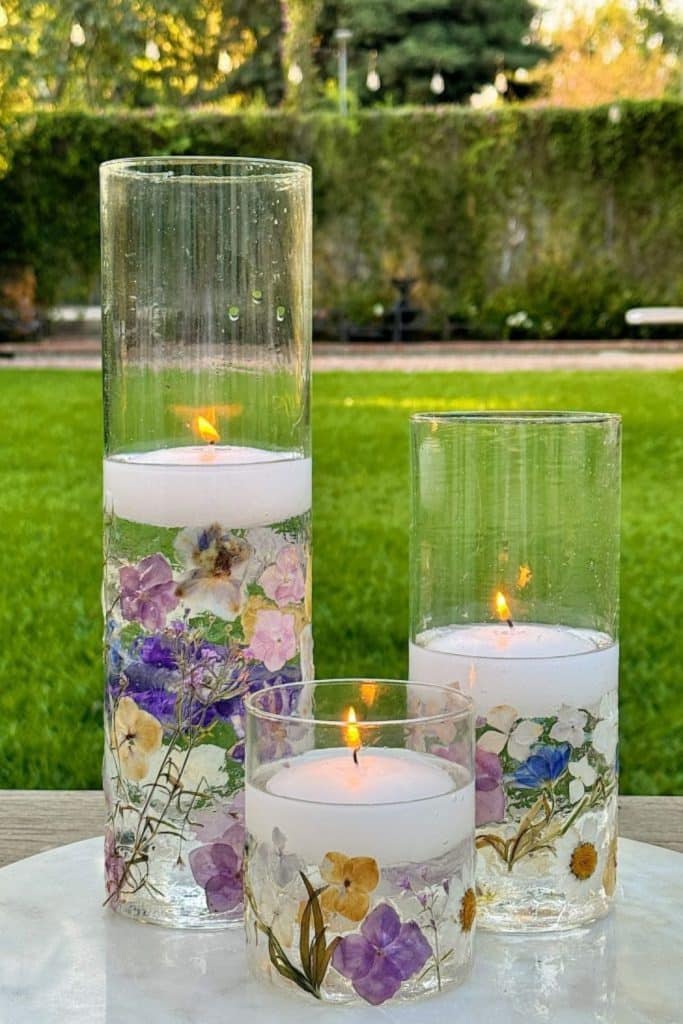
DIY Pressed Flowers | My 100 Year Old Home
DIY Pressed flowers are a beautiful and charming addition to any home decor. When made into candle holders, they are stunning. These delicate creations bring a touch of nature indoors and can be customized to fit any style or occasion. Whether you want to create a romantic centerpiece, a whimsical decoration, or a unique gift, DIY pressed flowers are a fun craft.

DIY Cacho Pod Wreath | My Sweet Savannah
Have you ever heard of natural cacho pods? The neutral pods offer a distinctive and intriguing decor element that will bring a touch of natural elegance to your home. Let me show you how to make a simple and inexpensive wreath out of them!
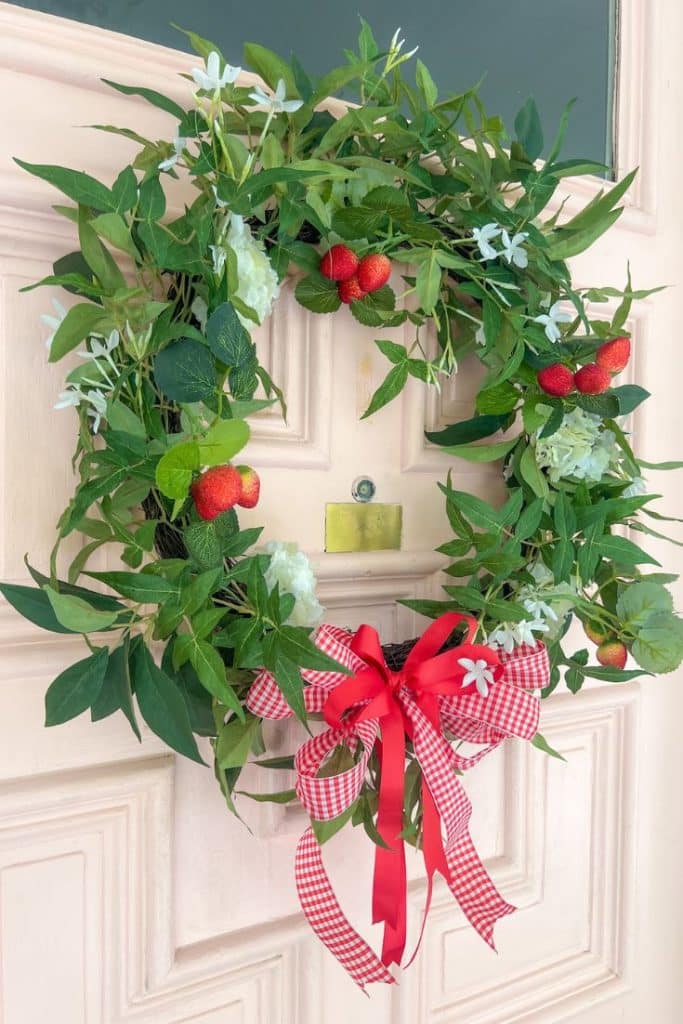
DIY Summer Strawberry Wreath | Tatertots and Jello
Create a charming summer strawberry-themed wreath by combining faux strawberries and flowers, lush greenery, and a red bow for a delightful way to decorate your front door.
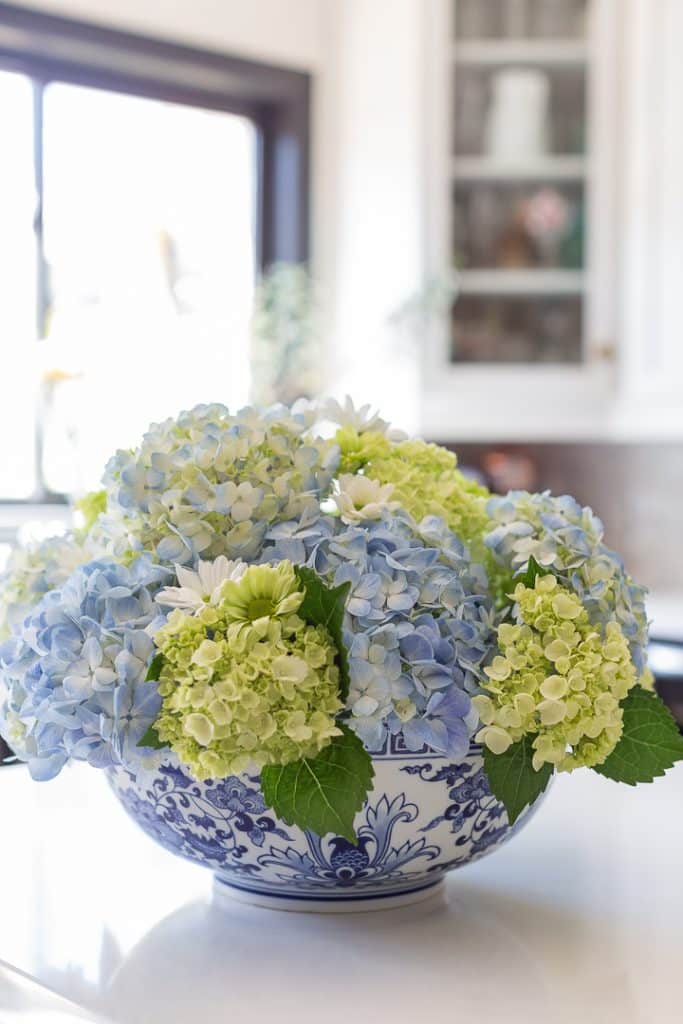
Blue Hydrangea Arrangement | Craftberry Bush
make a beautiful seasonal arrangement in a shallow bowl using the grid method and other environmentally friendly oasis.
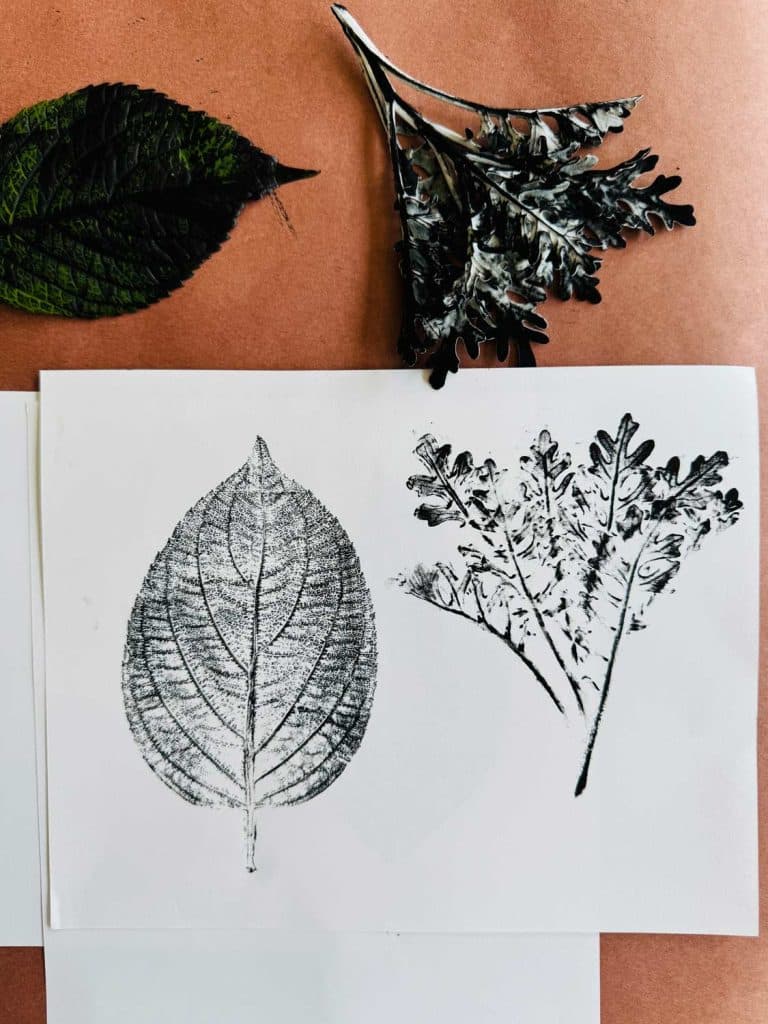
Monoprinting with Nature | Most Lovely Things
I tried somerthing new to me…monoprinitng with botanicals. With just a few supplies, it was fun to create something so beautiful from nature.

- Red and White Christmas Tree - July 9, 2026
- Tori Karaage Don (Japanese Chicken) - July 2, 2026
- Fluffy Japanese Pancake Recipe (Souffle) - June 24, 2026


annie diamond
Janine- I love your lavender wands and baskets. So cool how the stems of the lavender become the basket with ribbons. You gave the loveliest ideas… I’m sure your mom would have loved these.💜