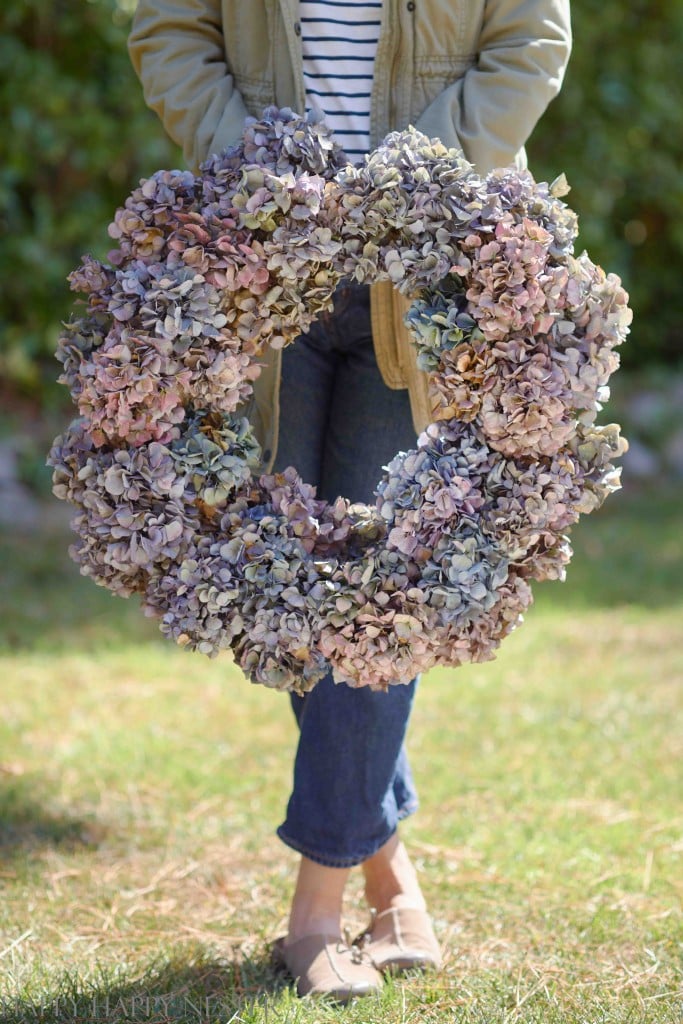
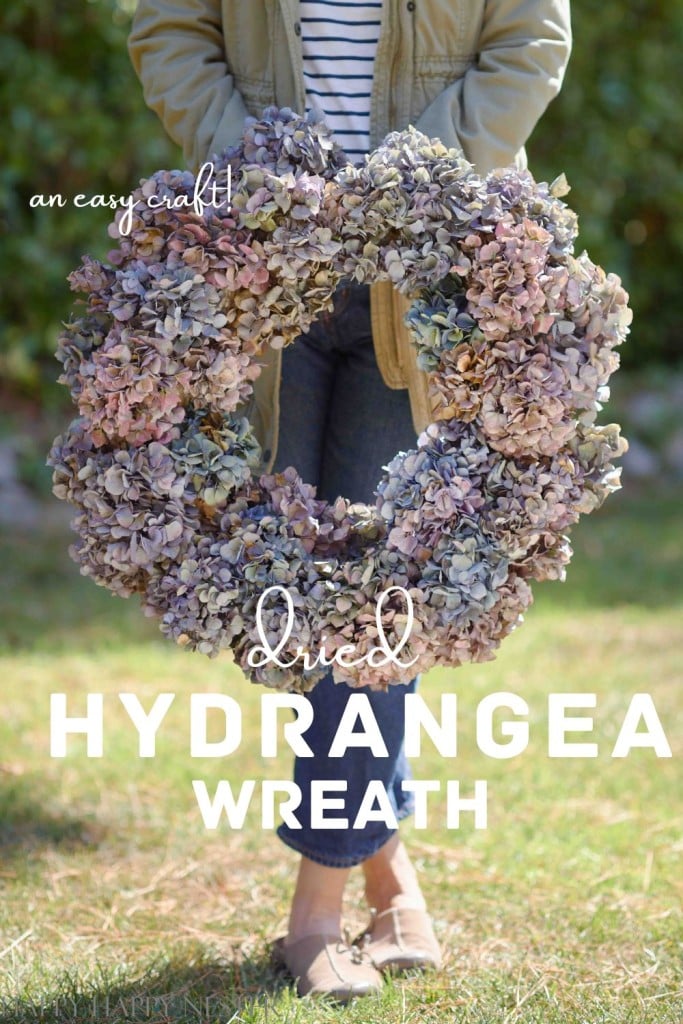
I love this time of year when all the hydrangeas turn royal colors. I decided to share my Dried Hydrangea Wreath Tutorial with you this fall. This simple wreath is gorgeous with its purples, blues, and deep green flowers. Use your flowers from your garden or buy them from a store.

Fall is the best time to use your hydrangeas and make a beautiful wreath. If you have fall dried hydrangeas from your garden, this DIY wreath is super inexpensive to make.
I hope you’re having a remarkable fall. I know there is some extreme weather going on in our country. Stay safe and healthy.
So much is going on right now that I’m happy that fall is a beautiful distraction. I keep busy creating recipes and home decor.
As you all might know, I have many wreaths over here if you’re interested in creating a few this fall.
MORE FALL WREATHS

Every fall, I take a trip to the San Francisco Flower Market, and I love all the gorgeous hydrangeas. The vendors have buckets and buckets of purple, blue, and green hydrangea blossoms. There is one shop at the market that sells beautiful hydrangea wreaths. I looked for them on my last visit but didn’t see them since I was probably too early.
So, I decided to make this hydrangea wreath DIY this fall.
How to Dry Hydrangea Blossoms
How to Make a Dried Hydrangea Wreath Tutorial
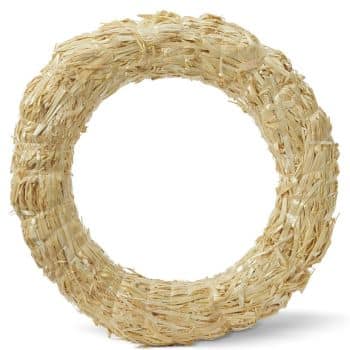
This wreath is so simple to create! You’ll only need a few supplies and minutes to create this beautiful fall wreath. I did use a significant wreath form, so mine came out huge! The bigger the wreath, the more flowers you’ll need.
I used about 41 blossoms to make a
Take a look at the list below.
Supplies You’ll Need to Make a Fall Hydrangea Wreath
- 16-inch Straw Wreath Form
- 41 Hydrangea Blossoms
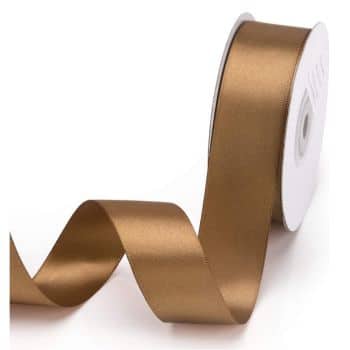
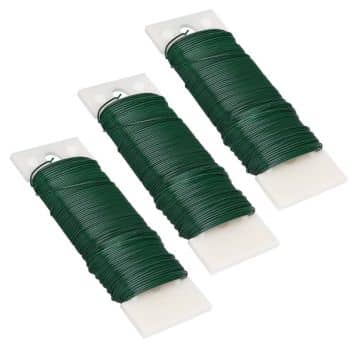
- Ribbon or Wire for Hanging
- Garden Shears
- Scissors
How to Make a Wreath with Hydrangeas
Here’s how many hydrangeas I used for each wreath section:
Outer Edge – 16 Flowers
Top Edge – 14 Flowers
Inner Circle – 11 Flowers
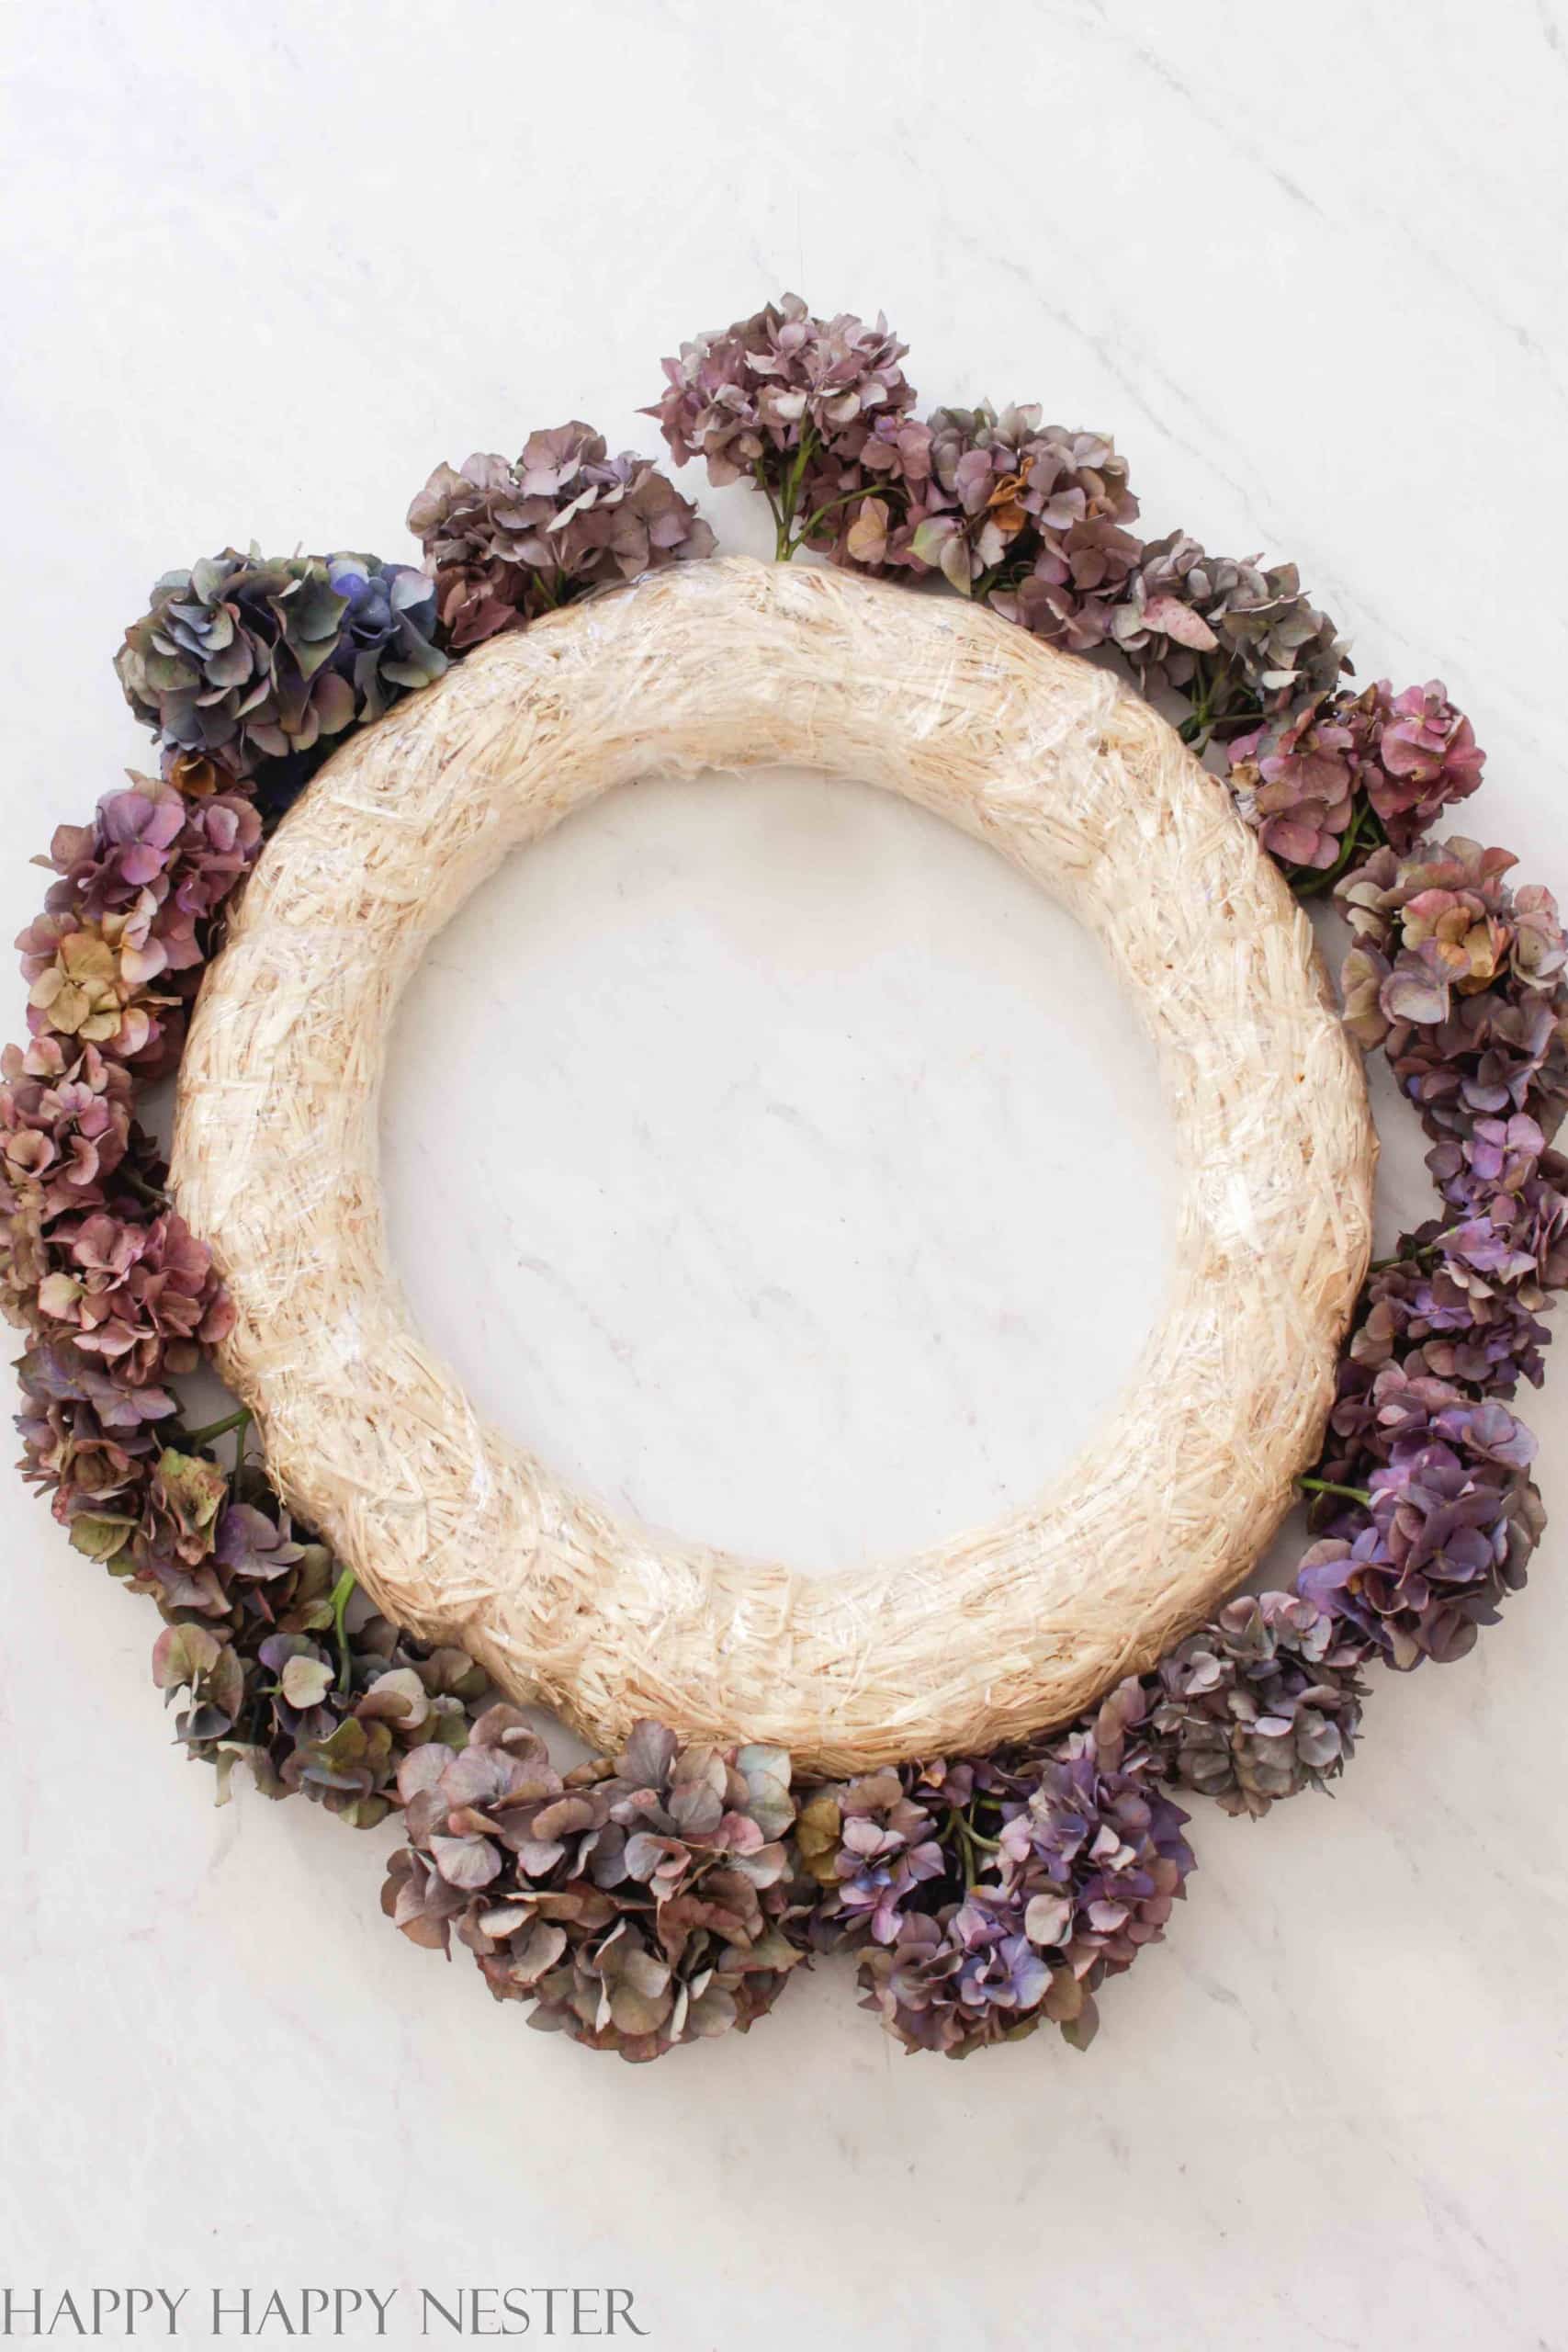
Step 1 – Layout Flowers
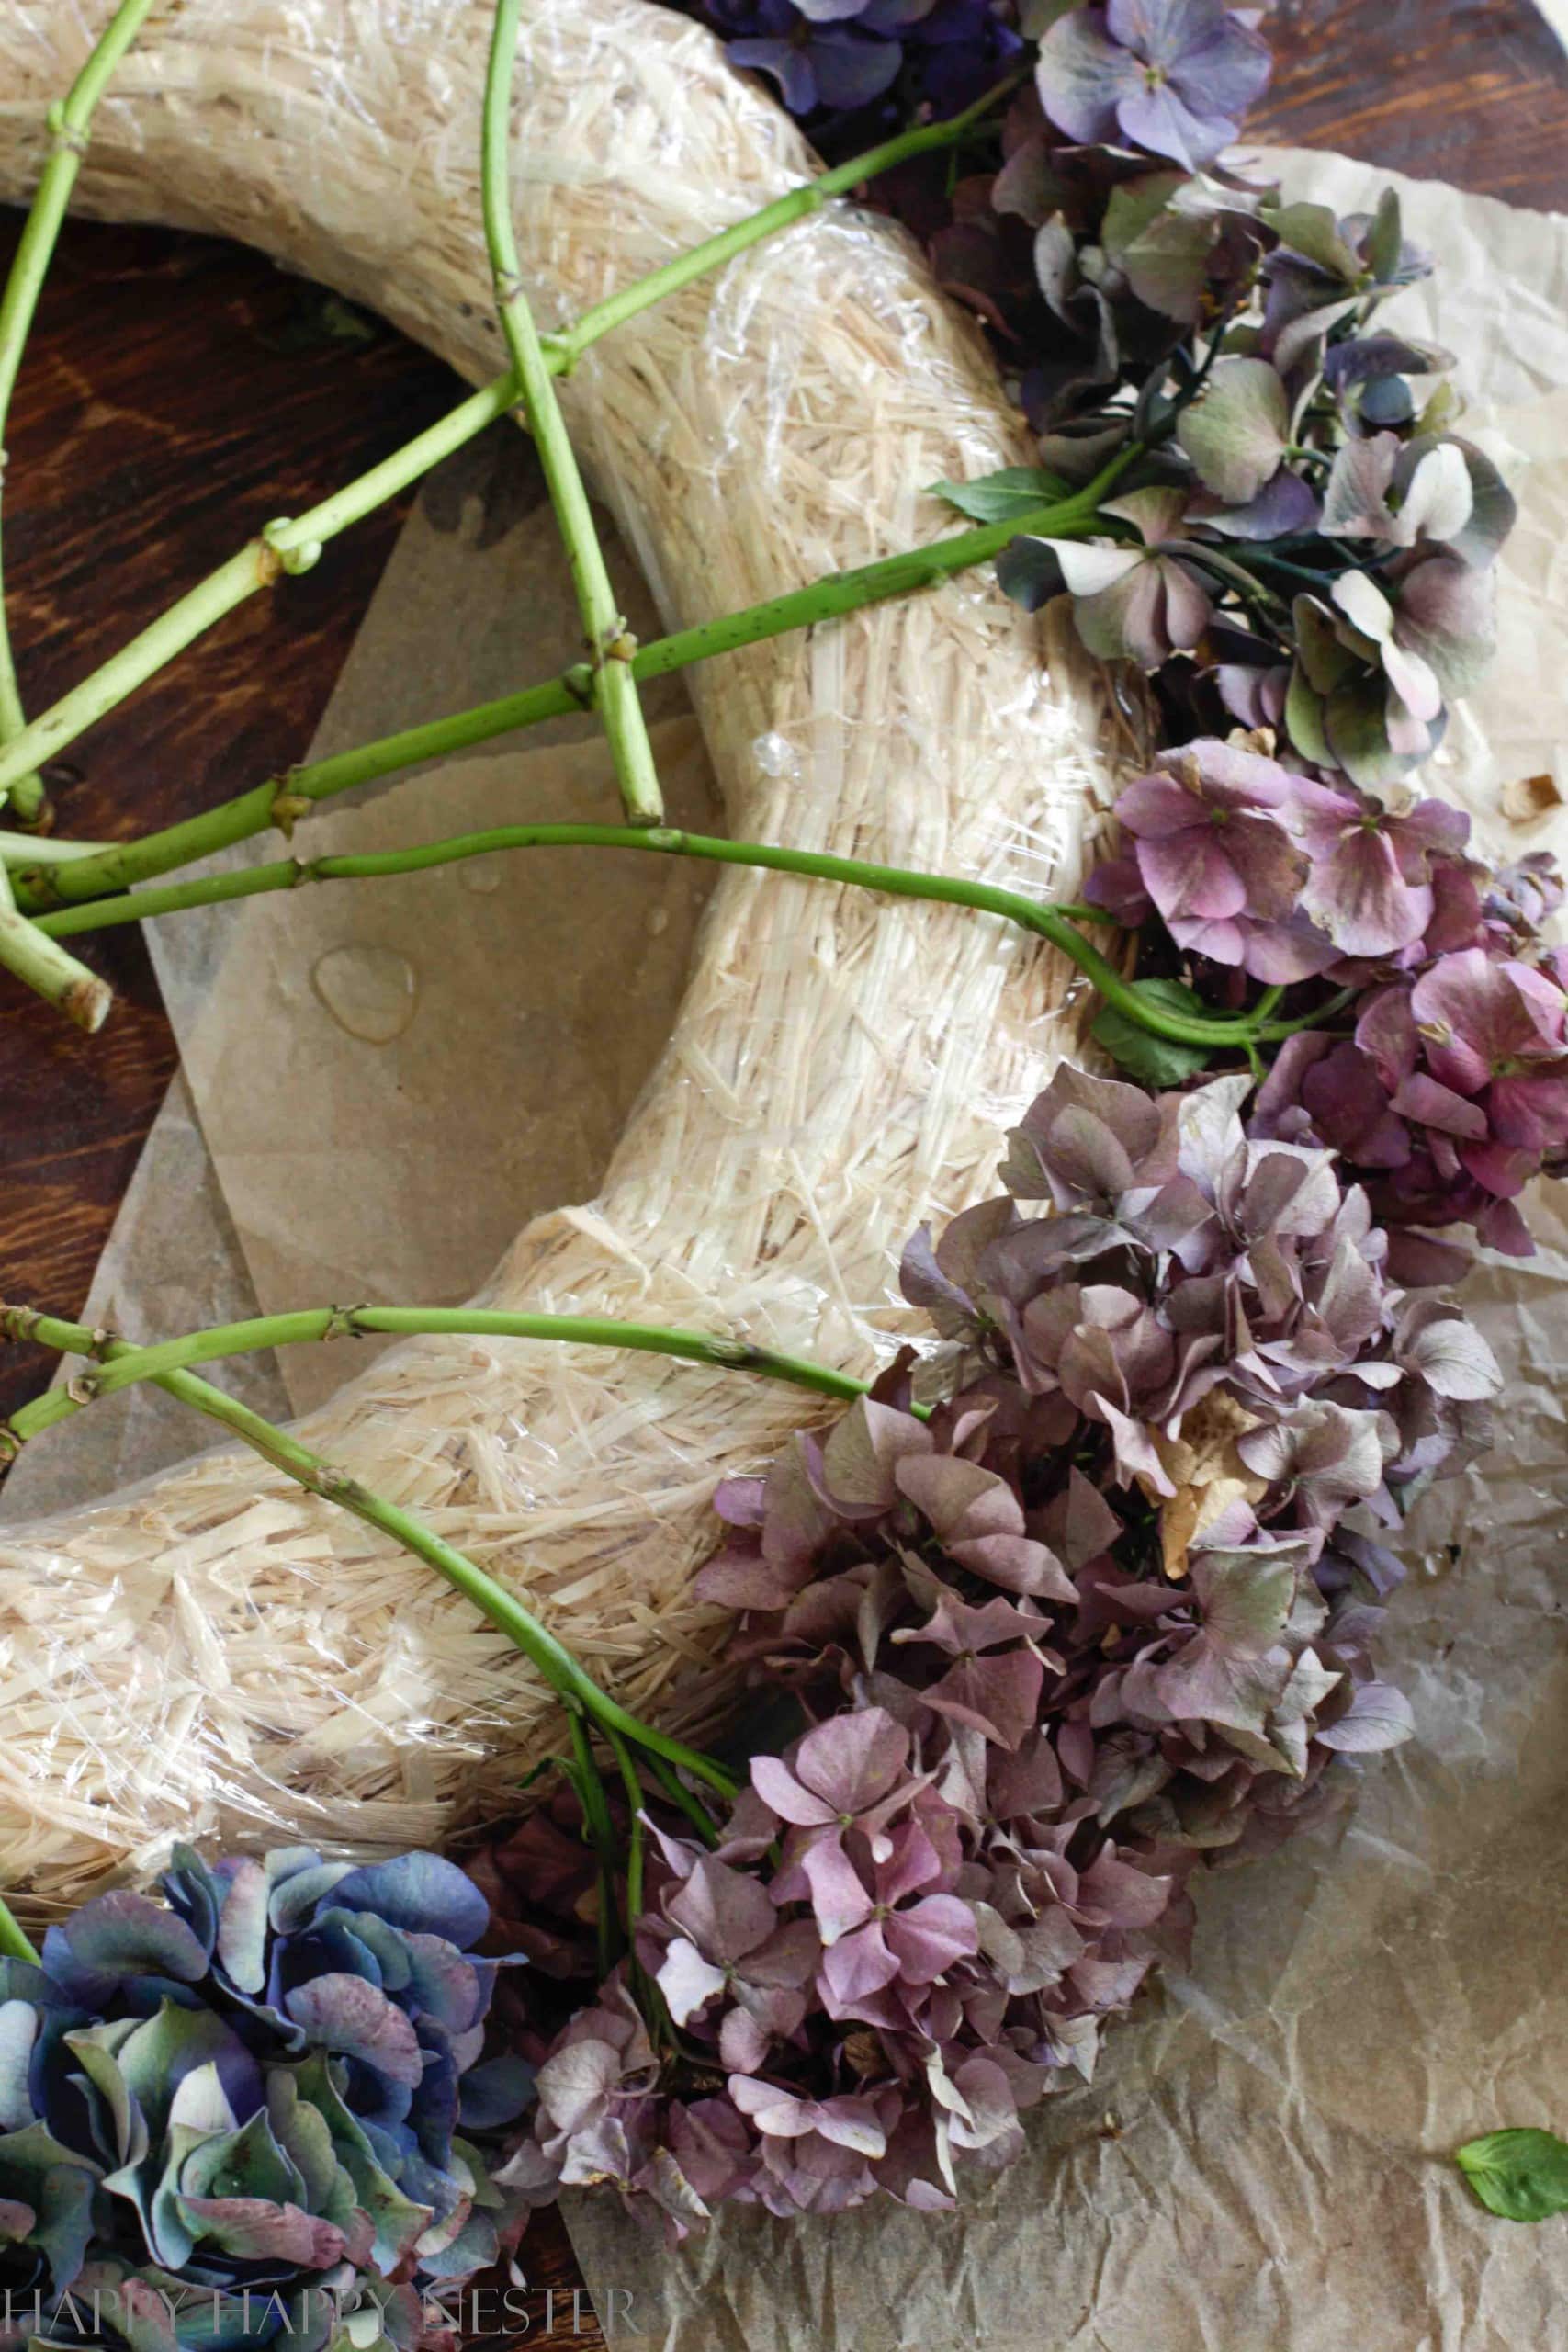
I laid out my first layer of flowers on the wreath. Start with the outer edge of your wreath form.
Trim off stems and leave about five inches beyond the blossom.
Take the tip of your scissors and dig a hole into the side of your wreath. Next, insert your blossom into the hole you just made and ensure the hydrangea is snug against the wreath.
Continue this step until you have a layer of hydrangea covering the whole side of the wreath, as pictured above.
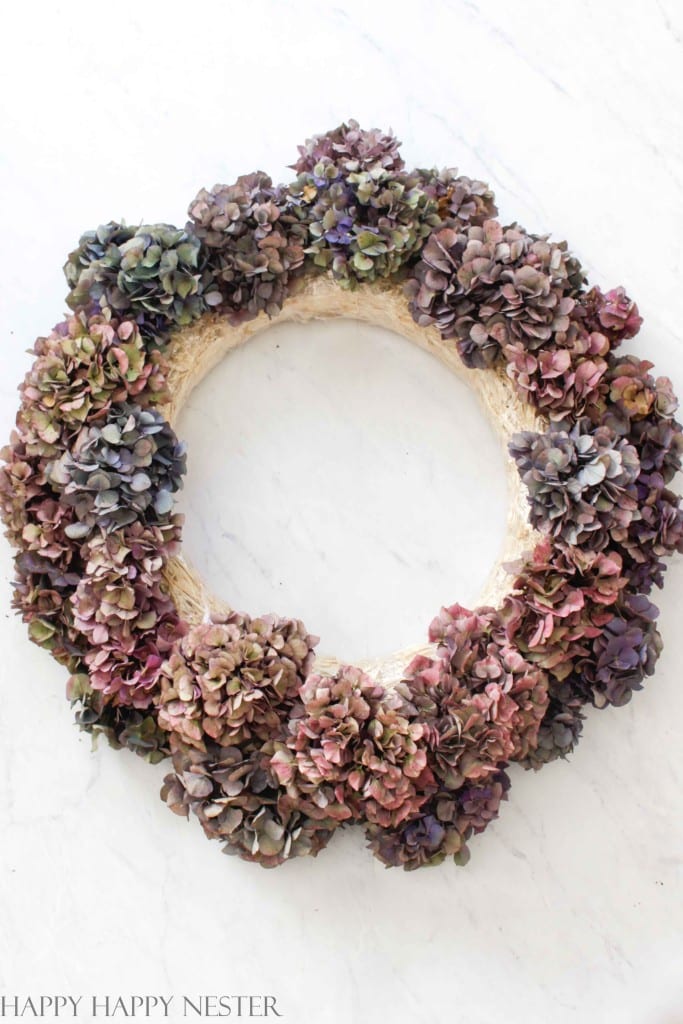
Step 2 – Fill the Top of the Wreath
Now repeat the process of step 1 for the top of the wreath.
Step 3 – Fill the Inner Circle of the Wreath
Repeat step 1 and fill in the inner circle of the wreath form with blossoms.
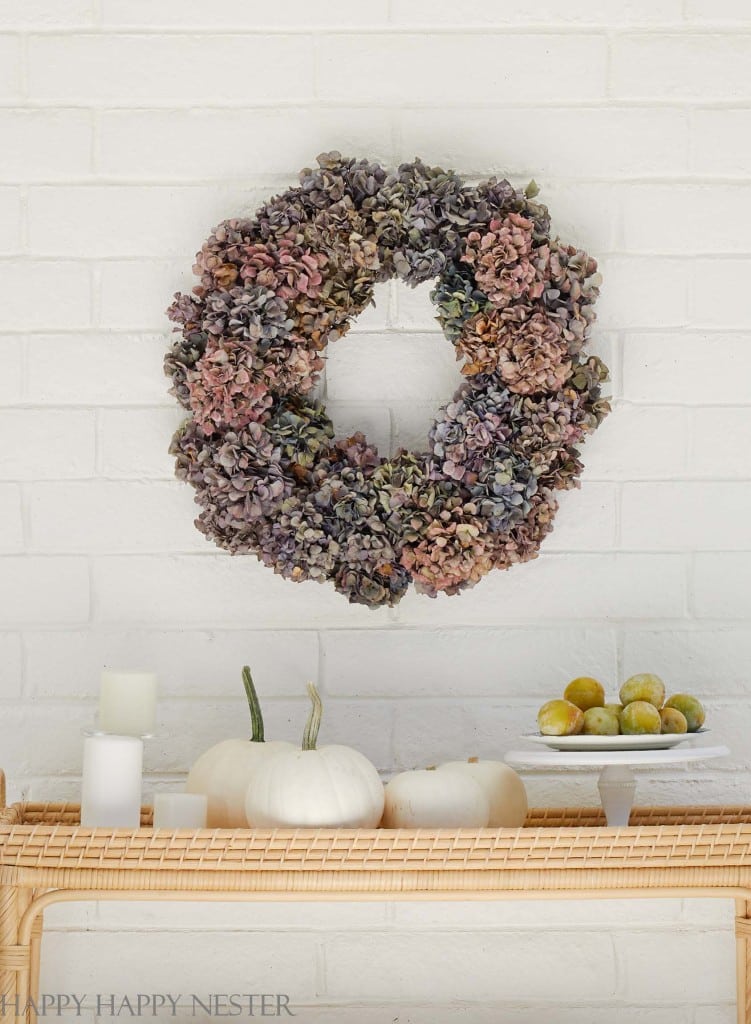
Step 4 – Hang the Wreath
I attached some fishing lines to my wreath. I looped the line through the wreath and then made a knot with a loop at the top. I hung my wreath from the fishing line loop.

Frequently Asked Questions:
If you pick the flowers too early, they might shrivel and die. So, it’s best to pick them early to late fall when the blossom petals are a bit leathery. Place the branches in a vase of water and let the flowers sit until they are dry.
It takes about one to two weeks for hydrangea blossoms to dry.
The blossoms can last for about a year.
They fade a bit, but if you want them to have a vibrant color, dry them in a vase of water. So, the slower the drying, the better the color. Also, place them in a cool and out of direct sunlight to preserve the flowers better.
You should pick hydrangeas for drying when they are at their peak bloom, typically in late summer or early autumn. Choose flowers that are fully open and have started to show some color changes, and then hang them upside down in a dry, cool place to preserve their beauty.
The blossom petals are a bit leathery and thick and will dry nicely.
WHY I LOVE DRIED HYDRANGEA WREATHS
- Long-Lasting Beauty: Dried hydrangea wreaths are long-lasting and provide year-round beauty as they retain their vibrant colors and shape.
- Natural Elegance: They add a touch of natural elegance to my home decor, enhancing its aesthetic appeal.
- Low Maintenance: Dried hydrangea wreaths require minimal maintenance, making them a convenient choice for busy individuals.
- Inexpensive Wreath: Dried hydrangea wreaths are an affordable decorative option, allowing for beautiful home decor on a budget.
- Creative Customization: Crafting and customizing dried hydrangea wreaths allows for personal creativity and a unique decorative touch.
A funny note is that I found these hydrangeas at a booth at the Flower Market. I waited for the booth owner to show up, and you saw the store was empty. I went shopping and circled back to find the owner putting his hydrangeas away.
I asked him if I could still buy them, and he was willing to sell them.
I bought two bundles, and my shopping trip to the city was complete. The rest of the story is history. And I made this fabulous hydrangea wreath for you today!

Where to Hang Your Wreath:
- Front Door: Hang your hydrangea wreath on the front door to welcome guests with its natural elegance and inviting charm.
- Dining Room: Adorn your dining room with a hydrangea wreath to create a delightful, fragrant centerpiece for special occasions and gatherings.
- Kitchen Wall: Brighten up your kitchen wall with a hydrangea wreath, adding a touch of beauty and nature to your cooking space.
- Bedroom: Hang a hydrangea wreath in your bedroom for a calming ambiance and a gentle, soothing fragrance.
- Outdoor Patio: Decorate your outdoor patio with a hydrangea wreath to bring the beauty of nature to your outdoor living area, enhancing its appeal for relaxation and entertainment.
Choosing a dried hydrangea wreath for Christmas is a fantastic idea because it’s like bringing a touch of nature indoors for the holidays. The soft, earthy colors of the dried hydrangeas give off a cozy, rustic vibe that fits right in with the festive spirit, and the best part is, you don’t have to worry about drying out and losing its charm before the holidays!
Make this fall-dried hydrangea wreath, especially if you have a bunch of blossoms in your garden. This is the perfect craft project for you!
Happy Crafting!

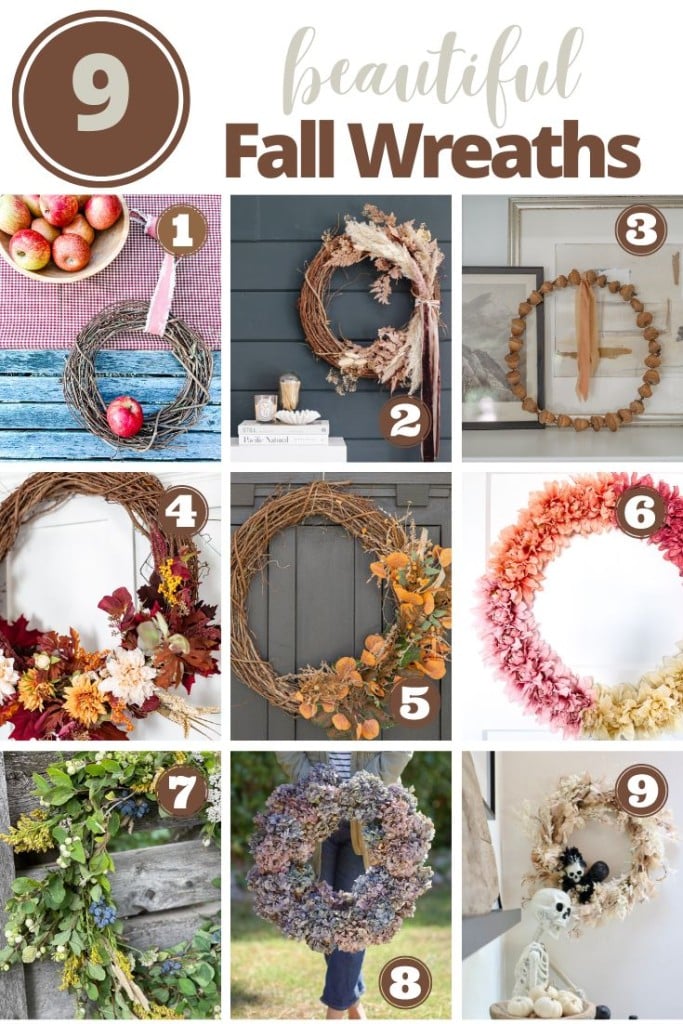
Blogger’s Best Fall Wreaths
- How to Make a Minimal Fall Wreath | Most Lovely Things
- Dried Flower Wreath For Fall | Modern Glam
- Fall Acorn Wreath | Finding Lovely
- Fall Wreath DIY | Craftberry Bush
- Gorgeous DIY Fall Eucalyptus Wreath | Twelve on Main
- DIY Dollar Store Fall Ombre Wreath | The Happy Housie
- How To Make A Fall Wreath From Yard Clippings | Sanctuary Home Decor
- Dried Hydrangea Wreath Tutorial | Happy Happy Nester
- How to Make a Chic Halloween Wreath | My Sweet Savannah


- Red and White Christmas Tree - July 9, 2026
- Tori Karaage Don (Japanese Chicken) - July 2, 2026
- Fluffy Japanese Pancake Recipe (Souffle) - June 24, 2026

")


Karen
Stunning Janine!! I adore dried hydrangeas and this wreath is just beautiful!!