• Skip to main content
  • Skip to header right navigation
  • Skip to site footer
  • About
  • Contact
  • Boutique of the Week
    • Facebook
    • Instagram
    • Pinterest
    • Twitter

Happy Happy Nester

Weekly Inspiration for Your Nest

  • Recipes
    • Appetizers
    • Breakfast/Brunch
    • Desserts
    • Dinners
    • Drinks
  • Crafts
  • Decor
  • Shop
    • Fall Decor
    • Kitchen
    • Pillows
    • Holiday Decor
  • Amazon Store
  • Recipes
    • Appetizers
    • Breakfast/Brunch
    • Desserts
    • Dinners
    • Drinks
    • Snacks
  • Crafts
  • Decor
  • Shop
    • Fall Decor
    • Kitchen Favorites
    • Pillows
    • Holiday Decor
  • Saturday Chitchat
  • Boutique of the Week
  • About
  • Contact
  • Facebook
  • Instagram
  • Pinterest
  • Twitter

See What’s Trending…

Cakes

Cookies

Dinners

Wreaths

Drinks

A decorative arrangement showcases green succulents and small white pumpkins, perfect for a DIY fall centerpiece. Nestled among brown pine cones and dried flowers on a white ceramic dish, the background softly blurs with more pumpkins.

Home › Crafts › Succulent Pumpkins DIY

Succulent Pumpkins DIY

Crafts Decor
By Janine Waite · Published on Oct 31, 2024
Affiliate Disclosure: This Post May Contain Affiliate Links.

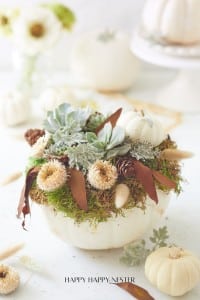
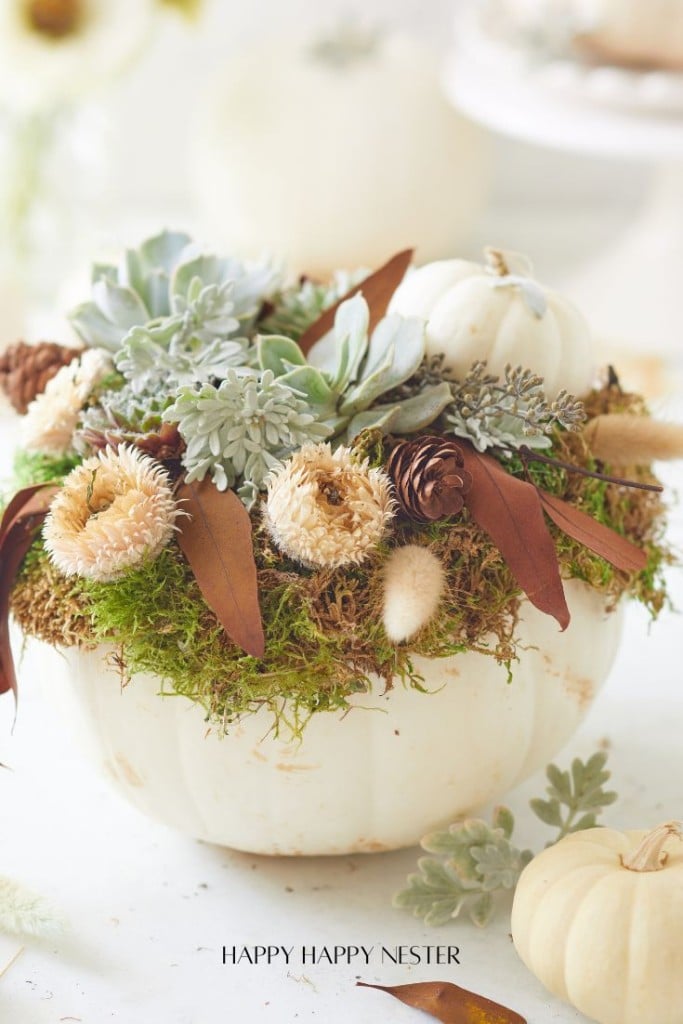
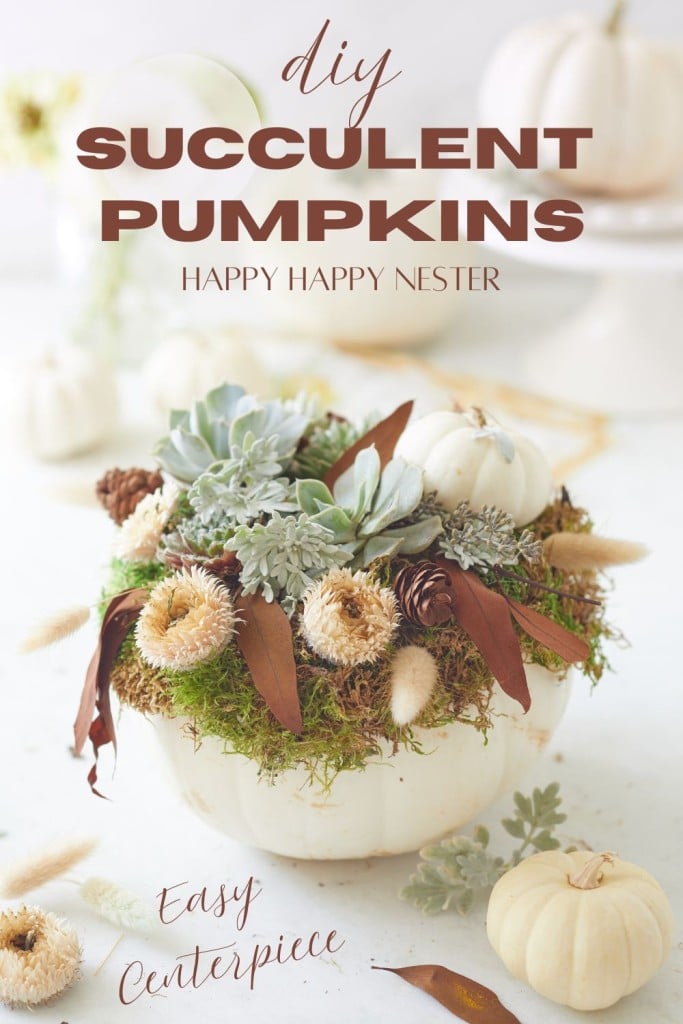
Looking for the perfect fall craft to add charm to your Thanksgiving table? This Succulent Pumpkins DIY is a simple, stylish way to bring a touch of autumn indoors! With just a pumpkin, a few succulents, moss, and a glue gun, you can create a beautiful pumpkin succulent centerpiece in no time. This easy succulent pumpkin DIY will elevate your seasonal decor and impress guests with its unique, natural look. Plus, this fall craft is beginner-friendly, making it an ideal choice for adding a bit of greenery and fall decor to any space!

Autumn floral arrangement in a white pumpkin vase, featuring succulents, dried flowers, pinecones, and moss, set on a white surface. In the background, blurred pumpkins and flowers are visible.

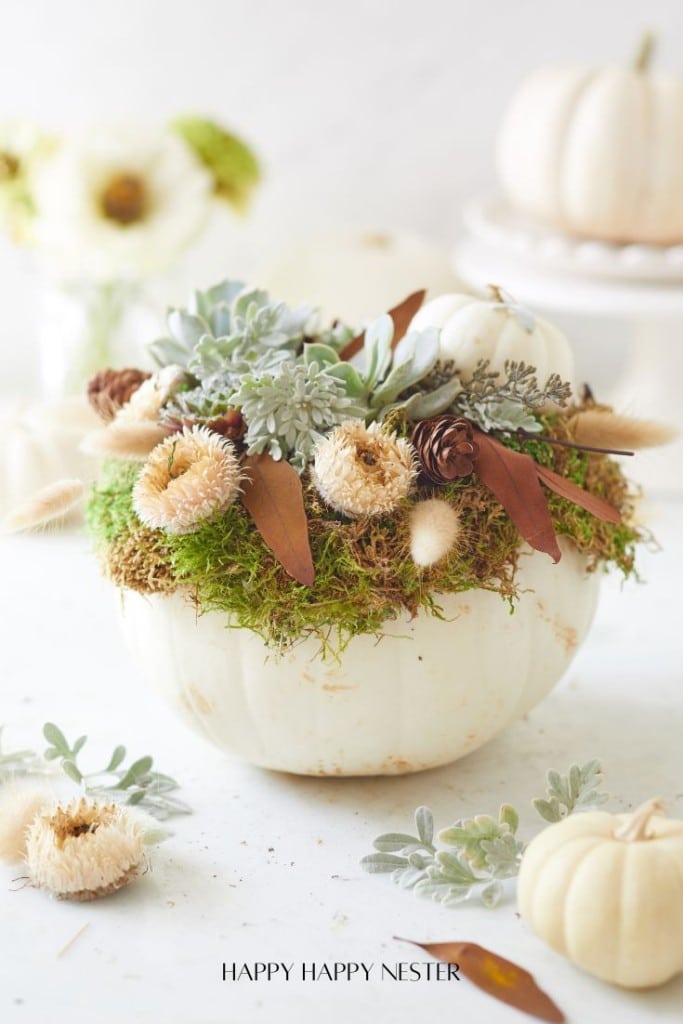
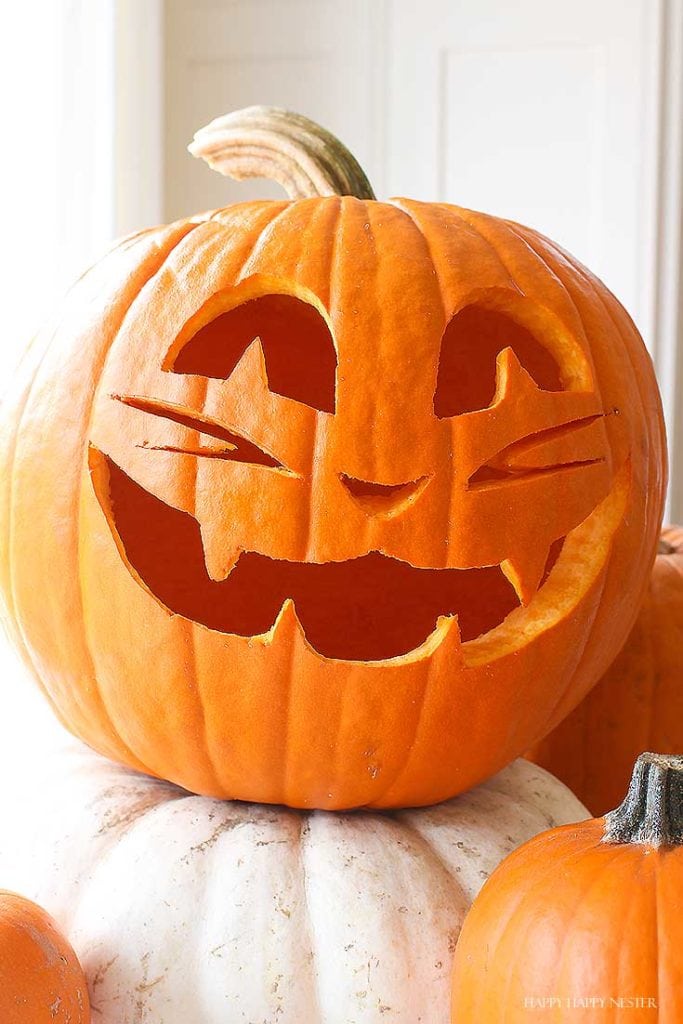
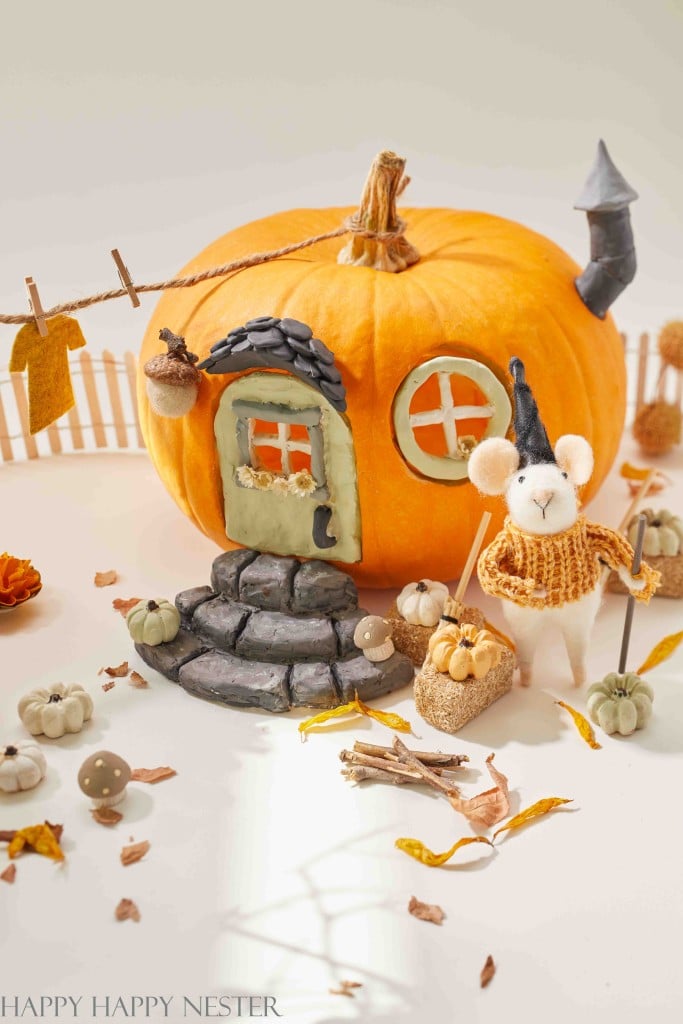
I’ve created quite a variety of decorated pumpkins over the years—I’ve carved them, turned them into vases, and even crafted pumpkin houses! Now, I’m on to my second succulent pumpkin, and I’m thrilled to share this unique twist on fall decor with you.

A centerpiece of a large white pumpkin decorated with green succulents, dried moss, and various dried plants is the epitome of fall decor ideas. The arrangement includes a small figurine at the top and is surrounded by lit candles and amber glasses on an elegantly set table.
cute pumpkin garden fairy house

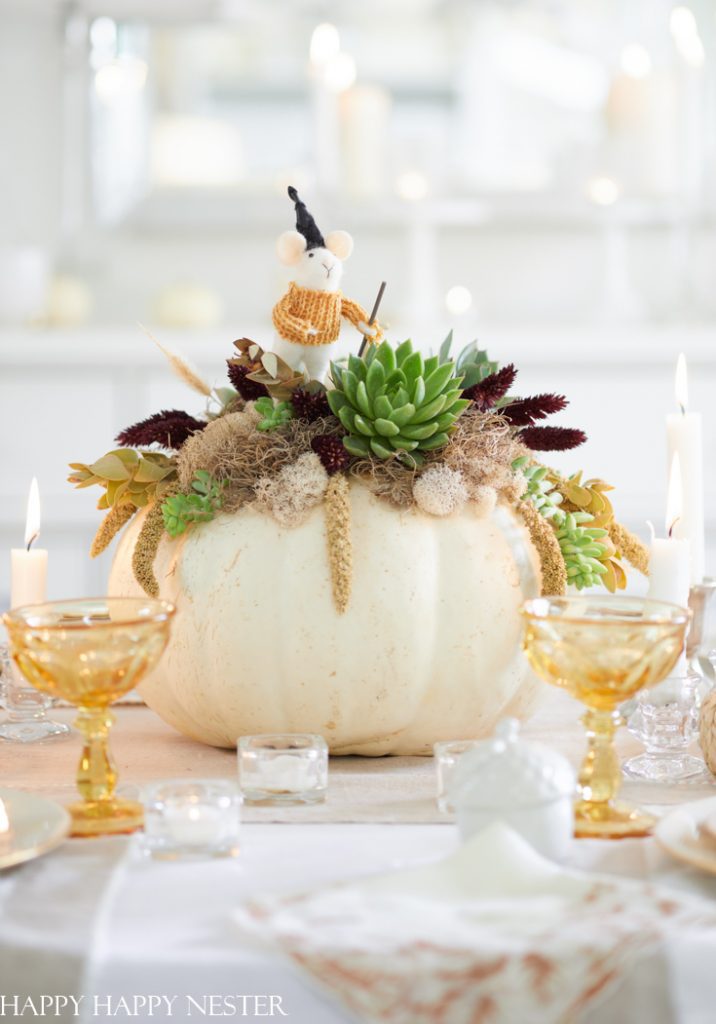
One of the things I love most about this fall project is its longevity. Using a fresh pumpkin allows this centerpiece to last well beyond autumn, bringing beauty to your home for weeks. And once the season’s over, the succulents can be repurposed! I simply plant them in my garden, giving them new life even after Thanksgiving.

The best part? You don’t need a green thumb to succeed with this DIY pumpkin succulent centerpiece. Succulents are incredibly hardy and can thrive even when stripped of their soil and attached to a pumpkin with glue!

Wait, does this craft use hot glue to secure the succulents?


Although attaching succulents to a live pumpkin with hot glue may seem surprising, the process doesn’t harm the plants! Succulents are incredibly resilient and can withstand brief exposure to the heat of the glue.

By applying a small dab of hot glue to the base of each succulent, you can press it directly into the moss on the pumpkin’s surface, and it will adhere beautifully. The glue cools quickly, creating a secure hold without damaging the succulent. This method works fabulously, keeping your arrangement in place for weeks without compromising the health of your plants.

One of the best parts about making a succulent pumpkin centerpiece is that there’s no need to cut into the pumpkin itself. Keeping the pumpkin intact significantly extends its lifespan—once cut, pumpkins tend to mold and decay quickly. Instead, we simply glue the moss and succulents onto the pumpkin’s surface, preserving its natural structure and preventing it from rotting. This way, your beautiful fall centerpiece can last weeks beyond Halloween and Thanksgiving!

Selecting Succulents

Size and Shape
Choose small to medium succulents that fit nicely on the pumpkin’s surface. Varying shapes—like rosettes, trailing, or spiky varieties—add visual interest and depth to your design.

Color Variety
Look for succulents in a range of colors to create a vibrant arrangement. Many succulents come in shades of green, blue, purple, and even pink, which add a beautiful contrast to the pumpkin’s color.

Sturdiness
Opt for hardy succulents with strong stems and leaves. These are easier to handle and attach to the pumpkin without damage, making them perfect for DIY projects.

Growth Rate
Consider choosing slow-growing succulents for your pumpkin. Fast-growing types can quickly outgrow the arrangement, while slower-growing varieties will stay beautifully in place longer.

Root Structure
Succulents with compact root systems are ideal, as they can lie flat on the pumpkin surface. Avoid succulents with large, sprawling roots.

Let’s look at this easy, beautiful autumn pumpkin craft, which will bring a natural look to your home!

How To Make Pumpkin Succulents

Supplies You’ll Need
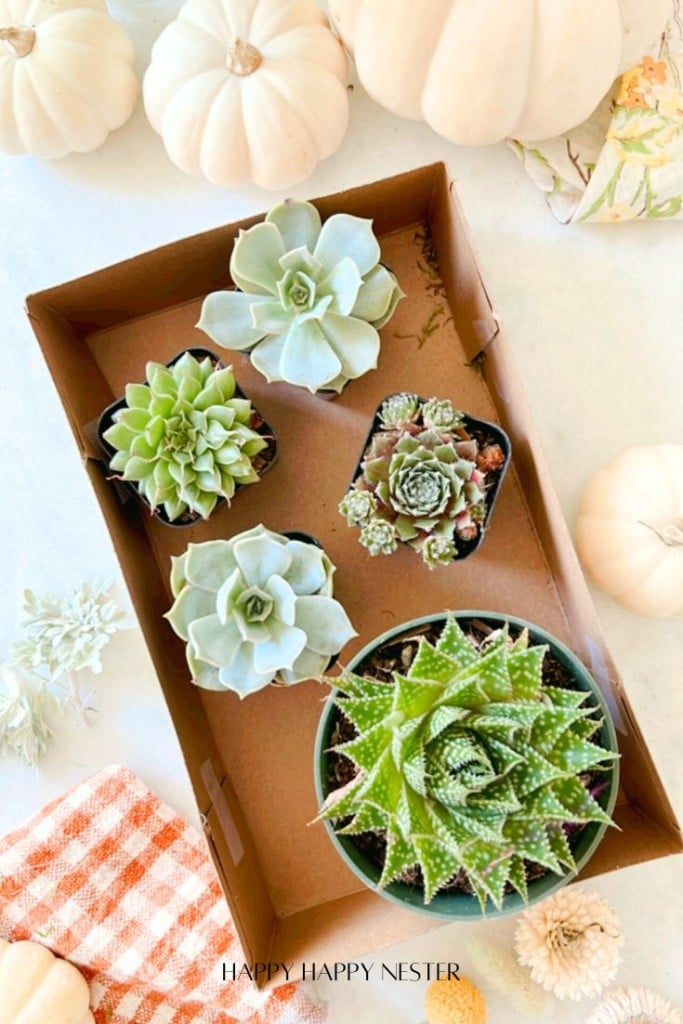
  • Pumpkin
  • 3-4 Succulents
  • Moss
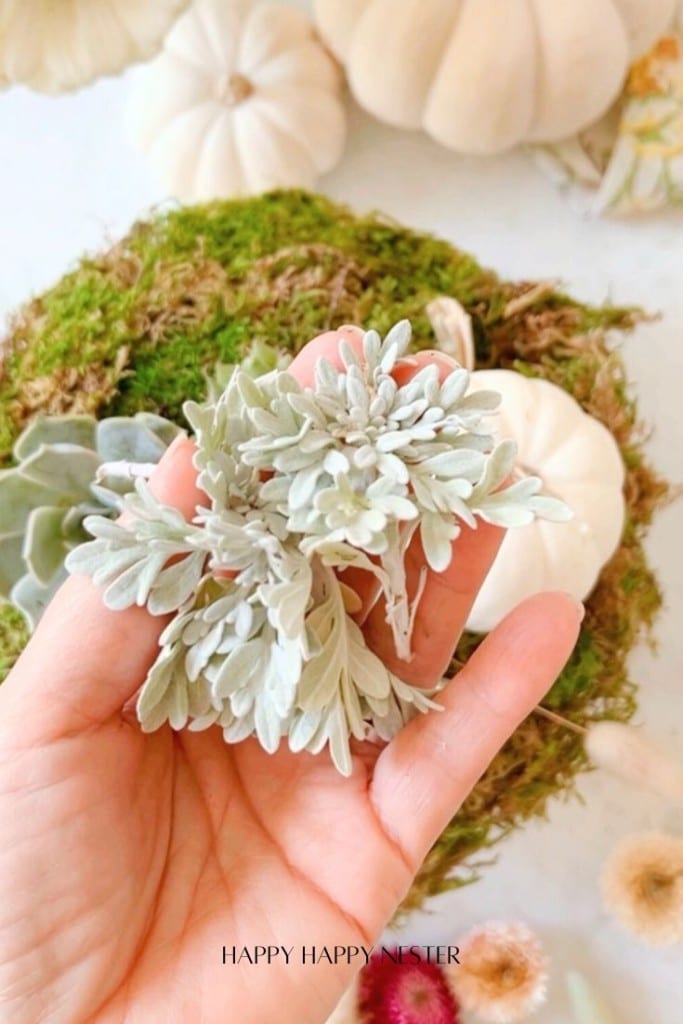
  • Dried Plants and Flowers – I used Dusty Miller from my yard, strawflowers, pinecones, brown died eucalyptus leaves, and bunny tails.
  • Hot Glue Gun
  • Mini White Pumpkin

A cardboard tray holds five potted succulents of varying shapes and sizes. Surrounding the tray are small white pumpkins and a checkered orange cloth on a white surface.

Step 1 – Choose Succulents
Select a variety of small succulents in different shapes, colors, and textures for visual interest. Aim for succulents with sturdy stems and leaves, which will hold up best on your pumpkin.

Step 2 – Clean Pumpkin
Wipe down your pumpkin with a damp cloth to remove dirt or residue. This ensures a smooth surface for the moss and succulents to adhere correctly.

A small succulent held in a hand with soil surrounding its roots. In the background, there are white pumpkins and a large flower, creating an autumnal scene.

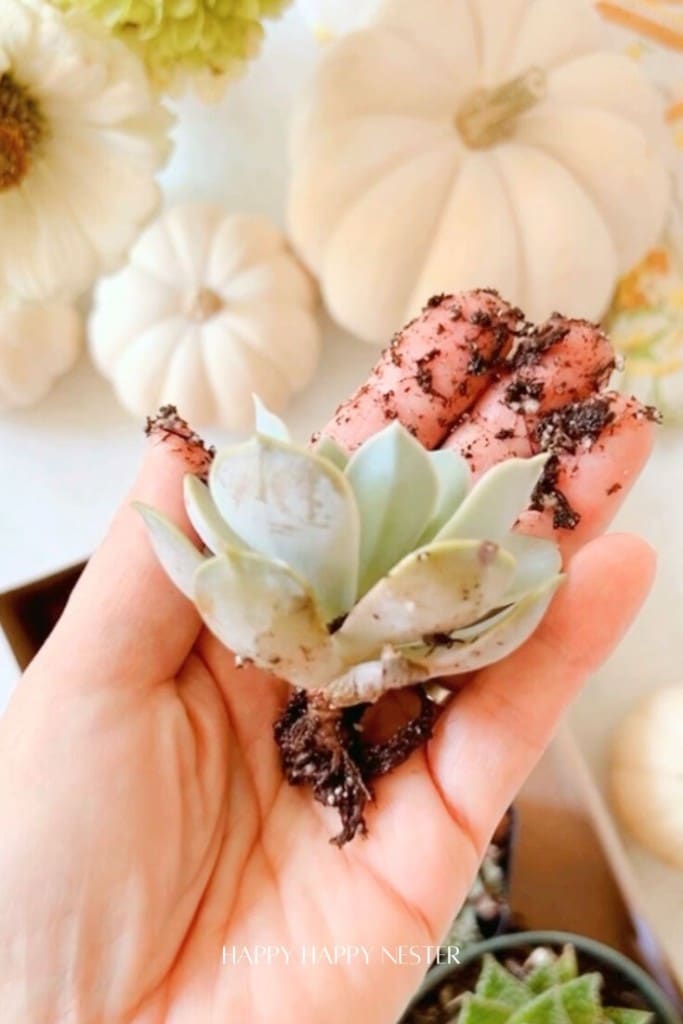
Step 3 – Remove Succulent from Pot
Carefully take each succulent out of its pot, gently removing as much soil as possible from the roots. You want the roots exposed, so they lie flat on the pumpkin surface.

A white pumpkin is artfully topped with lush green moss, creating a charming centerpiece for any succulent pumpkins DIY project. Below, a small succulent pot peeks out, while in the blurred background, a white daisy and decorative elements enhance the tranquil scene.

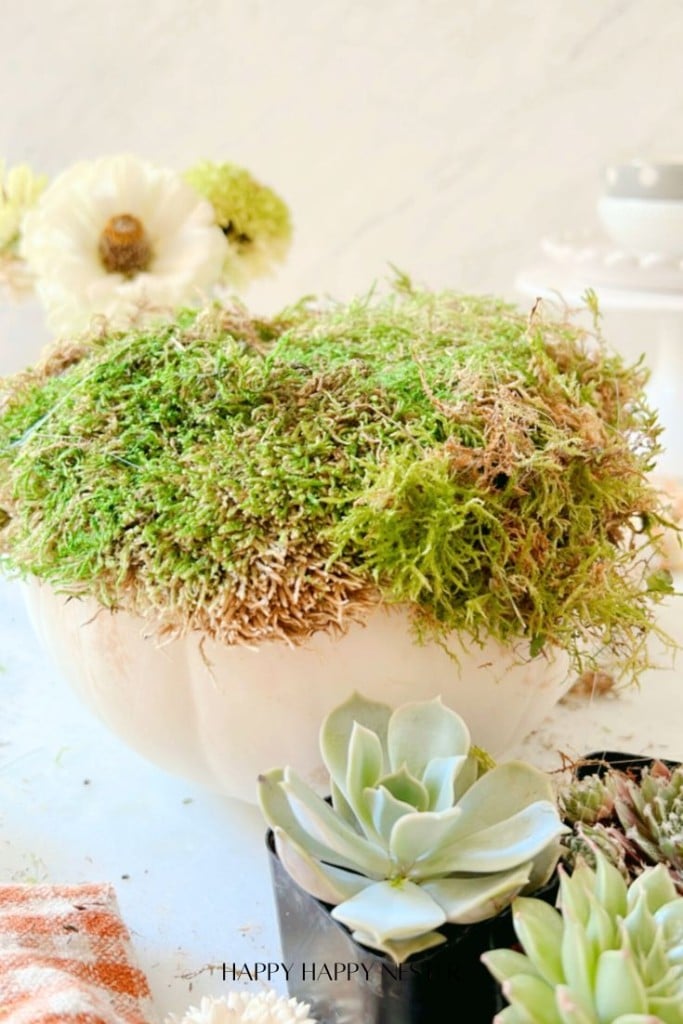
Step 4 – Hot Glue Moss to Pumpkin
Apply a layer of hot glue to the top of your pumpkin, then press the moss firmly onto the glue. This layer of moss acts as a base for your succulents and provides a natural, earthy look to the arrangement.

Top view of a decorative moss-covered pumpkin adorned with a variety of succulents. The setup is placed on a white surface with small white pumpkins and a patterned cloth nearby, creating an autumn-inspired display.
Top view of a moss-covered pumpkin adorned with succulents and a small white pumpkin. Background includes more white pumpkins and daisies on a light surface. An orange-checkered cloth is visible in the corner.

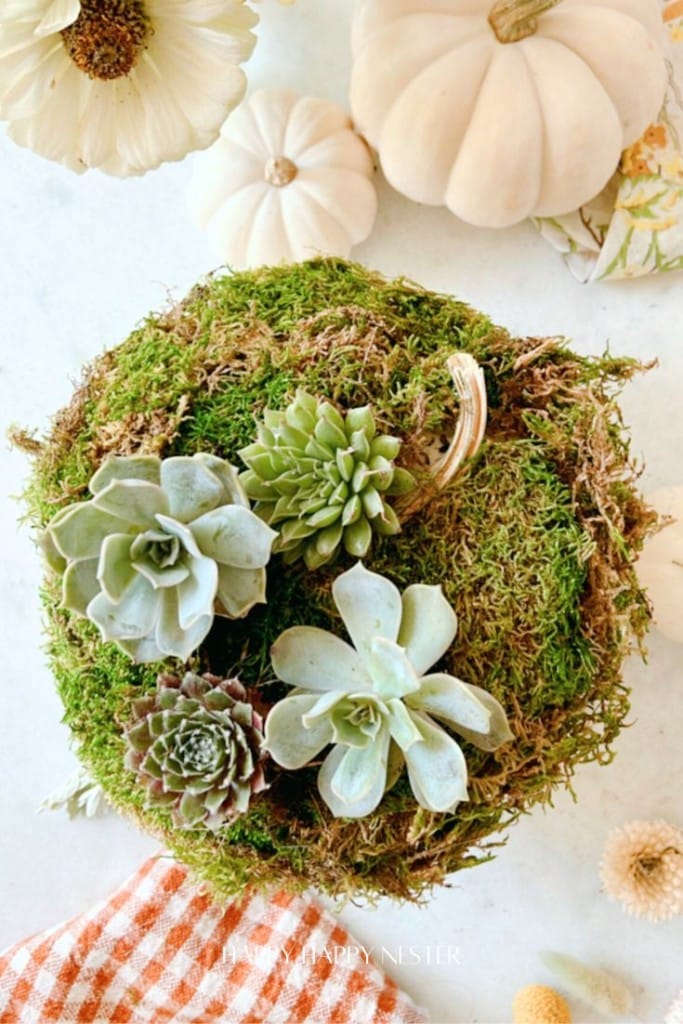
Step 5 – Attach Succulent to Pumpkin
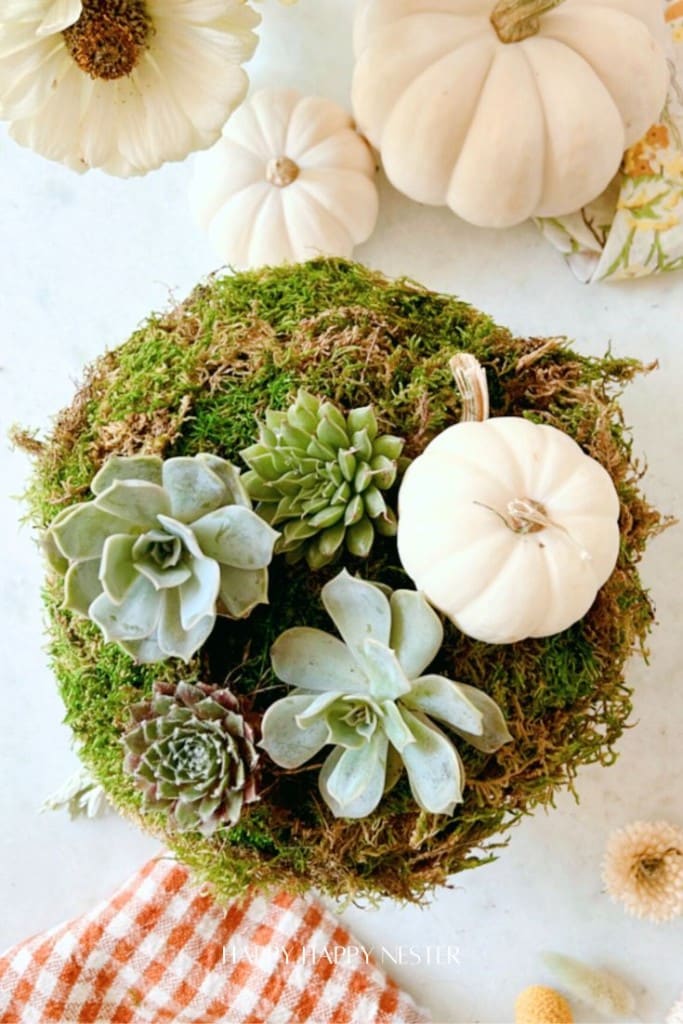
One by one, apply a dab of hot glue to the base of each succulent and press it into the moss. Arrange the succulents however you like, making sure to fill in any gaps for a lush, full appearance.

A hand holding a bunch of small, pale green leaves, with a backdrop of moss and white pumpkins, inspires a DIY vision of succulent arrangements and festive décor.
A top-down view of a table centerpiece featuring small white pumpkins and succulents on a round moss base. Surrounding the arrangement are additional white pumpkins and flowers, with a checkered cloth visible at the bottom.
A hand holding two brown leaves over a fall-themed floral arrangement with succulent touches, white pumpkins, pinecones, and various rustic foliage. This DIY masterpiece captures the essence of autumn perfectly.
A hand holds three soft, textured flowers above a decorative arrangement of white pumpkins and green foliage, all set on a white surface.
A hand holding three fluffy, tan pampas grass stems over a decorative arrangement of white pumpkins and succulents on a background of moss and flowers.
Hands carefully holding a small pinecone over a light autumn centerpiece, where DIY creativity shines with white succulent pumpkins, green succulents, and delicate flowers artfully arranged on a mossy base.

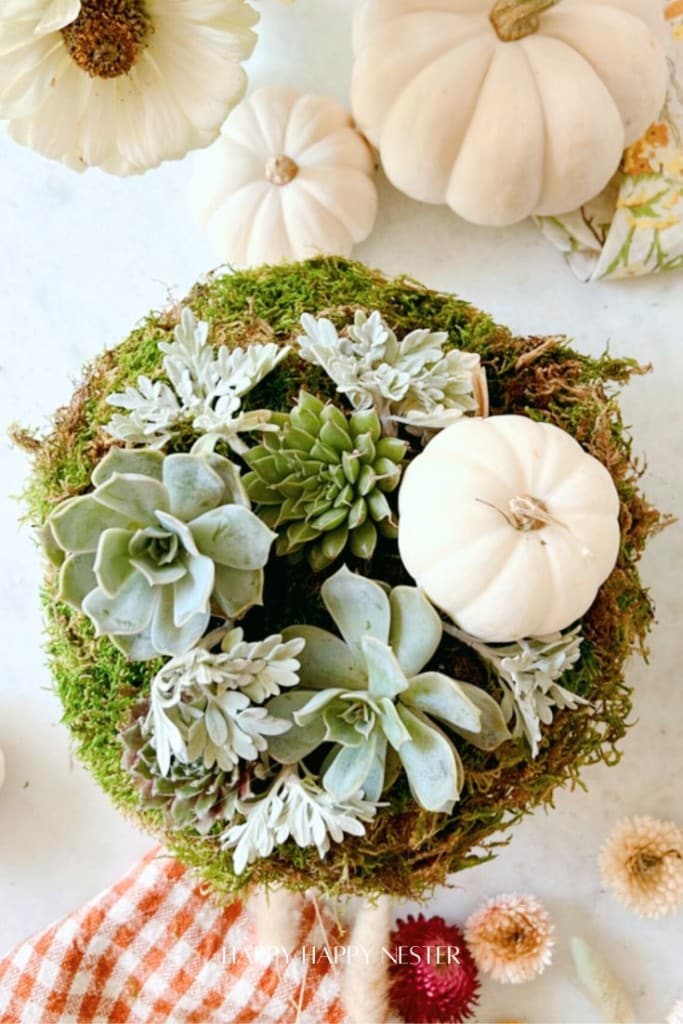
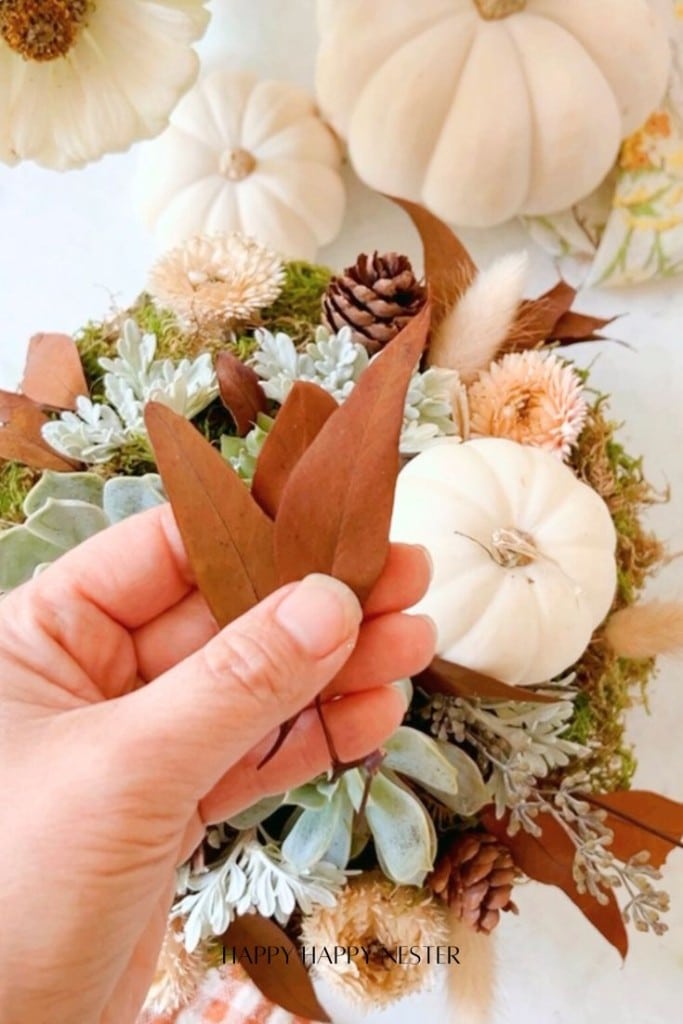
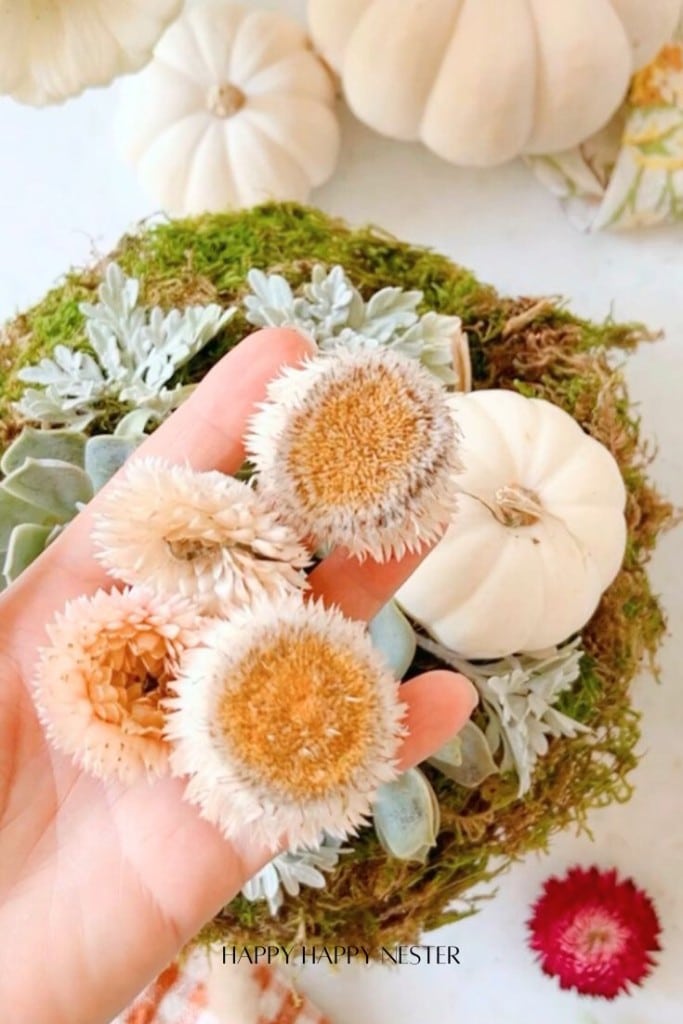
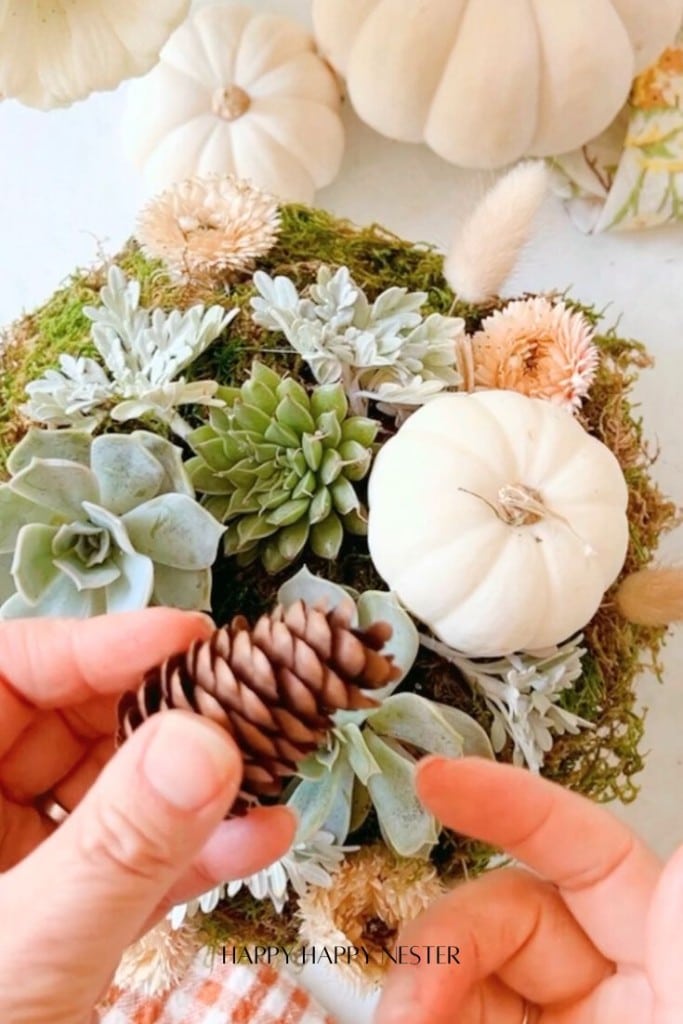
Step 6 – Add Final Touches
Once your succulents are in place, you can add small decorative elements like mini pinecones, acorns, or even a sprinkle of glitter for extra flair. These little details can make your succulent pumpkin centerpiece truly unique!

Transform a white pumpkin into a stunning DIY centerpiece, blending succulents, dried flowers, brown leaves, and small pine cones for an autumnal touch.

Step 7 – Display Your Succulent Pumpkin
Place your finished succulent pumpkin on your table, mantle, or anywhere that needs a festive touch! Enjoy this beautiful, long-lasting fall decor, and once the season is over, replant the succulents in your garden.

Frequently Asked Questions

How long will a succulent pumpkin last?

A succulent-topped pumpkin can last anywhere from 2 to 3 months if kept in a cool, dry location. Once the pumpkin softens, you can remove the succulents and replant them.

How to take care of pumpkin succulents?

To care for pumpkin succulents, mist the succulents lightly with water once a week and keep the pumpkin in a cool, dry place to prevent rotting. Avoid overwatering, as the succulents get moisture from the air and the pumpkin base itself.

Does the hot glue hurt the succulents?

No, hot glue doesn’t harm the succulents; it allows them to attach securely to the pumpkin without damaging the plants. The succulents will still root and grow, even after being glued.

Can you plant the succulents after the holidays?

Yes, once the pumpkin starts to decay, you can remove the succulents and replant them in soil, where they’ll continue to grow.

How do you keep pumpkins from rotting with succulents?

Place pumpkins in a cool, dry area, avoid direct sunlight and mist the succulents sparingly to keep them from rotting. Be careful not to gouge or nick the pumpkin’s skin, as any damage can cause it to rot more quickly.

A decorative arrangement showcases green succulents and small white pumpkins, perfect for a DIY fall centerpiece. Nestled among brown pine cones and dried flowers on a white ceramic dish, the background softly blurs with more pumpkins.

Thanks for joining me on this fun succulent pumpkins DIY! Creating these long-lasting fall decorations is an easy way to add seasonal charm to your home without worrying about constant upkeep.

Remember, keeping the pumpkin intact and lightly misting the succulents will help your succulent pumpkin arrangement last for months. This guide inspires you to craft your beautiful, low-maintenance, succulent pumpkin centerpiece this season.

Happy decorating!

wente tour signature

Photo Credits: MyPhotography.com

pin it button
A decorative centerpiece in a white pumpkin-shaped bowl, brimming with green succulents, dried flowers, pinecones, and moss. Text overlay reads, "Succulent Pumpkins DIY by Happy Happy Nester. Easy Centerpiece.
  • Author
  • Recent Posts
Janine Waite
Follow me
Janine Waite
I named my blog Happy Happy Nester because I love everything related to the home. I’ve always enjoyed decorating my surroundings. Get cozy and stay for a bit, thanks for visiting!
Janine Waite
Follow me
Latest posts by Janine Waite (see all)
  • How to Make a Tender Juicy Steak - May 8, 2025
  • My Favorite Flower Crafts - May 3, 2025
  • Easy Corkboard Placemats DIY - May 2, 2025

You May Also Like

  • pumpkin arrangement for thanksgiving
    DIY Pumpkin Succulent Planter
  • thanksgiving dinner menu template
    Fall Flower Centerpieces
  • a pumpkin vase holding a fall flower arrangement as a centerpiece on a white table
    Pumpkin Vase for Flowers
  • Two white pumpkins that have the words boo and wicked on them
    Letters on a Pumpkin (Easy No Carve)

Sharing This!

  • Facebook
  • Twitter
  • Email

Reader Interactions

Leave a Reply Cancel reply

Your email address will not be published. Required fields are marked *

Recipe Rating


Sidebar

Janine the Nester

Hello from the Nester

We love everything related to home, so get cozy and stay for a bit. Thanks for visiting our blog. Learn More...

Reader Favorites

The Best Crunchy Crispy Chocolate Chip Cookie

This Italian Cream Cake has a pumpkin cream cheese frosting that makes this a winning combination. This dessert is perfect for the holidays.

Italian Cream Cake with a Twist of Pumpkin

French Apple Custard Tart with Puff Pastry

DIY Paper Flowers Tutorial (Tissue Paper)

Upcycling Tin Cans with Scrapbooking Paper

How to Make a Paper Flower Wreath DIY

Popular Categories

  • Cakes
  • Cookies
  • Dinners
  • Wreaths
  • Organizing

Join Our Newsletter

Join our mailing list to receive the latest news and updates from our team.

You have Successfully Subscribed!

AFFILIATE DISCLOSURE:
I am grateful to be of service and bring you content free of charge. In order to do this, please note that when you click links and purchase items, in most (not all) cases, I will receive a referral commission. Your support in purchasing through these links enables me to keep my design and customization prices ridiculously low and empower more people worldwide to blog with less worry and less hassle.
Happy Happy Nester is a participant in the Amazon Services LLC Associates Program, an affiliate advertising program designed to provide a means for sites to earn advertising fees by advertising and linking to amazon.com.
Thank you! :)
-Happy Happy Nester

Our Guide

Join Our Newsletter

Join our mailing list to receive the latest news and updates from our team.

You have Successfully Subscribed!

  • Facebook
  • Instagram
  • Pinterest
  • Twitter

Recipes

Appetizers
Breakfast/Brunch
Desserts
Dinners
Drinks

Crafts & Decor

DIY
Gardening
Holiday
Wreaths

About

About The Nester
Contact
Privacy Policy

Copyright © 2025 · Happy Happy Nester by Janine Waite · Privacy Policy

↑ BACK TO TOP