I’ve always wanted to make a Christmas wreath with orange slices, and I finally did it. This DIY will show how simple it is to dry the oranges in the oven. Make this beautiful dried orange slices wreath to hang on your front door or wall for the holidays. A gorgeous warm citrus wreath brings the perfect touch of holiday cheer.

Drying the orange slices can be done in a dehydrator or the oven. For this project, I found I could dry many more orange slices in the oven.
Assuming you’ve landed on this page, you’re likely someone who enjoys crafting.
And if wreath-making is your thing, you might find my collection of wreath tutorials interesting. Okay, it’s not exactly a library, but I’ve definitely got a good number of them to share!
Also, this wreath tutorial is part of a blog hop; you can view my friend’s Holiday Wreaths below.
I crafted this at my friend Leslie’s beach house last weekend. We had such a great time putting together our holiday decorations. The photos were snapped right there at her place, which made for the ideal setting!

CHRISTMAS WREATH WITH ORANGE SLICES
As I mentioned earlier, drying orange slices always seemed daunting to me. But once I decided to try it, I was surprised by how simple the process was.
Let me walk you through my method so you can enjoy creating a delightful wreath with dried orange slices.


HOW TO DRY ORANGE SLICES
First, I had to decide if I should use my dehydrator or the oven to dry my oranges.
OVEN OR DEHYDRATOR:
Well, for this project, I needed a ton of orange slices, and my small dehydrator wouldn’t make a dent in the amount I needed. So, I decided to dry them in the oven.
TIME COMMITMENT:
The hardest part of this wreath is the time you need to spend tending your orange slices in the oven. It took about 5 hours, and I turned them every 30 minutes. So, you can plan to dry your oranges on a day you’ll be working in or near your kitchen.
My dear friend Leslie from My 100 Year Old Home forgot about her oranges and ended up with some dark slices. I actually love her wreath with the various colored orange slices. So, if you mess up, go with it and see how it turns out!
SUPPLIES YOU’LL NEED:
A Bag of Oranges (40 Orange Slices)
Ribbon

INSTRUCTIONS FOR MAKING THE ORANGE SLICE WREATH


Step 1 – Dry Oranges in Oven
- Preheat your oven to 200 degrees, and if you have a convect oven, make sure to choose it.
- Use a sharp knife and slice your oranges about 1/8 to 1/4 inches. You want them as thin as you can cut them and all the same thickness.
- Line a baking tray with parchment paper.
- Place orange slices on the lined baking sheet, trying not to overlap them.
- Place trays in the oven and bake slowly for 3 to 4 hours. Make sure to turn them every 30 minutes.
- At the end of 3 hours, check often since they will burn quickly at this point in the baking.


Step 2 – Wrap Wreath Form
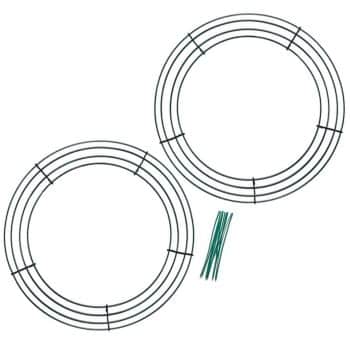
- Wrap the wreath form in ribbon, overlapping the ribbon and gluing the ribbon down to the frame and ribbon as you go.


Step 3 – Attach Oranges to Wreath
- Once the wreath is covered, you can begin attaching your orange slices. I place two orange slices side by side, straddling the wreath as pictured.
- If you prefer to cover the whole wreath in the first layer, place the second layer next. I placed two to four down and then put the following orange slices on top and in the middle.
- Keep working your way around the wreath until you get where you started.
Step 4 – Attach Ribbon
- Using your favorite ribbon, wrap it around the back of the wreath and tie a bow on the end.
FREQUENTLY ASKED QUESTIONS
Orange slices are done drying when they have a firm, leathery texture and are not sticky. The edges should curl up slightly, and they should be a consistent deep orange color without any moisture.
Drying orange slices typically takes between 4 to 6 hours in an oven set at a low temperature, around 200 degrees Fahrenheit, or until they are completely dry and slightly hardened.
To preserve the color, dry the slices at a low temperature and consider adding a sprinkle of sugar or soaking them in lemon juice beforehand to help retain their vibrant hue.
Yes, you can air dry orange slices by placing them in a warm, dry area out of direct sunlight, which can take several days up to a couple of weeks.
If properly dried and stored, orange slices should not attract bugs; ensure they are completely dehydrated before storage and keep them in an airtight container.
Prevent mold by ensuring the orange slices are thoroughly dried with no moisture left and stored in a cool, dry place in an airtight container.
Absolutely, dried orange slices are versatile and can be used for decorations throughout the year, not just during the holidays, adding a natural and rustic touch to your décor.
Yes, if you’re cramped for time, you can buy the already dried orange slices. I linked to them above under the section titled, Shop this Post.

Hey, thanks for stopping by to check out my Christmas wreath with orange slices! There’s no need to stress over drying oranges – it’s easier than you think, and before you know it, you’ll have made this gorgeous holiday wreath yourself.
Happy Crafting,

Photo Credits: MyPhotography.com
BLOGGER’S BEST DIY HOLIDAY WREATHS

Easy Christmas Apple Wreath | Twelve on Main
This year I have become obsessed with using dried apples in my Christmas decor, so I decided to create a simple Christmas wreath using dried apples.

Poinsettia Christmas Wreath DIY | My 100 Year Old Home
This year, I decided to bring a handmade touch to our holiday decorations by creating a crepe paper poinsettia Christmas wreath.


- My Favorite Cleaning Items from Amazon - January 28, 2026
- Machine Washable Rugs - January 21, 2026
- Pink Crafts for Adults - January 17, 2026


Kim
Do you think a orange and apple wreath together would work? Can the apples be glued on with the oranges the same way? Tell Leslie I made a centerpiece out of mini pumpkins, oranges, and apples and burnt mine too. All of them. I still used them, they look fine.