• Skip to main content
  • Skip to header right navigation
  • Skip to site footer
  • About
  • Contact
  • Boutique of the Week
  • Facebook
  • Instagram
  • Pinterest
  • Twitter

Happy Happy Nester

Weekly Inspiration for Your Nest

  • Recipes
    • Appetizers
    • Breakfast/Brunch
    • Desserts
    • Dinners
    • Drinks
  • Crafts
  • Decor
  • Shop
    • Fall Decor
    • Kitchen
    • Pillows
    • Holiday Decor
  • Saturday Chitchat
  • Recipes
    • Appetizers
    • Breakfast/Brunch
    • Desserts
    • Dinners
    • Drinks
    • Snacks
  • Crafts
  • Decor
  • Shop
    • Fall Decor
    • Kitchen Favorites
    • Pillows
    • Holiday Decor
  • Saturday Chitchat
  • Boutique of the Week
  • About
  • Contact
  • Facebook
  • Instagram
  • Pinterest
  • Twitter

See What’s Trending…

Cakes

Cookies

Dinners

Wreaths

Drinks

Home › Crafts › How to Stencil a Cute Doormat

How to Stencil a Cute Doormat

Crafts DIY
By Janine Waite · Published on Sep 5, 2019
Affiliate Disclosure: This Post May Contain Affiliate Links.

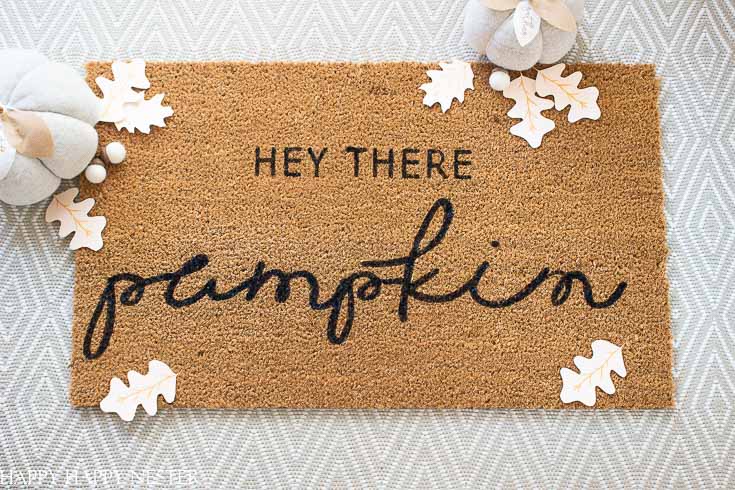
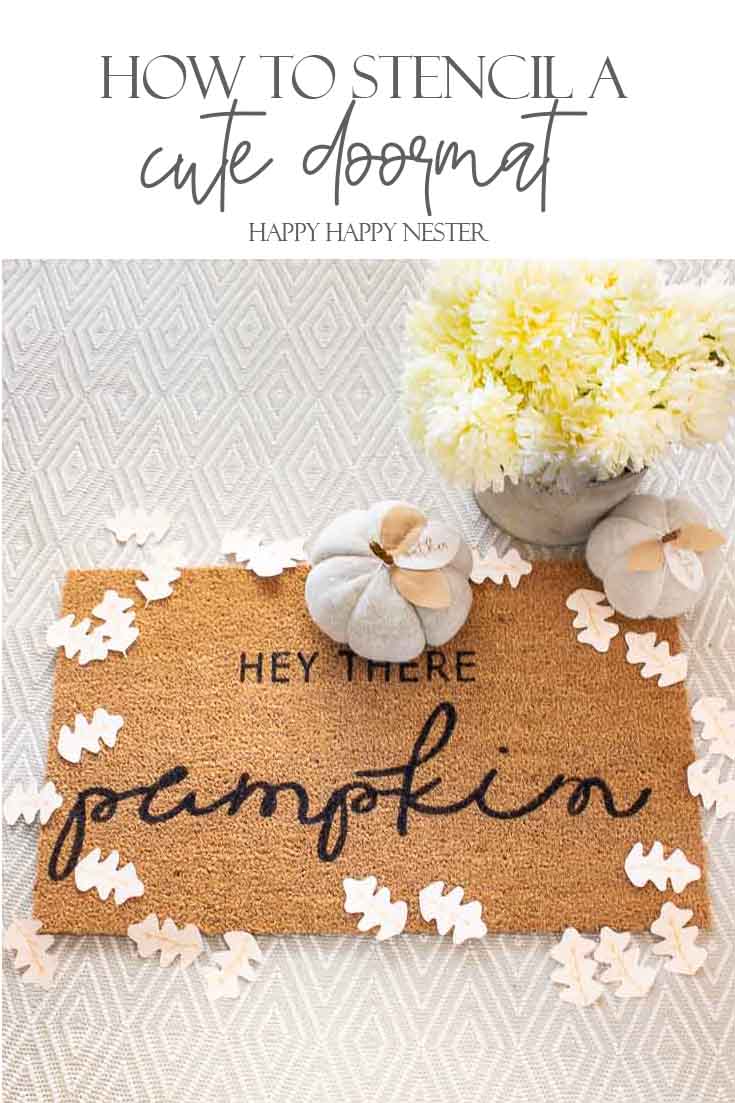
I’ve always wondered How to Stencil a Cute Doormat. So, finally, I had the opportunity to create one and I was super surprised how easy it was to make. 

*The following post contains affiliate links.

Have you ever wondered How to Stencil a Cute Doormat? I was surprised by how easy they are to stencil. Once you have your stencil, it takes minutes to paint. #stencils #doormat #craftproject #frontdoor

But first off, I want to mention that my friends and I are hosting a Fall Doormat Blog Hop, so make sure to view all the other cool designs at the bottom of this post.

Have you ever scrolled through Pinterest and spied all the adorable homemade fall mats? Well, I always wondered how they created them. I love that you can personalize a blank mat to whatever cute saying you want for your doormat. Well, I finally figured out how these crafty folks created them and I’m so happy to share it with you today.

I’m confident you’re going to love this project, especially since I’m including this cute doormat saying for free. 

Have you ever wondered How to Stencil a Cute Doormat? I was surprised by how easy they are to stencil. Once you have the stencil, it takes minutes to paint. And this post includes a free stencil printable. #stencil #falldoormat #cutedoormat #craft #craftproject

I’m pretty delighted with how my fall doormat came out, and of course, I had to do my happy dance.

But, one of the things that you must know in regards to how to stencil a cute doormat is that you need to own a Silhouette or Cricut machine. I went over to my friend Ashley’s mom’s house and we created our stencils on her machine. So, if you are familiar with these machines then this project will be a piece of cake for you to handle. 

For this Fall doormat project, you need a blank mat, paint, and a free printable stencil design. Once you have your stencil, it only takes a few minutes to complete your cute fall doormat! #stencils #doormat #doormattutorial

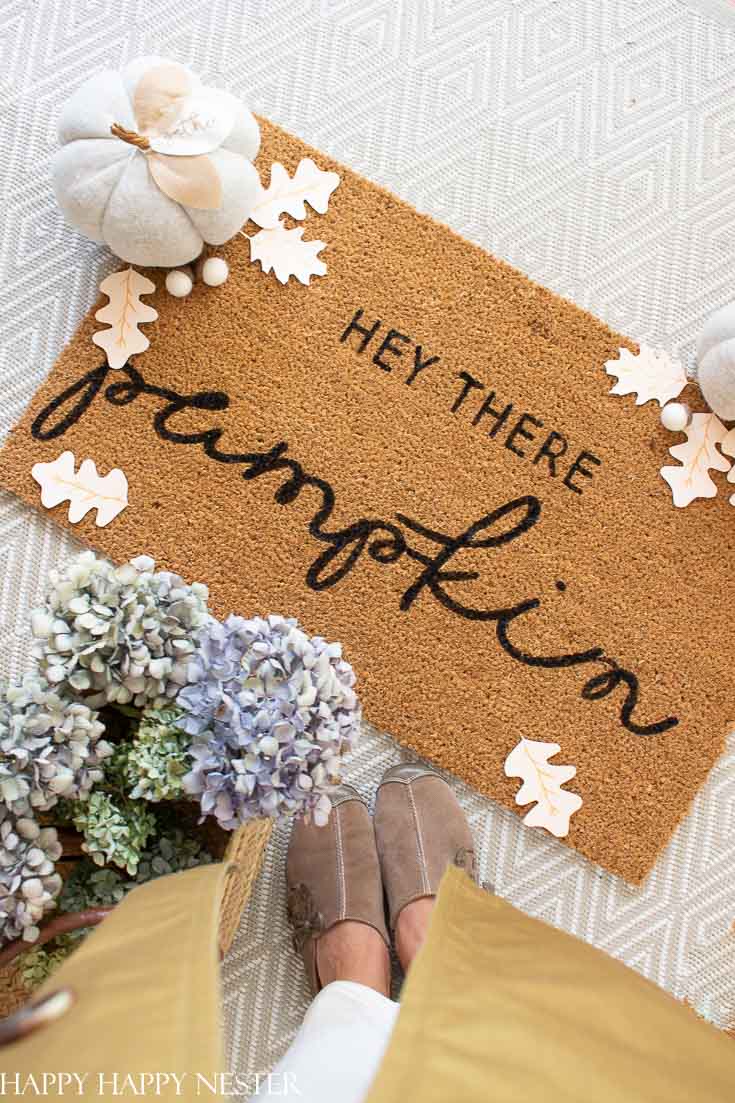
I’ve stenciled items before and had a few annoying things happen. For instance, paint got under the stencil and I didn’t get a clean line so of course, I was a little concerned that I would have a hot mess. But when painting this cute doormat, I didn’t encounter that problem at all. I think that since the coir mat was textured the paint stayed exactly where I brushed it on.

Ok, let’s start our project.

How to Stencil a Cute Doormat

Supplies

Silhouette Machine 

Plain doormat

Stencil paper

Silhouette Hey there, Pumpkin Stencil

Waterproof craft black paint

Stencil Paintbrush


Instructions on how to stencil 

1. Download the free Silhouette stencil and place it on your machine. 

2. Print out the stencil. It helps to make sure the stencil paper is blue so you can see it on the mat. The clear doesn’t show up on the mat and that makes it super hard view. 

3. It is a bit tricky to remove the backing of the stencil. I placed mine on a table edge and slowly removed the backing pulling in a downward motion. 

3. Press the stencil down on the mat and if you want to secure it more, place sewing pins through the stencil and onto the mat. 

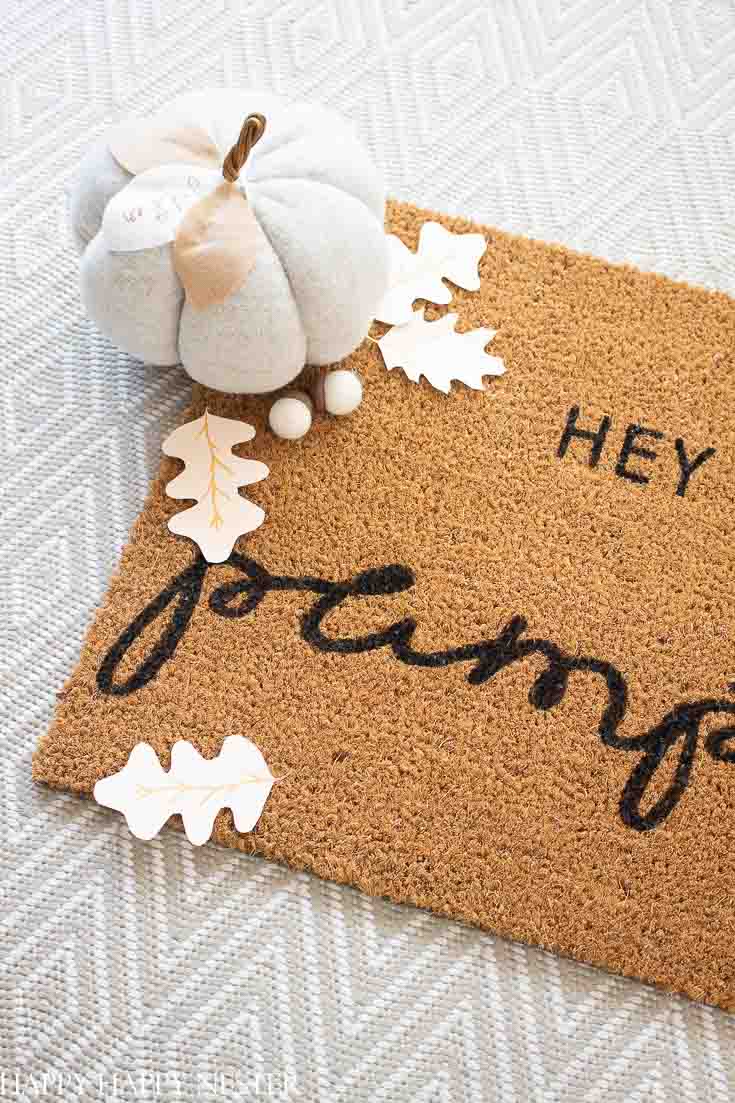
4. Place the black paint in a dish and dab your brush inside the stenciled letters. You may need to brush two layers of paint to get a dark image. 

5. Once your words are all filled in, you can remove your stencil and let it air dry. You might want to spray a thin layer of spray paint sealer but, the black waterproof acrylic paint should do the trick. 

6. This completes how to stencil a cute doormat and you are ready to enjoy your fun mat.

Have you ever wondered How to Stencil a Cute Doormat? I was surprised by how easy they are to stencil. Once you have your stencil, it takes minutes to paint. And this post includes a free stencil printable. #stencil #falldoormat #cutedoormat #craft #craftproject


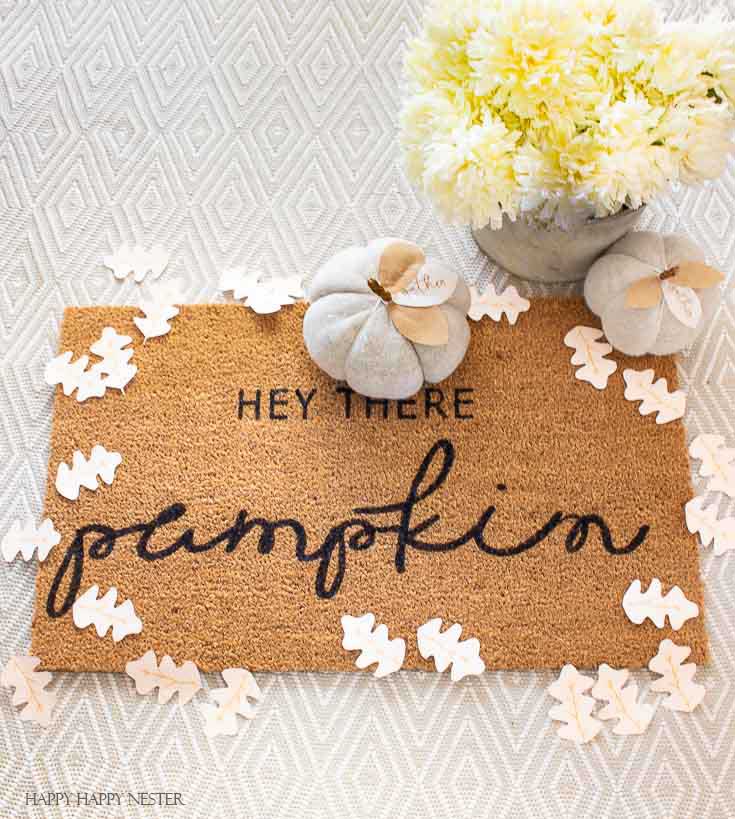
Don’t you just love the seasons and all the fun things that we can make for our homes?

So glad you joined us today for my post on how to stencil a cute doormat. I always love a pretty craft that I can actually use around my home. And now that I have my new fall doormat, I’m super excited to decorate our front porch. Last year I had a blast getting our inexpensive Halloween front porch decorated, so I thought I should mix it up this year and go with the autumn theme. 

Happy Crafting my friends!

Cheers,

signature


Look At These Cute Doormat Ideas By My Friends!

DIY Doormat | Modern Glam

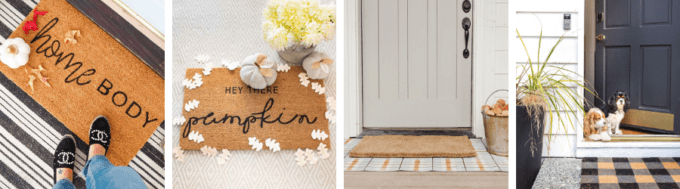
Cute Doormat | Happy Happy Nester

Drop Cloth Doormat | Twelve on Main

Fall Doormat | Zevy Joy

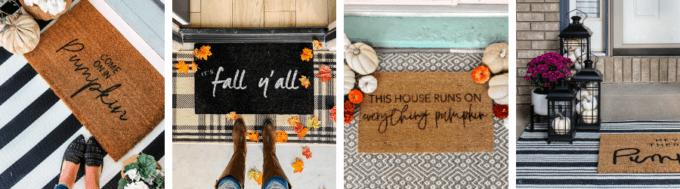
Easy Fall Stenciled Doormat | Tatertots & Jello

DIY Fall Doormat | Your Marketing BFF

DIY Fall Stenciled Doormat | Lolly Jane

Layered Fall Doormats | Inspiration for Moms


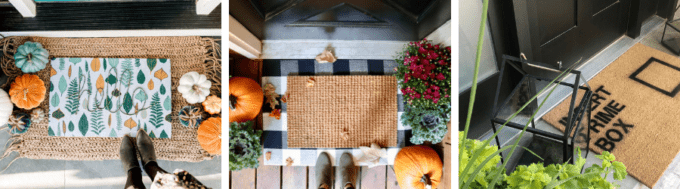
DIY Fall Doormat from a Shower Curtain | The DIY Mommy

How To Layer Doormats | My Sweet Savannah

Welcome Mat Ideas | Pink Peppermint Designs


Have you ever wondered How to Stencil a Cute Doormat? I was surprised by how easy they are to stencil. Once you have your stencil, it takes minutes to paint. And this post includes a free stencil printable. #stencil #falldoormat #cutedoormat #craft #craftproject

  • Author
  • Recent Posts
Janine Waite
Follow me
Janine Waite
I named my blog Happy Happy Nester because I love everything related to the home. I’ve always enjoyed decorating my surroundings. Get cozy and stay for a bit, thanks for visiting!
Janine Waite
Follow me
Latest posts by Janine Waite (see all)
  • Large Chocolate Easter Bunnies - March 22, 2023
  • March Crafts - March 18, 2023
  • How to Make Mussels in White Wine Sauce - March 17, 2023

You May Also Like

  • Outdoor Patio Ideas for Spring
    Outdoor Patio Ideas for Spring
  • How to Create Easy Chalkboard Art
    How to Create Easy Chalkboard Art
  • Easy Tin Can Project that Upcycles
    Easy Tin Can Project that Upcycles
  • Thank You Tag DIY
    Thank You Tag DIY

Sharing This!

  • Facebook
  • Twitter
  • Email

Reader Interactions

Comments

  1. Jennifer Hadfield

    September 06, 2019 at 2:44 am

    Super cute Janine!!

    I love the way you style it too! I saved it to my Fall board.

    xoxo

    Reply

Leave a Reply Cancel reply

Your email address will not be published. Required fields are marked *

Recipe Rating


Sidebar

Janine the Nester

Hello from the Nester

We love everything related to home, so get cozy and stay for a bit. Thanks for visiting our blog. Learn More...

Reader Favorites

This Italian Cream Cake has a pumpkin cream cheese frosting that makes this a winning combination. This dessert is perfect for the holidays.

Italian Cream Cake with a Twist of Pumpkin

The Best Crunchy Crispy Chocolate Chip Cookie

French Apple Custard Tart with Puff Pastry

DIY Paper Flowers Tutorial (Tissue Paper)

Upcycling Tin Cans with Scrapbooking Paper

How to Make a Paper Flower Wreath DIY

Popular Categories

  • Cakes
  • Cookies
  • Dinners
  • Wreaths
  • Organizing

Join Our Newsletter

Join our mailing list to receive the latest news and updates from our team.

You have Successfully Subscribed!

AFFILIATE DISCLOSURE:
I am grateful to be of service and bring you content free of charge. In order to do this, please note that when you click links and purchase items, in most (not all) cases, I will receive a referral commission. Your support in purchasing through these links enables me to keep my design and customization prices ridiculously low and empower more people worldwide to blog with less worry and less hassle.
Happy Happy Nester is a participant in the Amazon Services LLC Associates Program, an affiliate advertising program designed to provide a means for sites to earn advertising fees by advertising and linking to amazon.com.
Thank you! :)
-Happy Happy Nester

Our Guide

Join Our Newsletter

Join our mailing list to receive the latest news and updates from our team.

You have Successfully Subscribed!

  • Facebook
  • Instagram
  • Pinterest
  • Twitter

Recipes

Appetizers
Breakfast/Brunch
Desserts
Dinners
Drinks

Crafts & Decor

DIY
Gardening
Holiday
Wreaths

About

About The Nester
Contact
Privacy Policy

Copyright © 2023 · Happy Happy Nester by Janine Waite · Privacy Policy

↑ BACK TO TOP