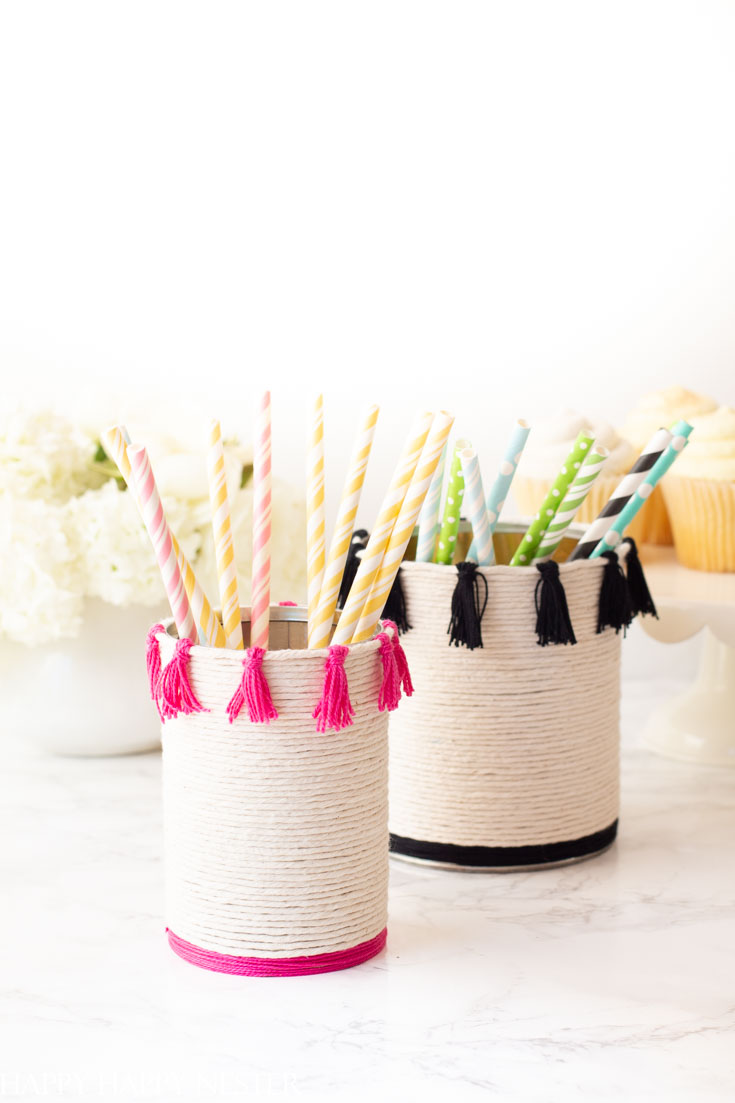
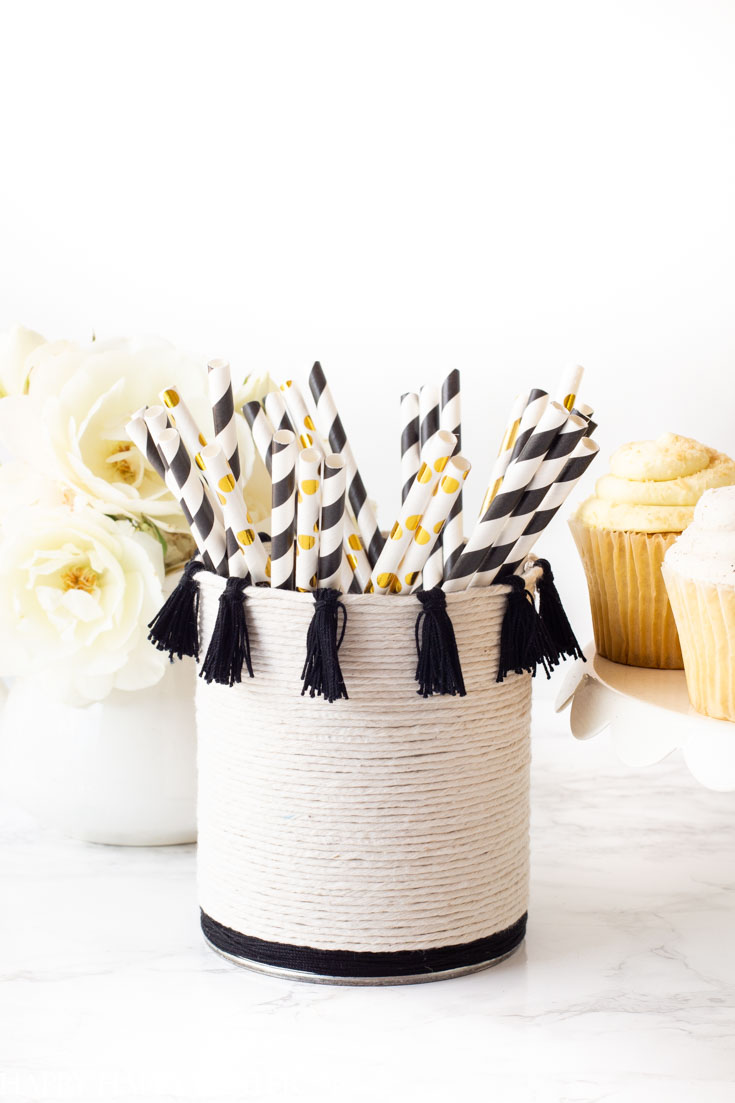
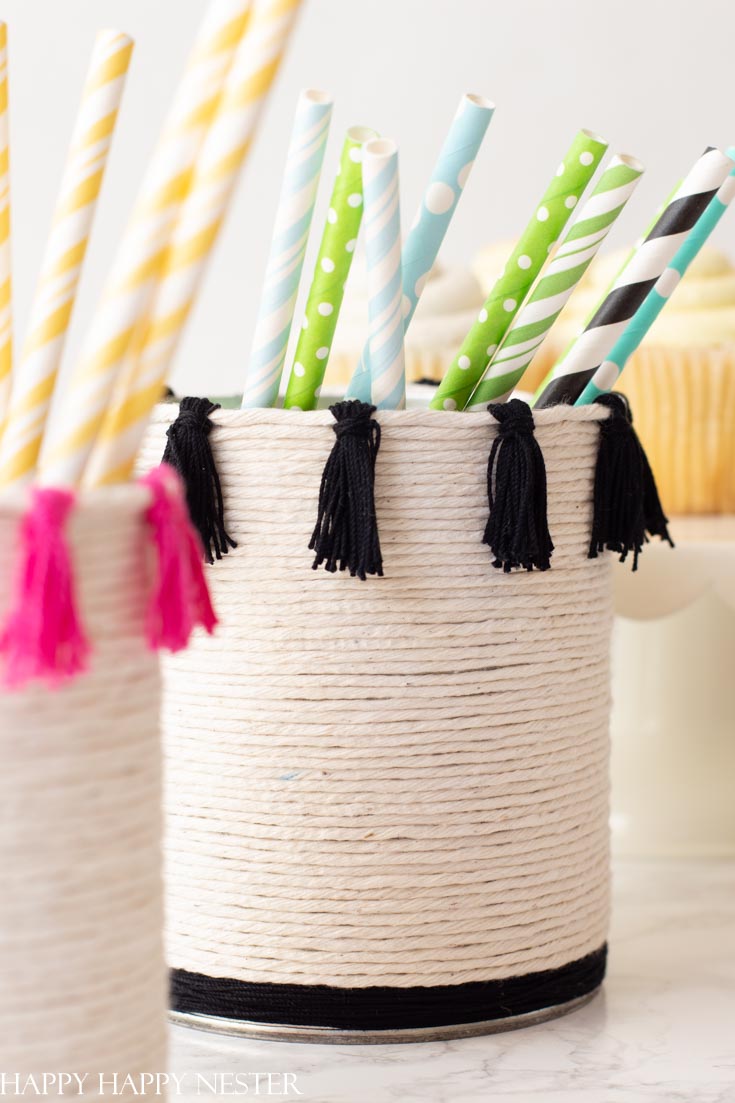
I love the challenge of decorating tin cans and transforming its drab exterior into a pretty decorative item. Also, the cool thing about this Easy Tin Can Project is that it is so simple that you can make it with your children. Create a playful one with lots of colors or use a single color for a more sophisticated container. The sky is the limit for this fun craft project.
But before we start this project, I need to mention that I am joined by 13 of my uber crafty blogging friends. They, too, have created some pretty cool upcycling DIY projects that you will want to check out. This great list of repurposing projects is located at the end of this post.
Ok, now back to upcycling. I have another burlap tin can craft that is so popular that it has literally circled the world several times. Yes, it is on a list of things to make with tin cans, and it has published on so many websites that I lost track. I think since everyone has tin cans, it is one of those basic DIYs that everyone can tackle. So, why not make something cute out of them?
*The following post contains affiliate links
Let’s make easy upcycling projects!
Since we are all in Shelter in Place, I’m trying to come up with easy projects, and readily found items. So, that is why I’m sharing how to make this easy tin can project. And since I’m always upcycling some household item my family will vouch that they are afraid to throw anything out around the house!
Ok, let’s get this project started!
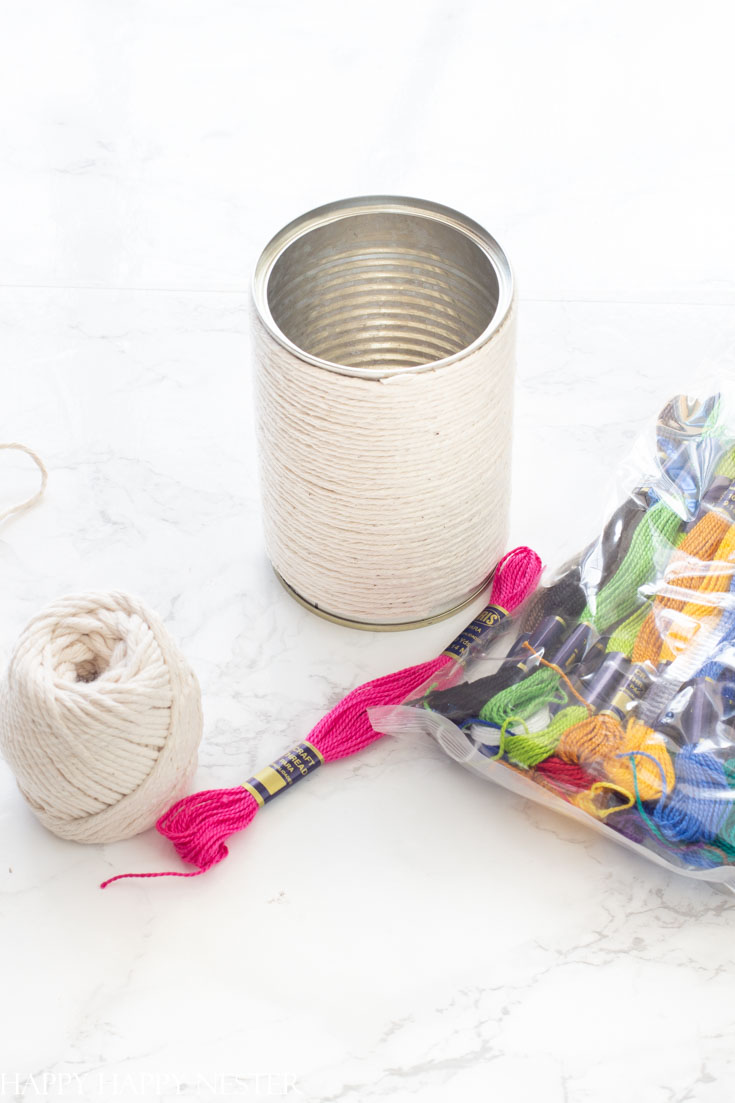
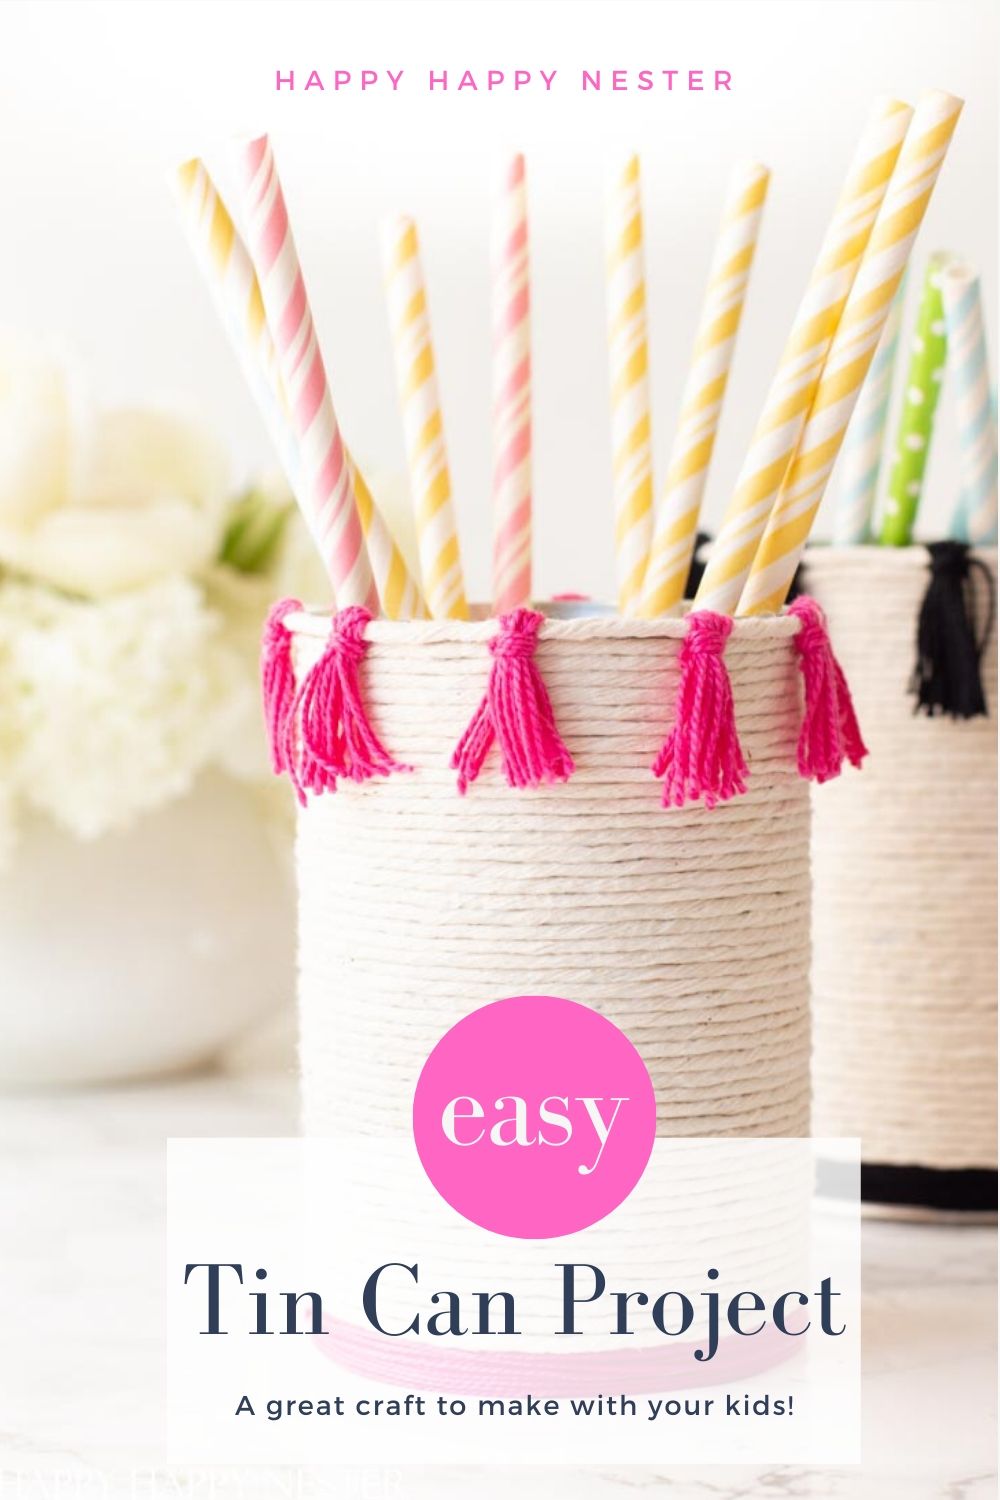
Easy Tin Can Project Supplies
- Tin can (label removed and washed)
- Ball of String (natural color twine)
- Embroidery Thread or Crochet Yarn
- Glue
- Scissors
Directions on how to make the easy tin can project:
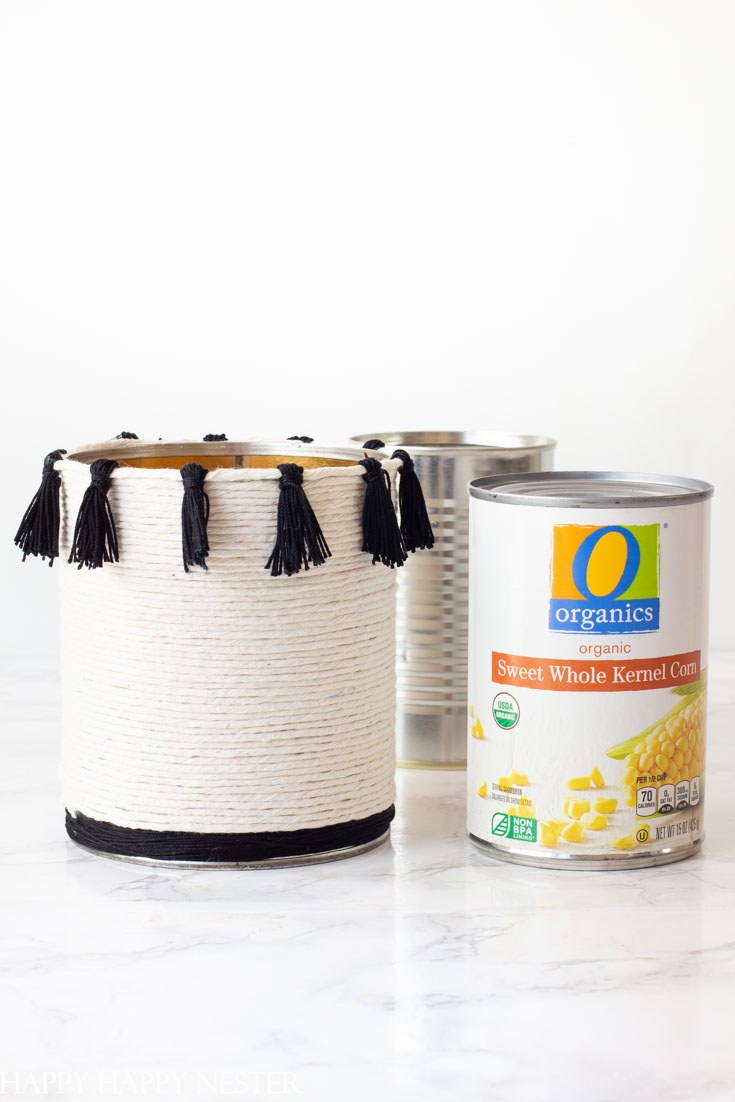
1. Tin Can
Find an empty tin can and remove the label and wash the can.
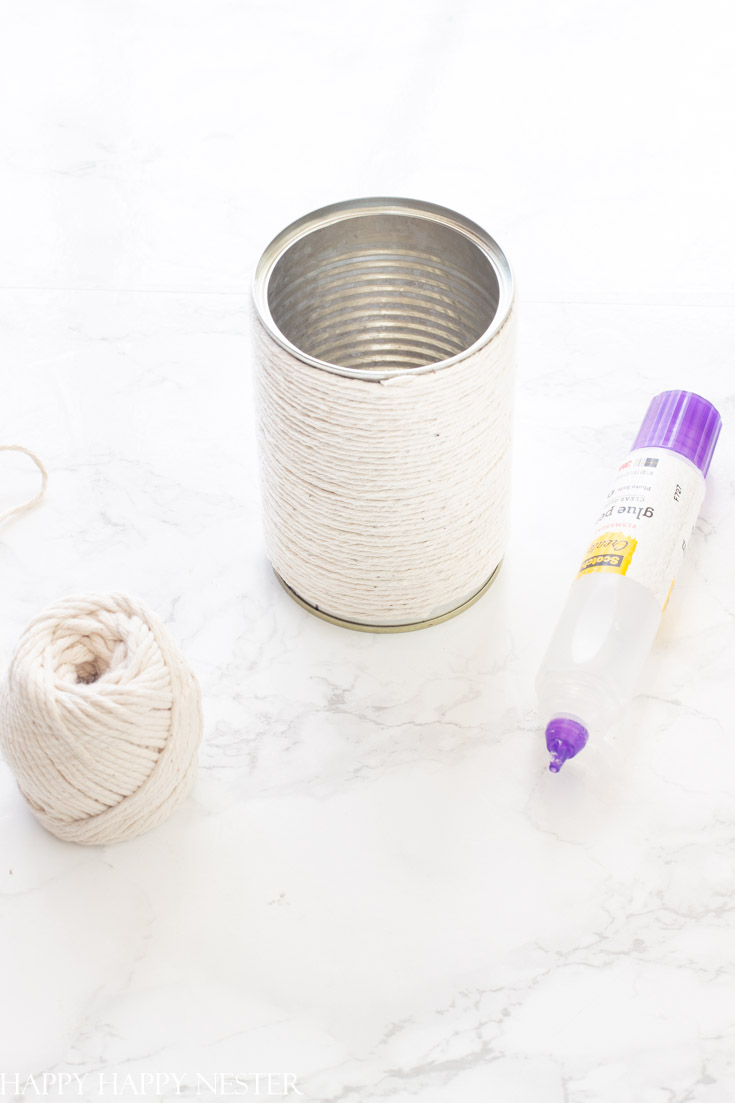
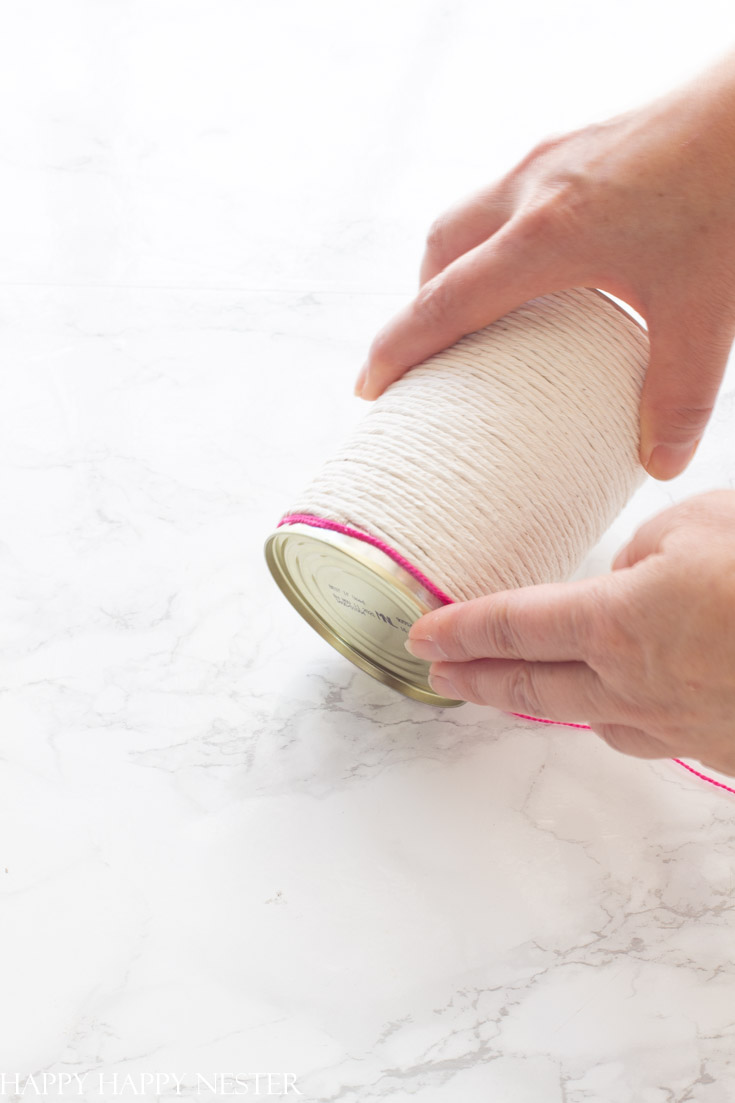
2. Covering the Can
Place a bead of glue along the top of the can just under the ridge. Begin to attach the string starting at the top and work your way down the tin can. There is no need to place glue over the whole surface of the can, just at the top and at the bottom. If you wrap it tightly over the tin, it will stay in place. Cover the tin and leave about a half an inch at the bottom. On the final row of string place a line of glue to secure that row in place.
3. Wrapping the Colored Thread at the Bottom
At this point in your easy tin can project, place another strip of glue and start wrapping your colored embroidery thread. Glue the bottom row of the tin and wrap your final piece of thread over the glue. Cut the thread and finish by gluing the last part to the tin.
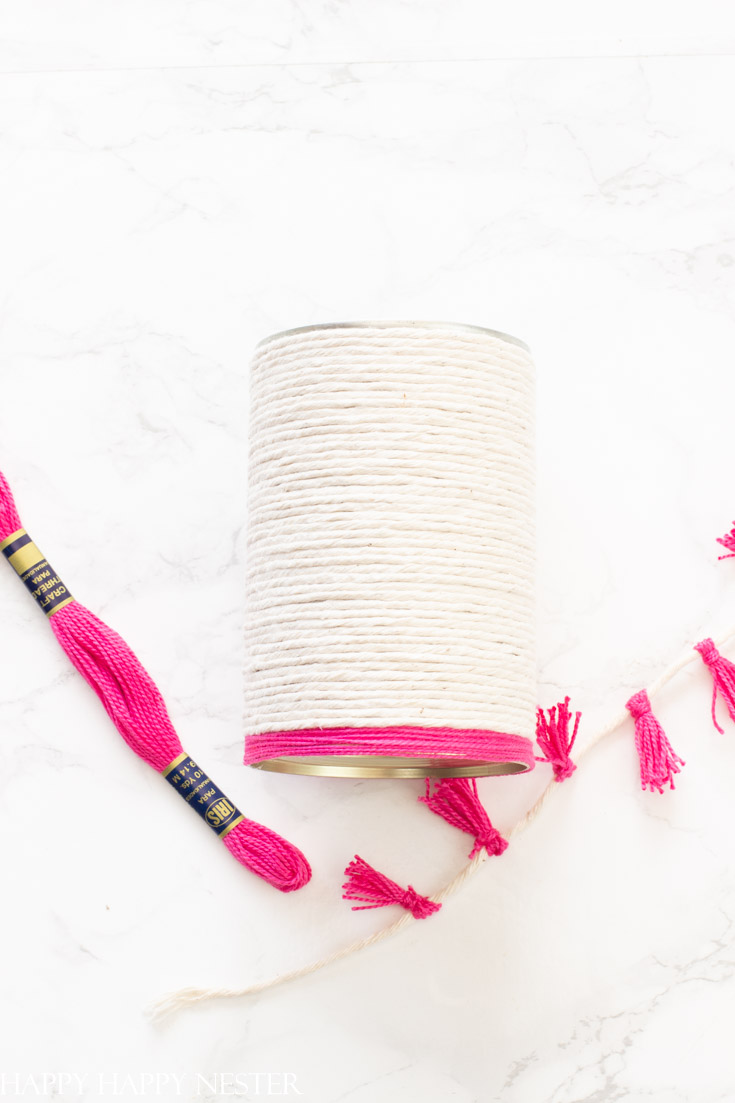
4. Cut the Final String for the Top
Measure a piece of the cotton twine the length of the top of the tin.
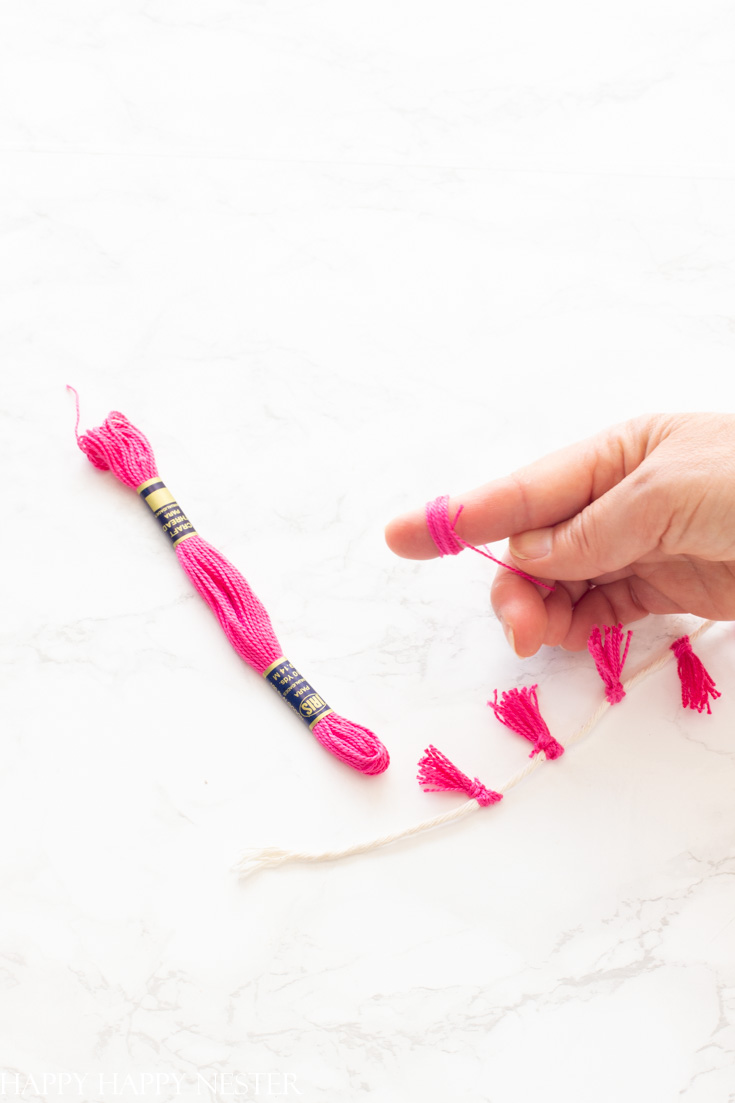
5. Making the Tassels
Wrap the colored thread around your index finger about ten times.
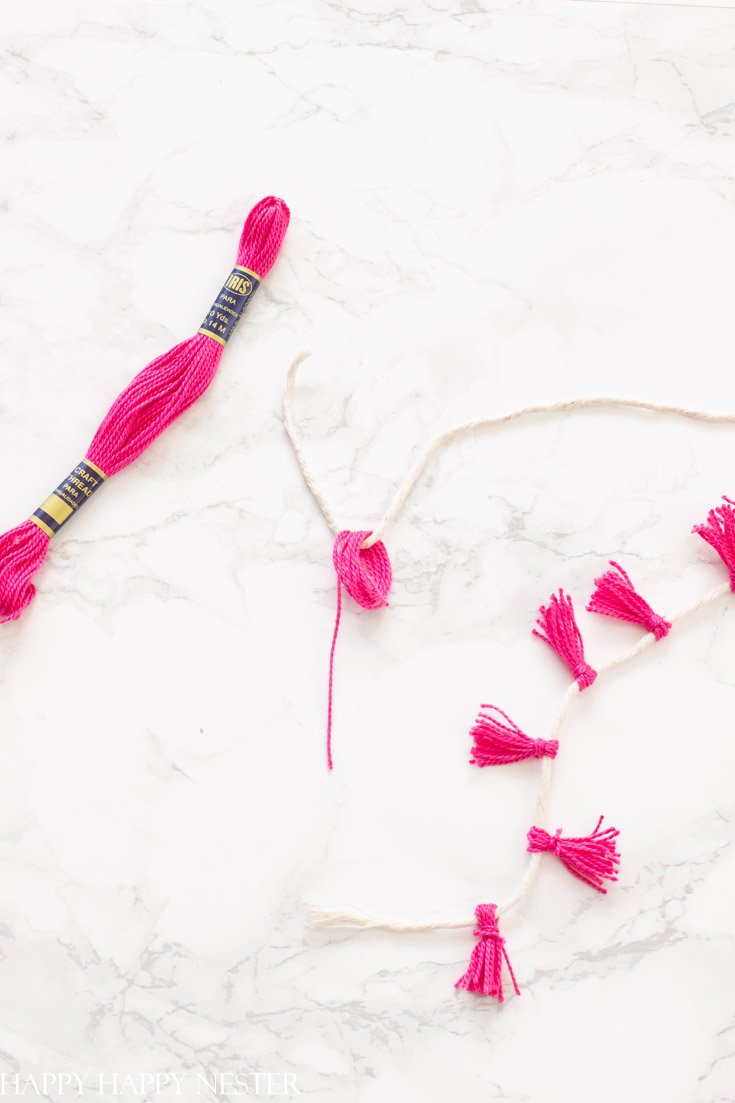
6. Take the loop of colored string and thread it through the cotton twine. Next, take another piece of colored embroidery thread and tie it just below where the tassel attaches at the top. Then tightly wrap the thread around the tassel a couple of times and tie two knots on the backside of the tassel. Trim excess thread and also trim the tassel ends.
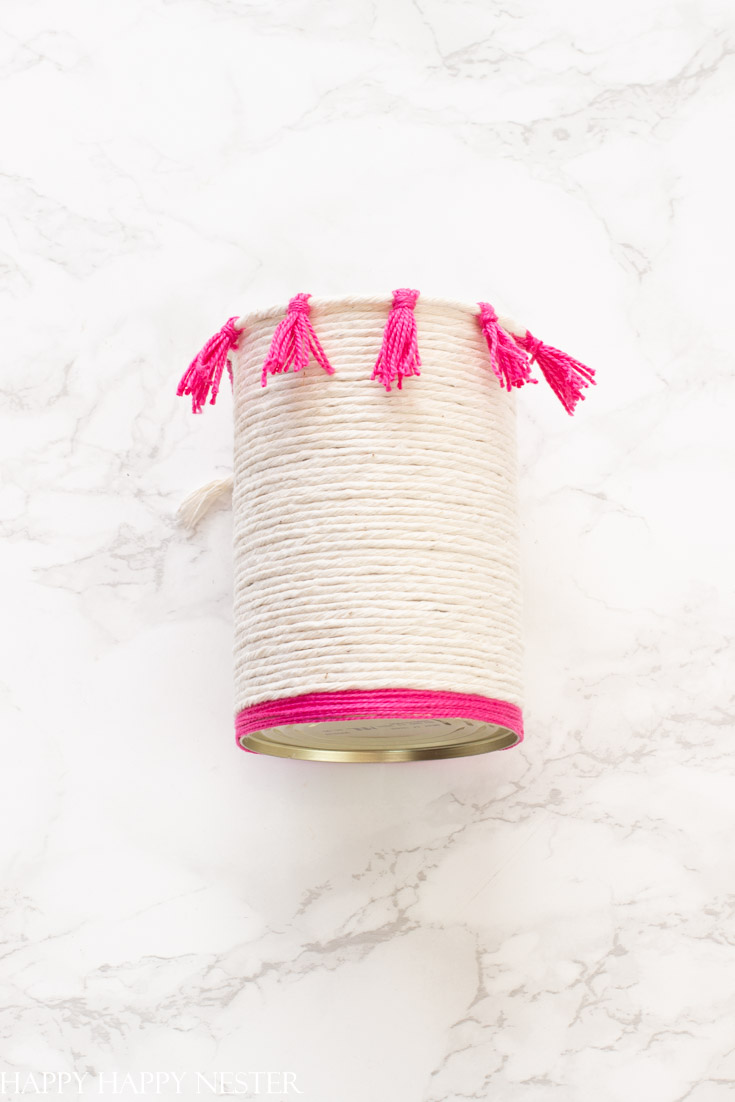
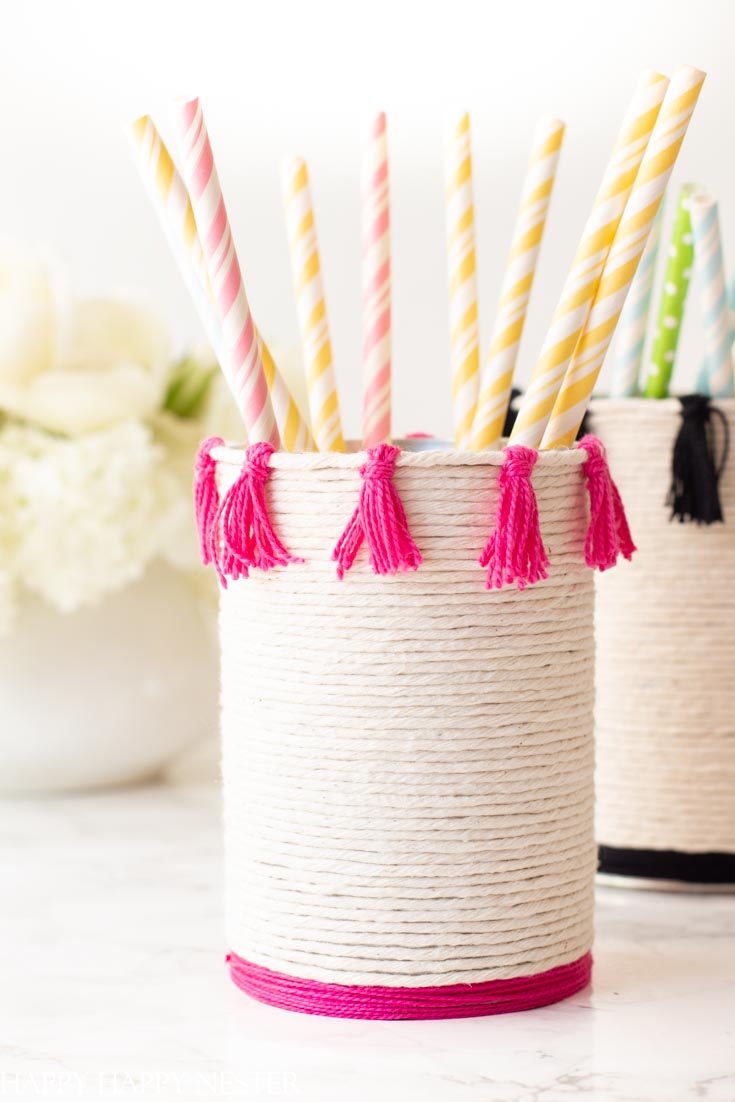
7. Make nine tassels for a small size can and eleven for a large size tin can. When all the tassels are attached, glue it down to the top of the rim. And you now completed your cute and easy tin can project, hooray.
I have another easy tin can project that uses lovely wrapping paper to cover the tin can. And that tin can canister project is also a post that got picked up on several roundup posts and has circle the world like the other post. Gosh, I didn’t realize until now that it looks like I’m a bit obsessed with tin cans! I guess I find upcycling everyday items in our homes is a good thing!
Check out Craftberry Bush for a Faux Cement Planter DIY. It’s so fun to make different containers for our home!
Well, until my next blog post, thanks so much for joining us,


- Fluffy Japanese Pancake Recipe (Souffle) - June 24, 2026
- Mochi Recipe: How to Make Easy Homemade Mochi - June 18, 2026
- Strawberry Oreo Cheesecake Recipe with Oreo Cookie Crust - June 15, 2026


cassie bustamante
these are just adorable! love the tassels!
happyhappynester
Thanks so much, Cassie! I’m in love with the adorable and happy tassels!
Lolly Jane
Okay these are too cute, Janine! So cheery! xo
happyhappynester
It feels like something you two would create!
Krista
I love this Janine! The tassels are the CUTEST!
happyhappynester
Ah thanks, Krista!