• Skip to main content
  • Skip to header right navigation
  • Skip to site footer
  • About
  • Contact
  • Boutique of the Week
    • Facebook
    • Instagram
    • Pinterest
    • Twitter

Happy Happy Nester

Weekly Inspiration for Your Nest

  • Recipes
    • Appetizers
    • Breakfast/Brunch
    • Desserts
    • Dinners
    • Drinks
  • Crafts
  • Decor
  • Shop
    • Fall Decor
    • Kitchen
    • Pillows
    • Holiday Decor
  • Amazon Store
  • Recipes
    • Appetizers
    • Breakfast/Brunch
    • Desserts
    • Dinners
    • Drinks
    • Snacks
  • Crafts
  • Decor
  • Shop
    • Fall Decor
    • Kitchen Favorites
    • Pillows
    • Holiday Decor
  • Saturday Chitchat
  • Boutique of the Week
  • About
  • Contact
  • Facebook
  • Instagram
  • Pinterest
  • Twitter

See What’s Trending…

Cakes

Cookies

Dinners

Wreaths

Drinks

Home › Uncategorized › Personalized Photo Candle Holders

Personalized Photo Candle Holders

Uncategorized
By Janine Waite · Published on Jan 30, 2013
Affiliate Disclosure: This Post May Contain Affiliate Links.
decorated glass candle holder
i had so much fun creating this project.  it’s easy and pretty during the day and incredibly cool at night when illuminated.  the key is to find a fairly good size glass container and use a small votive candle…this prevents the glass, paper, and glue from getting to hot. i plan to make a few of them and also as presents!  it is a relatively inexpensive project with great results.  
here’s the glass container i used.  i tried to find one on amazon, but couldn’t find the exact same one, sorry.
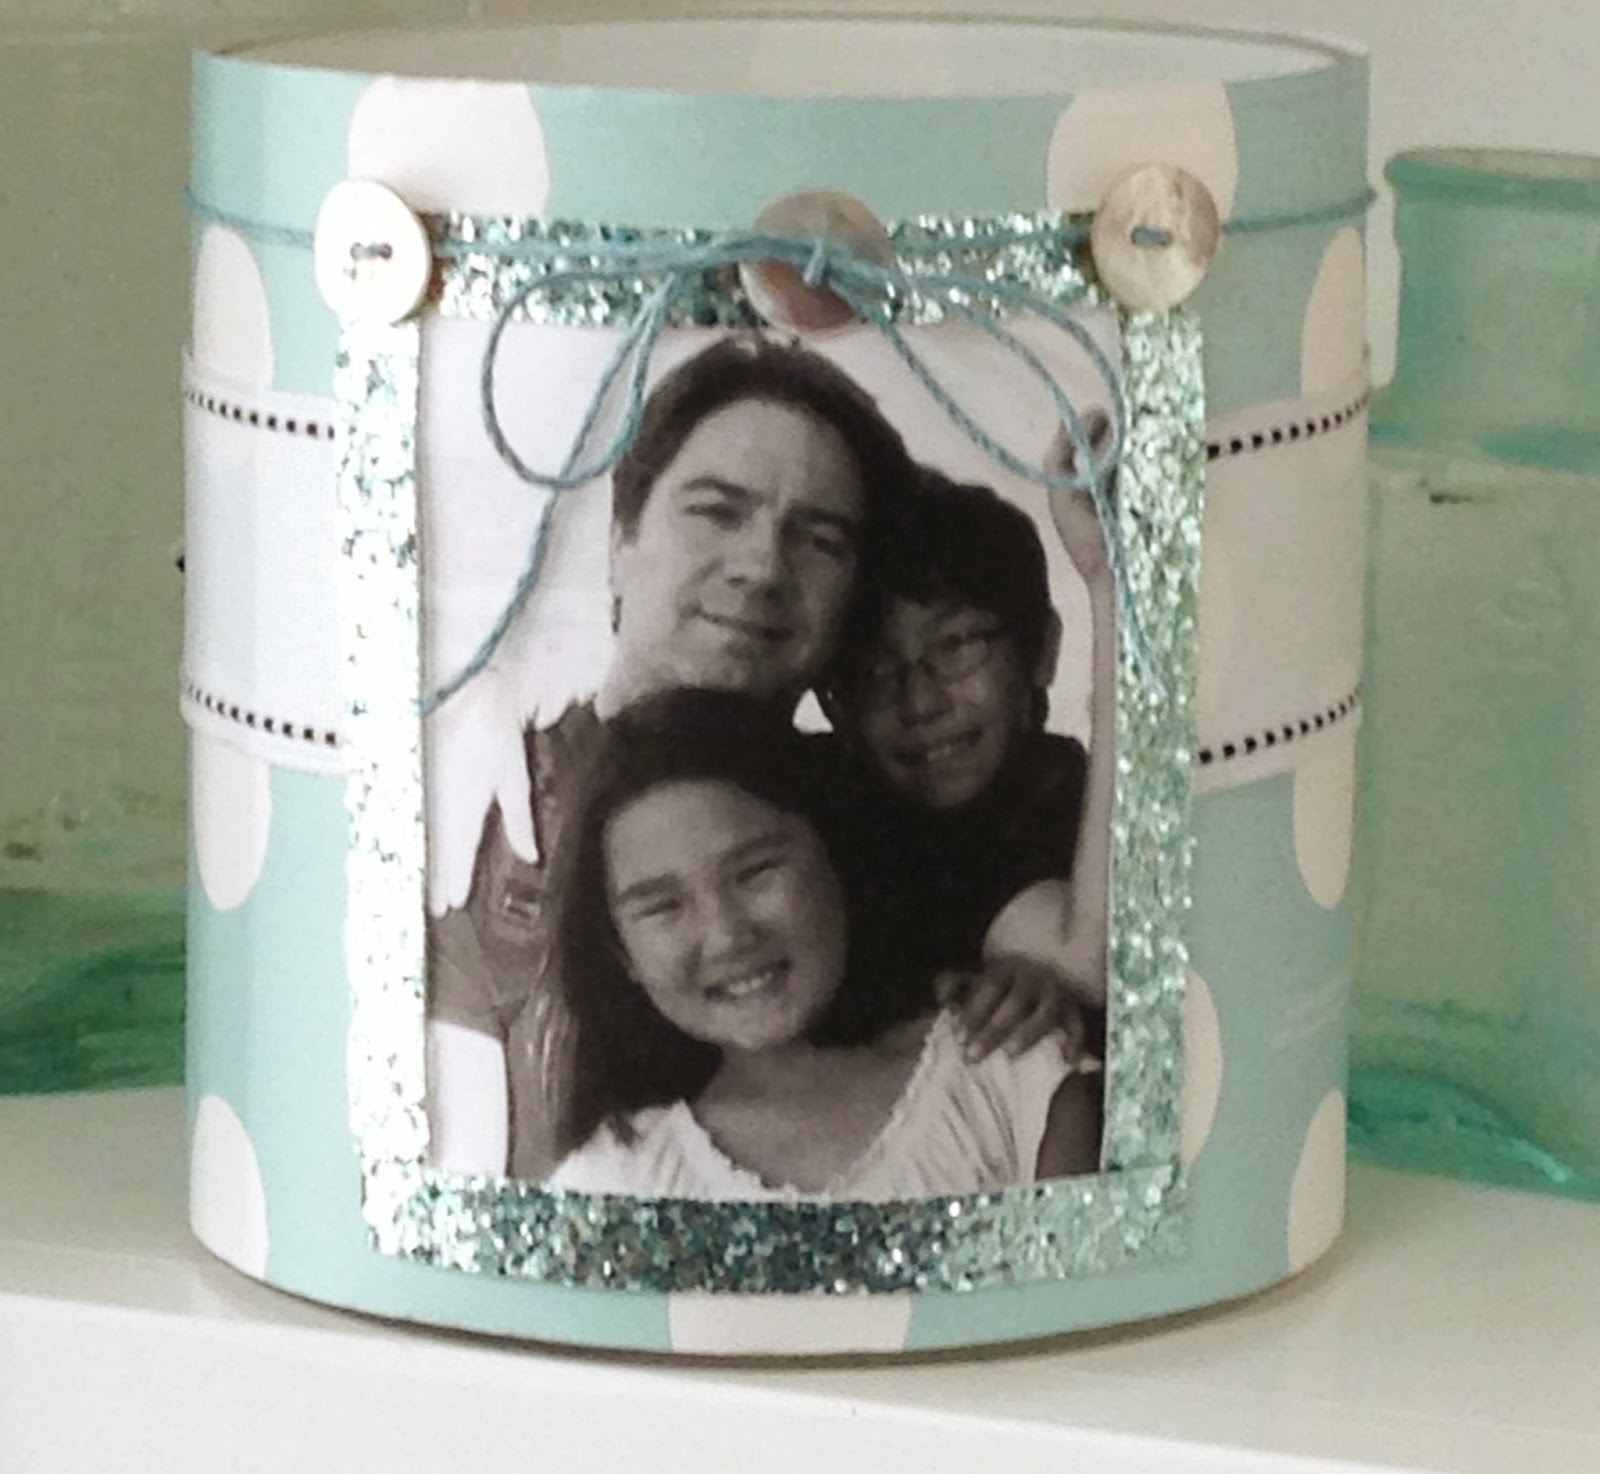
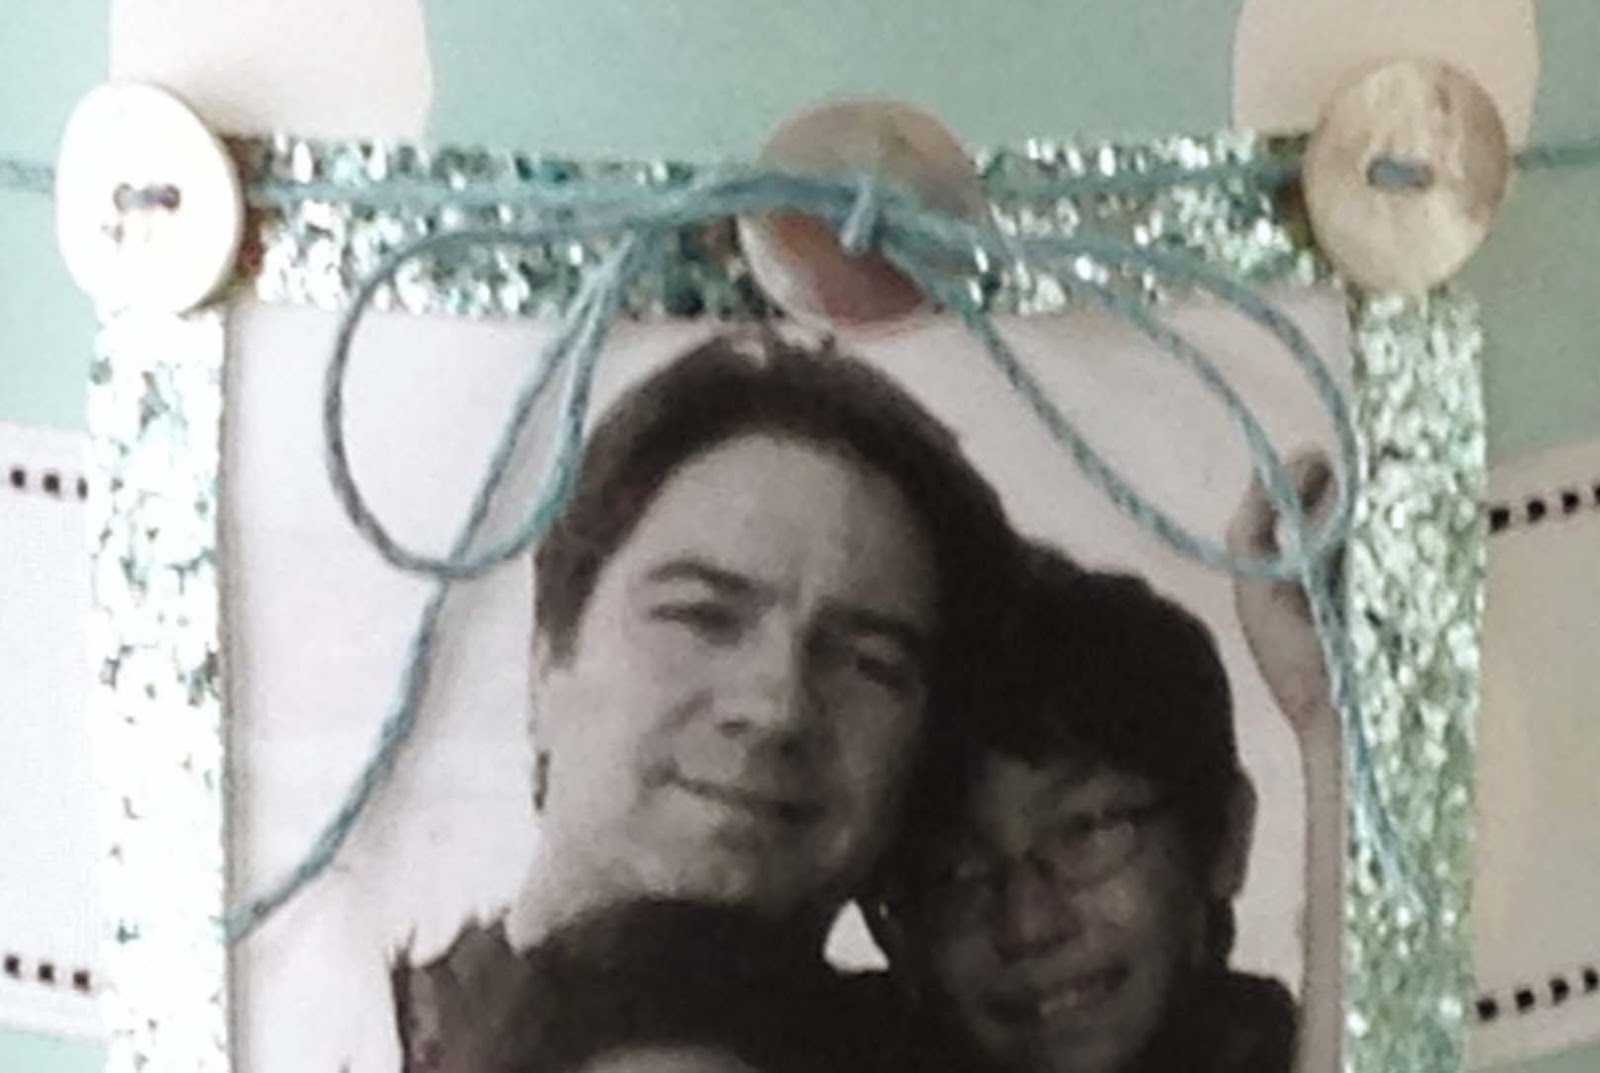
next pick a photo you’ll want to display on the candle holder.  mine is just a copy i made on our home printer.  since it is printed on regular paper it has a see through quality which is cool when you light the candle at night.  if you want that vellum look, i’ve been told by my friend Nancy, that there is vellum ink jet paper available at Staples. 
i cut my photo to size and then also cut glitter ribbon to frame the photo.  i always want a little sparkle on my projects.  
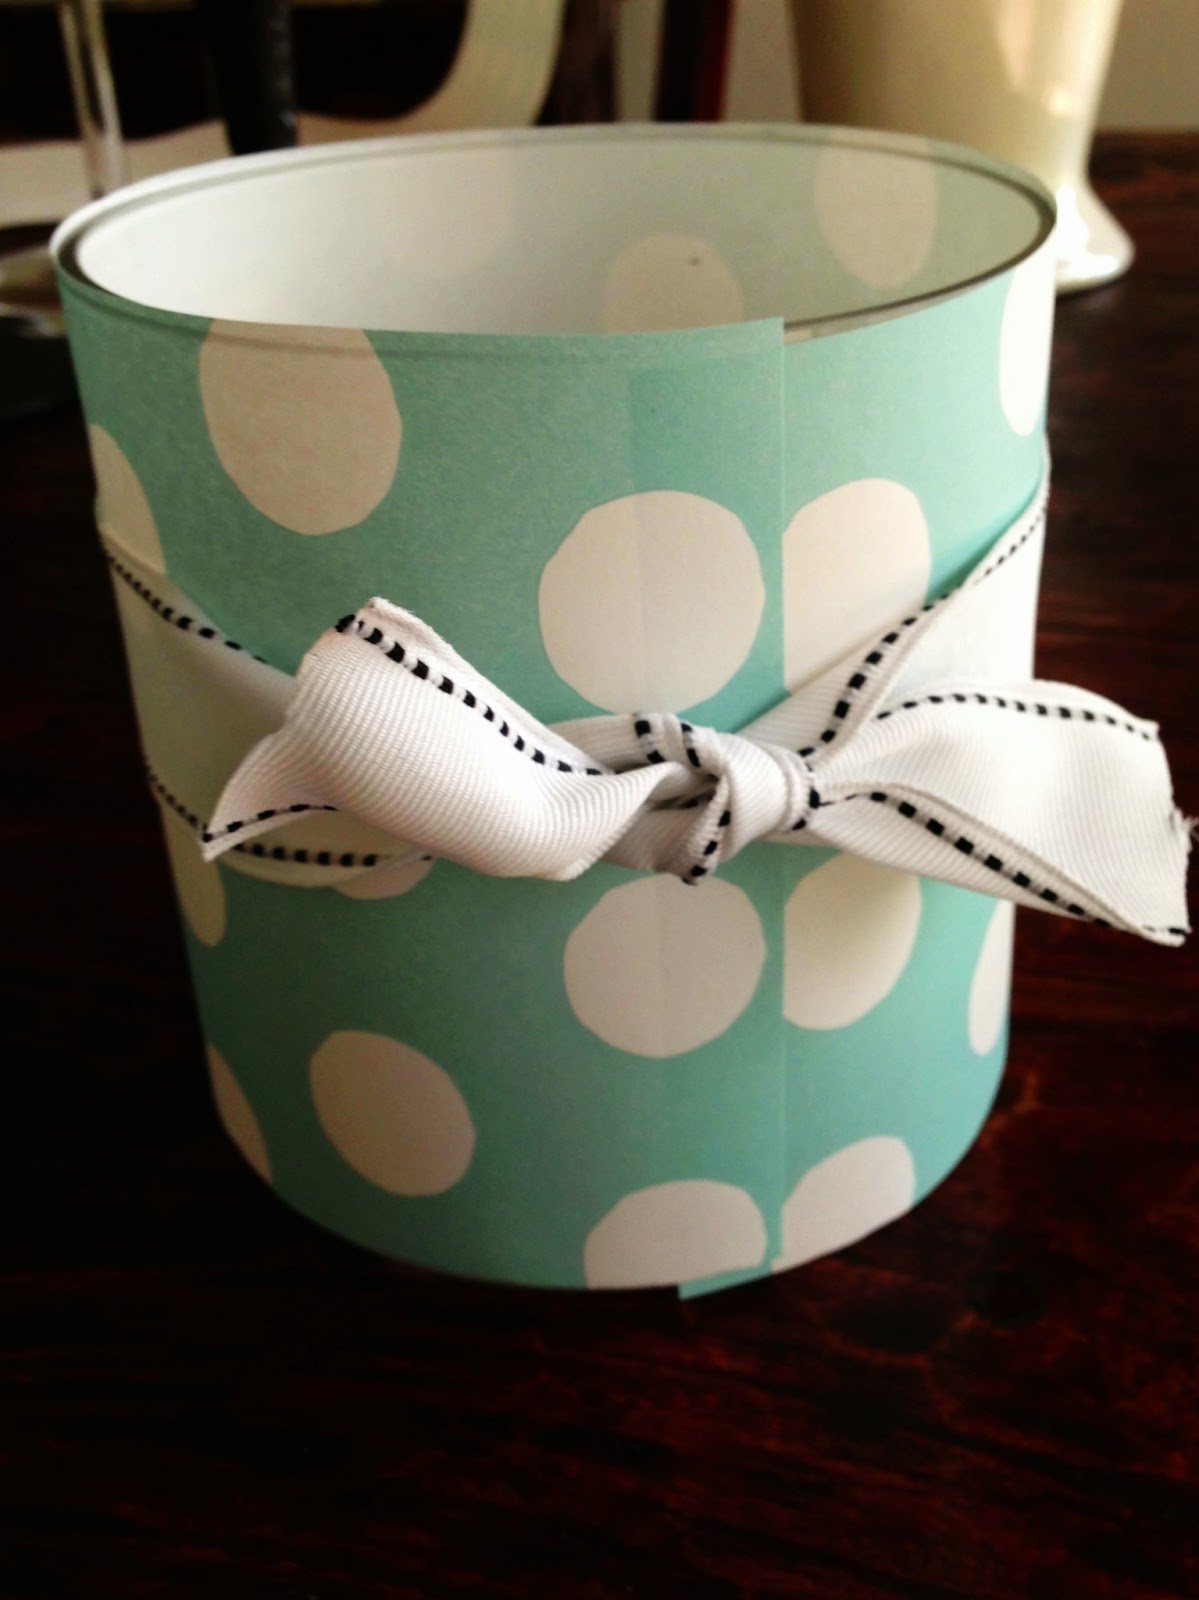
next i used my fun wrapping paper that i bought from the Paper Source.  i also used ribbon that i bought from Costco.  if you haven’t found their awesome supply of ribbon you have to check it out.  in keeping with the Costco tradition, it comes in a bulk amount of nice quality ribbon!
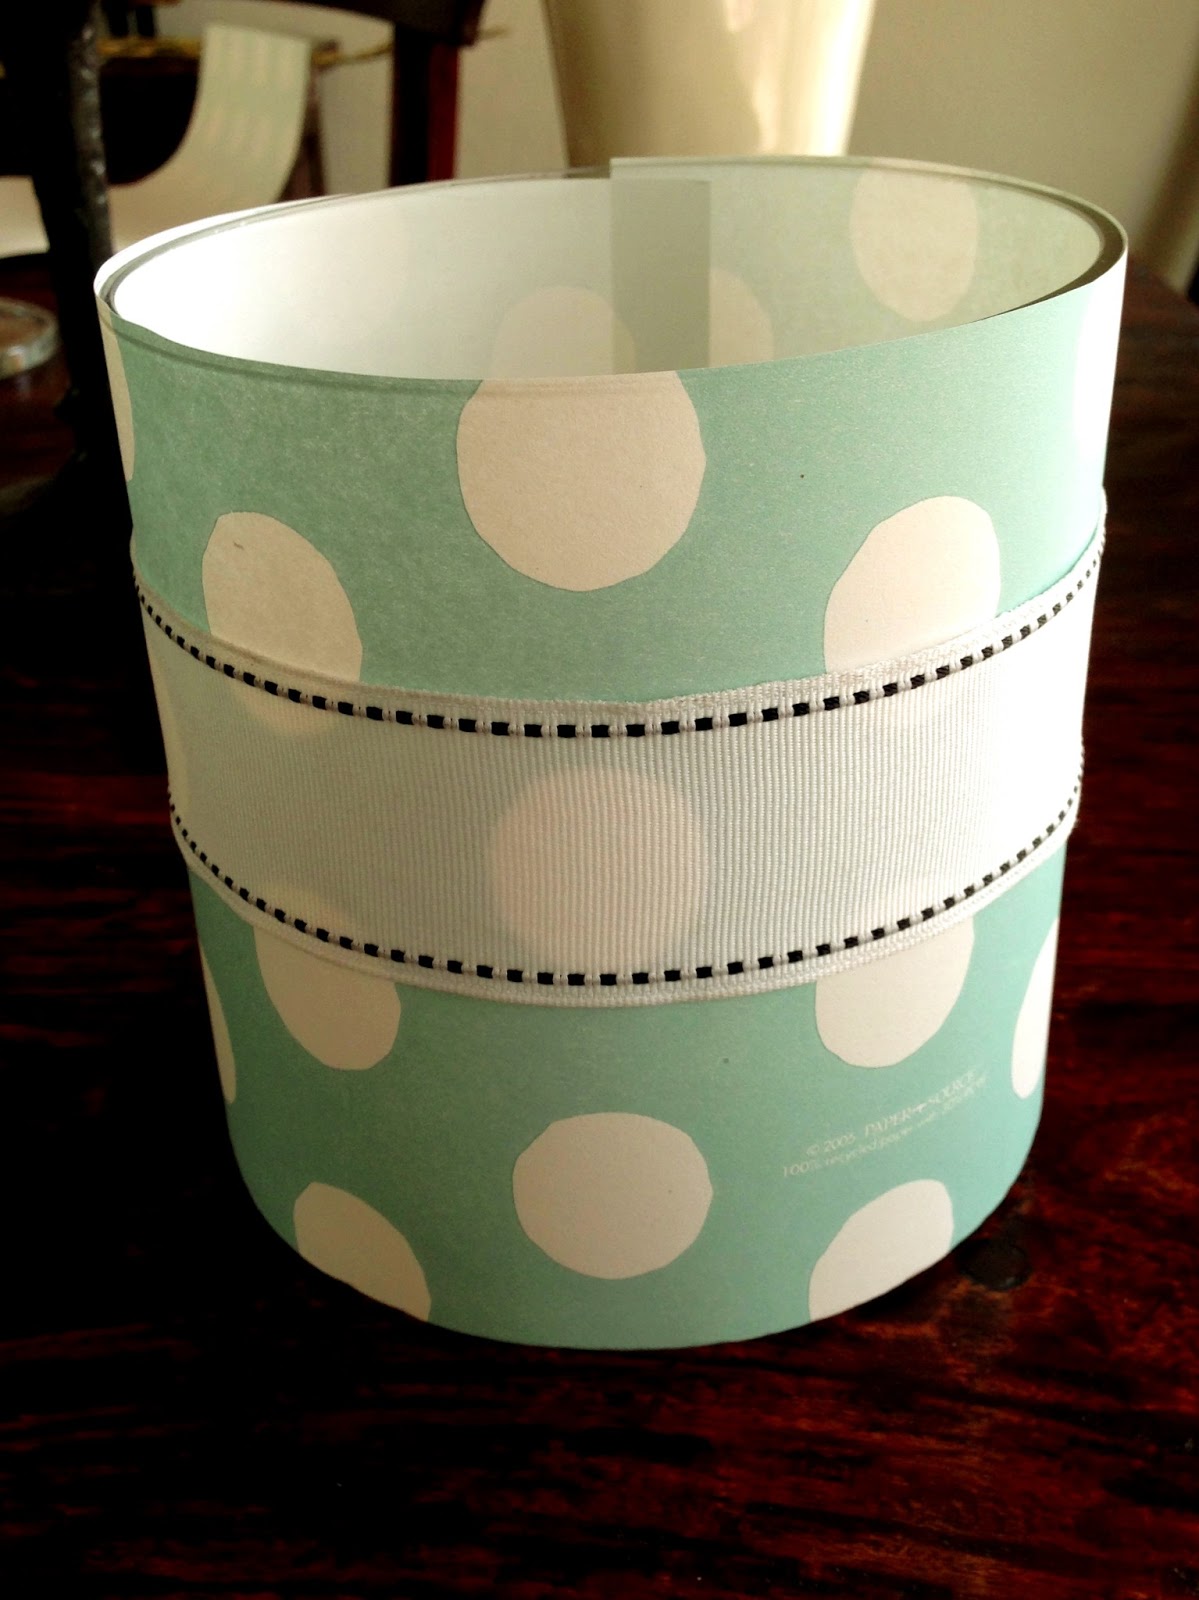
now i just tied the ribbon on the back, since i didn’t want to hassle with the glue.  in other words i was lazy…
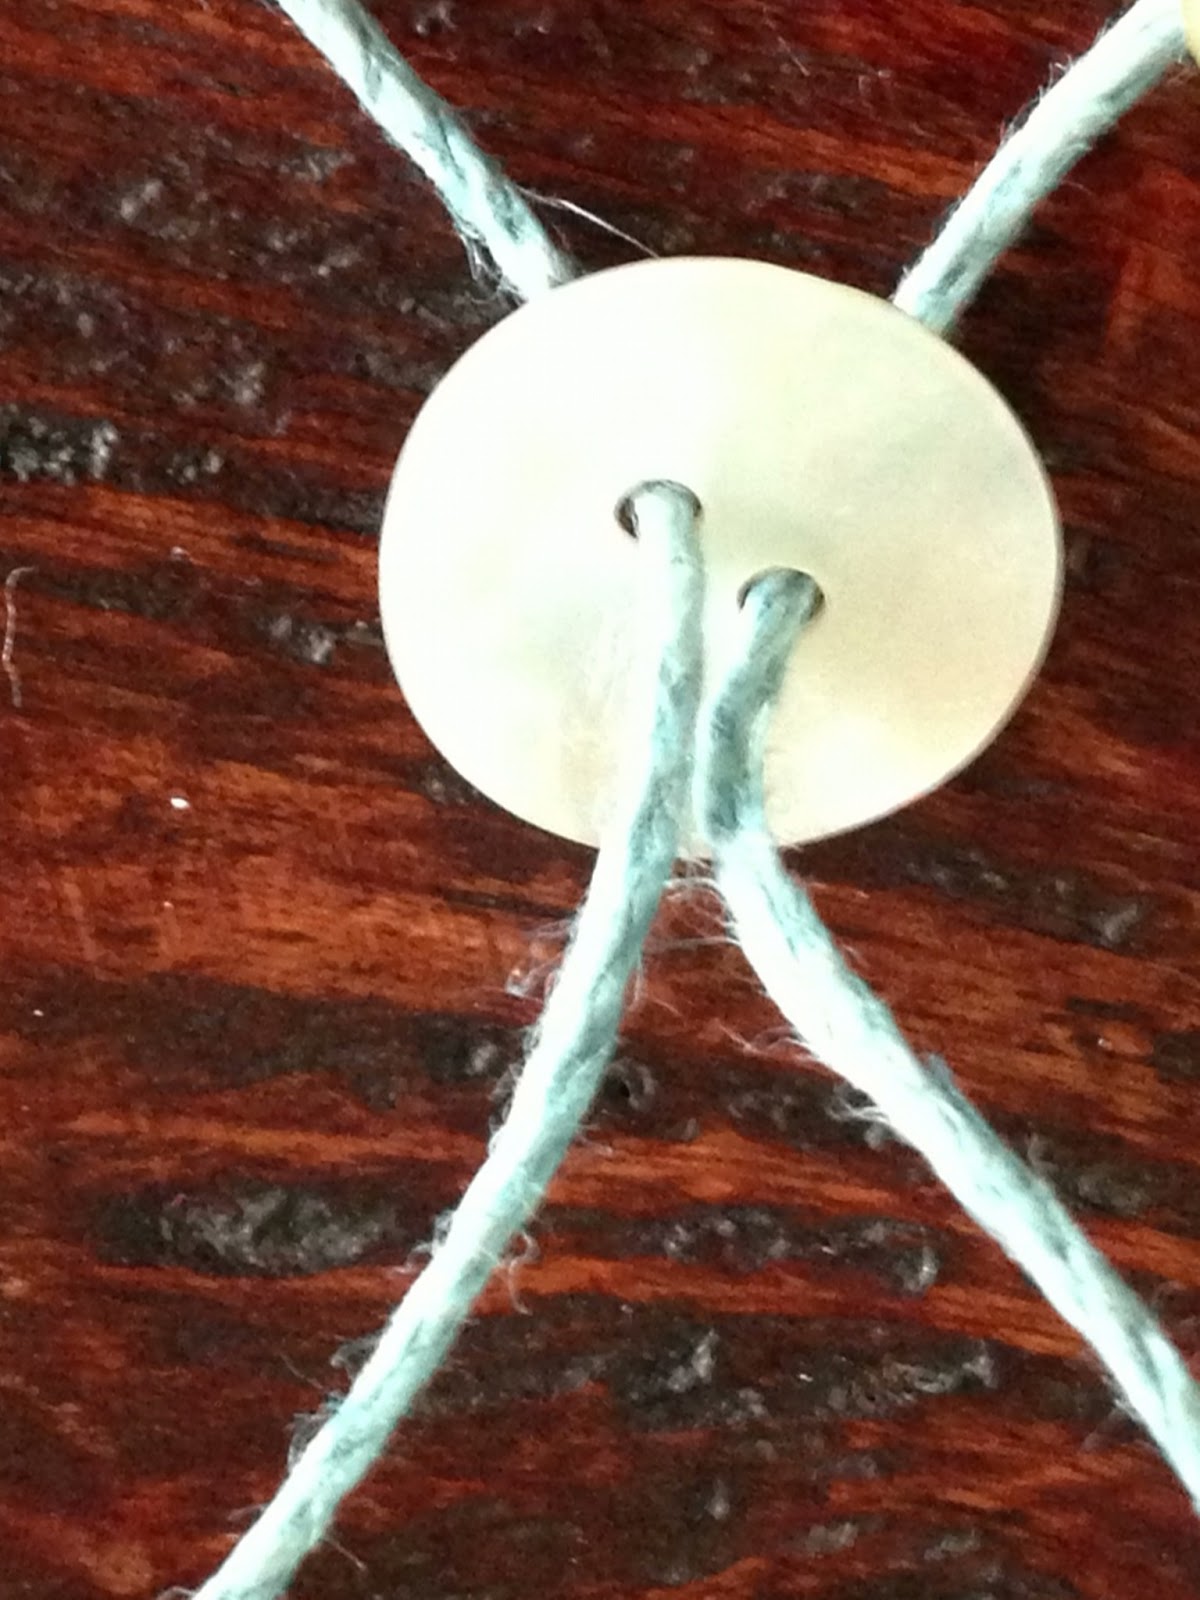
next if you want to make a fun string decoration, here is how i made mine.  i used some hemp string and tied three pearl buttons to them.  
 
string the two buttons on and on the third one you’ll want to string both ends through each hole.  hope this make sense…  then place it on your candle holder and tie a bow on top of that third button.  center the buttons around the photo.  

the bow looks like this.
you’re done with a cute project and you can decorate any room with it!  mine is in my bedroom that has a a seaside decor.  love it…

  • Author
  • Recent Posts
Janine Waite
Follow me
Janine Waite
I named my blog Happy Happy Nester because I love everything related to the home. I’ve always enjoyed decorating my surroundings. Get cozy and stay for a bit, thanks for visiting!
Janine Waite
Follow me
Latest posts by Janine Waite (see all)
  • Instant Pot Garlic Mashed Potatoes - May 30, 2025
  • 4th of July Wreaths - May 28, 2025
  • My Favorite Flower Inspiration - May 24, 2025

You May Also Like

  • how to make candles
    How to Make Your Own Personalized Candles
  • hygge with candles 6
    Add Hygge To Your Home with Candles
  • host gift vintage candles
    Pretty Vintage Candles for the Home
  • halloween decor ideas
    DIY Halloween Decor: Printable Candle Label

Sharing This!

  • Facebook
  • Twitter
  • Email

Reader Interactions

Leave a Reply Cancel reply

Your email address will not be published. Required fields are marked *

Recipe Rating


Sidebar

Janine the Nester

Hello from the Nester

We love everything related to home, so get cozy and stay for a bit. Thanks for visiting our blog. Learn More...

Reader Favorites

The Best Crunchy Crispy Chocolate Chip Cookie

This Italian Cream Cake has a pumpkin cream cheese frosting that makes this a winning combination. This dessert is perfect for the holidays.

Italian Cream Cake with a Twist of Pumpkin

French Apple Custard Tart with Puff Pastry

DIY Paper Flowers Tutorial (Tissue Paper)

Upcycling Tin Cans with Scrapbooking Paper

How to Make a Paper Flower Wreath DIY

Popular Categories

  • Cakes
  • Cookies
  • Dinners
  • Wreaths
  • Organizing

Join Our Newsletter

Join our mailing list to receive the latest news and updates from our team.

You have Successfully Subscribed!

AFFILIATE DISCLOSURE:
I am grateful to be of service and bring you content free of charge. In order to do this, please note that when you click links and purchase items, in most (not all) cases, I will receive a referral commission. Your support in purchasing through these links enables me to keep my design and customization prices ridiculously low and empower more people worldwide to blog with less worry and less hassle.
Happy Happy Nester is a participant in the Amazon Services LLC Associates Program, an affiliate advertising program designed to provide a means for sites to earn advertising fees by advertising and linking to amazon.com.
Thank you! :)
-Happy Happy Nester

Our Guide

Join Our Newsletter

Join our mailing list to receive the latest news and updates from our team.

You have Successfully Subscribed!

  • Facebook
  • Instagram
  • Pinterest
  • Twitter

Recipes

Appetizers
Breakfast/Brunch
Desserts
Dinners
Drinks

Crafts & Decor

DIY
Gardening
Holiday
Wreaths

About

About The Nester
Contact
Privacy Policy

Copyright © 2025 · Happy Happy Nester by Janine Waite · Privacy Policy

↑ BACK TO TOP