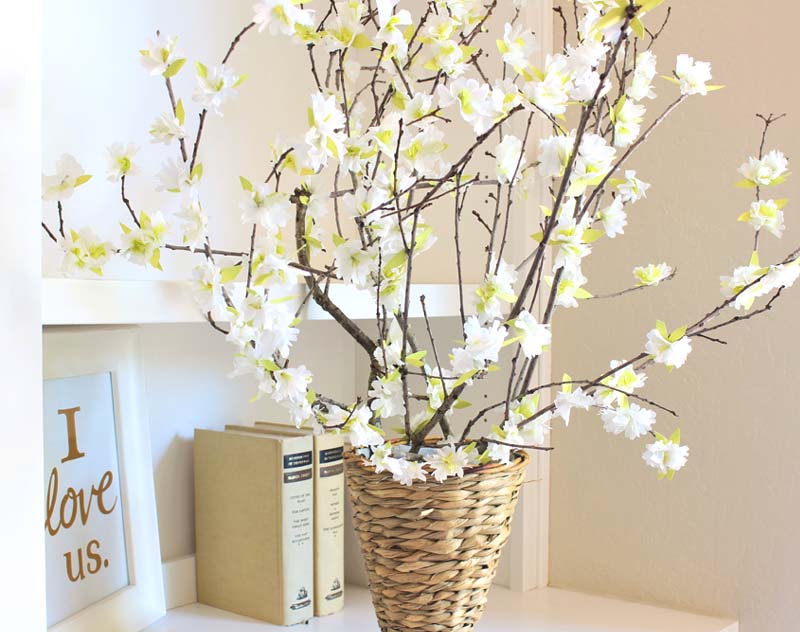
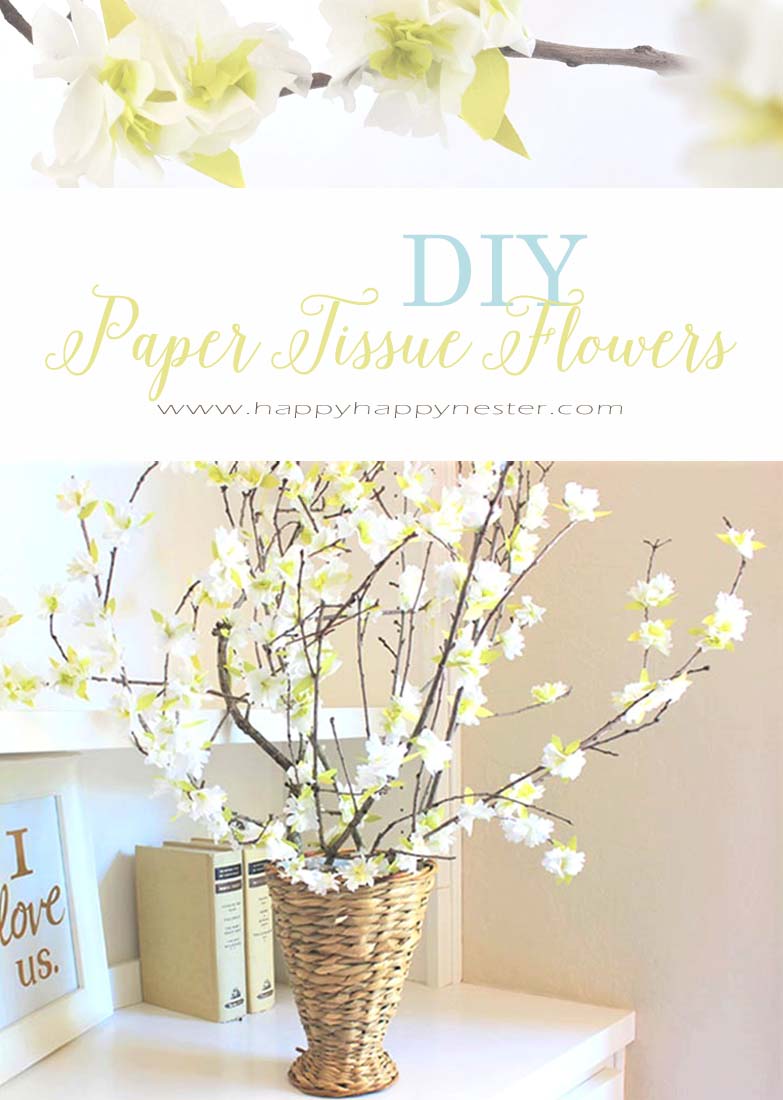
Today’s Happy Craft is Pear blossoms tissue paper flowers. I have a new obsession with paper flowers, and I hope you viewed my Cherry Blossom DIY. I love how these flowers are so easy, and how little care they need. So, if you are like me with plants, you’ll love having these faux flowers around your home.
When I was a child, my grandma was always on the hunt for wildflowers and branches.
She collected various things like pussy willows and cattails since she taught the Japanese craft of Ikebana.
One day, our family packed up our gold colored 70’s station wagon. My parents, brothers and I, all piled in and my grandma tagged along for our ride out into the countryside. Our family would do this on occasion.

Of course, on our little journey, my grandma eyed some wild cattail alongside the road. She, of course, asked my dad to stop since she wanted to cut some for her flower arranging classes.
I had the brilliant idea that I would retrieve some branches for her.
Well, maybe some of you already know that cattails tend to grow in swamps.
So, need I say more?
My sneakers and legs were deep in mud, but I succeeded in gathering a bouquet of cattails for my grandma. She was so happy with my thoughtfulness.
Sweetly, she handed down to me, her passion for wildflowers and greenery. I sincerely wish, my grandma could see what I have done with her love of flowers.
Tissue Paper Flowers DIY
Materials:
Sheets of lime green cardstock paper
Sheets of lime green tissue paper
Green embroidery thread (you can use a couple of threads for the center if you don’t want to use the green tissue paper)
Pencil
Real tree branches
*the above materials contain my Amazon affiliate links
Instructions:
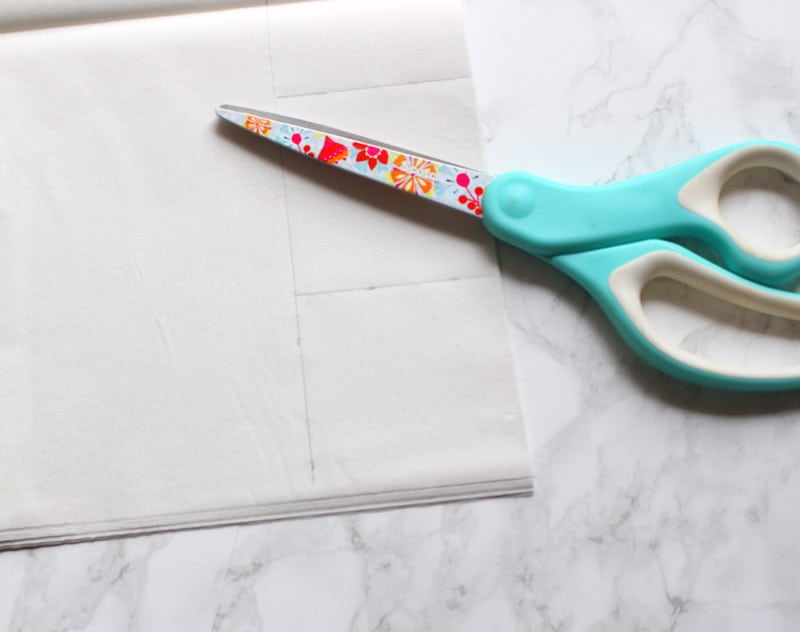
1. Take about 5 sheets of the white tissue paper and cut 2 1/2 inch squares.
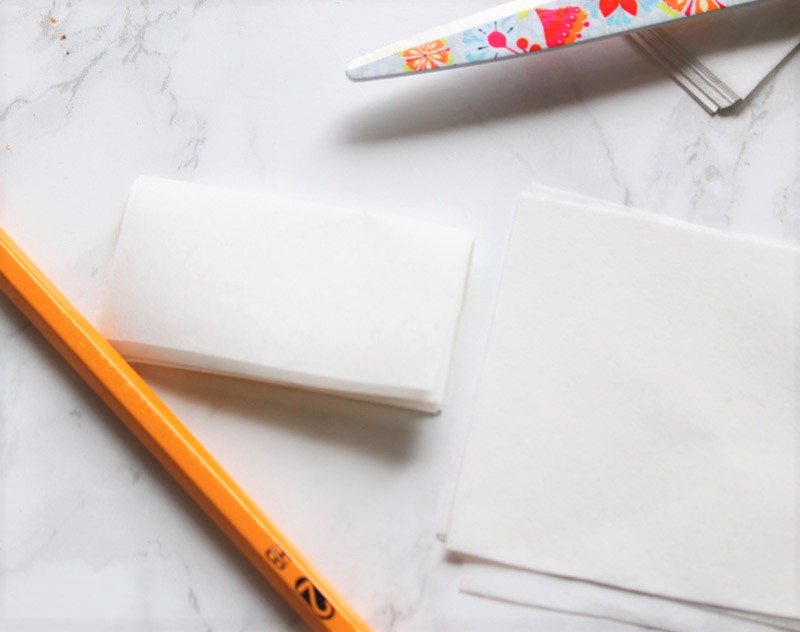
2. Place about 5 squares together and fold in half.
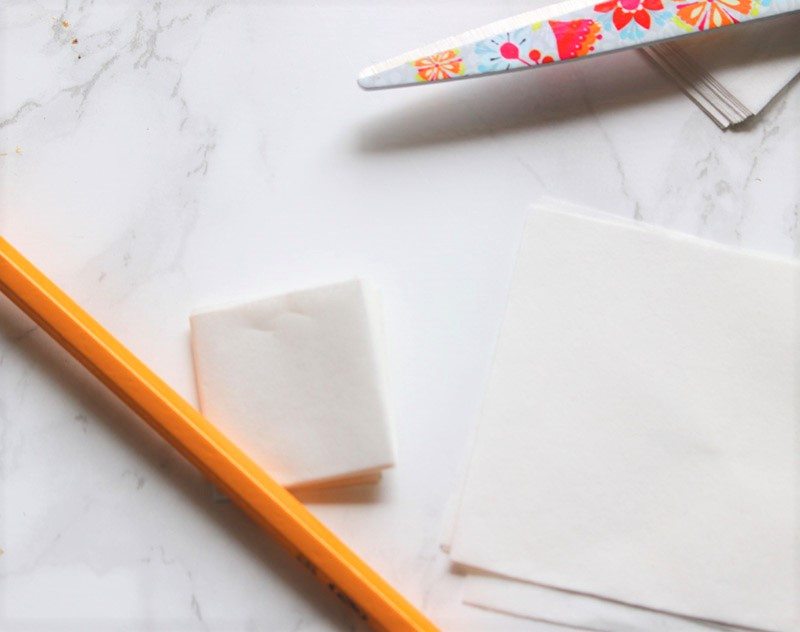
3. Fold it in half again.
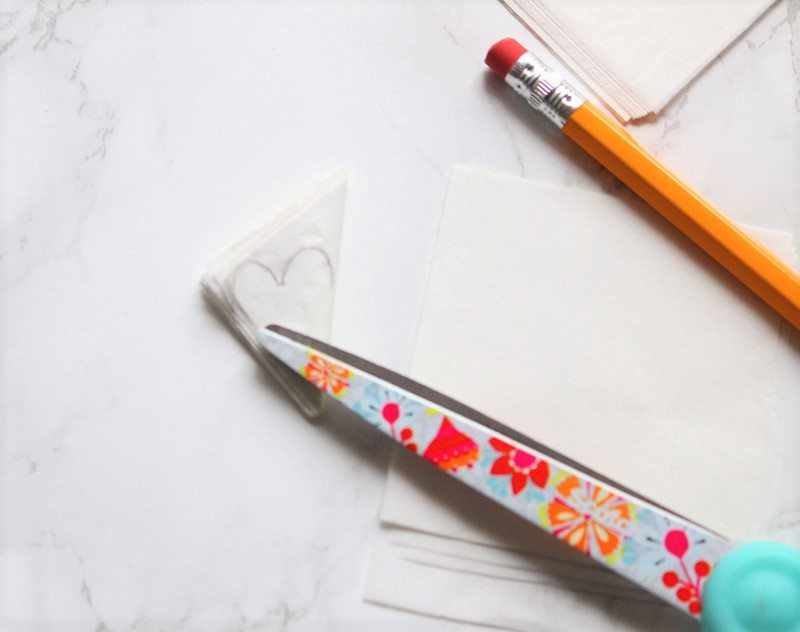
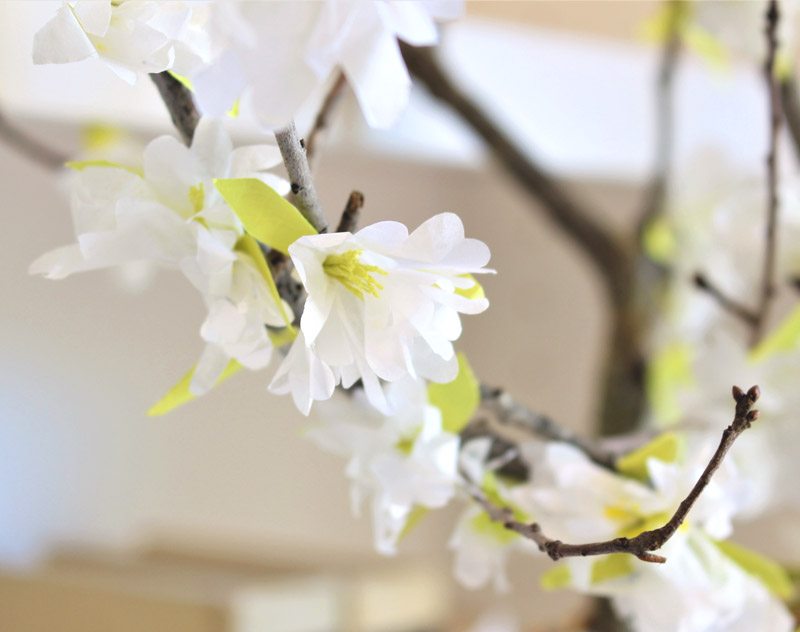
4. Now fold it into a triangle. And with the fold to the right draw two petals like shown.
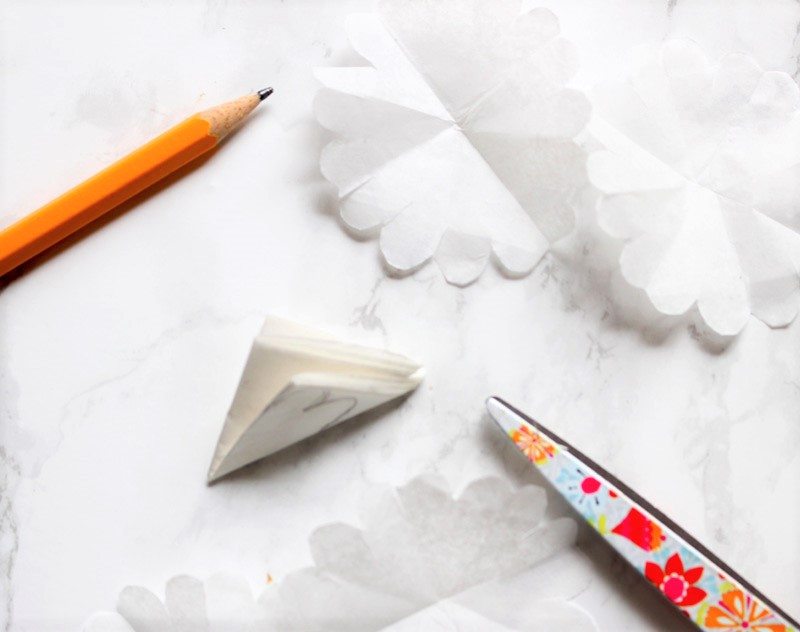
5. So, this is important, make sure the edges look like the photo. If you don’t get this part correct, your tissue paper flowers won’t come out correctly.
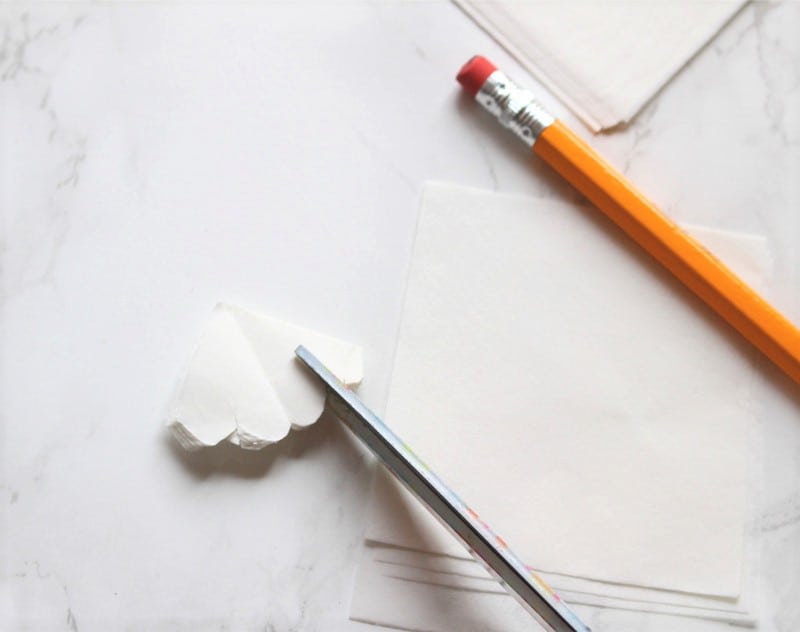
6. If you want nice petals, you can cut down into the petals as shown.
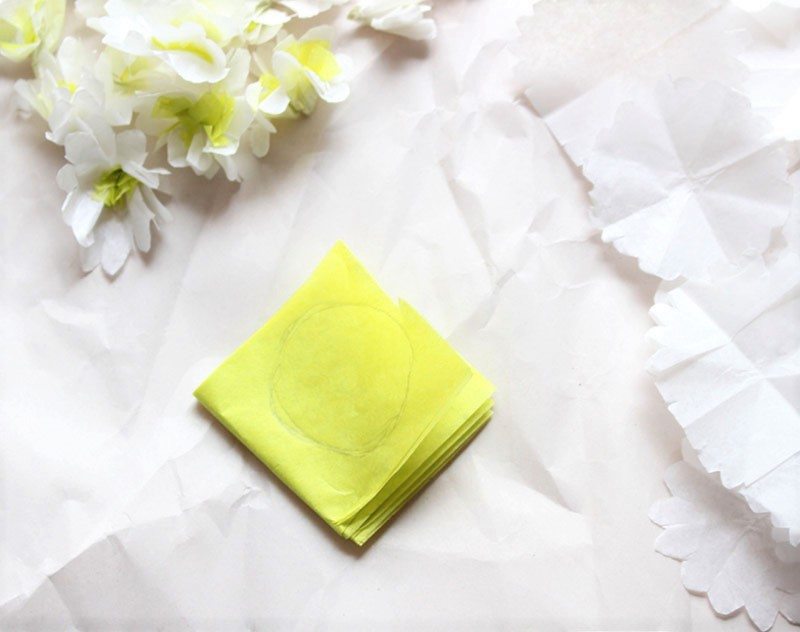
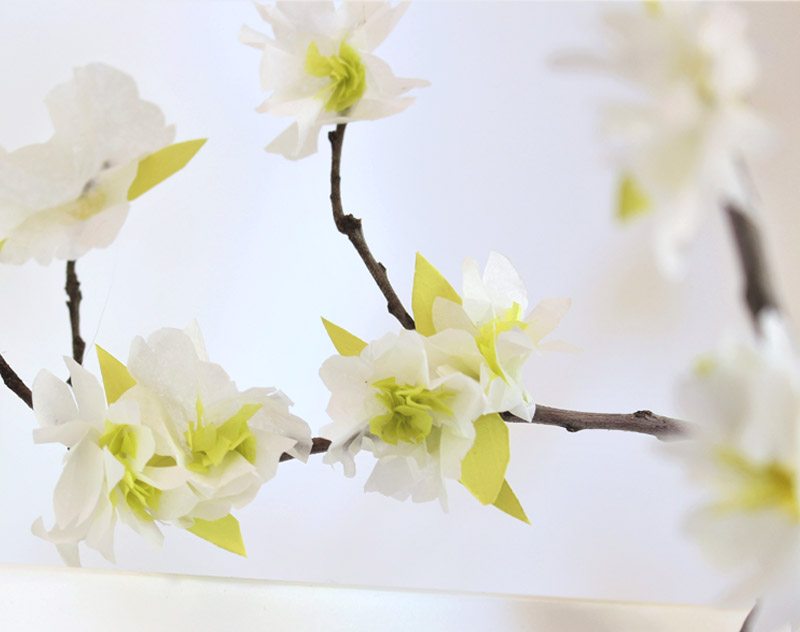
7. Now for the green center, place about 5 layers of 1-inch squares of green tissue paper. Draw a circle on the paper. So, cut the circle. Next, fold one circle in half.
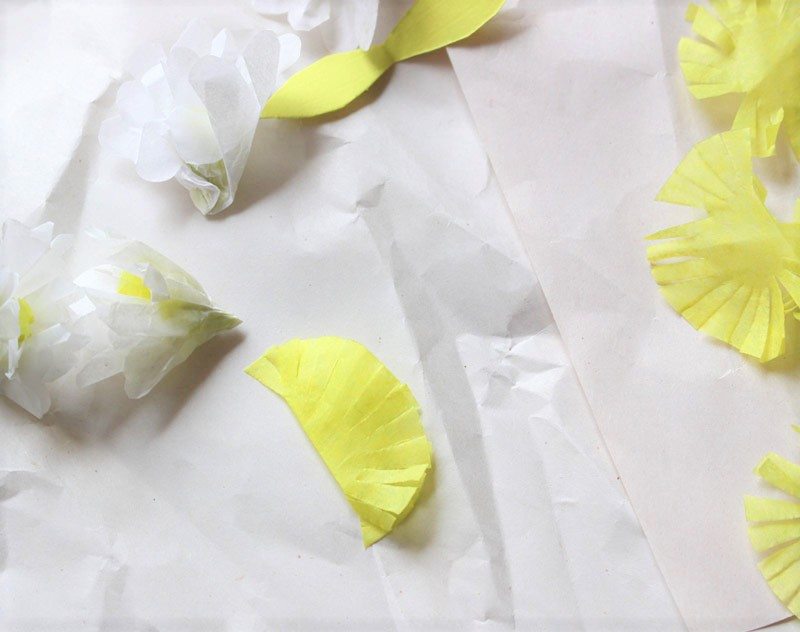
8. Now cut into the circle like pictured above.
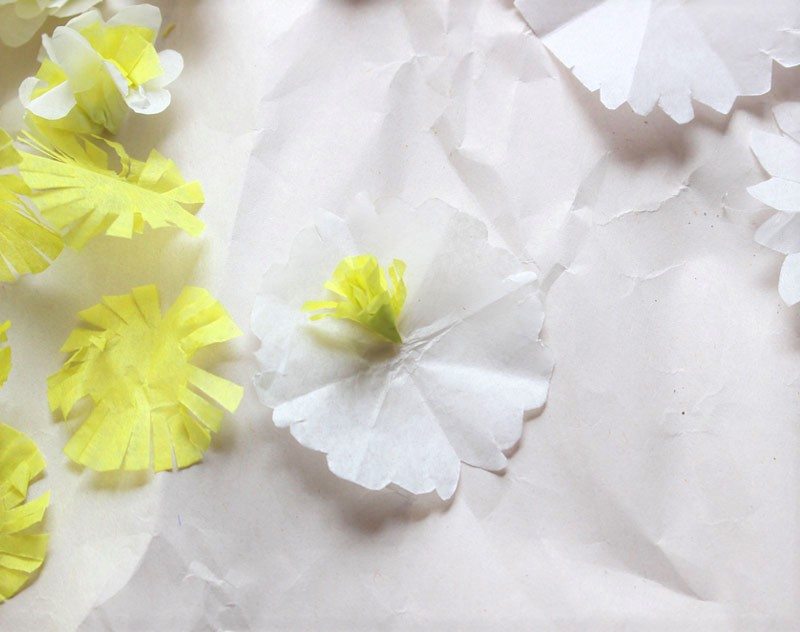
9. Unfold the green paper and pinch the middle of the circle and pull the paper up to create tendrils. Next, place the green tendrils in the middle of one white petal.

10. Grab ahold of the middle and pinch and twist to form the bottom of the tissue paper flowers.
Paper Petals
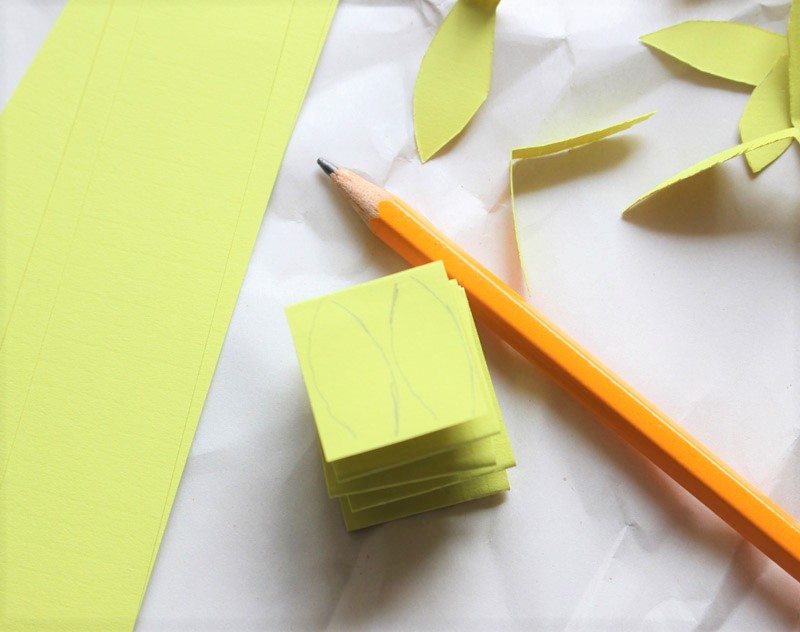
- Cut the lime green paper into strips about an inch and a half in width. Fold like an accordion and draw leaves. Make sure to place one end of the leaves on the folded edge. Now, cut the leaves out but make sure not to cut the folded side.
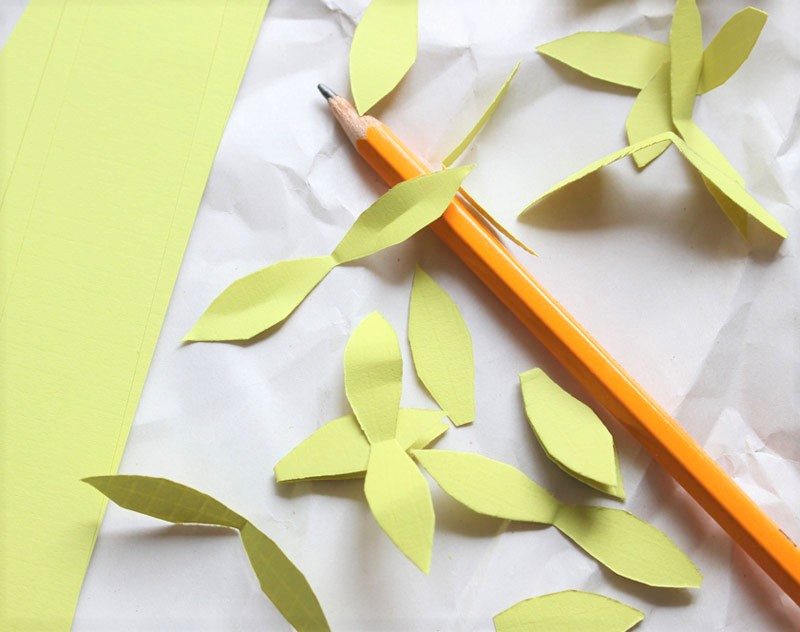
2. Since you have a fold, the leaves should be attached in the middle.

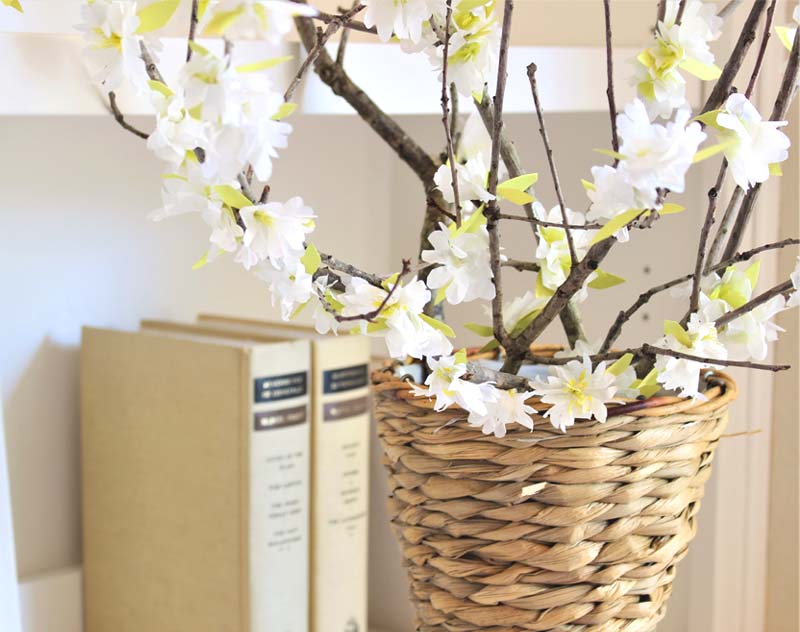
3. With all your flowers and petals made, you can begin to attach them to your branch. Glue the petals first and then place the flowers in the center of the petals and attach them with glue. Cover your branches with petals and tissue paper flowers, and you will soon have a lovely floral arrangement.
Around here, Spring has certainly come in with a crisp breeze, and our hills are green and dotted with cows. I find this time of year breathtaking with the grass popping up and the trees blooming with gorgeous flowers. It is like an average tree becomes a star for a couple of weeks. I’m planning on continuing this flower passion and trying my hand at making some Chinese Magnolia blossoms. Enjoy your week and thanks for your visit!
Cheers,

You might enjoy these posts
![]()

- Lazy Saturday Morning Breakfast Ideas - July 18, 2026
- Lemon Blueberry Crumble (With Creamy Mascarpone) - July 16, 2026
- Red and White Christmas Tree - July 9, 2026
")


")
Tanya Capeci
Beautiful candle and I love to hear the crackling sound!
Ashley
Perfect candle!! I love wood wick, so cozy ❤
Coco in the Kitchen
I have to make these! They’re so beautiful. Daisy will love helping, too! xo
happyhappynester
Yes, Olivia will enjoy making them. Wouldn’t it be cute to make a little garland out of them?
Hannah
This is such a cool idea! So creative and simple to make! Looks awesome!
Marci
I came looking for a new, fun project, and I think I found it! The end result is absolutely beautiful, Janine!
happyhappynester
This is a fun project, Marci. I always do part of my paper projects while watching a movie in the evenings. It is kind of mindless and I can get a lot done in a short amount of time. I hope you enjoy making this project! Thanks for the blog visit and comment!