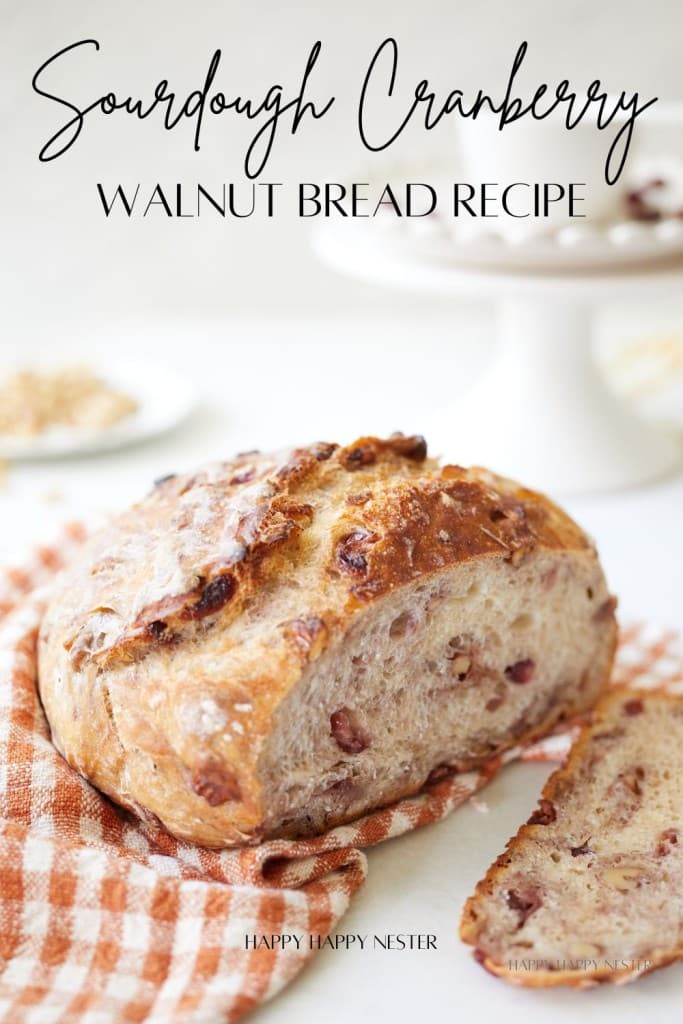
Have you tried the cranberry walnut bread from Costco? I love this yummy bread, but it’s only available during certain times of the year. So, I decided to create my own version: sourdough cranberry walnut bread! It’s such a close match with the chopped nuts and cranberries that I’m thrilled with the result. Now, I don’t have to wait until the holidays to enjoy my favorite bread!
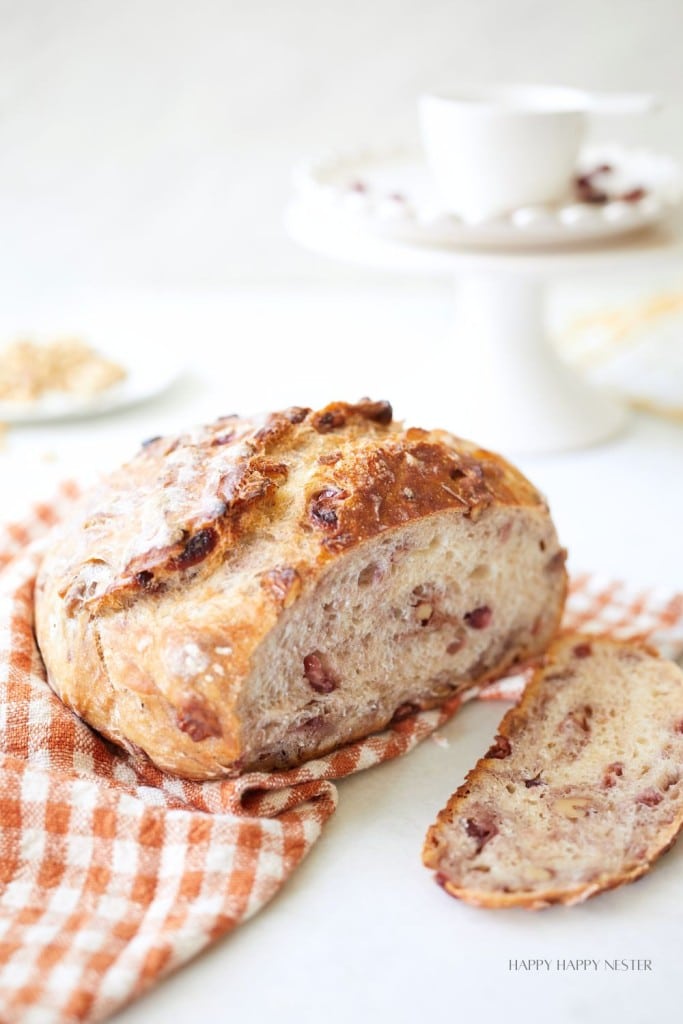
This easy recipe calls for a sourdough starter instead of yeast. With just a few ingredients—water, flour, salt, walnuts, and cranberries—you can create a beautiful, rustic cranberry bread.
I’ve made sourdough bread since the 2019 during the pandemic. Like everyone else, I was stuck at home and wanted to learn how to make this delicious bread. I found it was difficult to find yeast, so I turned to relying on a sourdough starter that I found online. In fact the starter I bought claims to be a San Franicsco starter from 1942!
What is Sourdough?
Sourdough is a special bread made using a naturally fermented starter instead of regular yeast. The starter is just a mix of flour and water that, over time, collects wild yeast and good bacteria from the air around us. This gives sourdough its unique tangy taste and chewy texture, making it not only delicious but also easier on the stomach. Plus, baking with sourdough is a fun, hands-on way to connect with the age-old tradition of breadmaking!
San Francisco Sourdough Starter
San Francisco sourdough is famous for its distinctive tang, thanks to the unique wild yeast in the Bay Area’s air. This natural yeast, known as Lactobacillus sanfranciscensis, thrives in the cool, foggy climate, giving the bread its signature flavor that’s hard to replicate elsewhere. The starter used in San Francisco sourdough is a living culture that’s been passed down through generations, capturing the essence of the city in every loaf. It’s this local yeast, combined with the city’s particular conditions, that makes San Francisco sourdough truly one-of-a-kind. If you’ve ever had a slice, you know just how special and delicious it is!
Why I Love Sourdough Starter!
Here’s the link to the starter I bought years ago!
- Enhanced Flavor: The tangy, rich flavor of sourdough is unmatched by other breads.
- Healthier Digestion: Sourdough is easier to digest due to its natural fermentation process.
- Natural Yeast: No need for commercial yeast—sourdough starter is a natural leavening agent.
- Versatility: A sourdough starter can be used in a variety of recipes beyond bread, like pancakes and pizza dough.
- Long Shelf Life: Sourdough bread stays fresh longer because of its natural acidity.
- Nutrient-Rich: The fermentation process increases the bioavailability of nutrients in the bread.
- No Preservatives: Sourdough starter allows you to bake without the need for artificial preservatives.
- Unique Texture: It creates a perfect balance of a crispy crust and a chewy interior.
- Customizable Flavor: You can adjust the flavor profile by varying the fermentation time.
- Satisfying Process: There’s a sense of accomplishment and tradition in maintaining and baking with a sourdough starter.
- Reliability of a Good Rise: When properly maintained, a sourdough starter can consistently produce a strong rise, leading to airy, well-structured loaves, though it may take some practice to achieve consistent results due to its sensitivity to environmental conditions.
Caring for Your Starter
Feed Regularly: Discard half of your starter and add equal parts of water and flour (by weight) to feed it.
Mix Thoroughly: Stir the starter well until the flour and water are fully combined, ensuring no lumps.
Store Properly: Keep your starter in a clean jar or container and store it in your fridge. I place mine in a bowl and loosely cover it with plastic wrap.
Monitor Activity: Look for bubbles and rising in the starter as signs of a healthy, active culture. It should double in size within a few hours after feeding.
Use or Refresh: When ready to bake, remove the amount you need and feed the remaining starter to keep it going. If it is refrigerated, let it warm up and feed it once or twice before using it.
How to Feed Your Sourdough
Monthly Feeding:
- Remove from Fridge: Take the starter out of the refrigerator once a month.
- Discard and Feed: Discard about half of the starter and feed it with equal parts flour and water (by weight). For example, if you have 100 grams of starter, add 100 grams each of flour and water.
- Let it Activate: Allow the starter to sit at room temperature for a few hours until it becomes bubbly and active again before returning it to the fridge.
Before Baking:
- Plan Ahead: If you want to bake with your starter, remove it from the fridge a day or two in advance.
- Refresh Feedings: Feed the starter once or twice at room temperature to boost its activity. This ensures it’s strong and active enough to leaven your bread effectively.
- Use and Store: After using the needed amount for baking, feed the remaining starter and store it back in the refrigerator.
How to Make This Sourdough Cranberry Walnut Bread
Ingredients:
Sourdough Starter: This is the heart of your bread, providing natural yeast and bacteria for fermentation, giving the bread its unique tangy flavor.
Salt: Enhances the flavor of the bread and helps control the fermentation process.
Water: Essential for hydrating the flour and activating the sourdough starter, it also affects the dough’s texture.
Flour: The main structure of your bread, providing the necessary gluten for elasticity and chewiness.
Dried Cranberries: Add a touch of sweetness and a burst of flavor that complements the tangy sourdough.
Walnuts: Provide a crunchy texture and a rich, nutty flavor that pairs beautifully with the cranberries.
Cinnamon: Adds warmth and a subtle spice, enhancing the overall flavor profile of the bread.
Honey: Adds a subtle sweetness and helps keep the bread moist while also enhancing the overall flavor profile.
Brown Sugar: Provides a rich, caramel-like sweetness and a touch of molasses flavor, which complements the tart cranberries and nutty walnuts perfectly.

Tap on Image to Shop!


Directions:
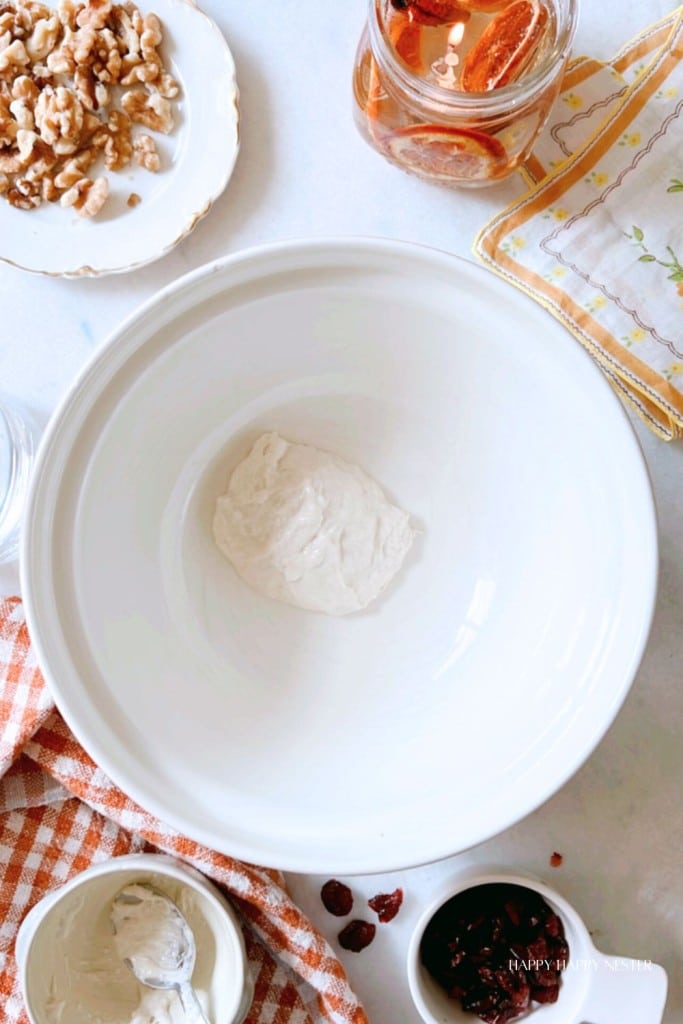
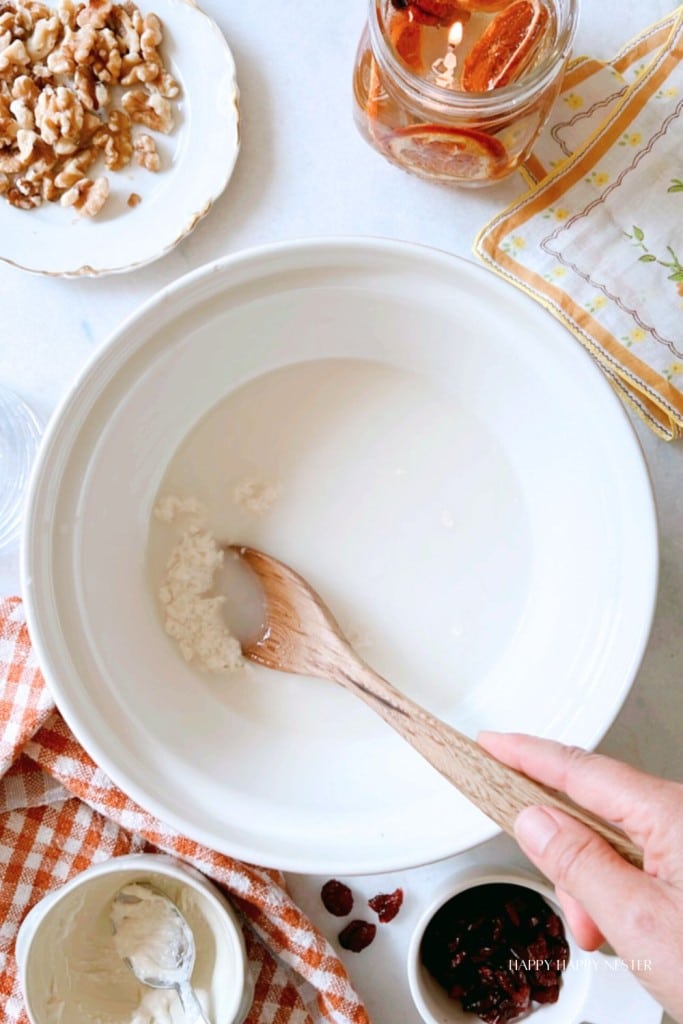
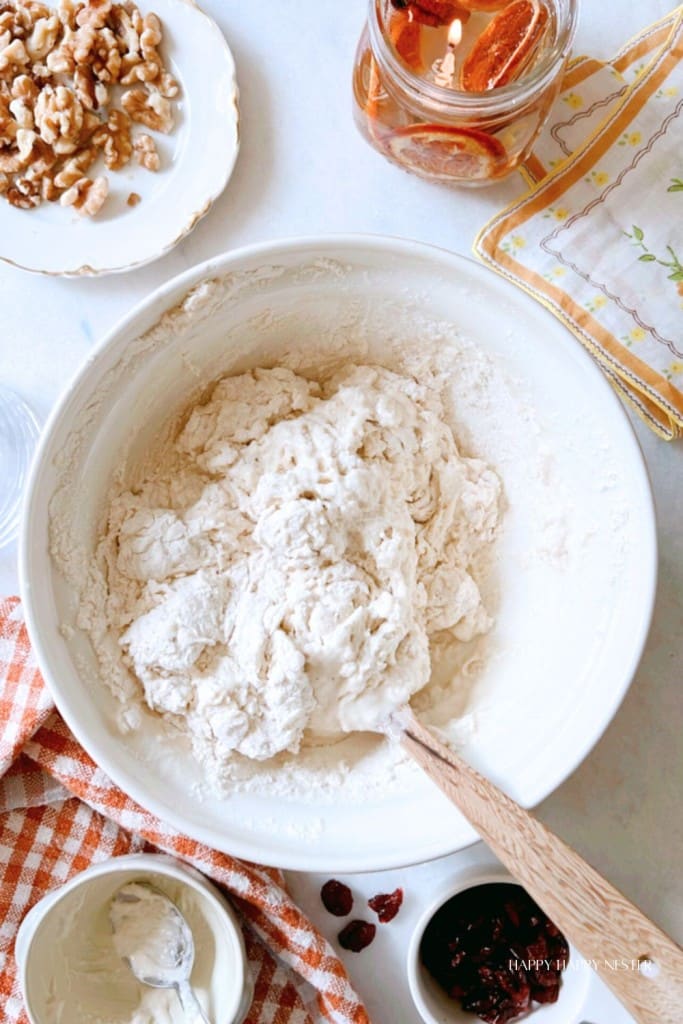
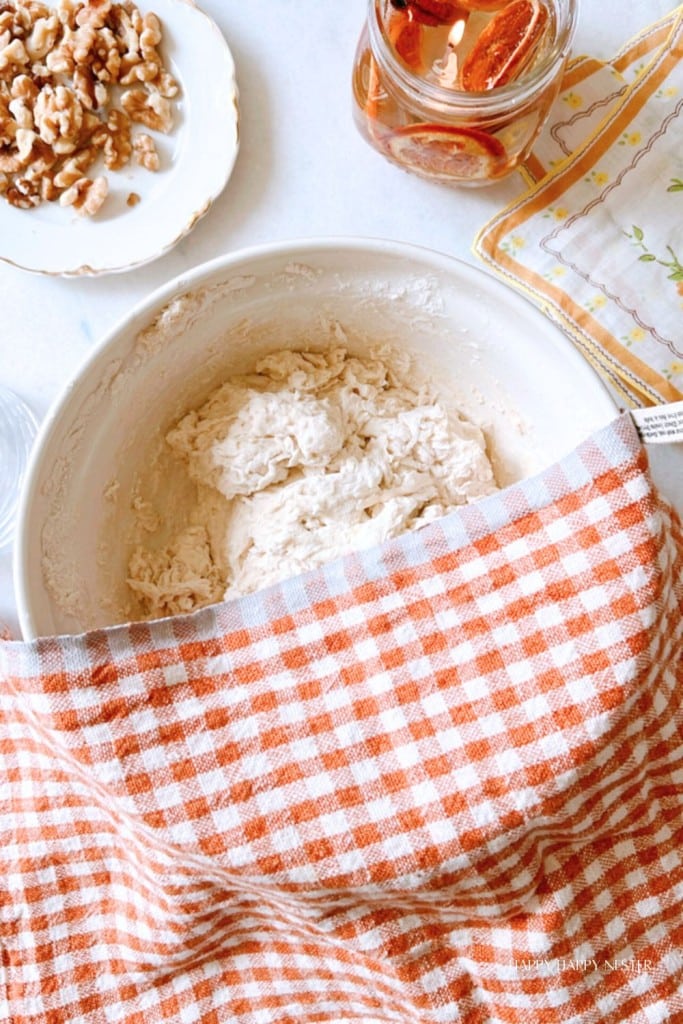
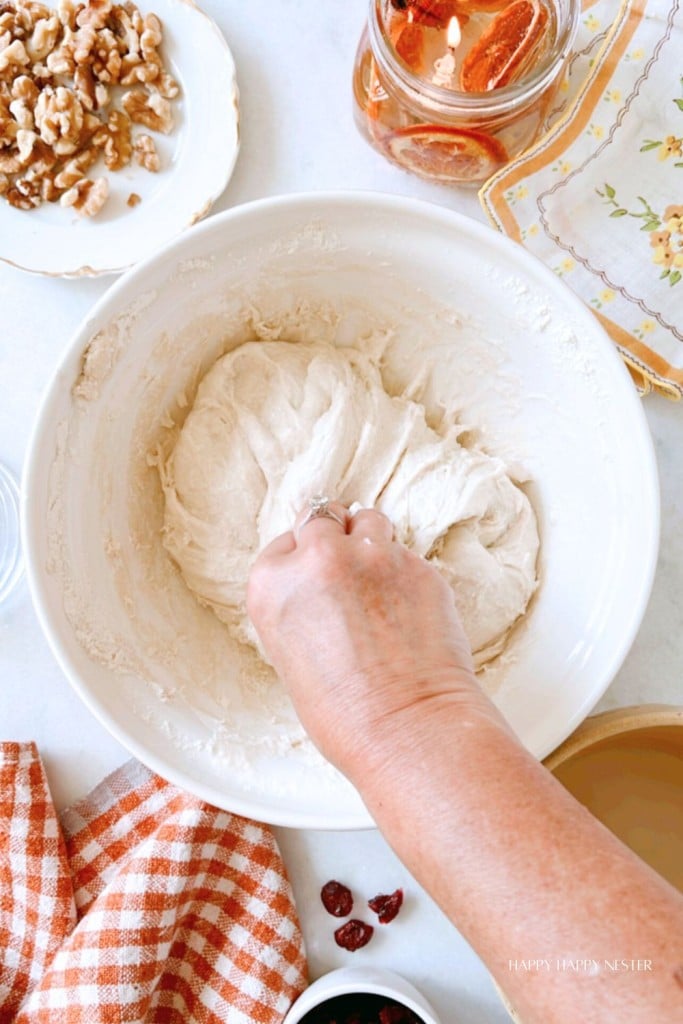
Step 1 – Make the dough: Whisk together the starter and water using a fork or spatula in a large bowl. Add the flour and salt, then mix until combined. The dough will be thick, shaggy, and challenging to mix. If you find that the flour isn’t fully incorporated, add water one tablespoon at a time until it all comes together. Finish by hand if needed to form a rough dough. The dough will start heavy, thick, and sticky, but it will relax as it rests. Cover it with a damp kitchen towel and rest for 30 minutes.
Step 2 – Stretch and fold: After 30 minutes, take one corner of the dough, stretch it up, and fold it into the center. Repeat this process 4 to 5 times, working around the dough. Let it rest for another 30 minutes, then repeat the stretching and folding. If you have time, repeat this process two more times for 4 cycles over 2 hours. However, even just one round of stretches and folds will still benefit your dough, so don’t worry if you need to step away shortly after mixing.
Step 3 – First Rise (Proof the Dough Overnight)
Cover the bowl with a damp kitchen towel (wet and wring it out) and let the dough rise at room temperature for about 8 to 10 hours at 70°F (21°C), on the counter overnight for 8-12 hours at room temperature. This bulk fermentation time can vary depending on your environment—warmer homes will speed up the rise, while cooler ones slow it down. I’ve proofed for up to 18 hours in colder winters, whereas in warmer summer conditions, the dough was ready in just 8 hours. You can proof it in your oven if it has this bread-proofing feature.
Step 4 – Soak Cranberries
Add hot water to the dried cranberries. Soak the cranberries until plump, then drain and squeeze out the water. Set aside for later.
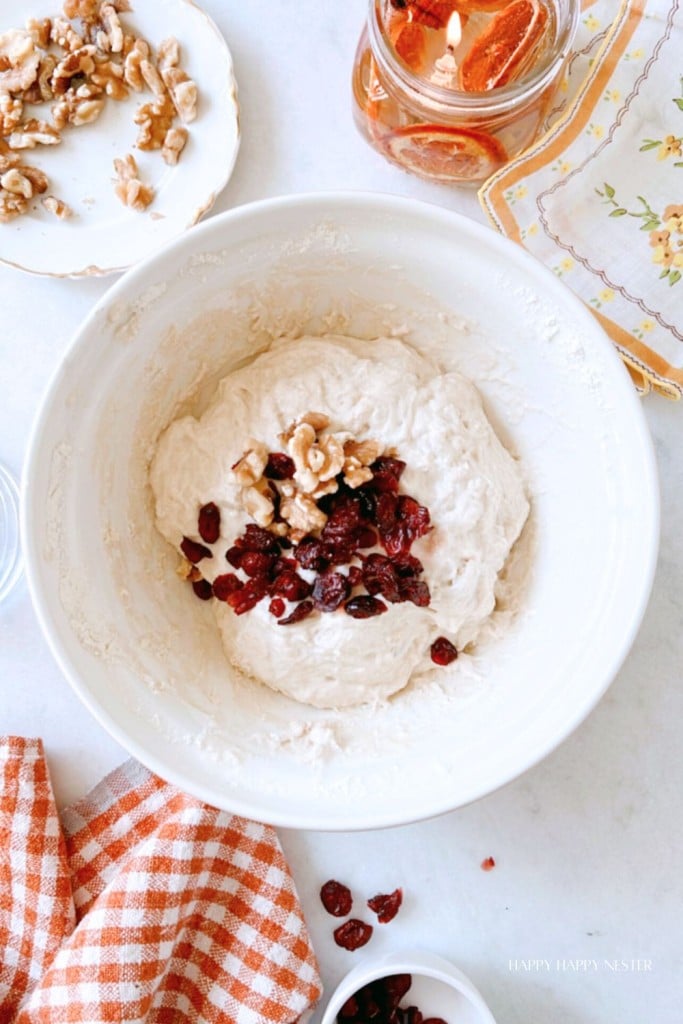
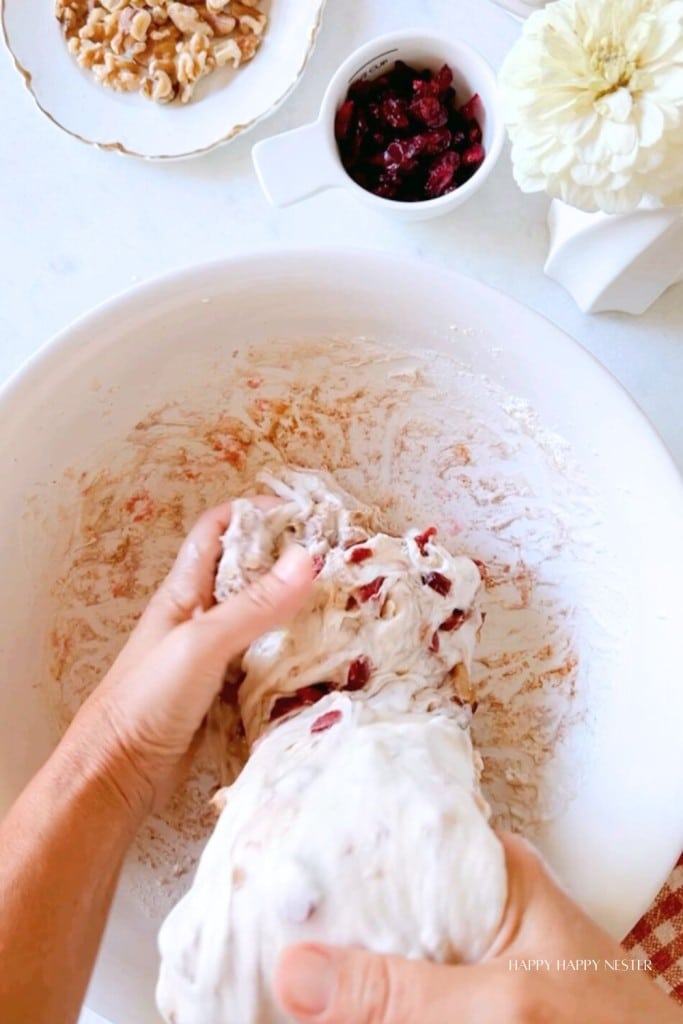
Step 5 – Add Cranberries, Walnuts, Cinnamon, Honey and Brown Sugar
Add cranberries, walnuts, cinnamon, honey, and brown sugar to the dough. Mix the ingredients into the dough.
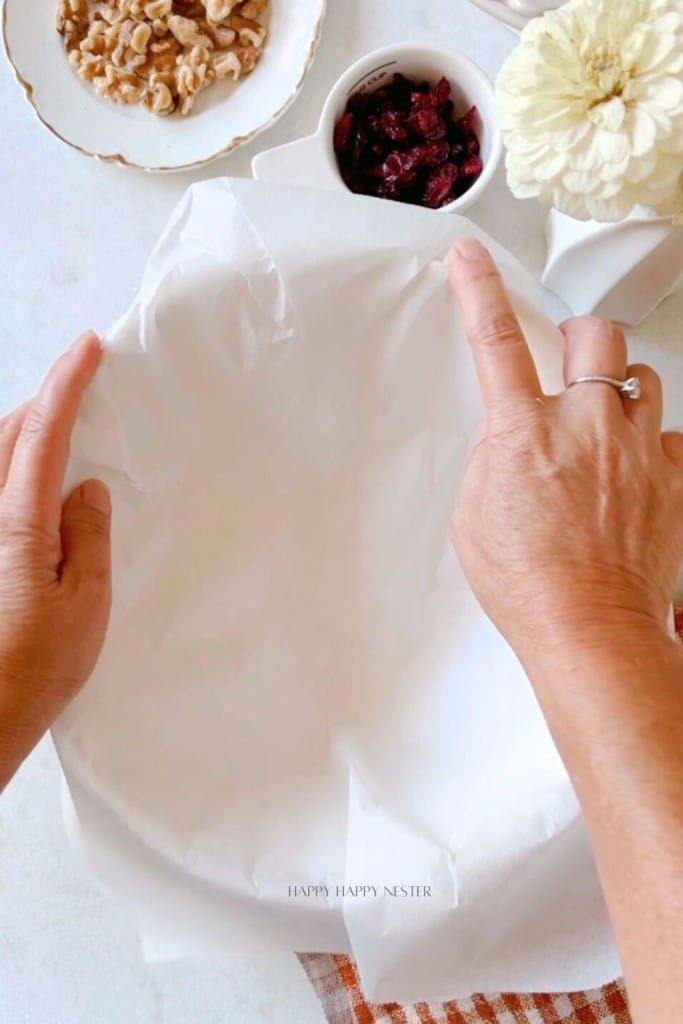
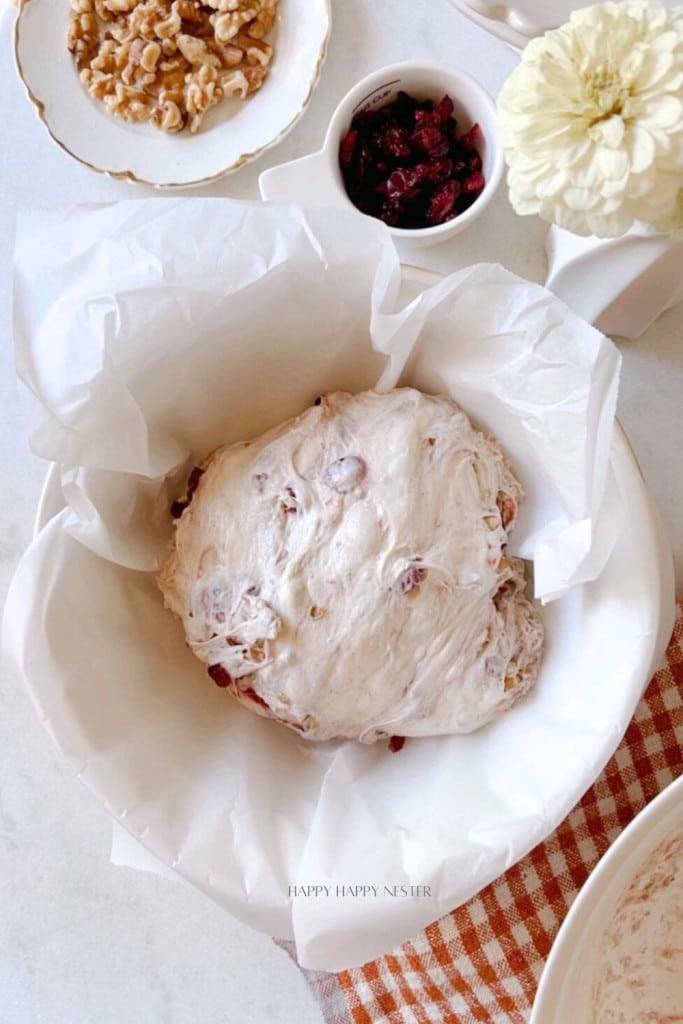
Step 6 – Prep Bowl
Line a 12-inch bowl with parchment paper.
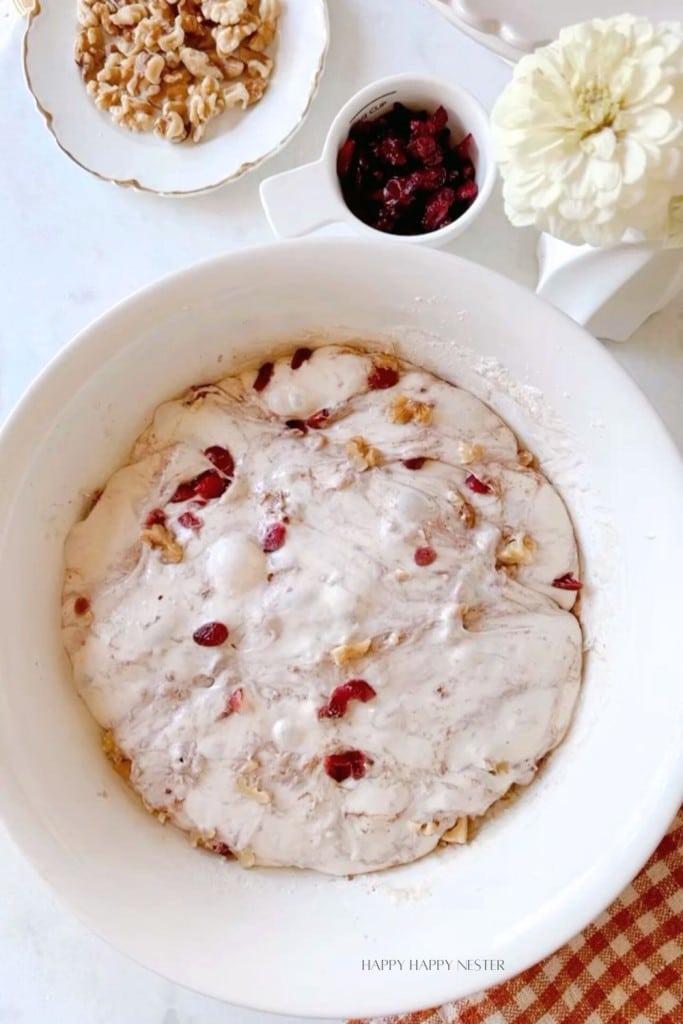


Step 7 – Second Stretch
First, wet your hands and gently loosen the dough from the sides of the bowl. Gently lift the dough from the middle, raising it about 1-2 feet, then gently fold it back onto itself like a ribbon draped on itself. Wet your hands again, rotate the bowl a quarter turn, and repeat the process. If needed, you can do this again in 20 minutes. On the third lift and stretch, place the dough into a parchment-lined bowl with the seam side down.
Step 8 – Second Rise
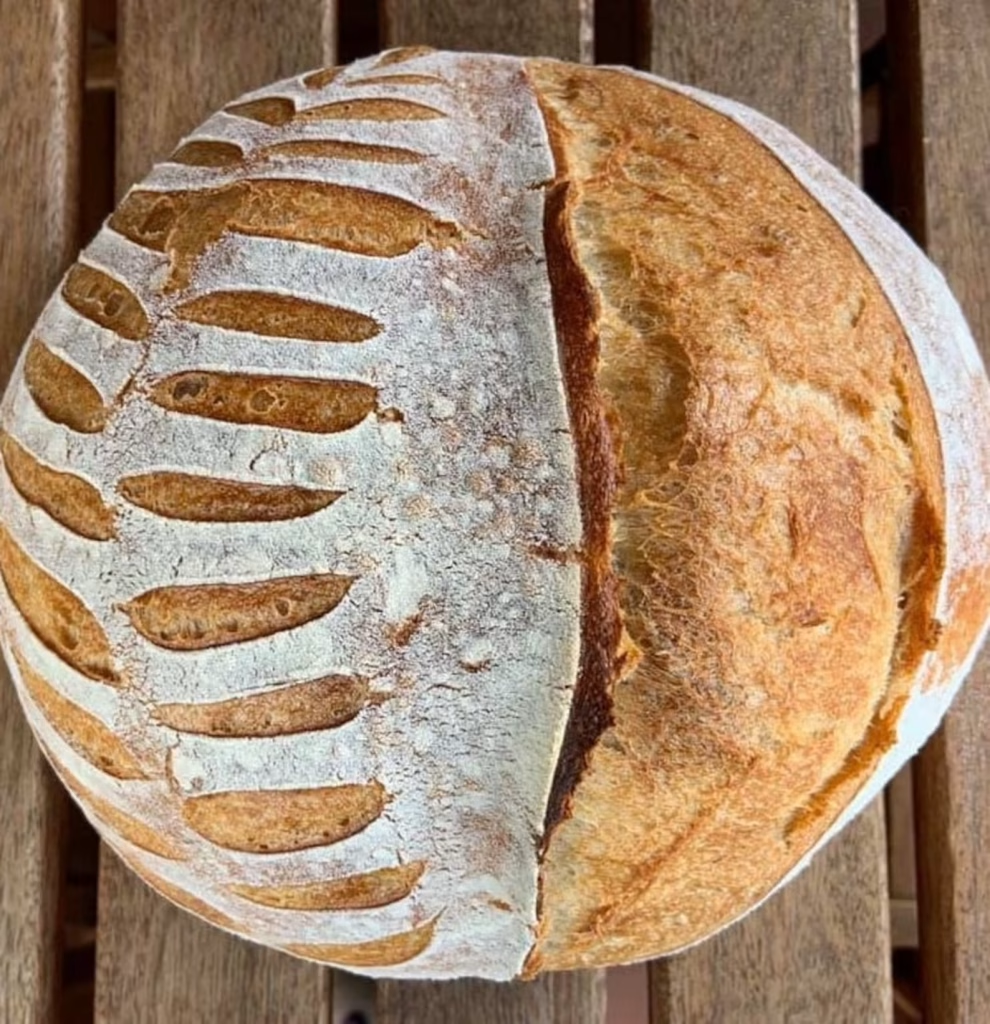
Remember to refrigerate the dough for 1 to 3 hours. Chilling the dough uncovered makes it easier to score and helps enhance the “oven spring” during baking. It’s important to note that the dough won’t rise during this time — it’s simply for firming it up for baking.
During this time, preheat the oven to 550°F with the Dutch oven pot with the lid on.
Step 9 – Bake
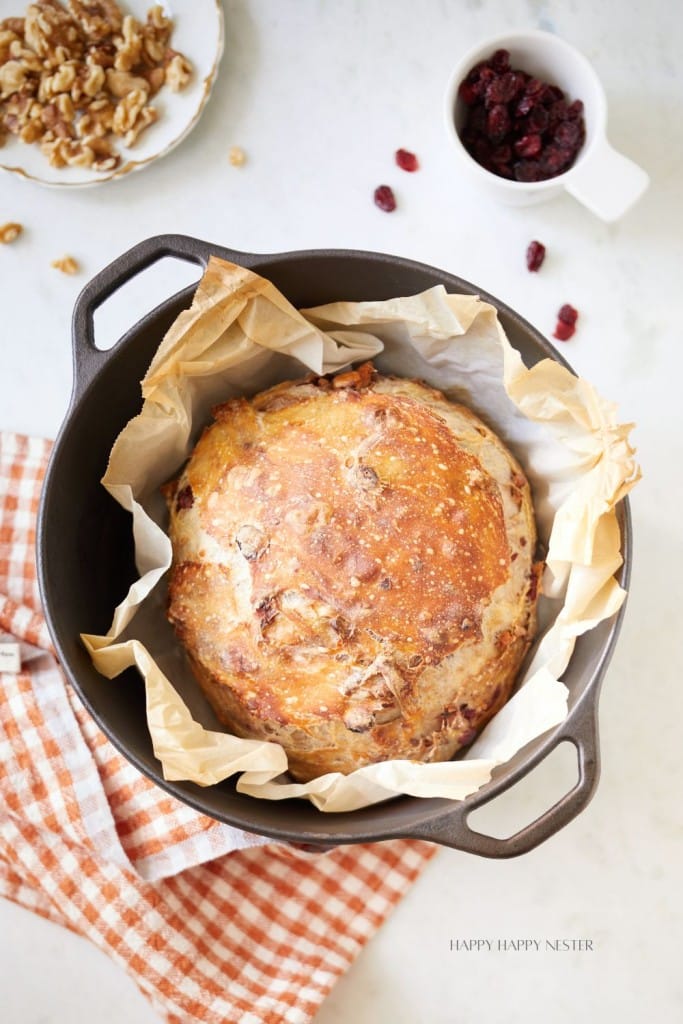
After carefully removing the Dutch oven from the oven, close the door to keep the heat inside. Take off the lid, then gently lift the dough by holding the corners of the parchment paper and place it into the Dutch oven. Quickly cover with the lid.
Return the bread to the oven, reduce the heat to 450° F, and bake covered for 30 minutes.
After 30 minutes of baking, remove the lid, lower the temperature to 400ºF (200ºC), and continue to bake for 10 – 15 minutes more.
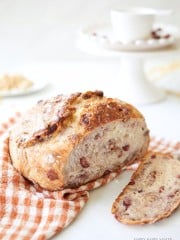
Step 10 – Cooling Loaf
Once the bread is done, cool it on a wire rack for 1 hour before slicing.
Sourdough Cranberry Walnut Bread Recipe
Ingredients
- 100 grams sourdough starter bubby active starter that has been fed.
- 375 grams warm water
- 500 grams flour
- 2 tsp salt
Mix-Ins
- 70 grams dried cranberries
- 75 grams hot water
- 75 grams chopped walnuts
- 1 tsp ground cinnamon
- 40 grams honey
- 3 tbsp brown sugar lightly packed
Instructions
Make the Dough
- Whisk together the starter and water using a fork or spatula in a large bowl. Add the flour and salt, then mix until combined. The dough will be thick, shaggy, and challenging to mix. If you find that the flour isn’t fully incorporated, add water one tablespoon at a time until it all comes together. Finish by hand if needed to form a rough dough. The dough will start heavy, thick, and sticky, but it will relax as it rests. Cover it with a damp kitchen towel and rest for 30 minutes.
First Stretch and Fold
- After 30 minutes, take one corner of the dough, stretch it up, and fold it into the center. Repeat this process 4 to 5 times, working around the dough. Let it rest for another 30 minutes, then repeat the stretching and folding. If you have time, repeat this process two more times for 4 cycles over 2 hours. However, even just one round of stretches and folds will still benefit your dough, so don’t worry if you need to step away shortly after mixing.
First Rise (Proof the Dough Overnight)
- Cover the bowl with a damp kitchen towel (wet and wring it out) and let the dough rise at room temperature for about 8 to 10 hours at 70°F (21°C), on the counter overnight for 8-12 hours at room temperature. This bulk fermentation time can vary depending on your environment—warmer homes will speed up the rise, while cooler ones slow it down. I’ve proofed for up to 18 hours in colder winters, whereas in warmer summer conditions, the dough was ready in just 8 hours. You can proof it in your oven if it has this bread-proofing feature.Remember that the timing can vary based on the amount of starter used and the temperature of your kitchen, so rely on visual cues like volume increase rather than time alone. A straight-sided vessel can make it easier to see when the dough has risen enough.
Soak Cranberries
- Add hot water to the dried cranberries. Soak the cranberries until plump, then drain and squeeze out the water. Set aside for later.
Add Cranberries, Walnuts, Cinnamon, Honey and Brown Sugar
- Add in a bowl, the cranberries, walnuts, cinnamon, honey, and brown sugar and thoroughly mix. Then, add it to the dough and mix thoroughly with your hands.
Prep Bowl with Parchment Paper
- Line a 12-inch bowl with parchment paper.
Second Stretch
- First, wet your hands and gently loosen the dough from the sides of the bowl. Gently lift the dough from the middle, raising it about 1-2 feet, then gently fold it back onto itself like a ribbon draped on itself. Wet your hands again, rotate the bowl a quarter turn, and repeat the process. If needed, you can do this again in 20 minutes. On the third lift and stretch, place the dough into a parchment-lined bowl with the seam side down.
Second Rise
- Remember to refrigerate the dough for 1 to 3 hours. Chilling the dough makes it easier to score and helps enhance the “oven spring” during baking. It’s important to note that the dough won’t rise during this time — it’s simply for firming it up for baking.During this time, preheat the oven to 550°F with the Dutch oven pot with the lid on.
Bake Loaf
- After carefully removing the Dutch oven from the oven, close the door to keep the heat inside. Take off the lid, then gently lift the dough by holding the corners of the parchment paper and place it into the Dutch oven. Quickly cover with the lid.Return the bread to the oven, reduce the heat to 450° F, and bake covered for 30 minutes.After 30 minutes of baking, remove the lid, lower the temperature to 400ºF (200ºC), and continue to bake for 10 – 15 minutes more.
Cool Bread
- Once the bread is done, cool it on a wire rack for 1 hour before slicing.
Nutrition
A Good Bread Knife Is Essential to Homemade Bread!
For years, we didn’t have a sharp bread knife, and our homemade bread would end up pretty mangled when we sliced it. Finally, we gave in, and my husband bought an amazing bread knife that cuts through bread like butter—it’s that sharp! I highly recommend investing in a good bread knife and reserving it just for your homemade loaves. It makes a world of difference, and I wish we had gotten one much sooner!

Why You’re Going to Love This Cranberry Walnut Bread!
- Tangy Flavor: The sourdough base offers a delightful tang that perfectly complements the sweetness of the cranberries.
- Crunchy Texture: The walnuts add a satisfying crunch in every bite.
- Natural Sweetness: Dried cranberries provide a natural sweetness without overpowering the bread.
- Healthy Ingredients: Made with wholesome, natural ingredients, this bread is a healthier choice.
- Perfect for Any Time of Day: It’s great for breakfast, a snack, or even as a side with dinner.
- Unique Flavor Combination: The blend of cranberries, walnuts, and cinnamon creates a flavor profile that’s both comforting and sophisticated.
- Versatile Use: This bread can be enjoyed on its own, toasted with butter, or used in sandwiches.
- Beautiful Presentation: The studded cranberries and walnuts make the bread visually appealing, perfect for sharing or gifting.
- Seasonal Appeal: The flavors of cranberry and cinnamon evoke a cozy, seasonal feeling, making it ideal for fall and winter.
- Homemade Satisfaction: Baking this bread at home brings a sense of accomplishment and fills your kitchen with an irresistible aroma.
Here are some more recipes you may enjoy!
I’m thrilled to finally share this recipe! After making sourdough cranberry walnut bread for so long, it feels great to pass on my passion for breadmaking.
Thanks so much for stopping by!
Enjoy this recipe,

Photo Credits: MyPhotography.com


- Tori Karaage Don (Japanese Chicken) - July 2, 2026
- Fluffy Japanese Pancake Recipe (Souffle) - June 24, 2026
- Mochi Recipe: How to Make Easy Homemade Mochi - June 18, 2026


Kathy McGuire
I love your recipe and it is delish the only problem I have is that the bottom gets so dark almost burnt. How you bake yours so the bottom isn’t dark?
Thanks Kathy
Janine Waite
Hey Kathy! Try baking the bread a couple minutes less. Are you using parchment paper underneath the bread? I find that when I place parchment paper underneath, it does not come out burnt.