
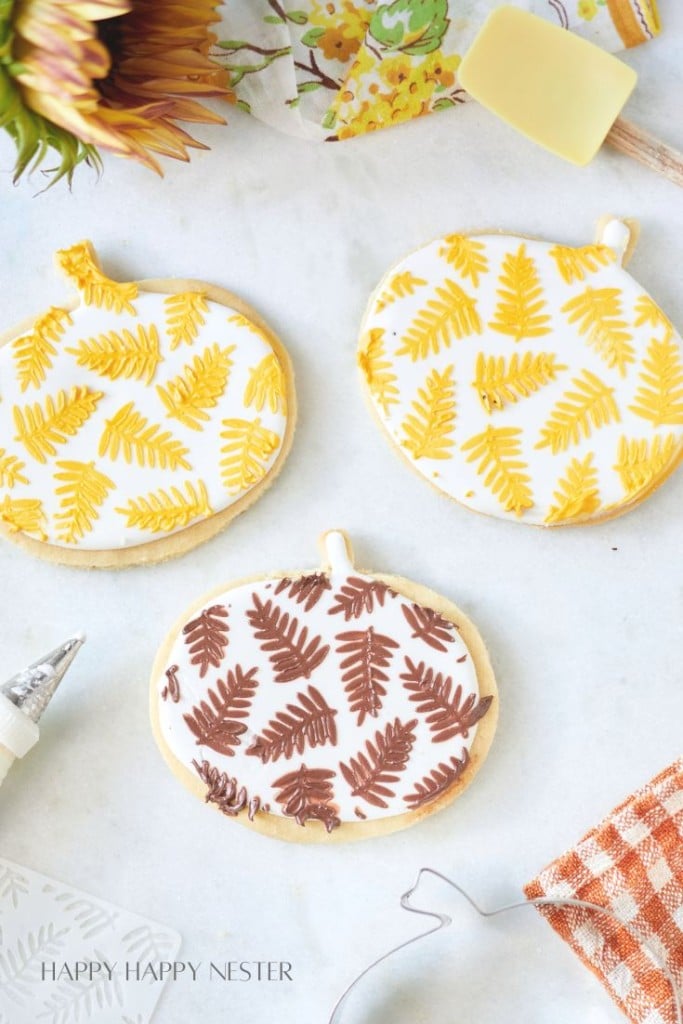
Looking for the perfect Autumn Sugar Cookies to celebrate the season? These festive cookies are shaped like pumpkins and beautifully decorated with icing and stenciled fall leaves, making them the ultimate treat for your fall gatherings. Their soft, buttery texture not only makes them taste amazing, but they also look stunning on any dessert table.
Beneath the charming fall-themed design, you’ll find a classic sugar cookie with just the right amount of sweetness. These cute sugar cookies are fun to make and even more fun to share, whether for a cozy night in or a festive fall party!
Who doesn’t love a pretty sugar cookie. I enjoy that they are a fun way to celebrate the seasons with cookie cutters, icing and sprinkles.
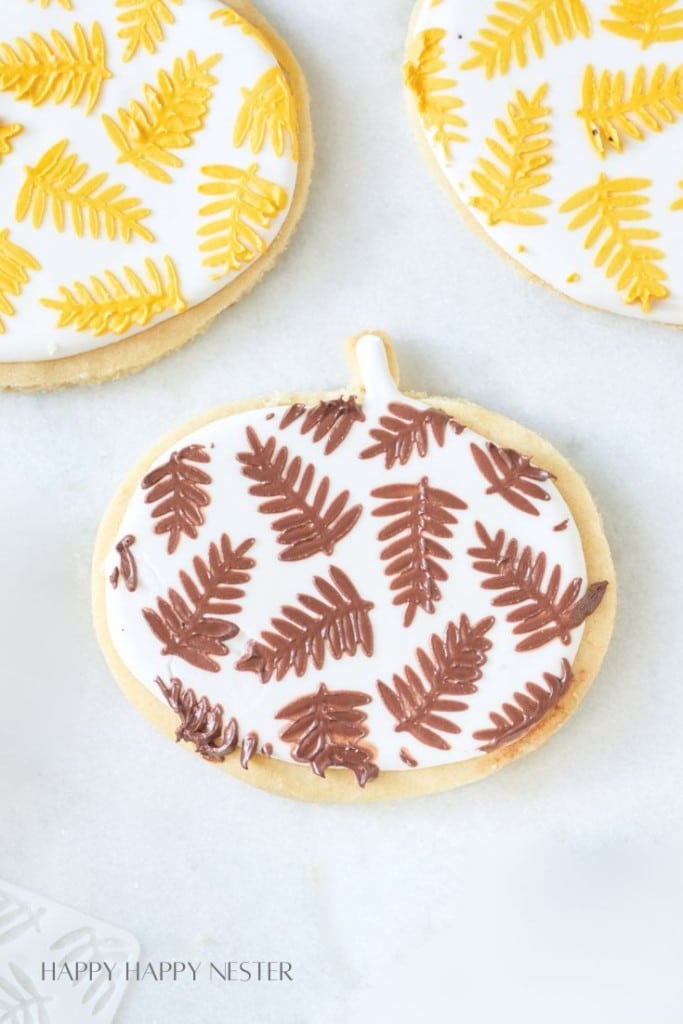
This little cookie that I’m sharing today celebrates Autumn with a pumpkin shape and a fun leaf stencil design. And I want to note, please don’t be intimidated with the icing! Once you learn the tricks to making the perfect icing, it’s hard to make a mistake.
The cool stencil design just adds such a fun touch to this sugar cookie. I was a bit worried that the stencil would move around and smudge, but instead the frosting that I covered it with kept that from happening.
So, let’s take a look at this fun Autumn sugar cookies!
LET’S TALK ABOUT ICING
I didn’t attempt icing sugar cookies for years since they intimidated me.
Finally, I took the plunge.
I learned a few things about making pretty iced sugar cookies. First, a good icing recipe is key, and second, the right cake decorating tools are essential. I finally broke down and invested in some good pastry tips.
Let’s chat about how to frost your sugar cookies.
In icing, you’ll want a consistency similar to marshmallow fluff. If you aren’t familiar with fluff, look for a frosting that is a bit on the runny side. If you watch my icing video, you’ll see the consistency.
Here is another easy tip: The 10-Second Rule. To check the consistency, drag the tip of a knife through the surface of the icing, letting the knife go approximately an inch deep, and slowly count to 10. If the surface of the icing smoothes over in approximately 10 seconds, then your icing is the correct consistency and is now ready to use.
Cookie Dough Ingredients
- Butter: The butter adds richness and a soft texture to the cookies, ensuring they turn out perfectly tender.
- Sugar: Sugar provides sweetness and helps to caramelize the edges of the cookies for a delicious golden-brown finish.
- Eggs: Eggs act as a binder, helping to hold the cookie dough together and giving it structure.
- Flour: Flour is the leading dry ingredient, giving cookies their structure and helping them hold their shape while baking.
- Vanilla extract: Vanilla extract enhances the flavor of the cookies, adding a subtle yet delicious aroma and taste.
- Salt: Salt balances out the sweetness of the other ingredients and enhances the overall flavor profile of the cookies, making them more flavorful.
Icing Ingredients
- Warm Water: Warm water dissolves the meringue powder and creates a smooth consistency for the icing.
- Meringue Powder: Meringue powder acts as a stabilizer and helps the icing to set and hold its shape once applied to the cookies.
- Powdered Sugar: Powdered sugar is the main ingredient in the icing, providing sweetness and creating a thick, smooth texture that coats the cookies perfectly.
- Leaf Stencil: You’ll need a leaf stencil to create a beautiful fall pattern on your cookies.
- Piping Tips #2 and #4: You’ll need the #2 tip to pipe the thin outline and #4 to flood the icing.
Frosting for Stencils
I used Vanilla store-bought frosting. You’ll only need about a cup of frosting to stencil the cookies.
Making Sugar Cookies
Step 1 – Make Dough
Cream the butter and sugar together until light and fluffy, about one minute at low speed. Add the eggs and vanilla and mix well.
Mix flour and salt in a separate bowl.
Slowly add the flour mixture to the butter with your mixer on the lowest speed. Mix for 30 seconds until the dough is thoroughly incorporated.
Step 2 – Roll Out Dough
Divide the dough into two parts. Place each between two pieces of parchment paper. Roll out each set of dough. I rolled mine out to a 6 mm thickness, but it is whatever thickness you prefer.
Transport each cookie dough to a cookie sheet. Refrigerate the cookie dough for 1 hour.
Place the cut-out cookies back in the fridge for about 10 minutes. Reroll the extra dough and place the cut-out cookies back in the fridge for 10 minutes.
Step 3 – Bake Cookies
Preheat oven to 350°.
Remove chilled cookies from the fridge and bake for 8-10 minutes.
With the extra dough, reroll and chill for 10 minutes. The colder the cookies, the better they keep their shape when baking. I hope this makes sense.
Decorating Cookies
Step 1 – Make Icing
Using your mixer bowl, add warm water and meringue powder. Whisk by hand until frothy. Place the mixing bowl on its stand. Now, add the powdered sugar all at once. Attach the paddle to the mixer and mix the icing at the lowest speed for 10 minutes.
To test if your icing is the right consistency, use the 10-second rule.
10 Second Rule: Drag the tip of a knife through the surface of the icing, letting the knife go approximately an inch deep, and slowly count to 10. If the surface of the icing smoothes over in approximately 10 seconds, then your icing is the correct consistency and is now ready to use.
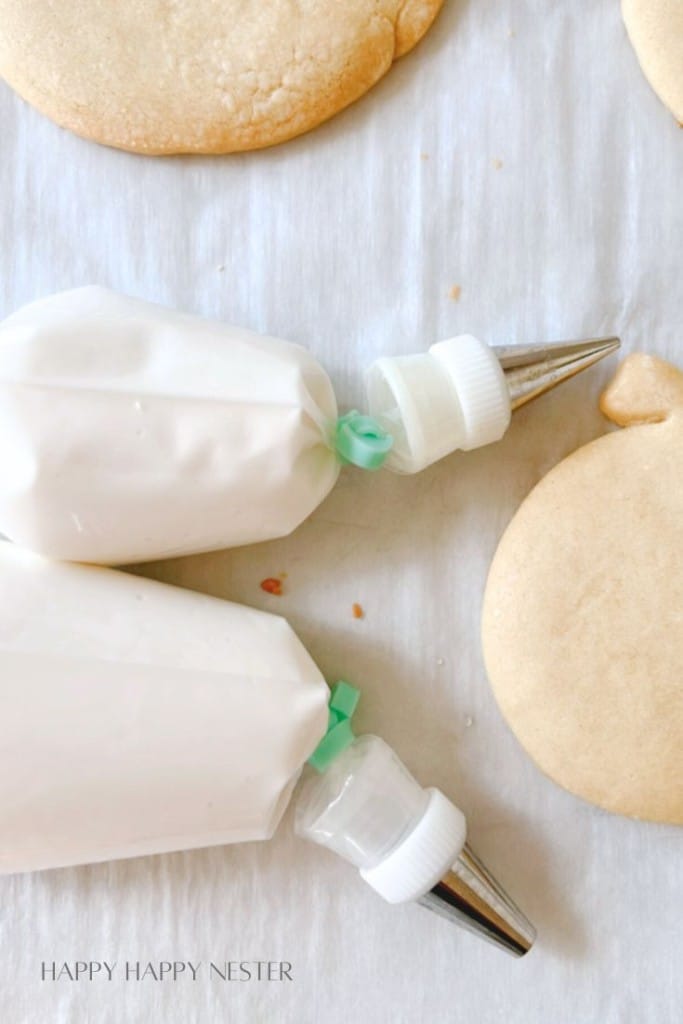
Step 2 – Fill The Pastry Bag
Place your tip (#2 round tip) and piping coupler on one of your pastry bags. On another pastry bag, do the same, but add a pastry tip with a larger opening, like a #4 round tip. Then, place each bag in a tall drinking glass and fold the bag on the outside of the glass. Fill the bag with icing.
If you don’t have pastry tips, you can cut a small hole at the tip. The smaller your opening, the easier it is to control. But if it’s too tiny, you’ll have difficulty squeezing out the frosting. I think I cut about 1/4 inch or less at the tip.
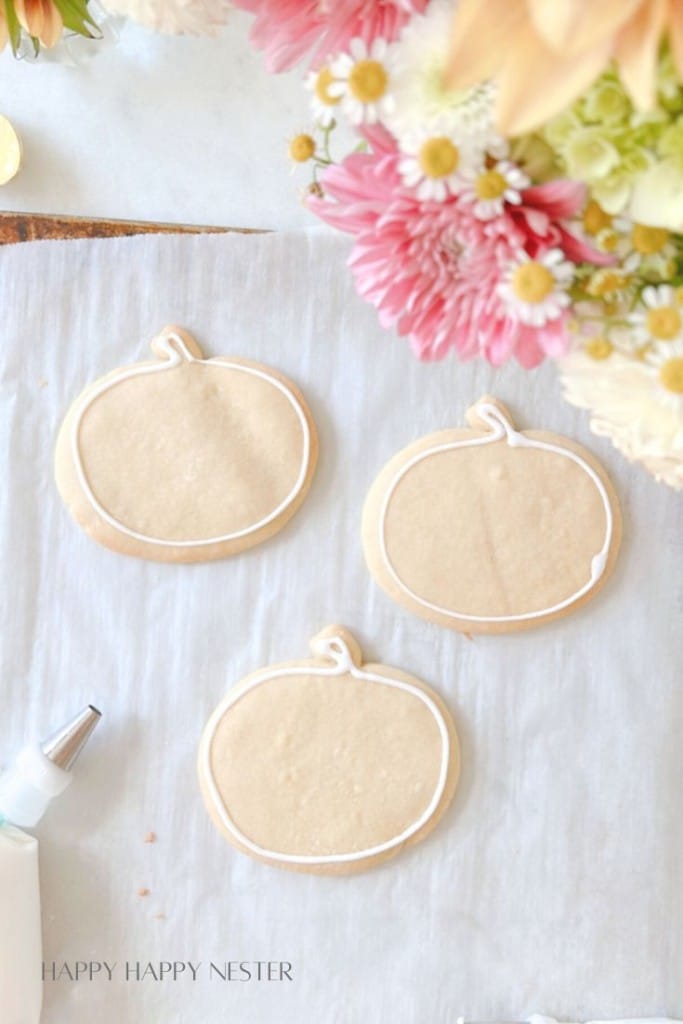
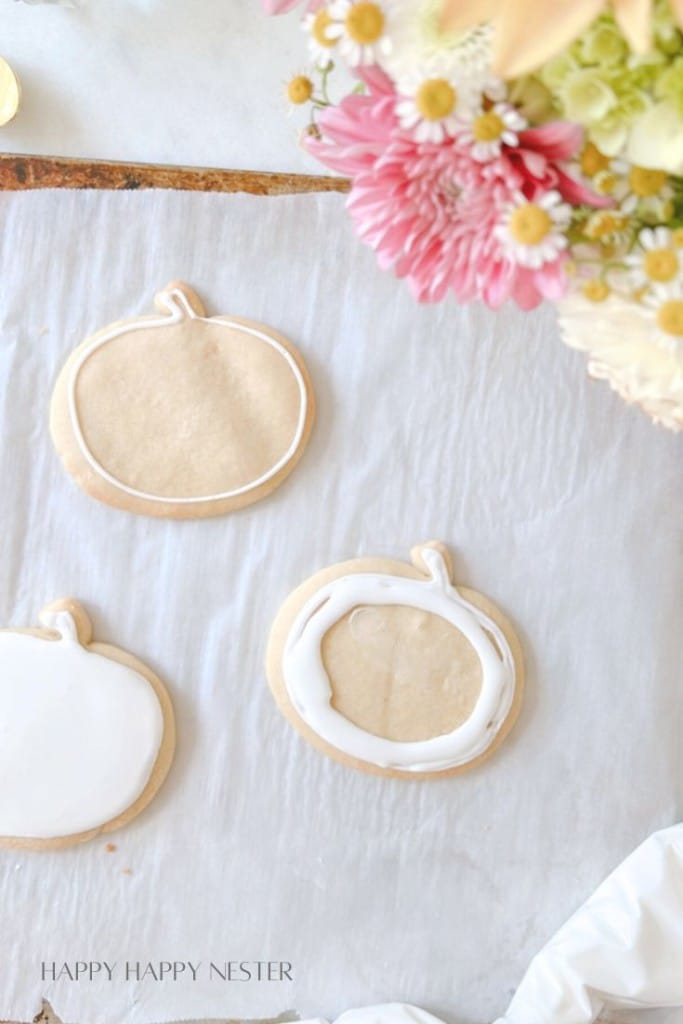
Step 3 – Start Piping
Using your smaller tip, outline your cookie with a single line of icing.
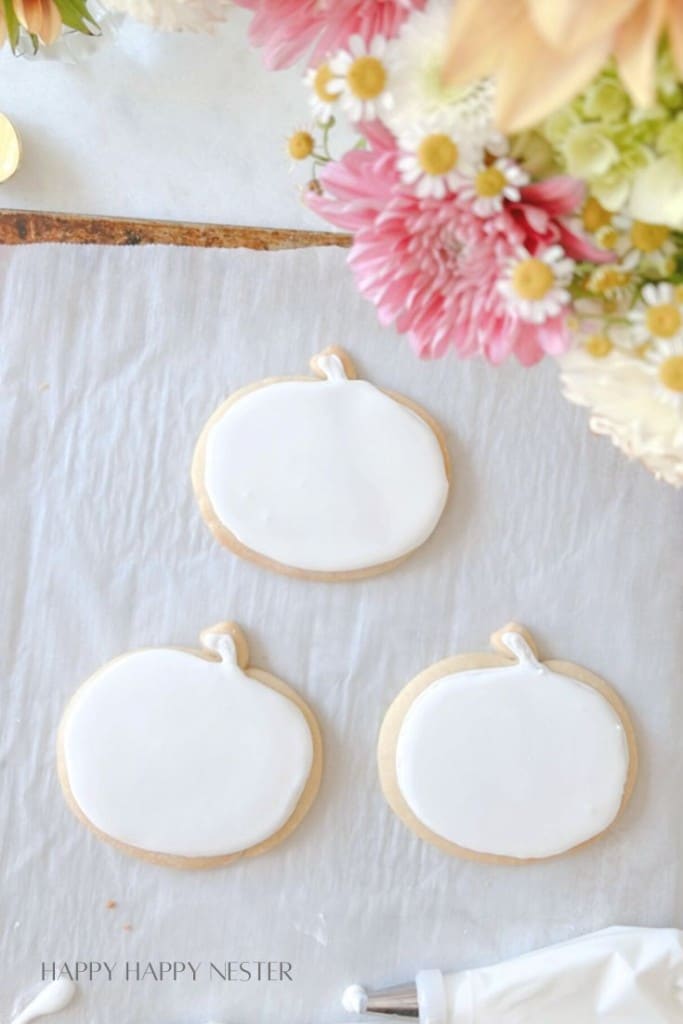
Step 4 – Flood the Icing
Fill in the outline with icing from your larger pastry tip bag. Go around the inside of the outline until the whole area is flooded with icing. Don’t worry if you have a few empty spots. Hold your cookie on the sides and jiggle it back and forth. This will spread the icing and create a smooth surface. I did shake one of my cookies too much, and it seeped out of the outline. So, while the icing was soft and malleable, I took my finger and cleaned up the outline.
Step 5 – Stencil Cookies
Mix your frosting (store-bought white icing) with food dye in a small bowl and set it aside. Once the icing on the cookies has fully hardened, which takes about two hours, ensure it’s firm by lightly pressing with your finger (it shouldn’t leave an indent). Place your stencil over the iced cookie, then spread a layer of the dyed frosting evenly over the stencil. Cover the entire stencil area, and use a pastry scraper to remove any excess frosting gently.

Fall Sugar Cookie
Ingredients
- 2 cups unsalted butter room temperature
- 2 cups granulated sugar
- 2 eggs large
- 5 cups all-purpose flour
- 3 tsp vanilla extract
- 1 tsp salt
Instructions
- Cream the butter and sugar together until light and fluffy. This takes about one minute on low speed.
- Add eggs and vanilla and mix well.
- Mix flour and salt in a separate bowl.
- With your mixer on the lowest speed, slowly add flour mixture to the butter. Mix for 30 seconds until the dough is thoroughly incorporated.
- Divide dough into two parts. Place each between two pieces of parchment paper.
- Roll out each set of dough. I rolled mine out to a 6 mm thickness, but it is whatever thickness you prefer.
- Transport each cookie dough to a cookie sheet.
- Refrigerate the cookie doughs for 1 hour.
- Preheat oven to 350°
- Take chilled cookie dough and cut out cookie shapes and place the cookies on a parchment lined cookie sheet.
- Place cut out cookies back in the fridge for about 10 minutes.
- Reroll extra dough and place cut out cookies back in the fridge for 10 minutes.
- Remove chilled cookies from fridge and bake for 8-10 minutes.
- With the extra dough reroll and chill for 10 minutes. The colder the cookies the better they keep their shape when baking. I hope this makes sense.
Icing and Decorating
- To make the icing, follow the icing recipe below.
- Fill The Pastry BagPlace your tip (#2 round tip) and piping coupler on one of your pastry bags. On another pastry bag, do the same, but add a pastry tip with a larger opening, like a #4 round tip. Then, place each bag in a tall drinking glass and fold the bag on the outside of the glass. Fill the bag with icing.If you don’t have pastry tips, you can cut a small hole at the tip. The smaller your opening, the easier it is to control. But if it’s too tiny, you’ll have difficulty squeezing out the frosting. I think I cut about 1/4 inch or less at the tip.
- Start PipingUsing your smaller tip, outline your cookie with a single line of icing.
- Flood the IcingFill in the outline with icing from your larger pastry tip bag. Go around the inside of the outline until the whole area is flooded with icing. Don’t worry if you have a few empty spots. Hold your cookie on the sides and jiggle it back and forth. This will spread the icing and create a smooth surface. I did shake one of my cookies too much, and it seeped out of the outline. So, while the icing was soft and malleable, I took my finger and cleaned up the outline.
- Stencil CookiesMix your frosting (I use store-bought white icing) with food dye in a small bowl and set it aside. Once the icing on the cookies has fully hardened, which takes about two hours, ensure it’s firm by lightly pressing with your finger (it shouldn’t leave an indent). Place your stencil over the iced cookie, then spread a layer of the dyed frosting evenly over the stencil. Cover the entire stencil area, and use a pastry scraper to remove any excess frosting gently.
- Allow the stenciled frosting to harden before serving.
Nutrition

Royal Icing
Ingredients
- 3 – 5 oz warm water
- 2½ tbsp meringue powder
- 4 cups powdered sugar
Instructions
- Using your mixer bowl add warm water and meringue together.
- Whisk by hand until frothy.
- Place the mixing bowl on the mixer. Now add the powdered sugar all at once.
- Attach the paddle to the mixer and mix the icing on the lowest speed for 10 minutes.
- You are looking for a slightly runny frosting. If it is too thick, add small amounts of water to get the right consistency. Make sure to do the 10 – second icing test.
- Place icing in bowls and add desired colors.
- Cover extra icing with plastic wrap. I place the plastic straight onto the icing preventing air from drying it out.
Nutrition
These Autumn sugar cookies are the cutest! Make them in whatever colors you prefer, and enjoy these festive cookies that look like they came from a pastry shop!
Cheers,

Photo Credits: MyPhotography.com

- Tori Karaage Don (Japanese Chicken) - July 2, 2026
- Fluffy Japanese Pancake Recipe (Souffle) - June 24, 2026
- Mochi Recipe: How to Make Easy Homemade Mochi - June 18, 2026


Leave a Reply