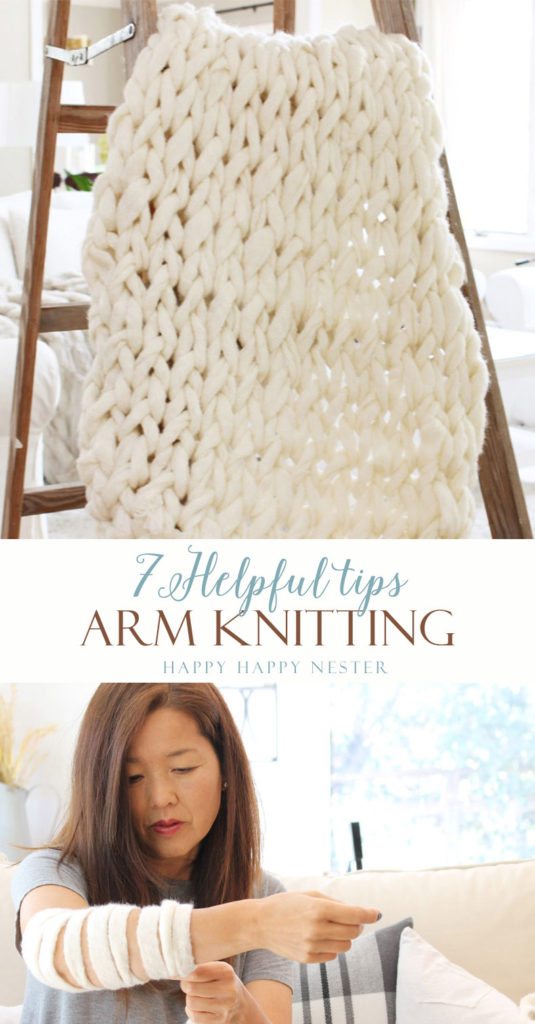
Arm Knitting
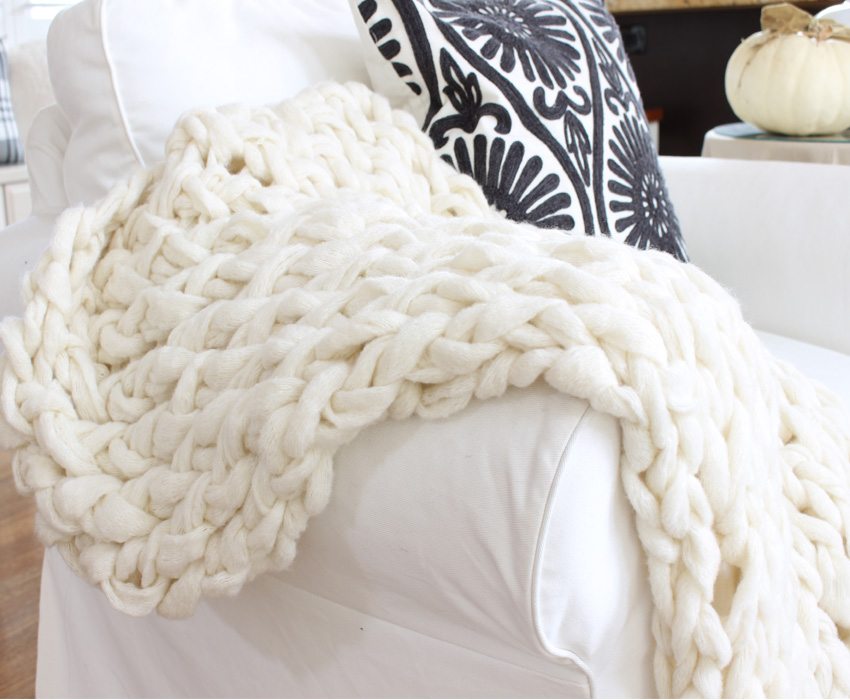
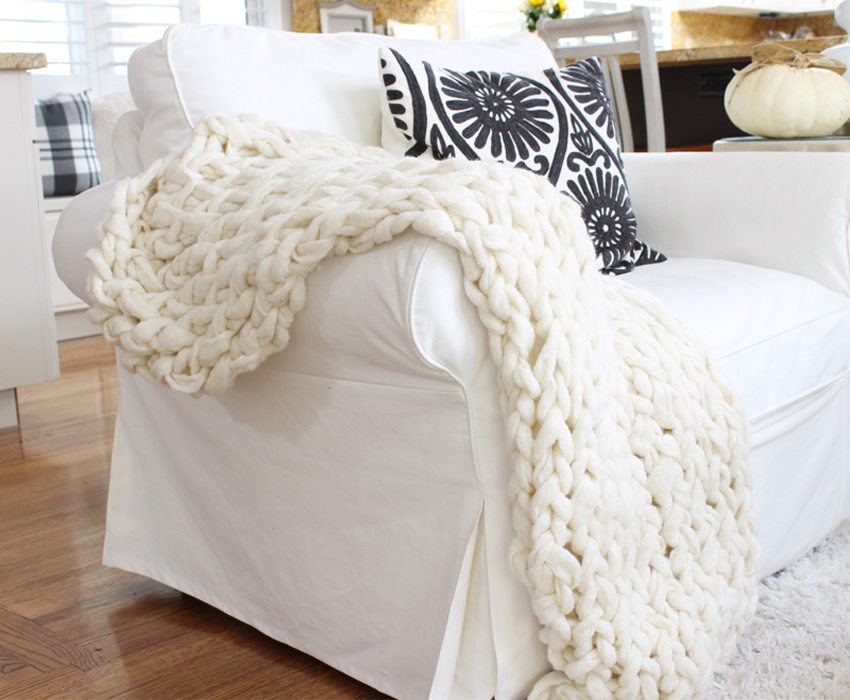
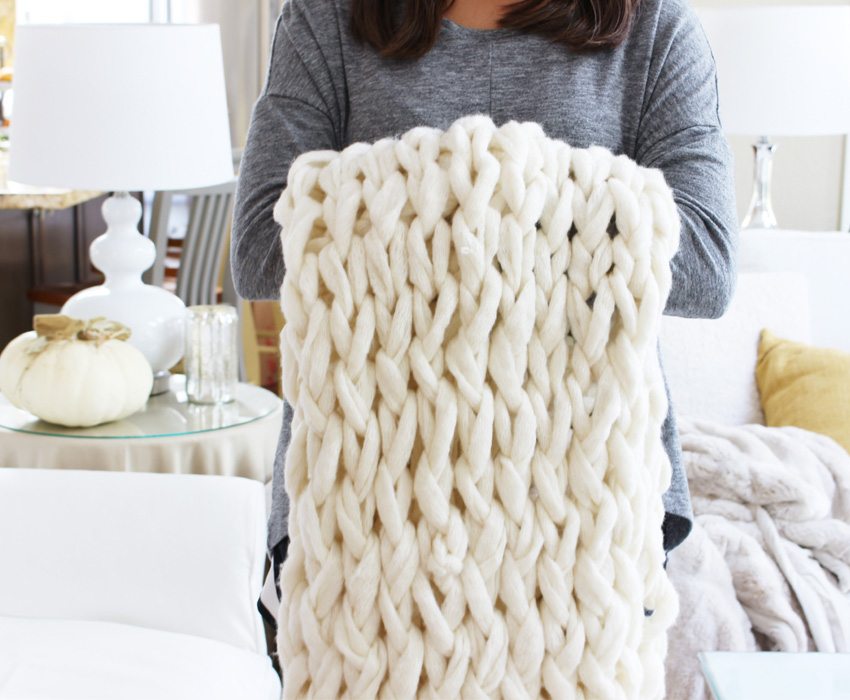
I immediately was smitten by these soft handmade blankets about a year ago. They are so unique that they instantly caught my eye. So, I finally bought the chunky yarn and made a date with my friend Jodie from The Design Twins, to make them. The fun thing about these incredible blankets is that it involves, arm knitting.
Yes, you heard correctly, your arms are the knitting needles.

My father was an accountant, and so during tax season he worked long hours. My mother kept busy with many projects, and knitting was one of them. Following in her footsteps, I always have a project up my sleeve, and I have my mom to thank for this passion.
There are many websites and videos that show how to make these marvelous blankets. I’m not even going to attempt to include the instructions on this post. But since I’m not a knitter, I realized it might be helpful if I share my experiences with you. This post is intended to supplement the arm knitting videos and instructions.
I recently found an easier way to arm knit and here is the video.
So grab a comfy blanket and let’s chit chat…
Time
Simply Maggie has a video and many blog posts on making this throw. She states that it should take about 45 minutes to an hour.
I originally found her post on Pinterest, and I must admit the 45-minute promise caught my attention.
Well, I will let you in on a secret of mine. It took my friend Jodie and I more than 45 minutes or more just to figure out how to cast on our stitches onto our arms.
While I struggled with my casting, Jodie watched the video many times.
I’m afraid I memorized the first part of the video.
My sweet pal Jodie kept encouraging me to relax and go with the flow, but I struggled. Thoughts of defeat set in and I had images of me just returning home with my big ball of yarn.
She is a such an encourager, and I’m so lucky to have a fun blogging friend.
So, here is the information you are waiting to hear about.
Drum roll, please!
Our first session took about five hours. And seriously not much chit chatting was going on since most of our brain power was at full capacity. More info below in regards to time.
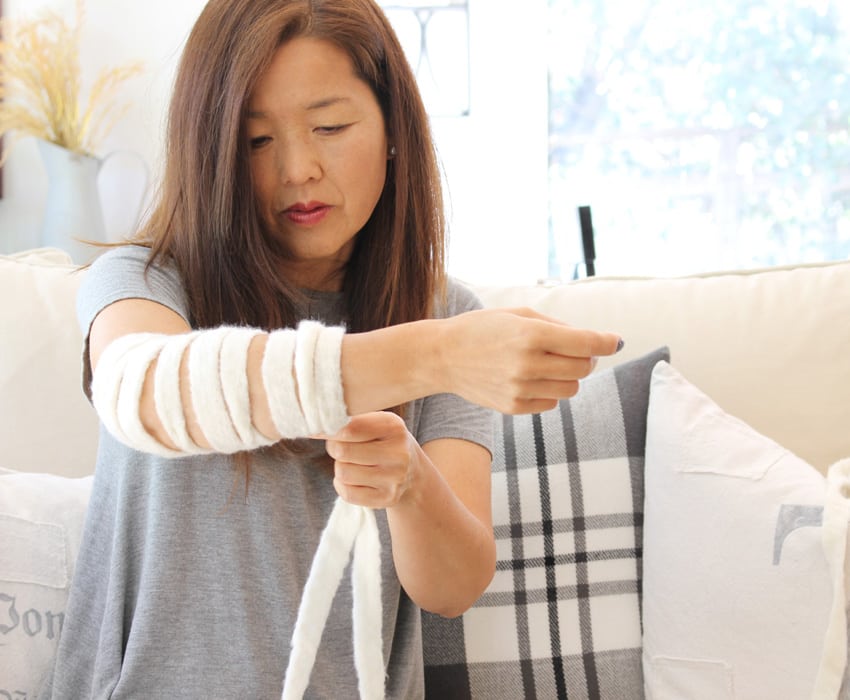
Casting on Stitches
This is by far the hardest part. I think since there is a lot of weaving of hands in and out of the yarn. I kept getting hung up on one section. I promise I’ll try and take a photo of the part I had the toughest time understanding.
But don’t give up, since this is the toughest step.
Trust me you can feel your brain hurt.
And I think it qualifies as a preventive exercise for early Alzheimer’s and Dementia. So that’s a added bonus!
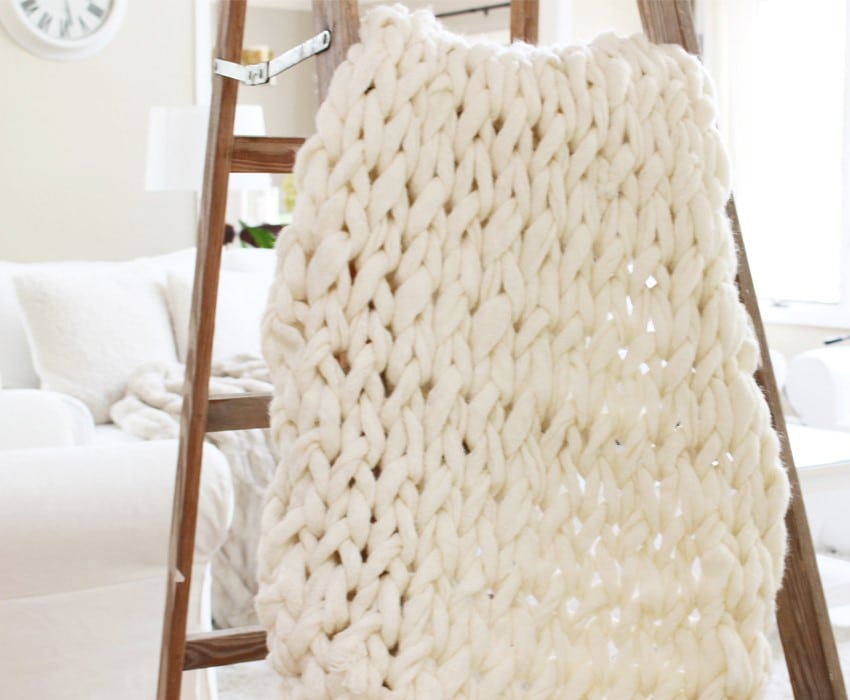
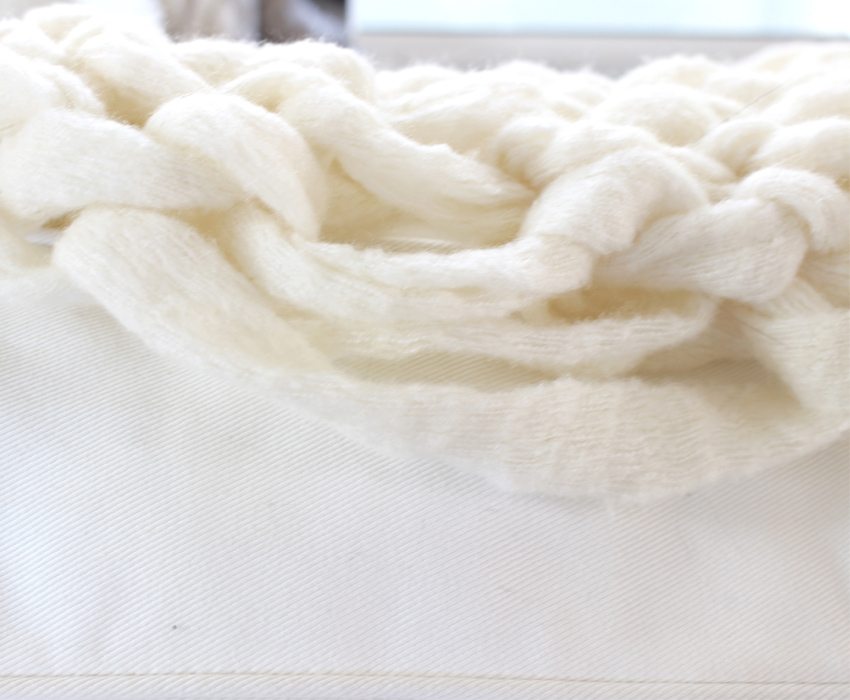
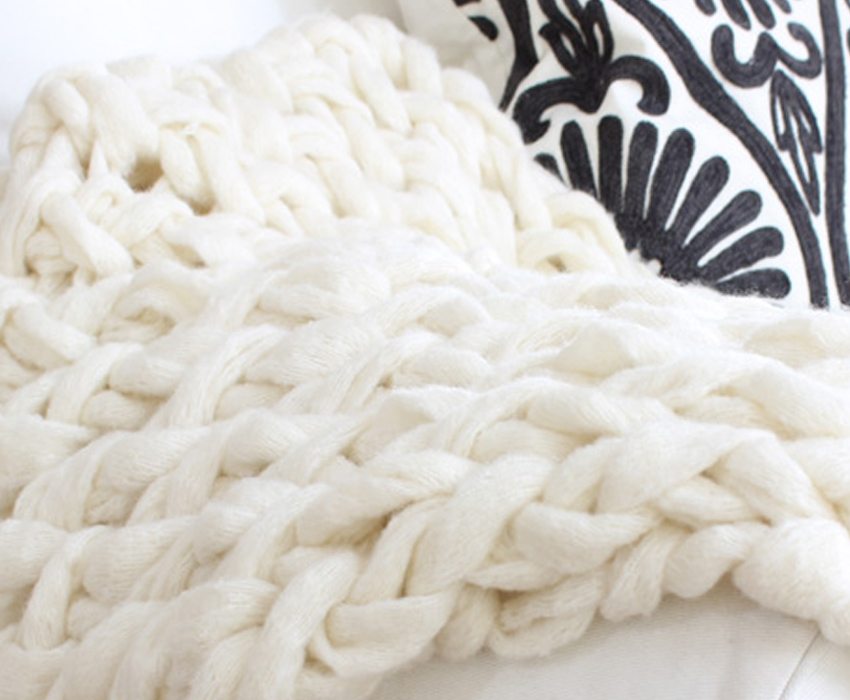
But now, I found a new and easier way to cast on stitches! Here is the video. And to get a throw that is 45″ x 45″ I cast on 30 stitches in the beginning.
Tightness of the Stitches
So, you don’t want the yarn too loose around your arm, but you don’t want it so tight that you lose circulation. I had a couple of moments that I felt claustrophobic, and I panicked that my arms were trapped.
Not sure about my panic since I have clothes on our arms all the time.
Silly old me.
The First Row
I felt that the first row was a doozy. On my first attempt, mine was way too loose, so I made sure to keep everything not too tight, but not too loose. When arm knitting the first row make sure to keep the distance between your arms small, so the stitch is tight.
Knitting
Once you complete the casting on and the first row, you’ll enjoy the rest. Seriously, I’m not sure what happens, but the knitting is super fun and easy. Jodie mentioned that when she had half the yarn on each arm, that was her happy place.
Funny how that works, since my happy place was when I had all the stitches on one arm.
We were a bit silly.
But, I did notice that the location of your working yarn is important. You see, you can have the yarn either close to you or furthest away from you. Keep it’s location consistent since it can change the knitting pattern if you move it back and forth.
Are you still with me? Not falling asleep? Grab some tea or coffee.
Yarn
In regards to yarn (Premier Yarns, Couture Jazz), I used what Simply Maggie recommended for this project. And as usual, I didn’t realize that it is acrylic yarn. But I think that if I used wool, the cost would’ve been significantly more. So if you order 10 skeins, it costs around $64 plus shipping.
10 skeins will produce a throw that is 45″ x 45″ in size. If you are worried you won’t have enough yarn, order 11 skeins.
Just a note, that this yarn attracts pet hair like nobodies business. So, if you have any pets choose a color yarn that blends well with you furry family members.
Little Notes
This project is super fun once you get the hang of arm knitting. I definitely plan to make another one soon. And oh yes, this is pretty obvious, but you should wear a short-sleeved top when you knit your throw.
It is the little things that help.
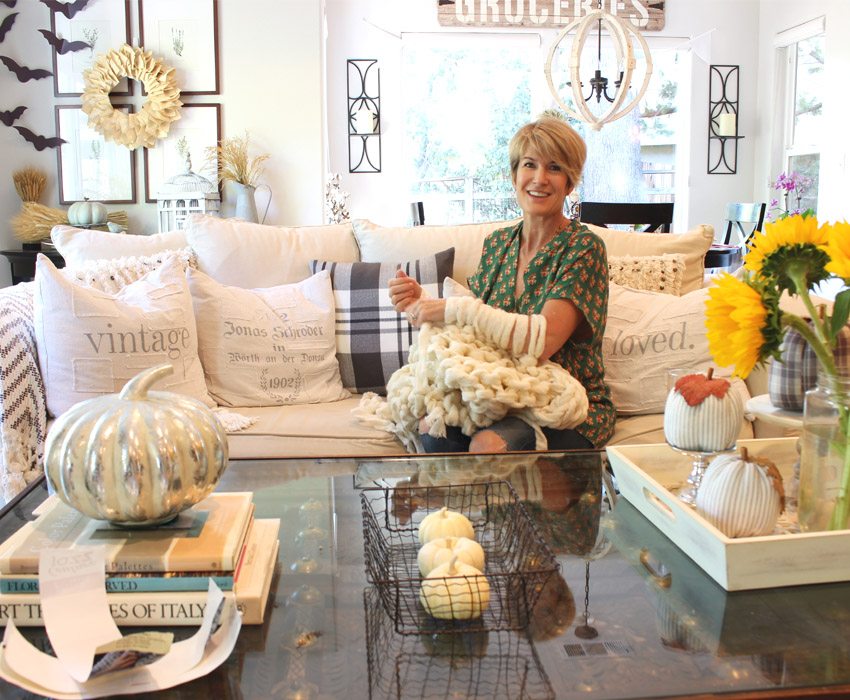
Also, I didn’t like how my first throw came out so; I tore it apart and started all over. Since I had a better grasp of the steps, it took about three hours my second time around.
Finally, if for some reason you need to take a break you can take the yarn off your arms. Just make sure not to tug at the throw and lose your loops that attach to your arms.
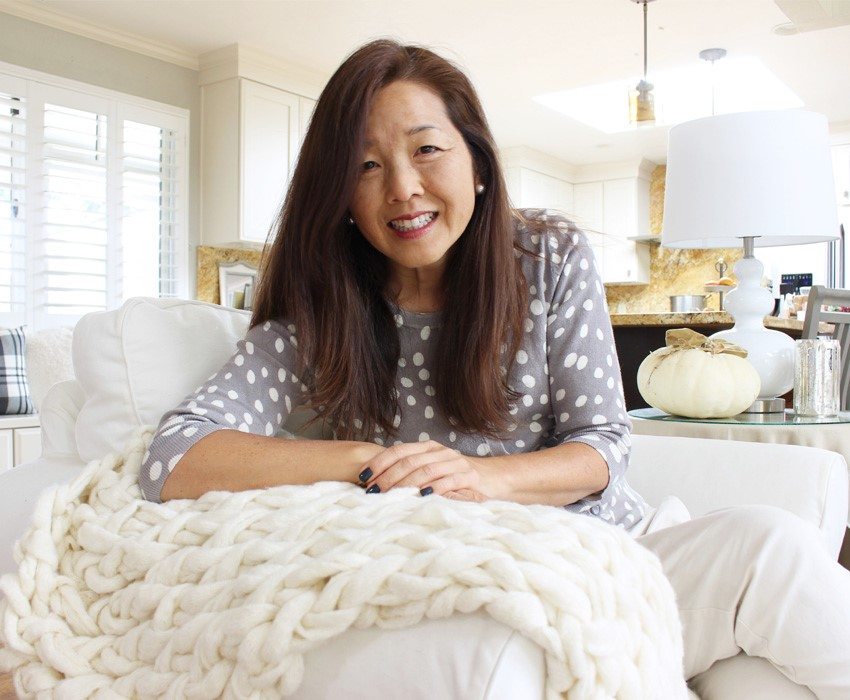
I highly encourage you to make this project if you have the time and the keen desire to own one of these amazing blankies.
Happy Knitting!
Cheers,

Here are some posts you might also like!


- Springtime Throw Pillows - April 8, 2026
- Cherry Blossom Cookie Recipe - April 3, 2026
- Amazon Simple Porch Decor - April 1, 2026


Marci
You did it!!!!!! It’s so pretty. You’re amazing.
happyhappynester
Marci,
Can you believe that I made my chunky throw!!! Oh my goodness, I’m so happy with it and I survived the knitting process! Thanks so much for your visit and comment!
Jodie Kammerer
Janine, I love your post! I love how you tell the story of our little chunky knit adventure. It was super fun and I’m ready for our next crafting project when you are! Haha! The pictures are all stunning too! As usual! 🙂
Thanks for including me! I’m not sure I could have survived it alone. xoxo Jodie
happyhappynester
Jodie,
I don’t think I could’ve done this alone. It was super nice to have you right alongside me! We had a lot of fun and I can’t wait to try more projects too!!! Let’s get busy! Thanks for your sweet comments in regards to my blogging style. I’m so happy to have found my voice! Thanks again, my sweet friend!
Julie Lancia
Janine, You know what I love most (besides your tenacity?) I love your voice…your sweet heart comes right on through your words and I feel like I’m sitting beside you enjoying a visit. Beautiful blanket, dear friend! I applaud Jodie’s and your bravery and hard work. I’m not sure I have the patience, but since Jodie says she’ll knit me one, haha, I may be good to go. Sending love & hugs, Julie
happyhappynester
Hi Julie,
I’m so glad you like my blog post style. I started with this tone when I began this blogging journey… and then lost it for a bit. I’m so happy to finally find my voice. I feel so at home with this style and it especially makes it easy to write! I’m so happy you noticed and like it! Thank you, thank you!
Lisa
I so LOVE these chunky, cozy looking blankets. They make me want to grab a cup of steaming tea and read a good book. Thanks for your post about your experience making one. So helpful
happyhappynester
Hi Lisa,
I’m super happy that you liked the post! I must say, that I’m so happy to share my experience. Simply Maggie made it look so easy, and it is after the first three hours! But, seriously after you get thru the casting on of stitches it is so, so easy! Well, it was worth the time and effort and I’m already planning my second one!
Dee Dobery
Great Christmas gift idea, a lap quilt, a good book and some teabags! Thank you!!!!
happyhappynester
Hi Dee,
You’re so right, I love how you think!
Kay Braasch
I’m very interested in the arm knitted throws.
happyhappynester
Ah, you need to make one! I so wish I could have a class for everyone! A knitting circle! Good luck and let me know if you make one!
Coco in the Kitchen
Beautiful post, beautiful pics, beautiful craft project, beautiful friend! xo
happyhappynester
Thank you, thank you, my sweet friend!
Daidri
Gorgeous and it looks so snuggly! I loved your determination, I would have stopped after the first hour. 😉
Way to go!!
happyhappynester
Daidri!
How are you?!!! This was a super fun project and I’m so glad I stuck with it. I must say there was a lot of laughing as well as frustration. It felt like my brain exploded! But, the throw is so much fun and I love it! Thanks so much for your visit and lovely comment!
Toni | Small Home Soul
Your throw turned out so beautiful! And thank you for you’re very honest experience with this project. I was never a great knitter and quickly gave it up. I do love how they look and might consider tackling this with a helper 🙂
happyhappynester
Toni,
I have had a couple false starts in regards to knitting! So, I know exactly what you are talking about. So, if you feel brave and want to make one, just let me know! Thanks for your wonderful comment and have a great rest of the week.
Susie
I love this so much! It’d be a great project for a rainy, cold day… And in January and February..we actually do get them. I look forward to my arm knitting… Stumbling and sharing… Susie from Chelsea Project
happyhappynester
Susie,
Thanks for your lovely comment! And yes, it will be the perfect project for this winter! Let me know how it goes!
Sam @ Raggedy Bits
What a great bunch of helpful tips!! I am wanting to make one soon and will definitely take on board your wonderful tips! Thank you for sharing your experience with us! Beautiful photos as always 🙂
happyhappynester
Thank you so much, Sam! I really appreciate your encouragement and friendship. You are priceless!
Jane @SustainMyCraftHabit
A chunky arm-knit blanket is very high on my to make list! Thank you for sharing your honest experience and tips! It looks beautiful.
happyhappynester
Jane,
It has been on my list for a year! It was great to do this project with Jodie. I couldn’t quit and had someone there to muddle through the instructions! You must try it and please let me know how it comes out! Thanks so much for your sweet comment and visit to the blog!
Rhonda Hallstrom
Thx for sharing this info, my son is going to make these. Yay
Sherry
Thanks so much for this!! I’m going to make one for my granddaughter!! I love your blog and following you on Instagram!
happyhappynester
Sherry,
That’s great that you are going to make it for your granddaughter! It will make a lovely Christmas present! I’m making one for my friend who is a breast cancer survivor, so a pale pink! Thanks for following my blog and my IG account! You’re so sweet!!!
Janet
I’ve seen these around for a couple of years and honestly would pay someone to make it for me, since I seem to never have a few hours these days!
happyhappynester
Hi Janet,
Yes, you definitely want to have a couple hours to make these blankets. Although I must say it is like therapy once you get the hang of it! I’ll make one for you! Thanks for you visit!
wendy
I’ve been wanting to try this, and your tutorial seems so easy to follow! I’m in a craft club, so I think we’ll make this an upcoming project. Thanks for sharing!
happyhappynester
Wendy,
Your group will love this project. I think it is best to make it with friends. I did find an easier video, so let me know if you want the website address. The casting on is the hardest and this blogger showed a much easier technique. Happy knitting!
Summer
Janine, this is amazing! It turned out so beautifully and I am dying to do one! You girls rock! ????????????????????
happyhappynester
I know we so need to get together and bake, craft and do makeovers!!!
Susanne
Your blanket is beautiful!! I tried arm knitting once….it did not turn out well, lol!! I may have to try it again because I want a blanket like yours!!
happyhappynester
This is such a fun project. I really wish I could have a knitting gathering of friends. We are going to try another blanket but with wool. I’ll keep you posted! Thanks for the visit and your lovely comment!
Sharon Hulbert
Hi Janine,
Thank you so much for your tips, your blanket is gorgeous! Please can you share with me how you joined the skeins?
happyhappynester
Hi Sharon,
I made two blankets. The yarn on this one comes in skeins, so I just knotted the yarn together. My other chunky wool blanket is one long piece of yarn and no need to knot. It is weighed and sent out, so my chunky wool blanket used 7 pounds of yarn! I love that I didn’t need to connect the yarn on that throw.