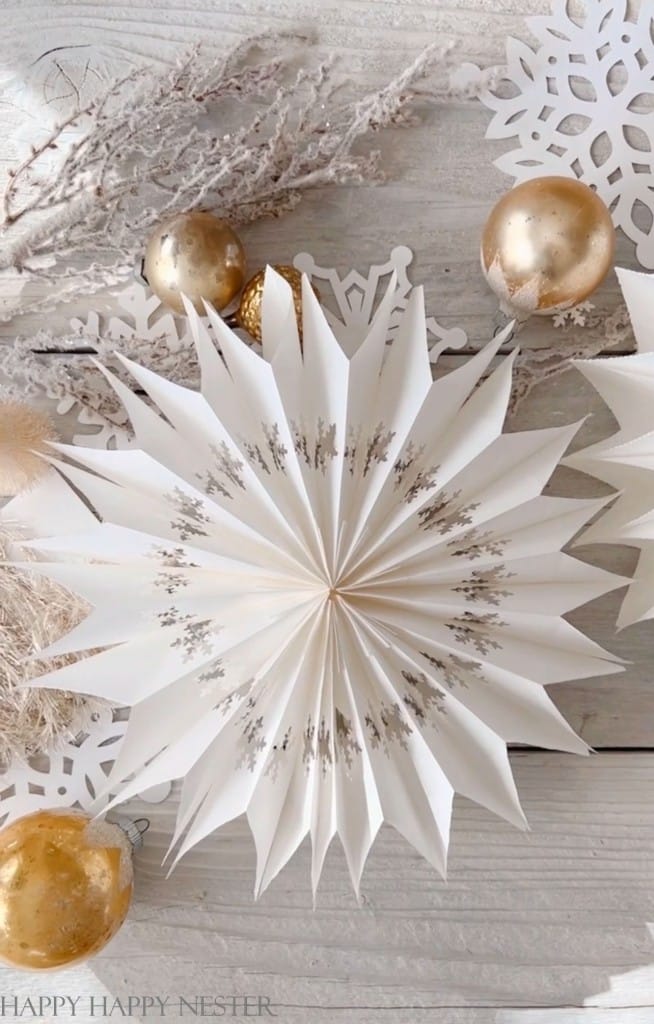
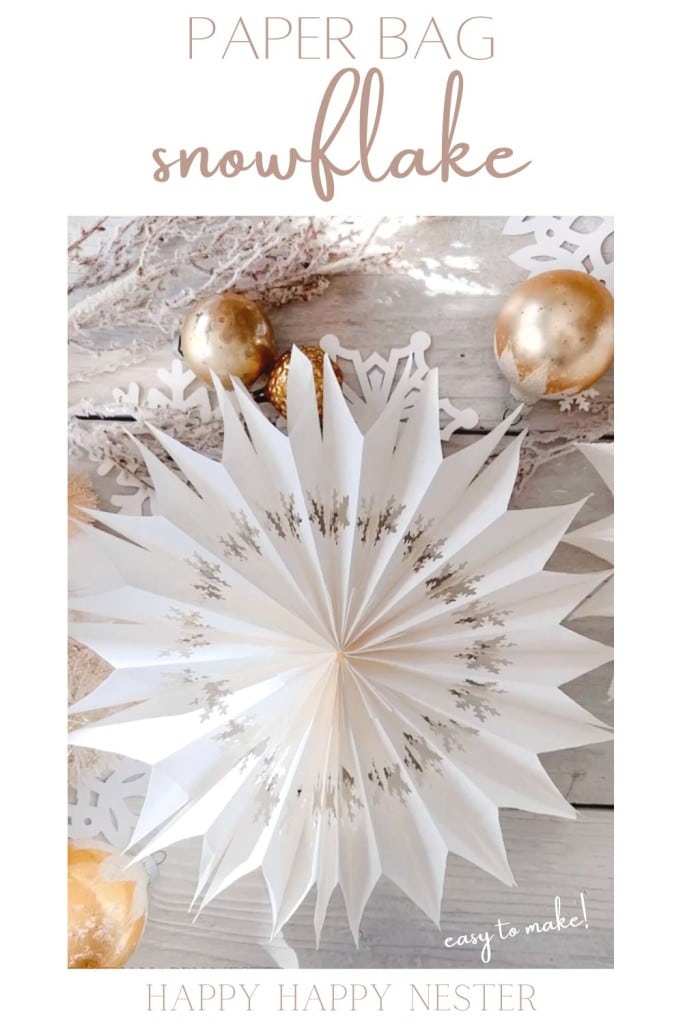
These Easy Paper Bag Snowflakes are all the rage on social media. I designed a snowflake that is super simple to make and still is as beautiful as the ornate ones. Not only is this craft simple it’s pretty inexpensive as well.
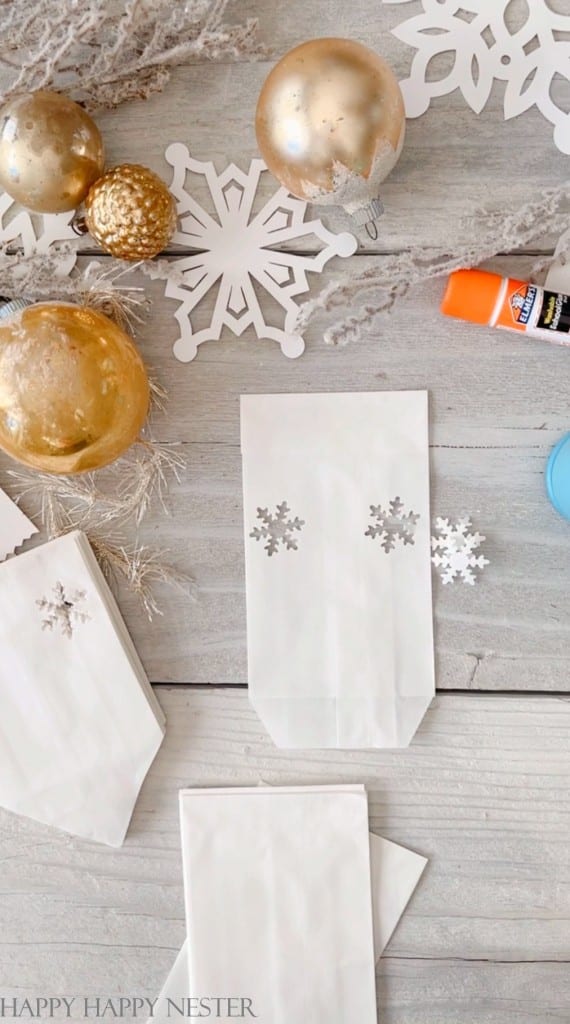
For this paper project, you’ll need white paper bags, a pretty snowflake hole punch, a glue stick, and a pair of scissors.
I’m obsessed with any paper project. I love to make paper flowers, paper snowflakes, etc. Here is a list of a few of those fun craft projects!
Easy Paper Bag Snowflakes
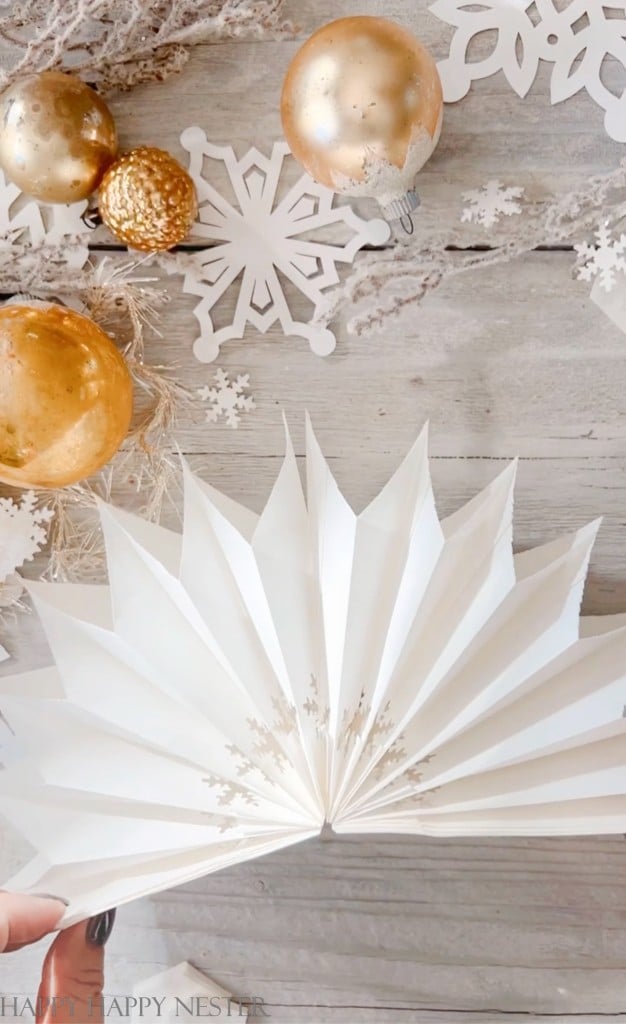
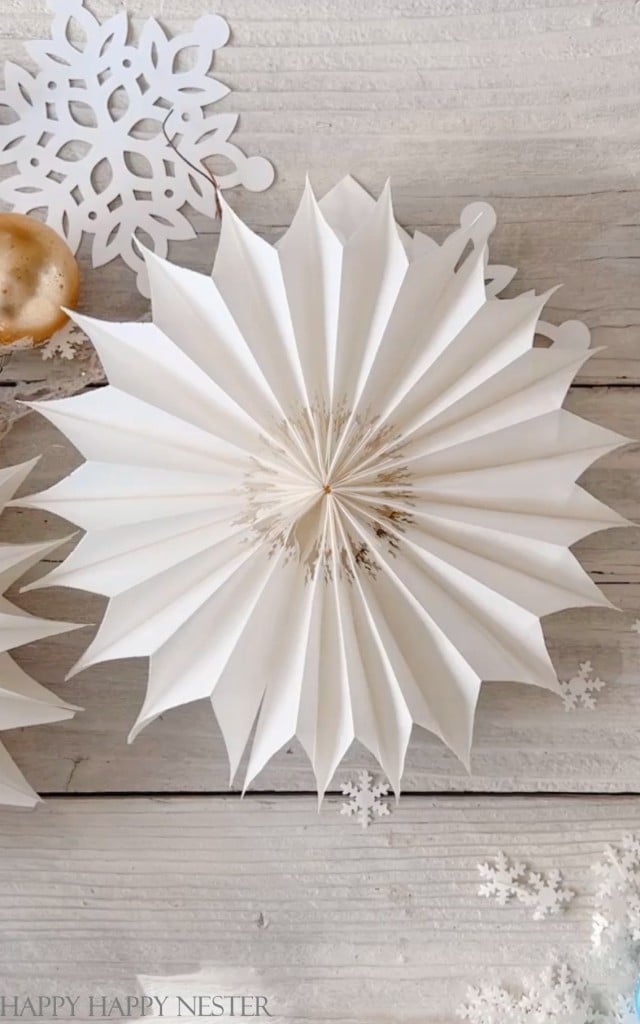
Well, I hope you’re enjoying the holidays! I’ve had fun creating all kinds of fun decorations this year. This pretty snowflake is magical when you glue all the paper bags together and then open it up to reveal a 3-D snowflake.
Once I wrapped my head around the snowflake basics, it was a pretty easy craft project.
Here Are a Few Snowflake Making Tips
Paper Bags
You can use white bags or any colored bags. I used 3″x 5″ small bags, and my snowflakes came out 10″ big. Also, depending on the bag’s depth, that is, the width of the snowflake.
So if you use brown grocery bags, be aware the snowflakes will be big!
Hot Glue or a Glue Stick
I recently made a honeycomb ornament with cupcake liners and a glue gun. And the big takeaway is that the hot glue dries quickly, and I had to reapply the glue. Also, with hot glue, there is no wiggle room. Once you put down the paper, you can’t move anything if you make a mistake.
So, I highly recommend using a glue stick and waiting for the glue to dry.
Punching the Snowflakes
I know it will be tempting to punch through more than one bag at a time, but the snowflake paper punch is wimpy!
How to Hang Paper Bag Snowflakes
It’s pretty simple to attach a ribbon and hang your snowflakes. I used my regular hole punch and made a hole at the top of one of the snowflake bags. Then I threaded my ribbon through the hole and tied a bow at the end of my ribbon.
Can I Use Any Hole Punch?
Yes, use whatever hole punch you like. But ensure the size isn’t bigger than the width of the bags you use to make your snowflake.
Here are the Supplies You’ll Need:
- 20 white paper bags
- Snowflake Hole Punch
- Glue Stick
- Scissors
- Ribbon/Fishing Line
- Regular Hole Punch (if you like, use a metal skewer to make a hole)
Step 1 – Punch Out Snowflakes
You’ll need 20 of your white paper bags. Use your snowflake hole punch and place one snowflake on each side of the bag. You’ll want to punch your snowflakes at about the same place on each bag.
You’ll be tempted to punch through more than one bag, but the snowflake puncher can realistically cut through only one bag at a time.
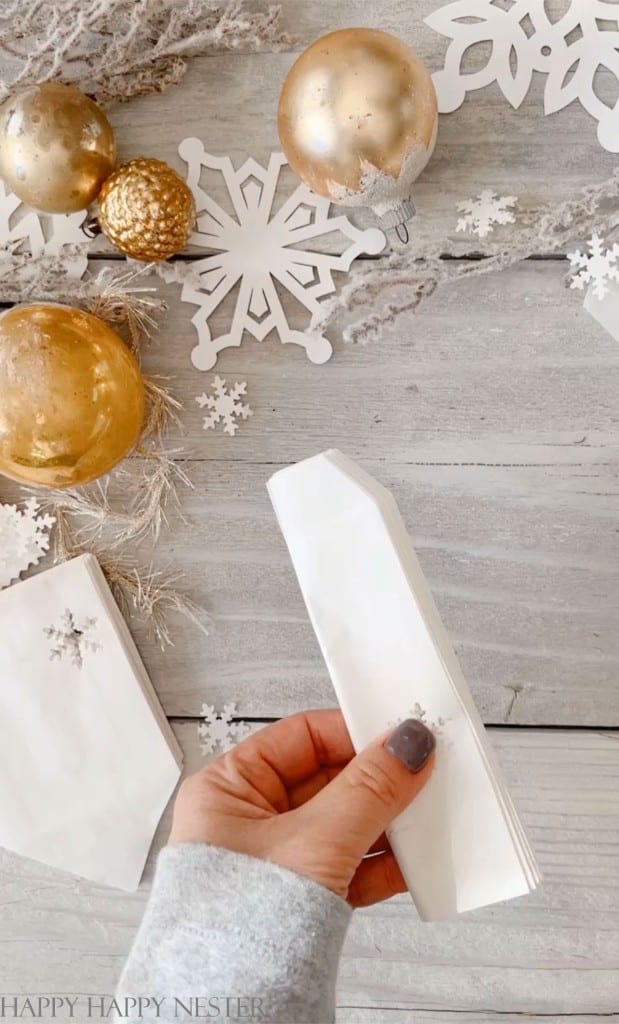

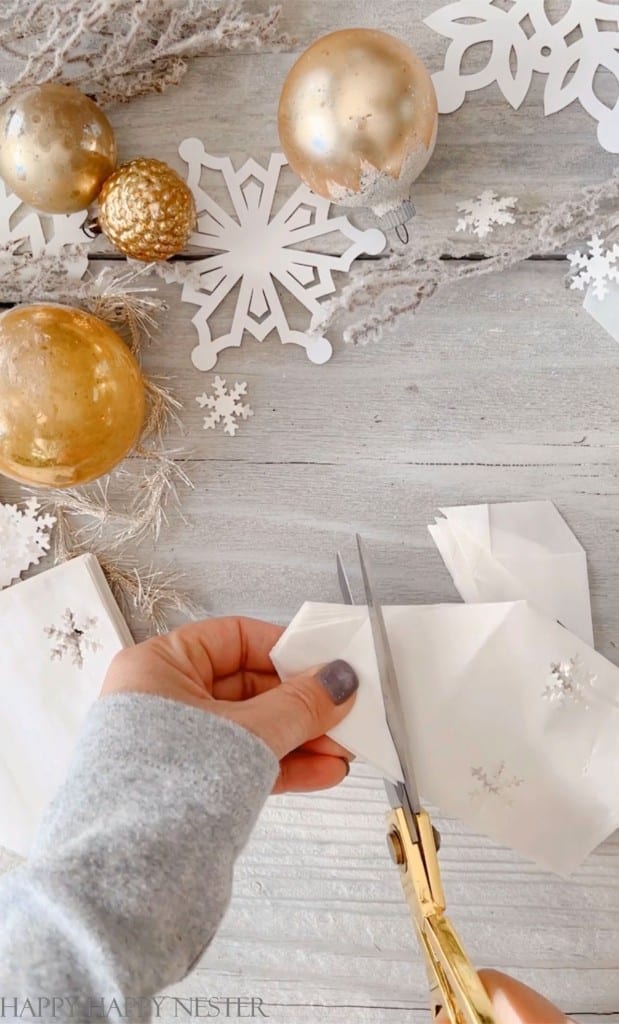
Step 2 – Shape Your Snowflake
For this section, you’ll want to work in two sets, and each set of bags has ten in them.
Fold each set of bags in half vertically. This fold shows the middle of your snowflake. If you like, measure the middle of the bags and mark the spot at the lowest part of the bag opening.
Next, fold from the top of the bag down. You want this fold to be big enough so that when you trim the paper, the top point is at the lowest part of the bag opening. You see, the opening of the bag is not even. One side is taller than the other.
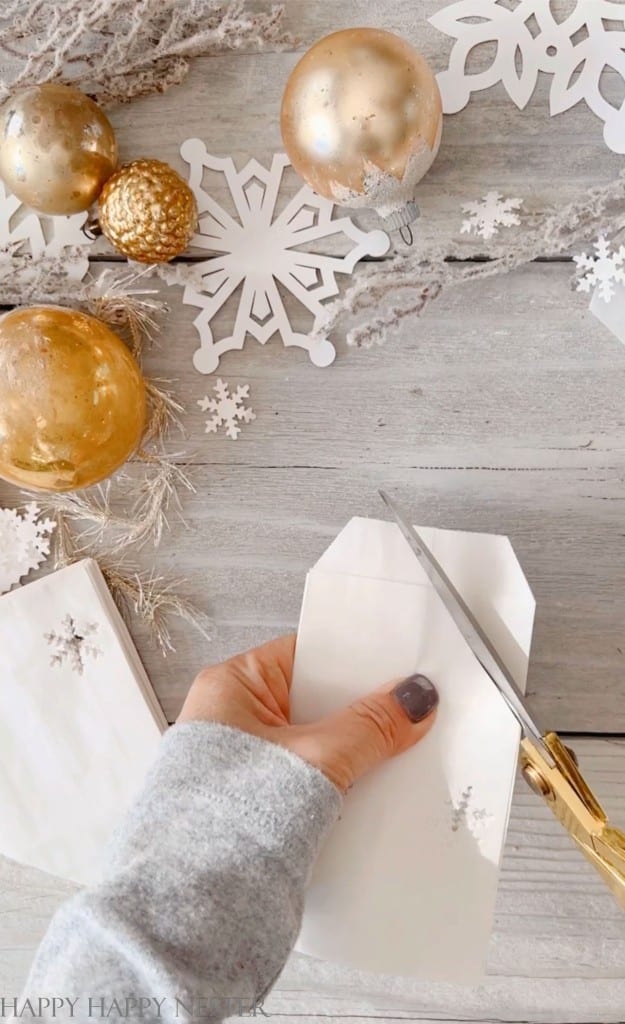
Starting from one side, cut to the middle of the top of your bag. Then repeat this on the other side of the bag.
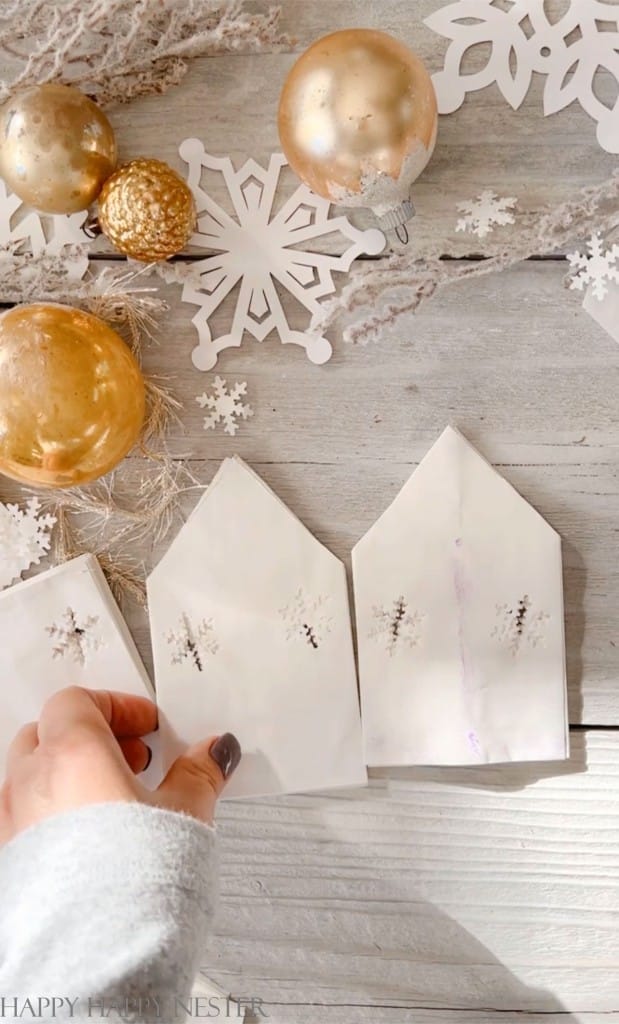
When you’re done, you should have an equal size peak to your snowflake.
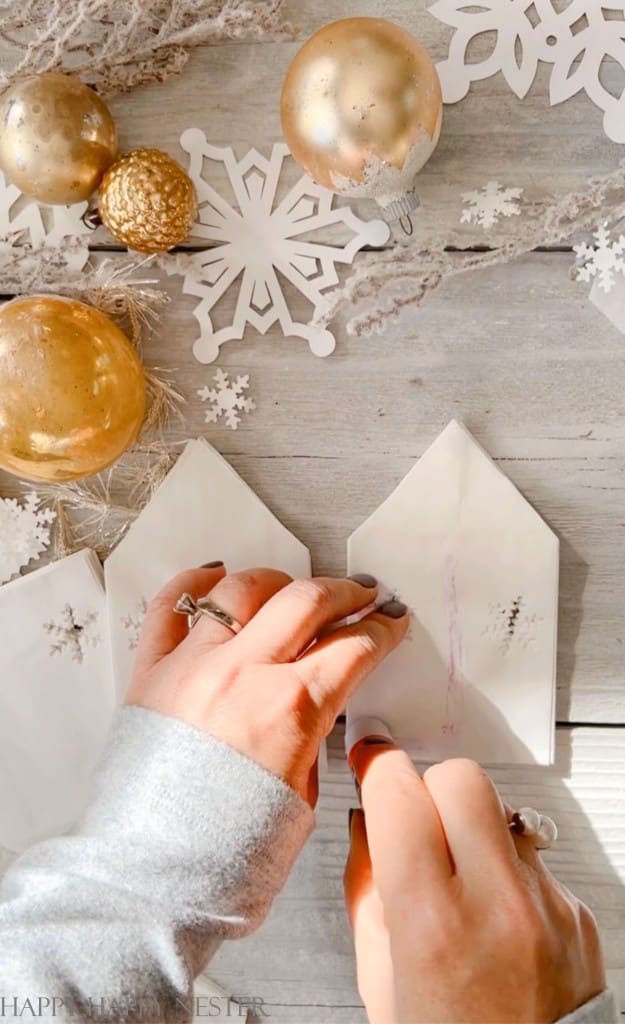
Step 3 – Glue the Bags
Take all your bags and glue them one at a time. Glue the bottom of the bag and then glue it straight up in the middle to the top peak. (my purple glue line in the photo to the left should continue up to the top of the bag). Line up and place another bag on top of the fresh glue. Repeat this step and glue them all together until each bag is used.
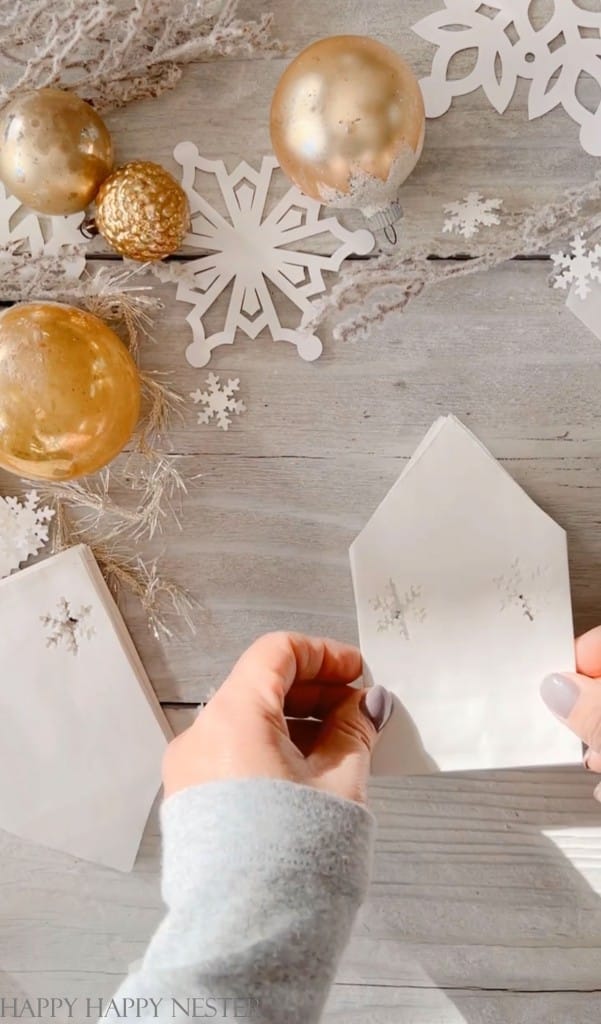
Allow the glue to dry for 10 – 20 minutes before opening the snowflake. And finally, open up the snowflake and glue the last two bags together, completing the snowflake.
Step 4 – Glue Both Sets of Bags Together
Glue one set the same way you did in step 3 and place the ten bags on top of the other set. Allow the glue to dry.
Step 5 – Open the Snowflake
After the snowflake is done drying, open it up carefully. Then glue the unattached ends the same way you glued all the other bags. Hold into place with clips until the glue is dry.
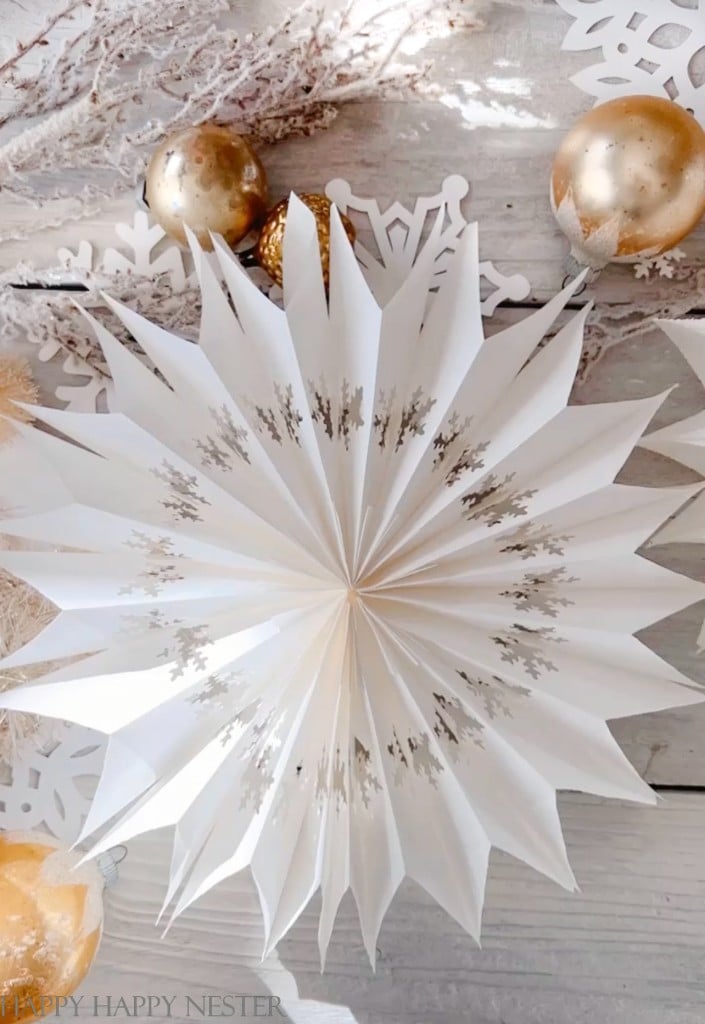
This is the funniest craft I made this holiday season. I love these easy paper bag snowflakes and how beautiful they turned out.
Make as many as you like without the fuss of a snowflake template or pattern. The snowflake hole punch adds a nice touch without complicating this project.
Ok, Happy Crafting and Happy Holidays!
Cheers,


- Cherry Blossom Cookie Recipe - April 3, 2026
- Amazon Simple Porch Decor - April 1, 2026
- Recipes For Springtime - March 28, 2026


")

Leave a Reply