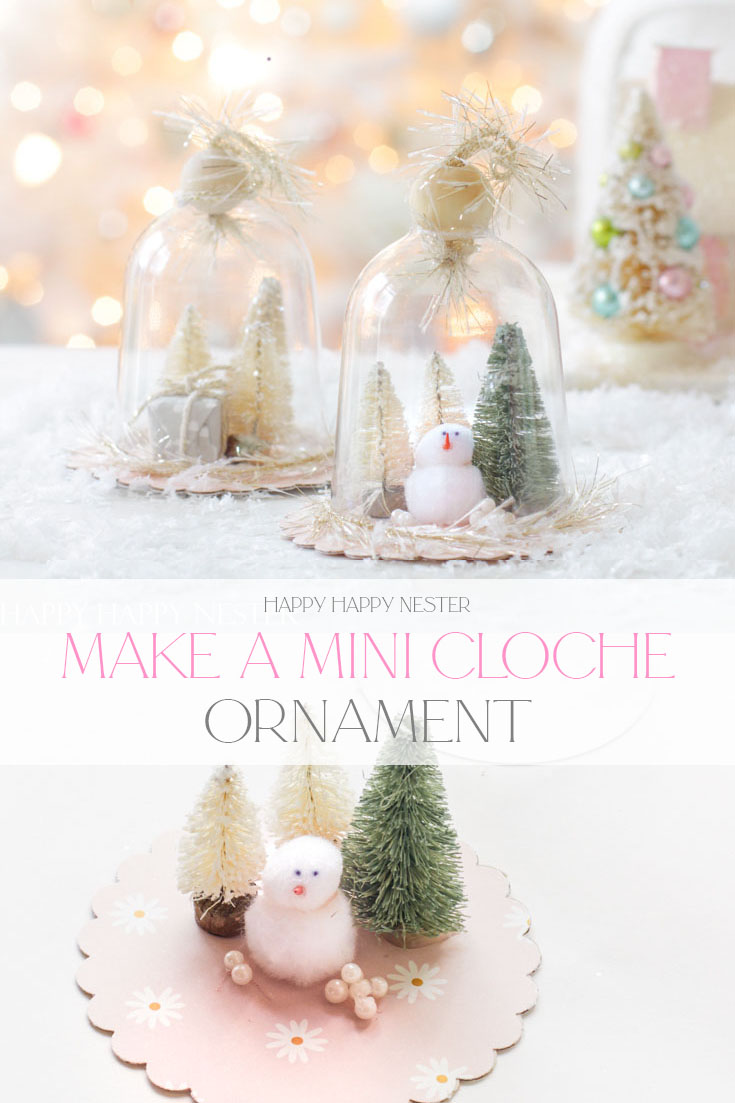
This holiday project is such a cute one. Make Your Own Ornament With a Cloche. Since there aren’t premade miniature plastic cloches, I made mine by altering a plastic glass. This easy Christmas craft can be made in less than 30 minutes.

This homemade Christmas craft has a vintage charm. Add whatever holiday trinkets you have in your Christmas decorations.
I love that you can personalize your cloche by adding your own items inside the cloche. In fact, kids can decorate the inside of the cloche with their favorite mini toys, maybe add a cute red truck with a mini bottle brush tree in the back.
These lovely cloches have a vintage style to them. So, if you like that look, you’ll definitely have to try this project. I will be making a few of them throughout the year since they are so darn cute. Won’t an Easter cloche be super cute?
Here’s How to Make Your Own Ornament Tutorial
*The following post contains affiliate links
Supplies
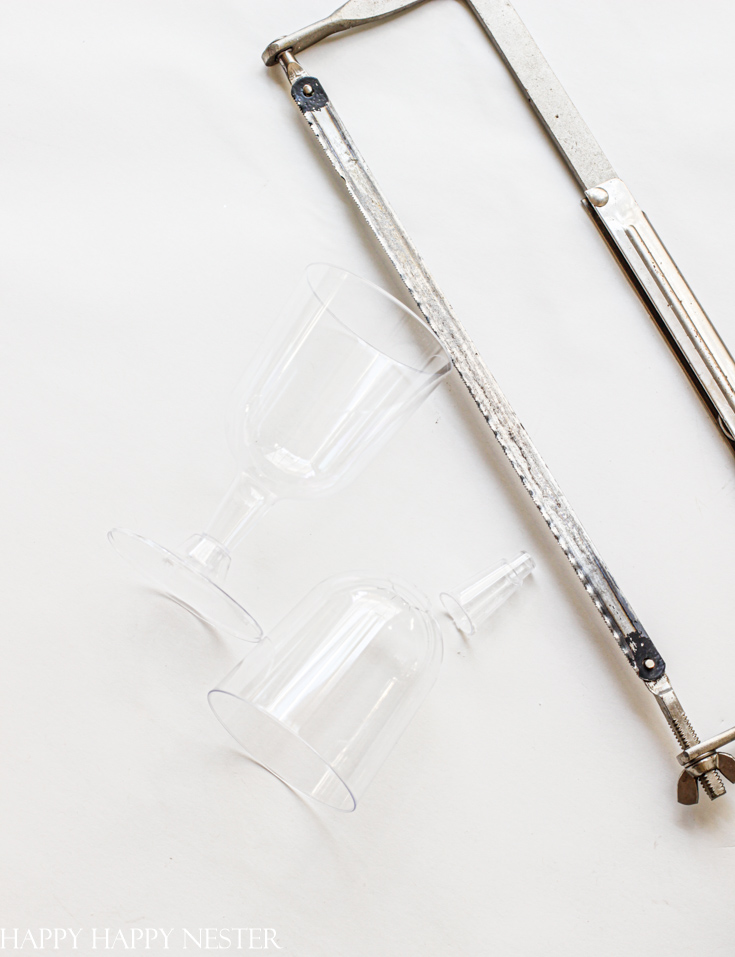
Plastic Wine Glasses (the set includes a cup and stem)
Scrapbook Paper
Cardboard (I used a cereal box)
Step 1:
Cloche Dome
The wine glass comes in two pieces. So use the top cup part and secure it on a sturdy surface in your garage or outdoors. I like to place a napkin or something soft under the cup so that the surface doesn’t get scratched. Next, carefully saw off the stem of the cup at the base.
Use fine-grade sandpaper and sand off rough edges of the plastic.
Clean and dry the plastic cup.
Step 2:
Cloche Base
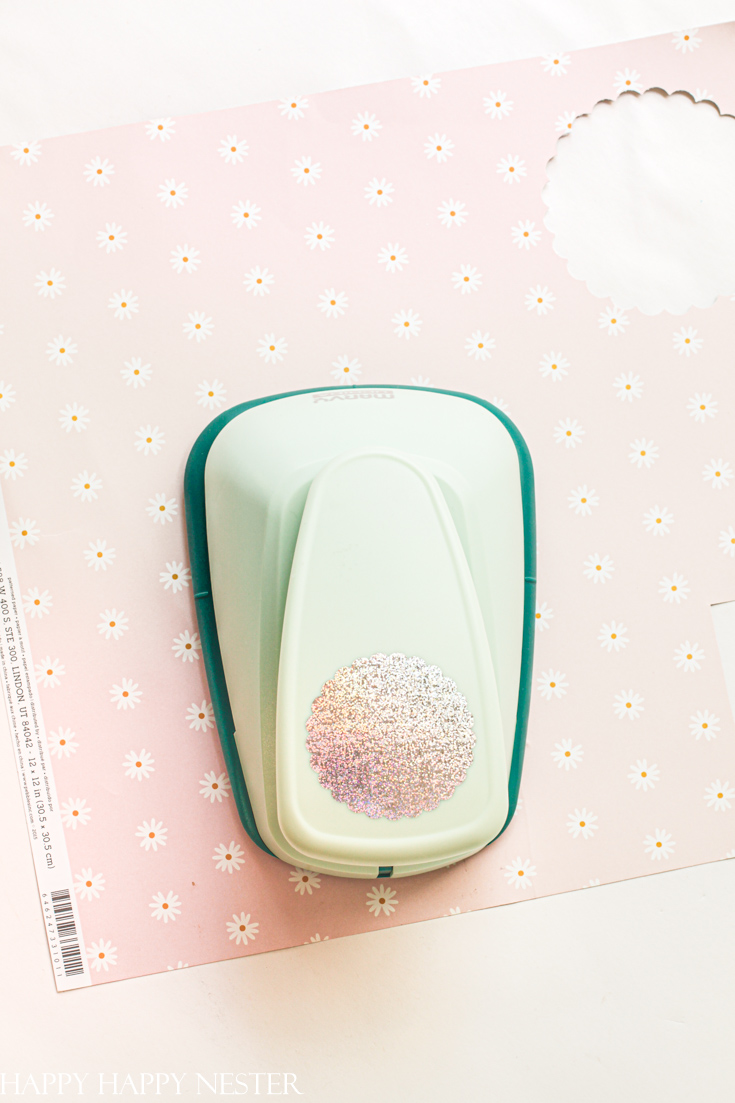
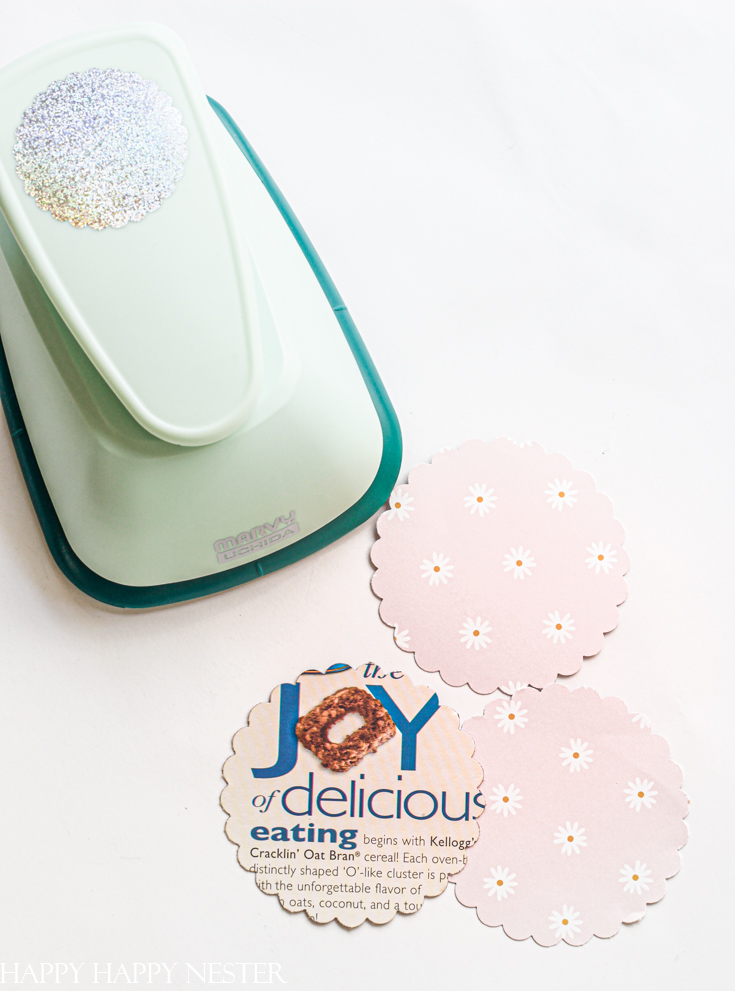
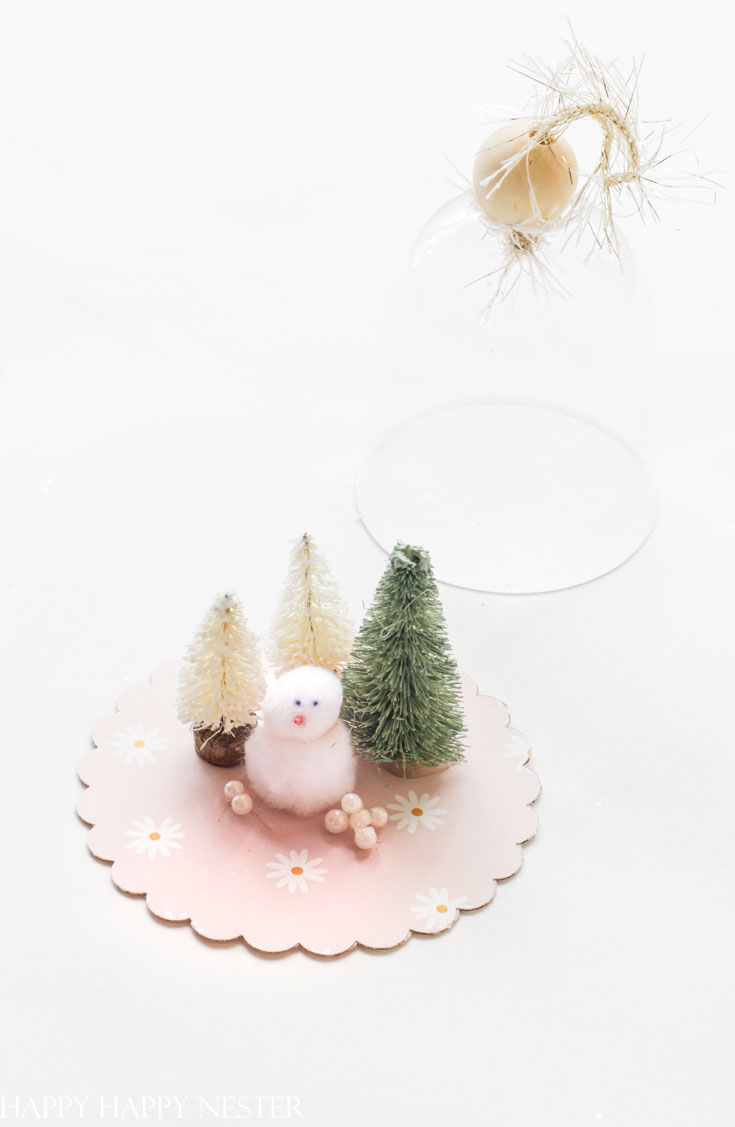
Scrapbook paper – Cut out 2 bottoms with the scalloped paper punch. The punch is 3 1/2 inches and just wide enough to be the plastic wine glass base.
Cereal box cardboard – Cut out 1 bottom for the back of a cereal box cardboard.
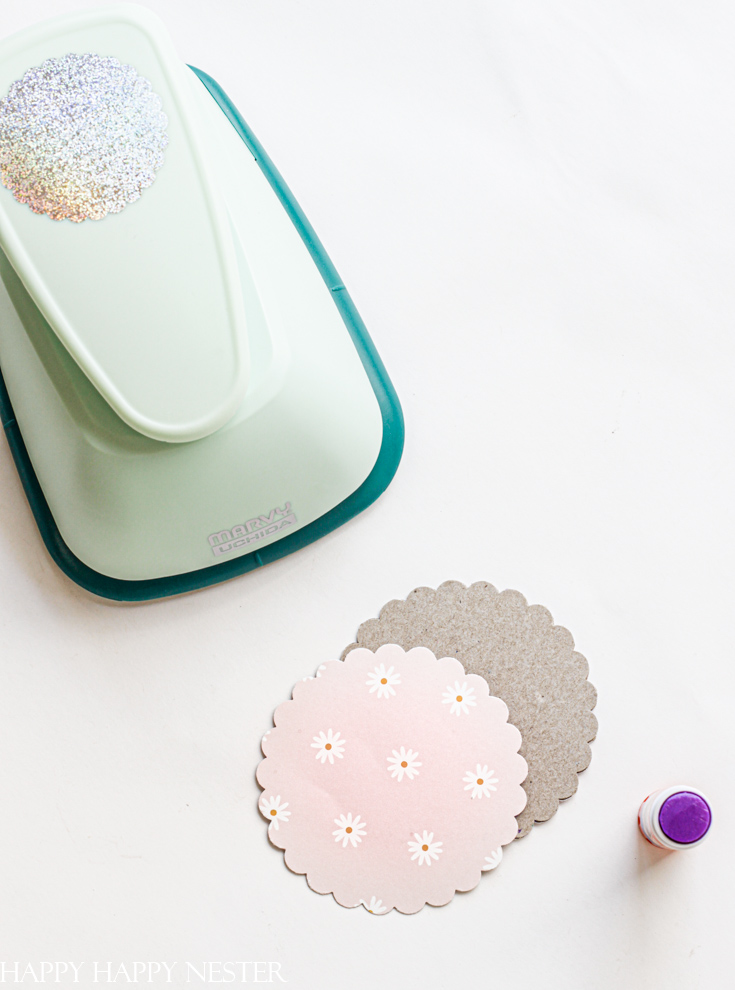
Glue – You should have three scalloped pieces. The cardboard creates a sturdy base and is sandwiched in between the two pieces of scrapbook paper. So, glue the scrapbook paper’s backside to the cereal box, making sure to line up the scalloped edges. Then take the second paper and glue the paper’s backside to the top of the cereal box board. You should now have a pretty scrapbook covered base.
Step 3:
Creating a Scene in the Cloche
Arrange the winter scene in your cloche. When you have everything you want, glue down everything to the cloche base with the glue gun. If you want little figurines, like a snowman, create one with some air drying clay. I made this snowman using two white pom-poms and attaching the tip of an orange toothpick.
If you want to add fake snow, you can place it where you want on the scene. I placed tiny bits of glue to the base and the trees and then sprinkled some white glitter. If you like, you can also add a layer of snow through the top after you glue down the cloche to the base of the ornament.
Step 4:
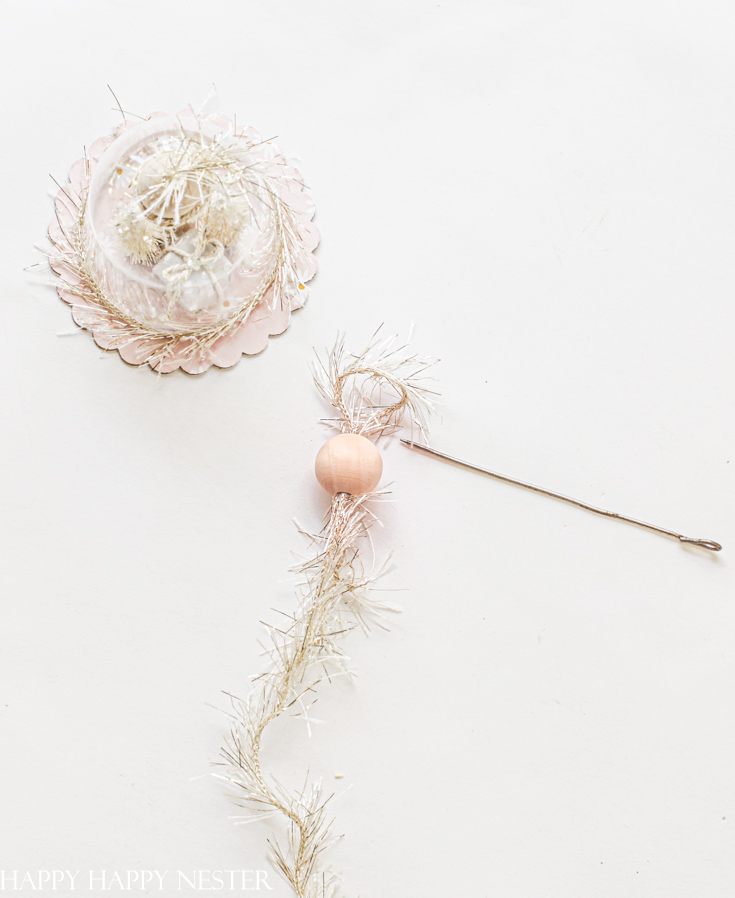
Make the Lid
Thread your yarn through the bead. Make a loop and thread it through the bead again. I used a skewer to push the yarn through the bead’s hole. It would be best if you had enough of the yarn to create a loop on the bead’s top end. On the other side of the bead, create a couple of knots with the string. I held on to the loop with one hand while making the knots, which prevented the loop from going back through the bead’s hole. 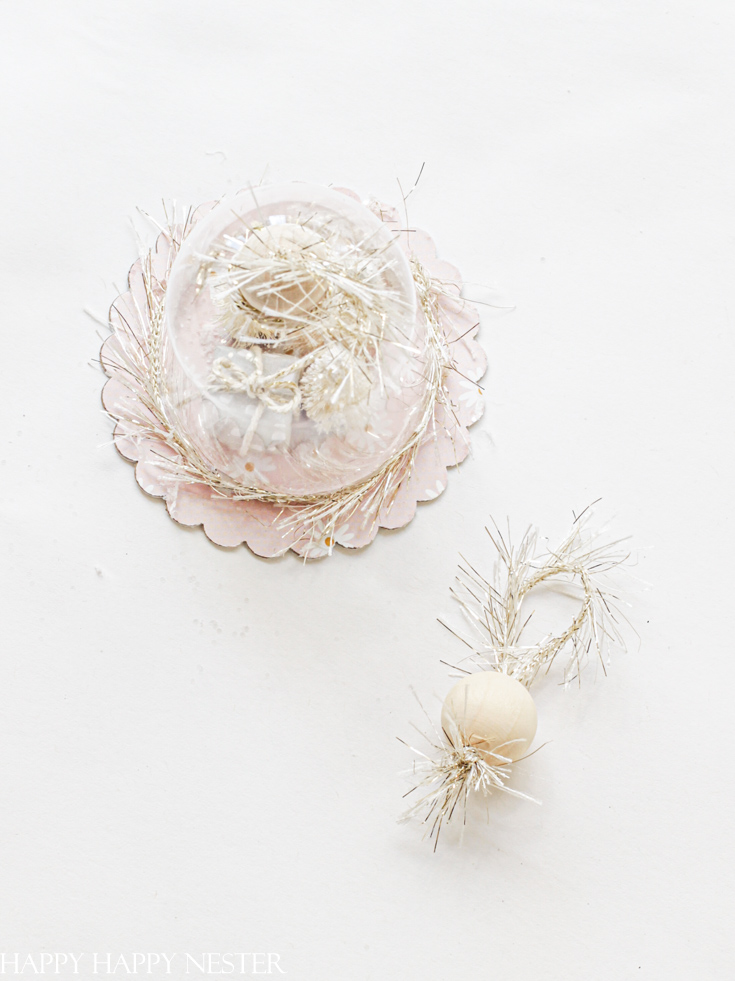
Make sure to place the knots right up against the bottom of the bead. Place a dab of hot glue on this knot, and this will secure the knot and the loop to the bead.
Once the glue is dry, trim off excess yarn.
Now, place the bead on the top of the cloche with the loop side up and the bead’s bottom (with the knot) down in the cloche. Hot glue the base of the bead to the top of the plastic cloche. You can add some yarn or ribbon where the bead and the cup meet. I wrapped a bit of baker’s twine to the bead, and I used dabs of Elmer’s glue to attach it.

Step 5:
Attach the Cloche to the Base
Line up the cloche to the base and hot glue it down. Be careful not to use too excessive amounts of glue since you’ll see it. If you like, you can use Elmer’s glue since you can brush it to the bottom of the plastic wine glass. Let the cloche dry thoroughly. Place yarn around the base and hot glue it down. And you are done, enjoy your new personalized decor!
If you like this project, you may like some of these other posts:
- Easy Christmas Ornaments
- Winter Wreath DIY
- Easy Washi Tape Ornament
- Mercury Glass Ornaments (this is from my friend, Leslie)
Thanks so much for dropping by to my make your own ornament post. I hope you have a chance to try this fun craft project. I have made two, and I want to make a couple more. I will make sure to add more photos.
Happy Holidays!


- Meringue Cookies Recipe - March 20, 2026
- Bathroom Accessories from Amazon - March 18, 2026
- Fluffy Japanese Pancake Recipe (Souffle) - March 16, 2026


")

Leave a Reply