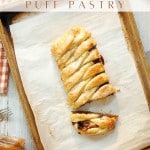
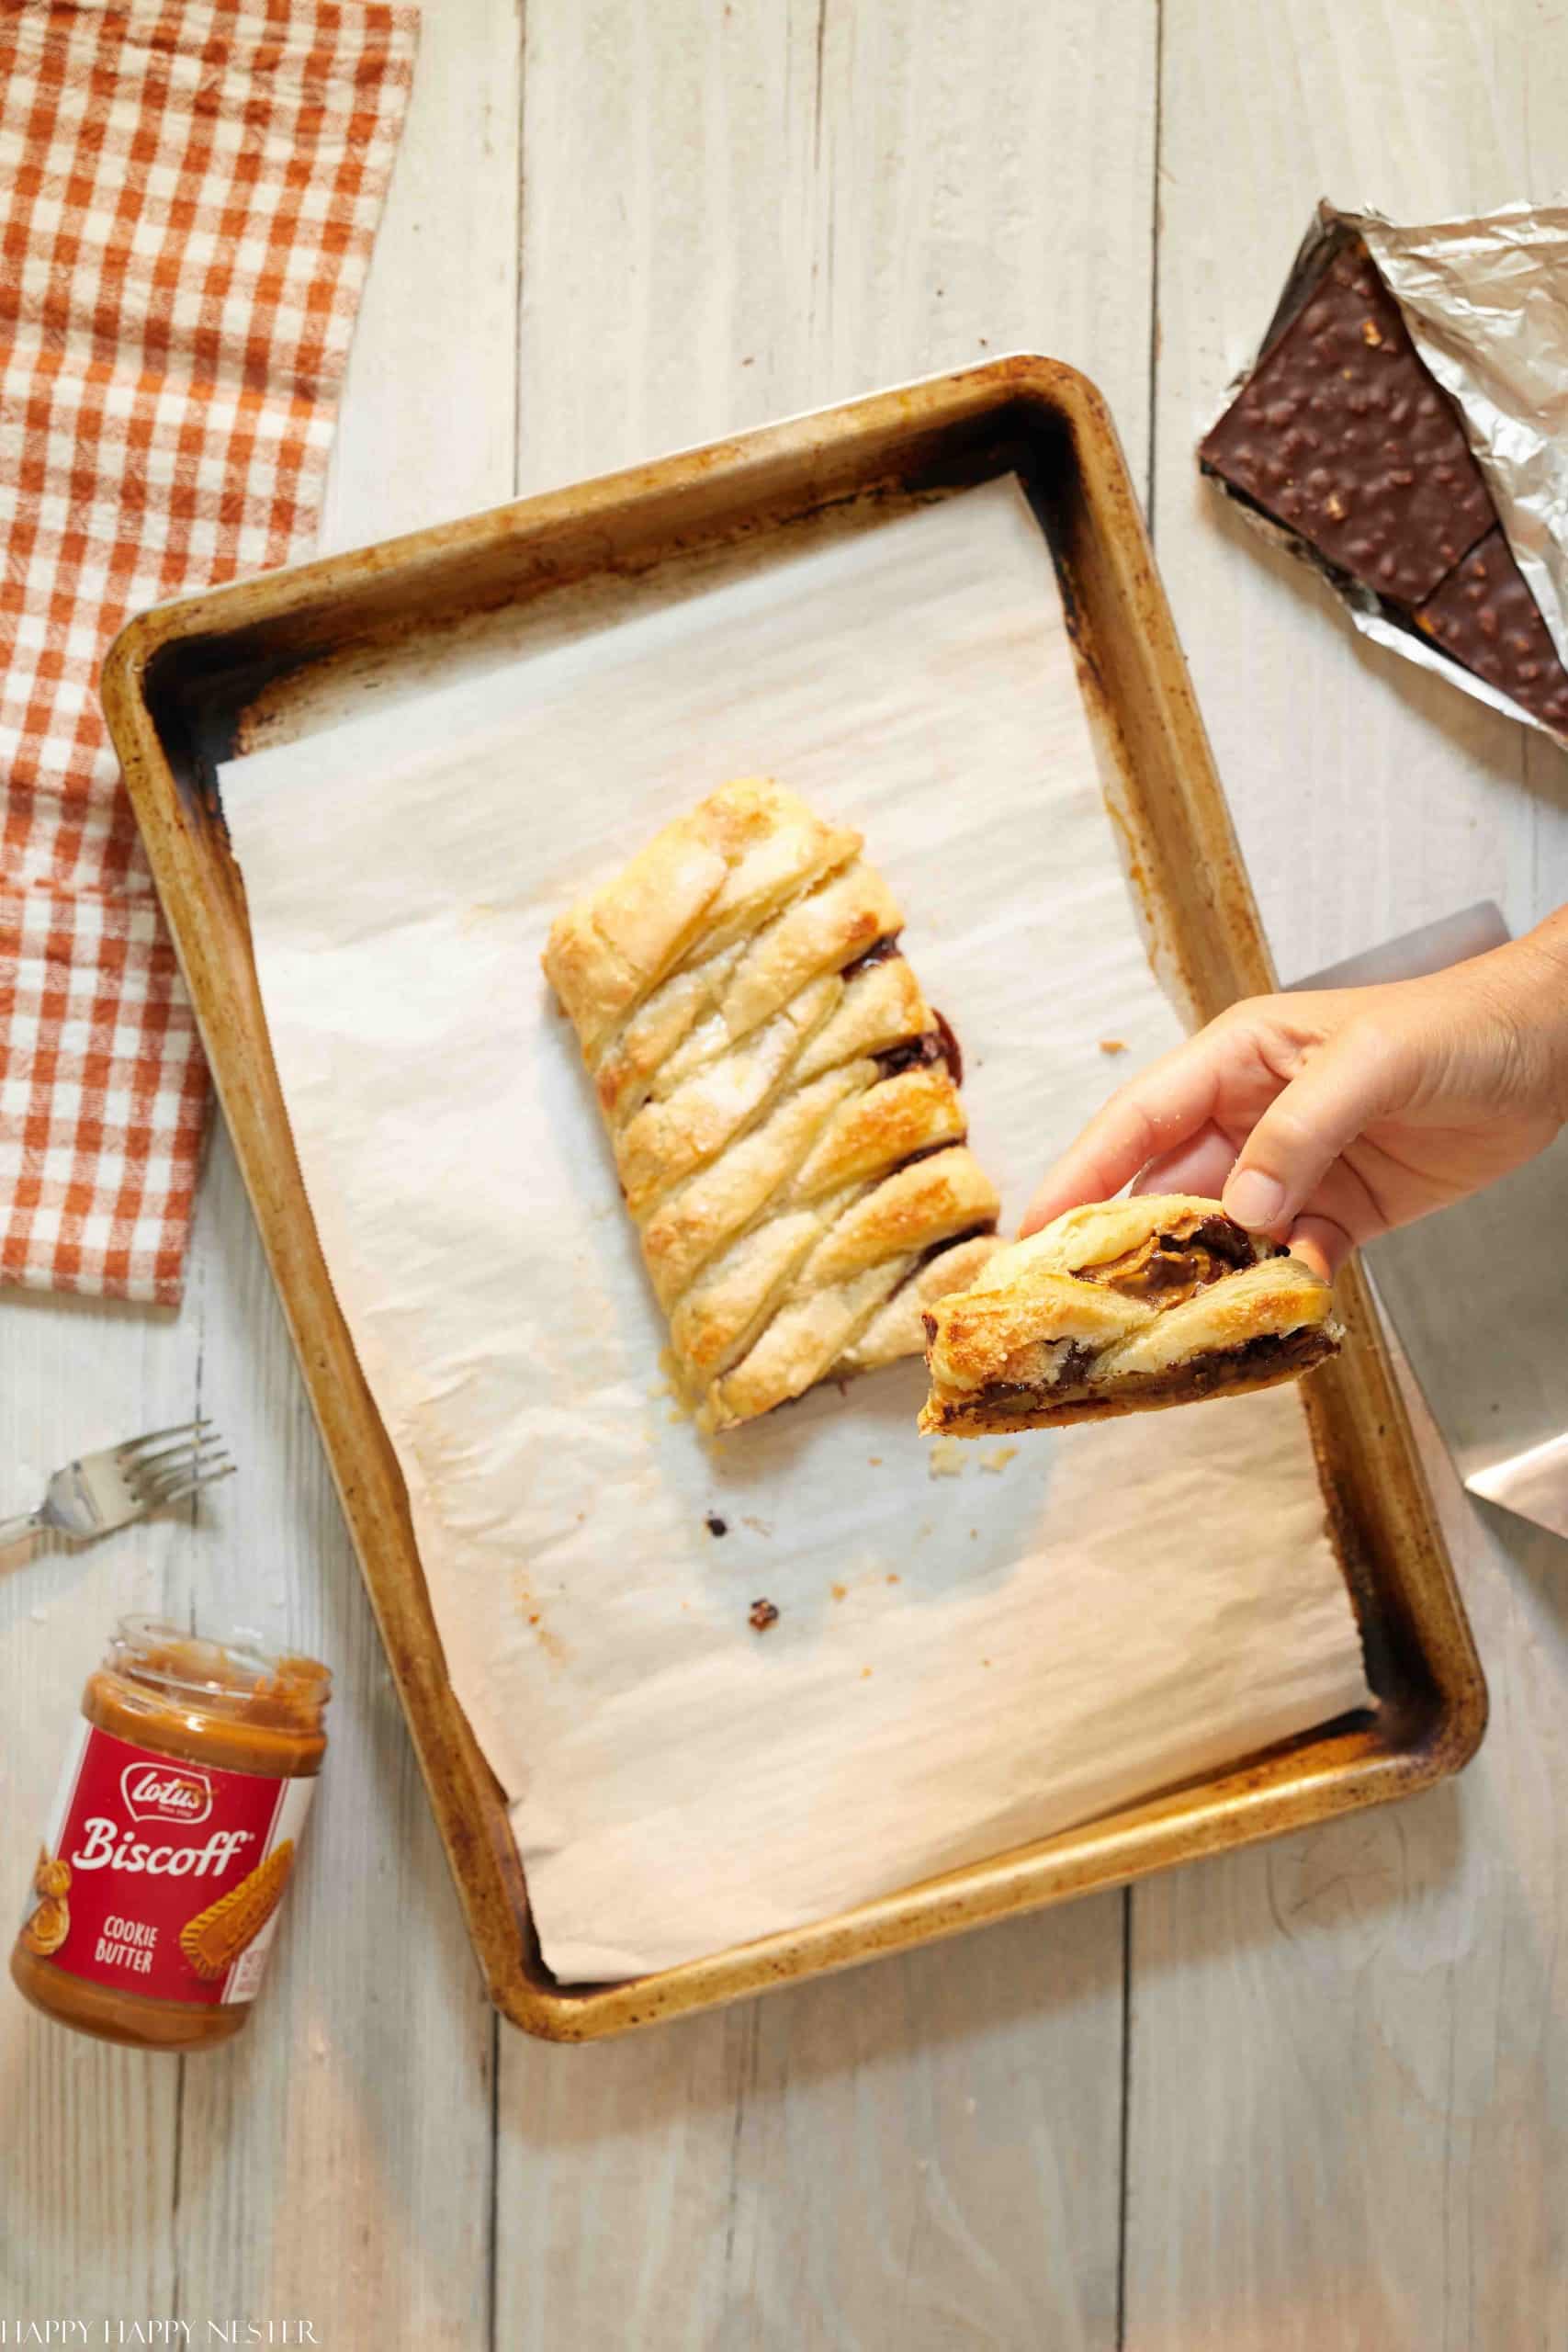
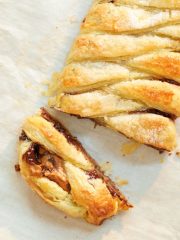
Here is an easy Chocolate Puff Pastry recipe that takes only 30 minutes to make from start to finish. This is like all the TikTok recipes but with a nice twist! There are only five ingredients that combine effortlessly to create a delicious gourmet-tasting chocolate pastry dessert.

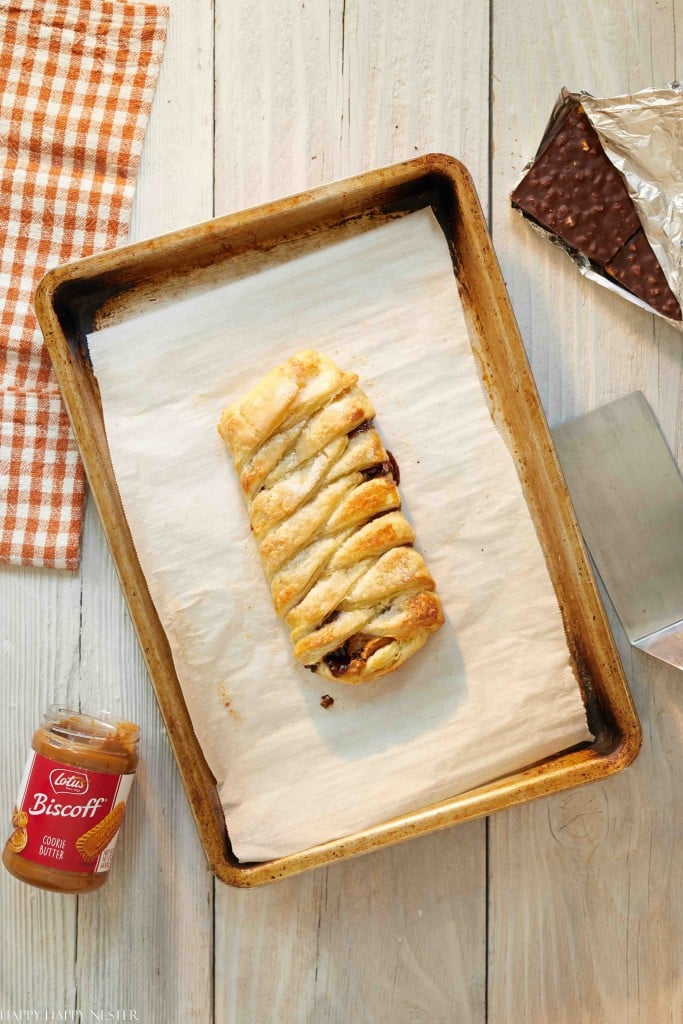
I found a popular puff pastry recipe for Pepperidge Farm’s dough and a chocolate bar. I loved the idea but felt that the ingredients were a little too simplistic, in my opinion. So I decided to add the delicious Biscoff Cookie Butter to mine.
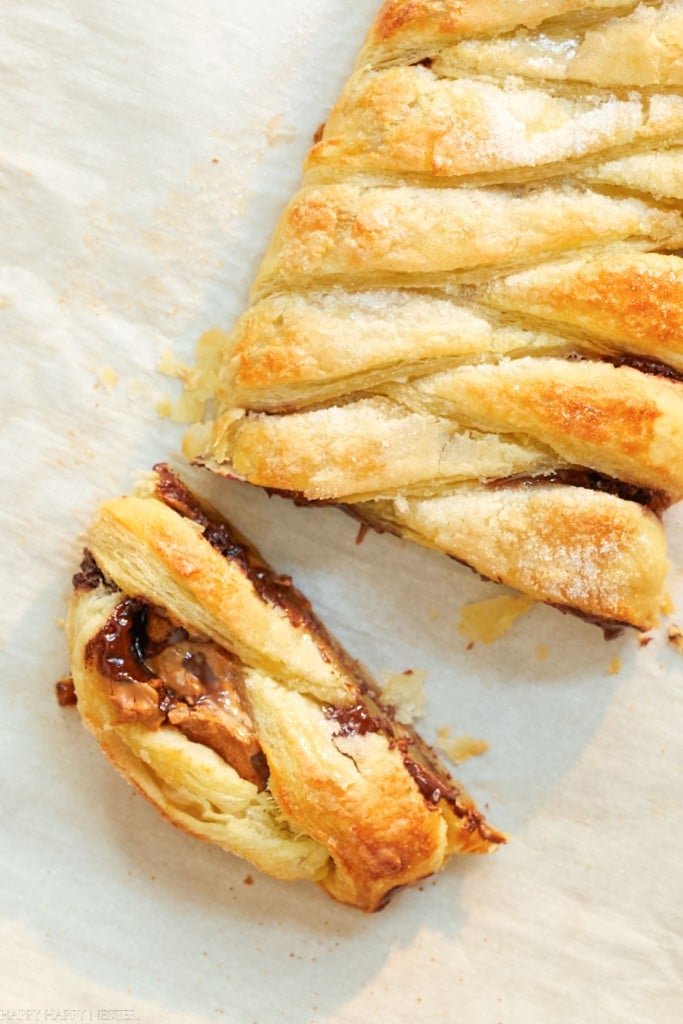
And I’m happy to report that the results are a decadent and creamy puff pastry that is so addicting and delicious!
You gotta try this chocolate pastry with Biscoff Cookie spread. It’s like a cozy hug in food form, seriously yummy! And guess what? I’ve got a bunch of other pastries that are just as comforting and delicious. So, I gathered up a few for you.
Check out these tasty recipes.

Every now and then, I’ll hang out over on Tiktok to see what’s trending. And a while ago, I saw this easy braided puff pastry dessert that included a chocolate bar. Of course, I was intrigued and had to make this easy dessert.
But I knew that adding only a chocolate bar would be boring. So, I wracked my brain to come up with another ingredient to add.
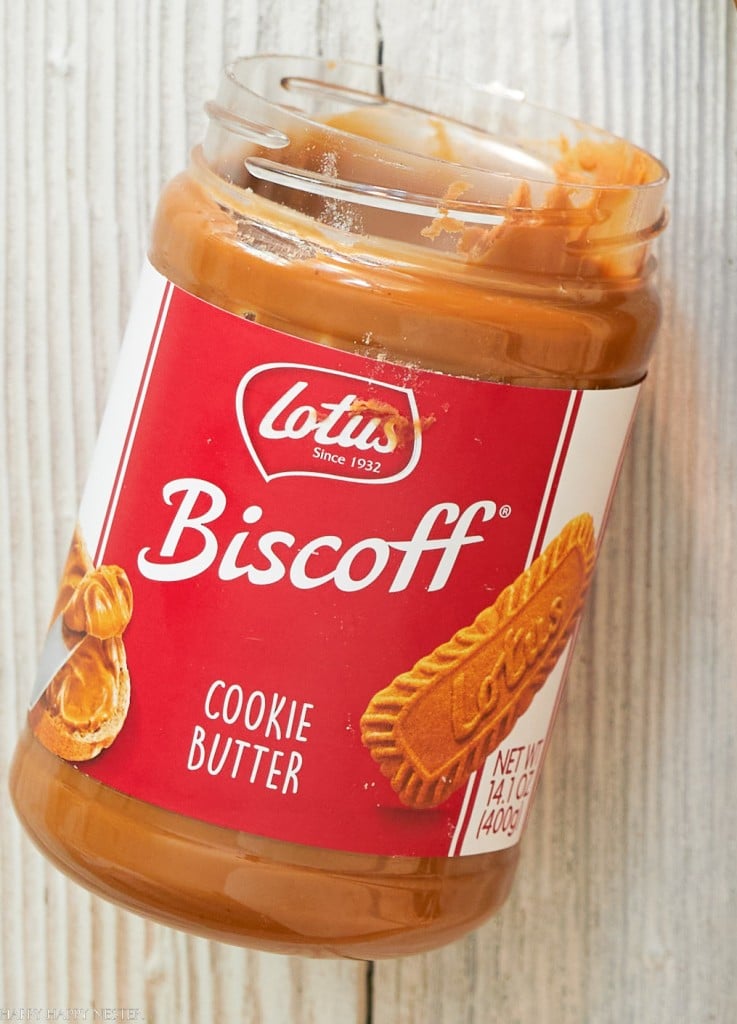
Biscoff Biscoff’s Butter popped up, and I knew I had to try making it. The cookie butter adds flavor and texture to this already delicious recipe. I have to say that the results are a more complex flavor.
What is Biscoff Cookie Butter?
So, maybe you’re in the same boat as me and just discovered Biscoff. Well, let me fill you in on what I’ve learned about this tasty treat.
Biscoff cookie butter is a delicious spread made from Biscoff cookies, also known as Speculoos cookies. These cookies have a unique flavor that is slightly spiced, with hints of cinnamon, ginger, and caramel. Biscoff cookie butter takes these cookies and transforms them into a smooth, spreadable consistency, similar to peanut butter or Nutella.
The process of making Biscoff cookie butter involves grinding Biscoff cookies into fine crumbs and then blending them with other ingredients to achieve a creamy and spreadable texture.
Additional ingredients may include oil, sugar, and sometimes a touch of salt. The resulting spread has a distinctive taste that combines the buttery sweetness of the cookies with the warming spices, creating a delightful flavor profile.
Ingredients You’ll Need For This Chocolate Puff Pastry
- Pepperidge Farms Puff Pastry
- Chocolate Bar
- Biscoff Cookie Butter
- Egg
- Sugar
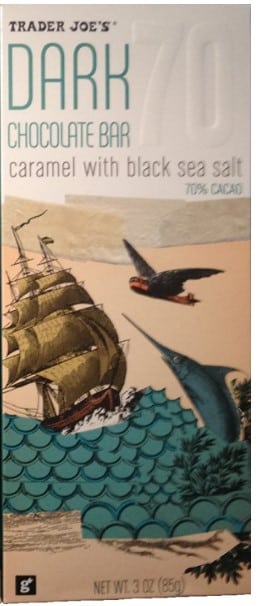
This is my favorite chocolate bar to use for this recipe. The added salt and caramel are so delicious! I made one without the caramel, and it was a bit drier. Here is the link to purchase them if you don’t have a Trader Joe’s store in your area.
How to Make This Easy Puff Pastry Dessert!
Don’t be intimidated by the braids, it is super simple to create. In fact, my good friend Kelly made this dessert, and she was shocked at how easy it was to make!
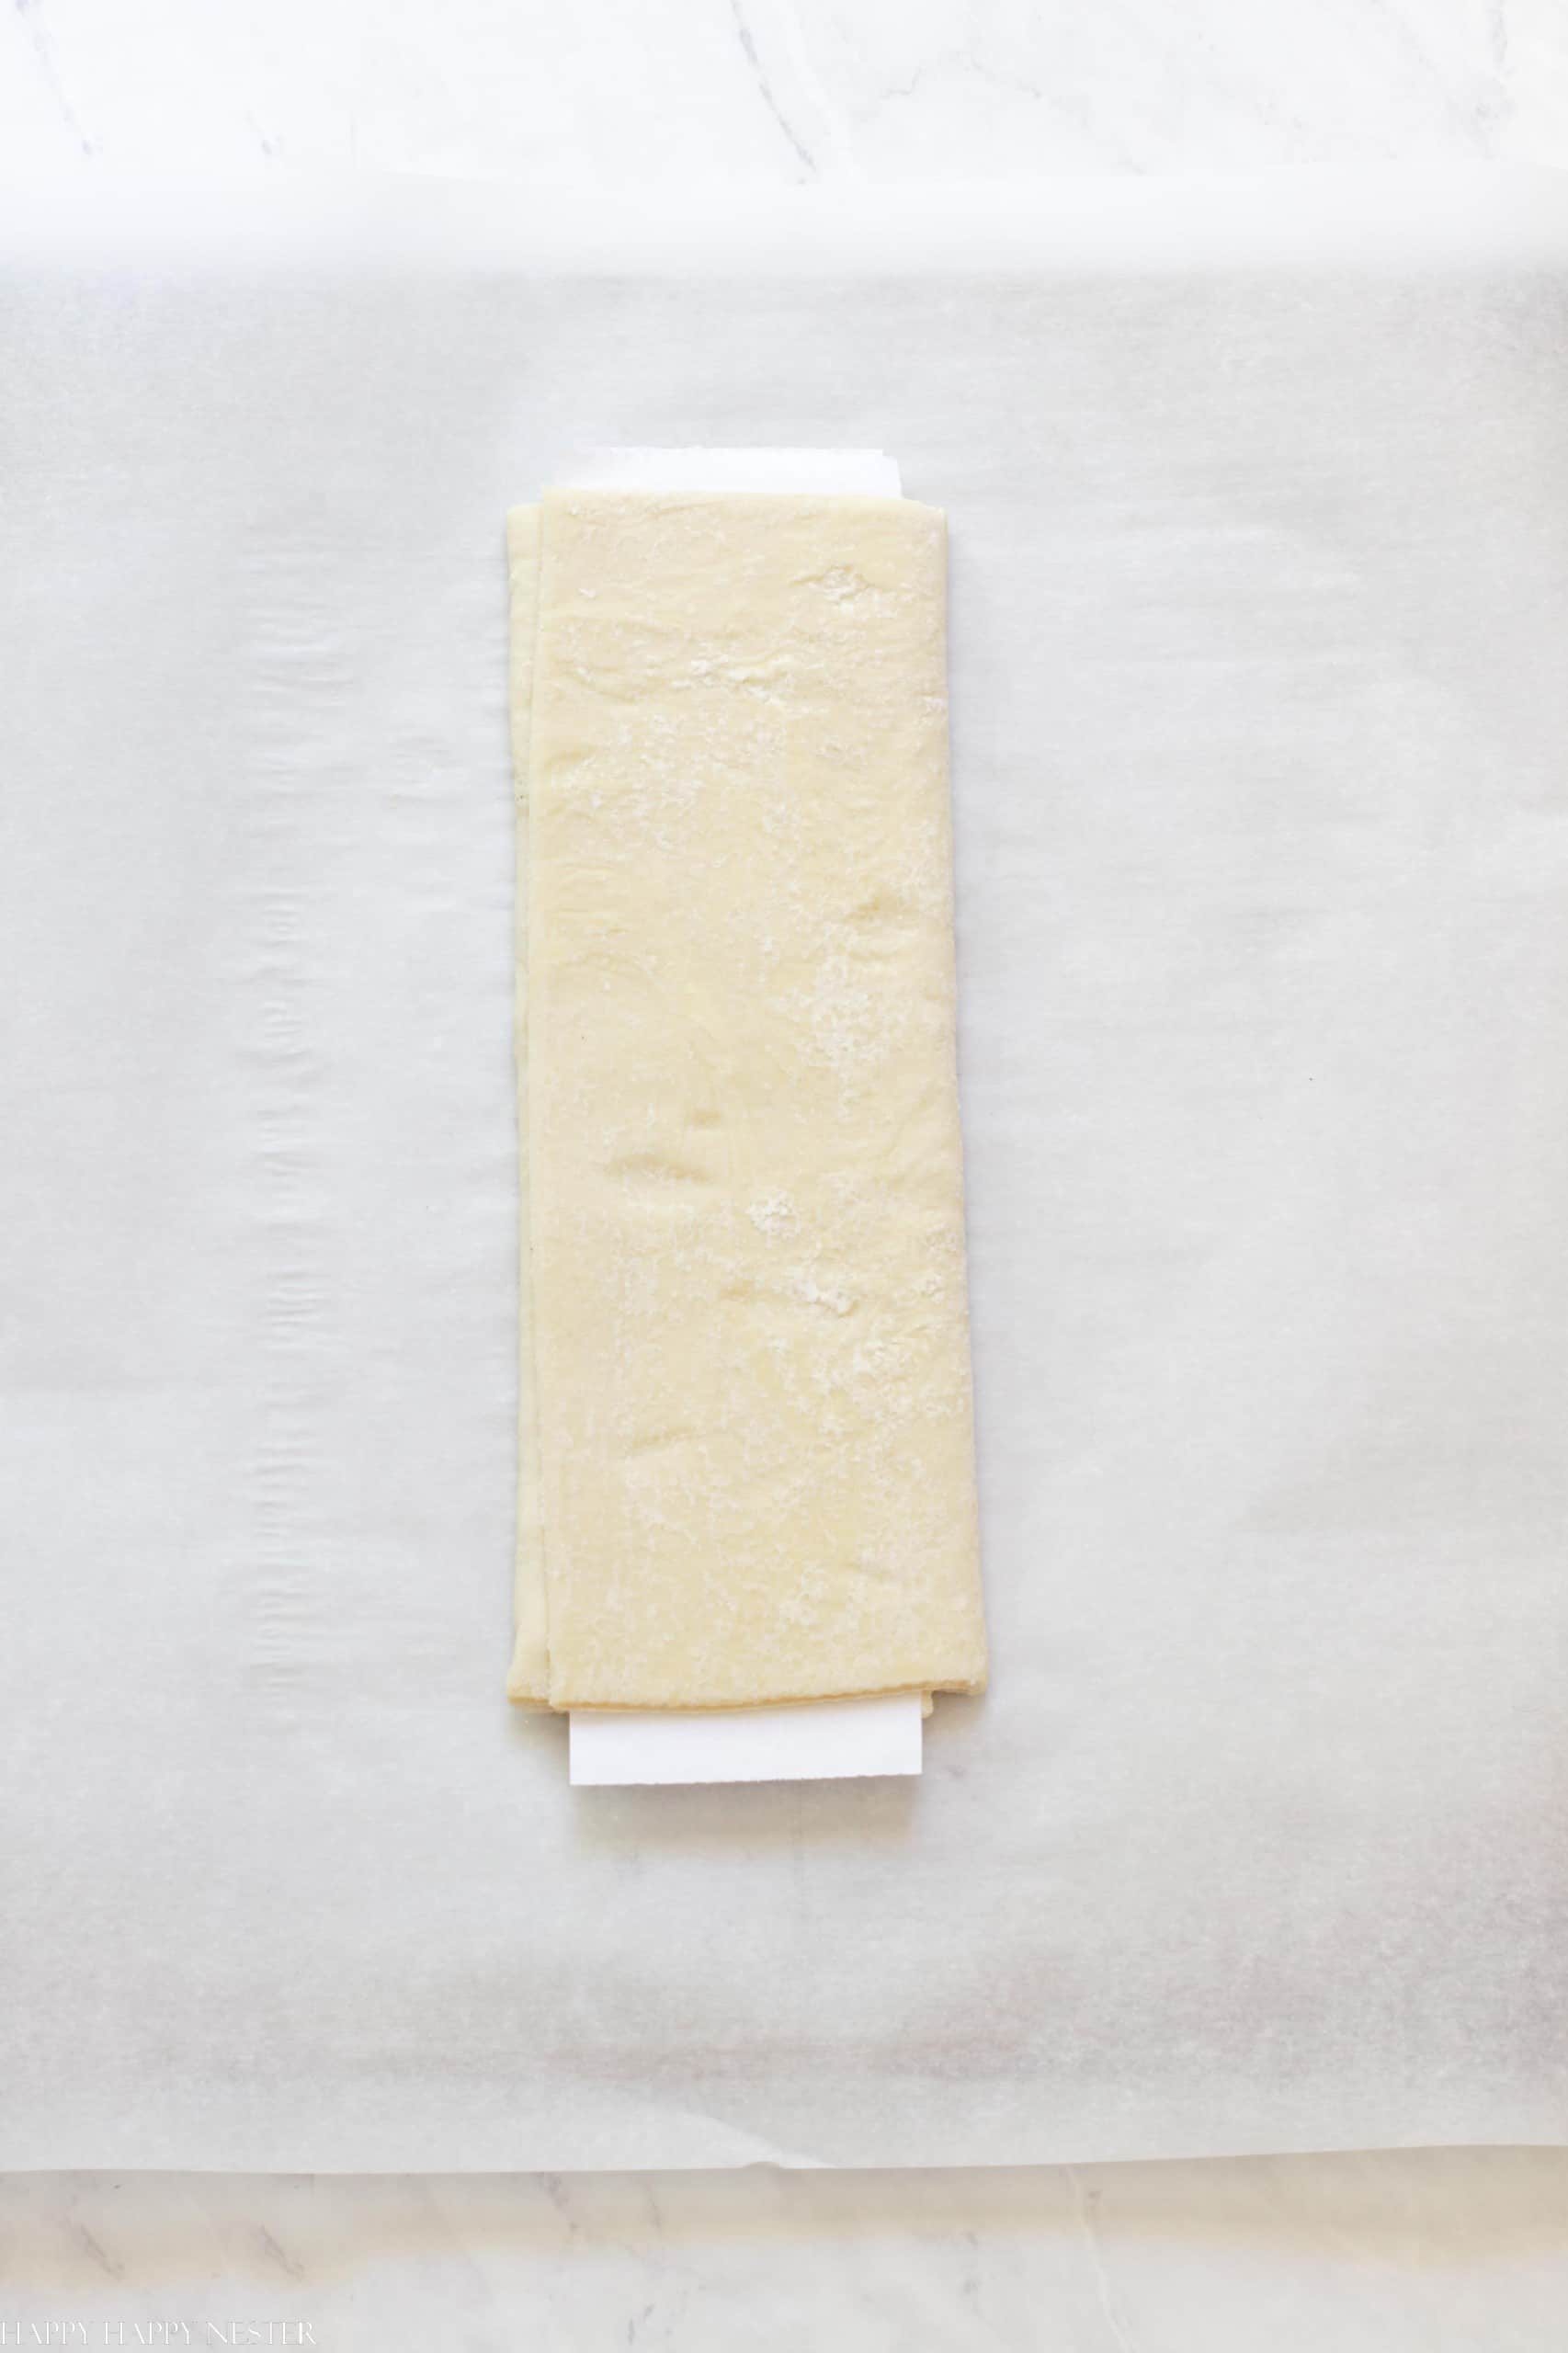
Step 1 – Thaw Pastry
Unwrap the frozen dough on a piece of parchment paper. Allow the dough to thaw for 30-40 minutes.
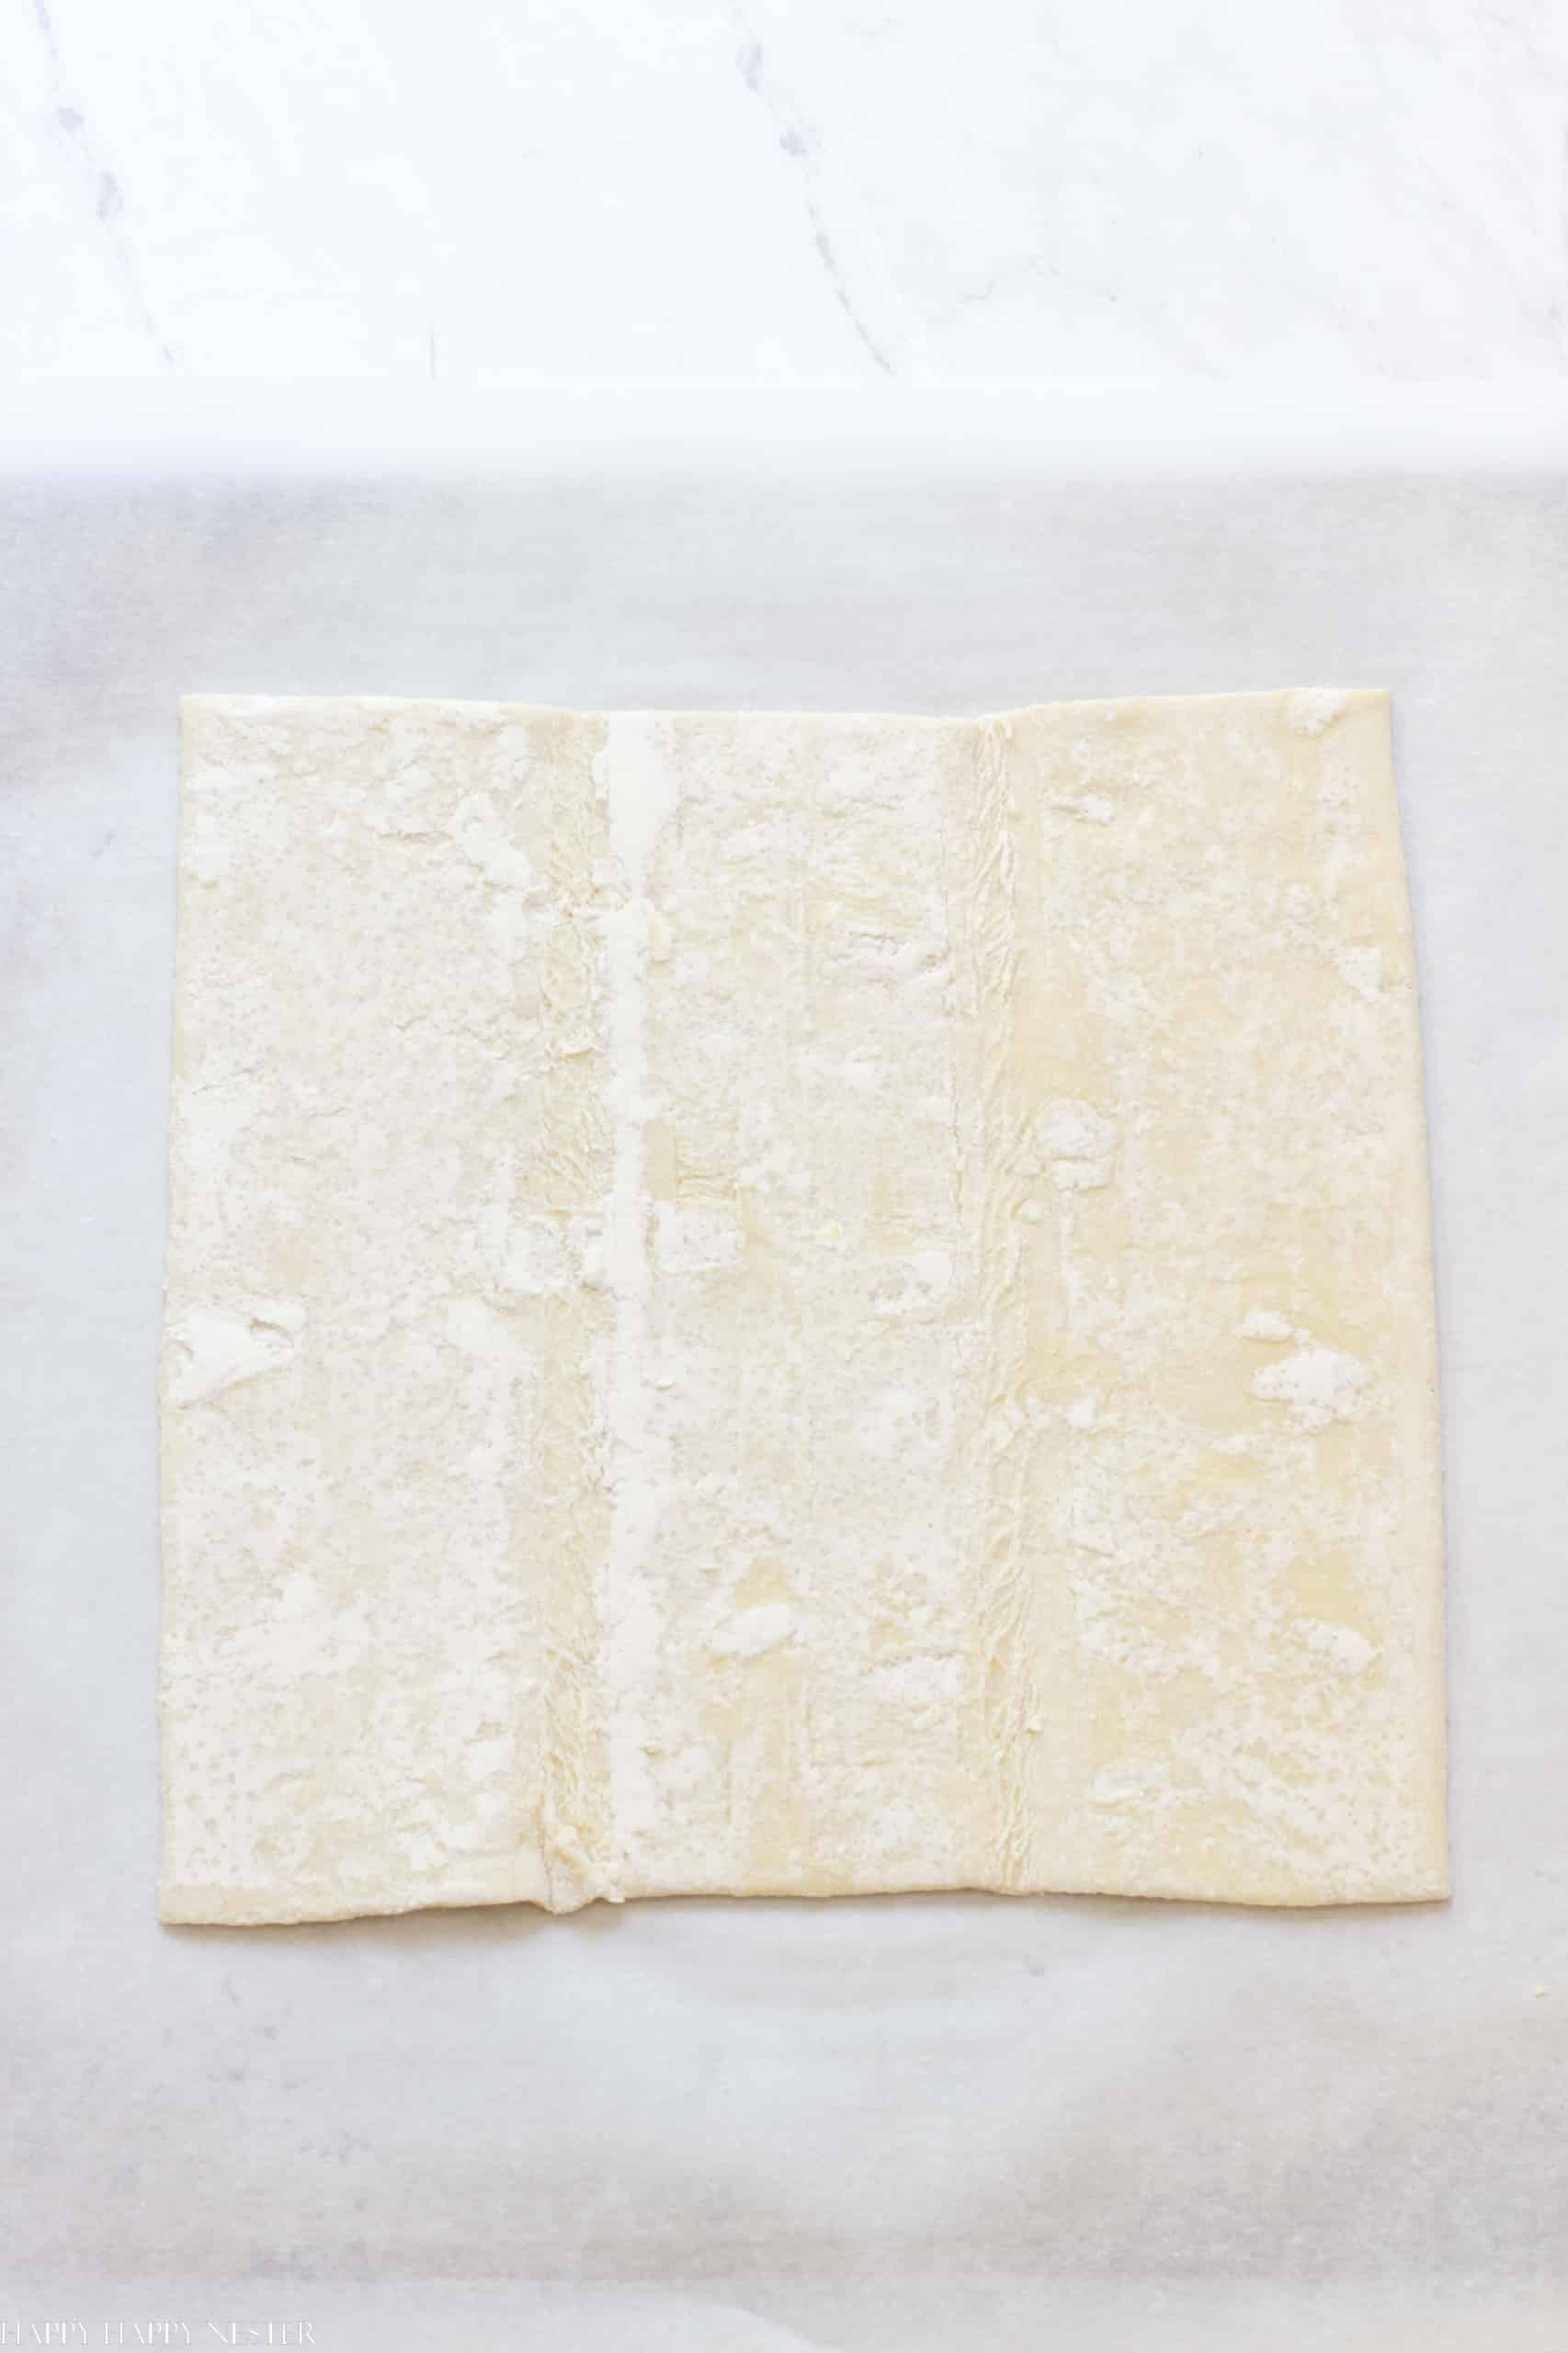
Step 2 – Cut Pastry
You’ll want to create 1-inch tabs on the bottom and top of the pastry. To make these tabs cut on the two folds at the bottom and top of the dough. These cuts will be about an inch long.
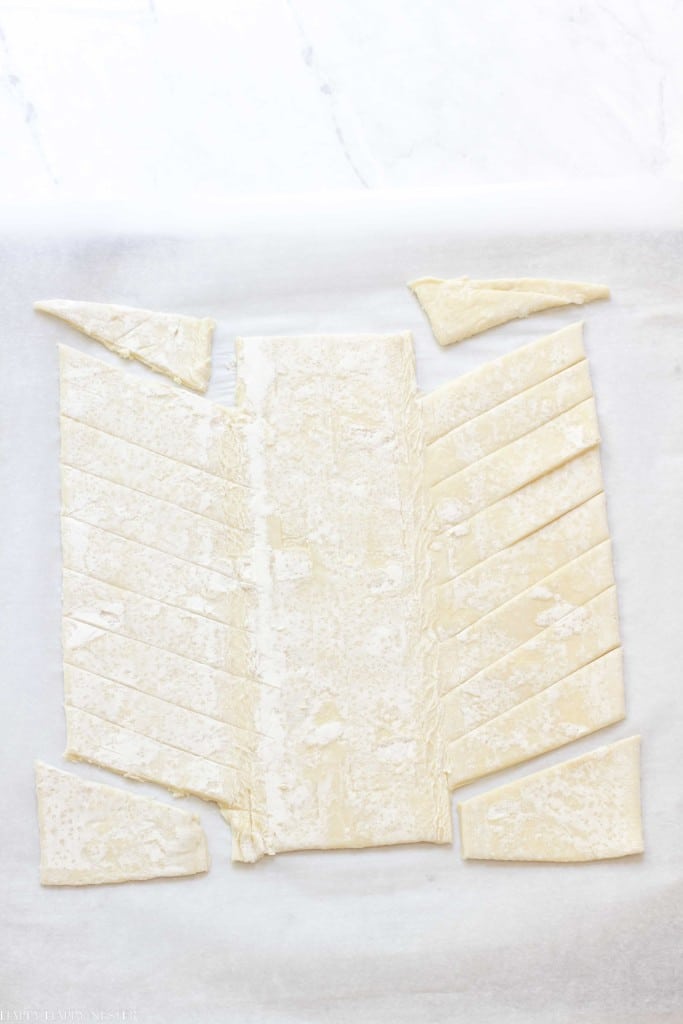
Next, trim off a triangle shape from these cuts on the top and bottom corners.
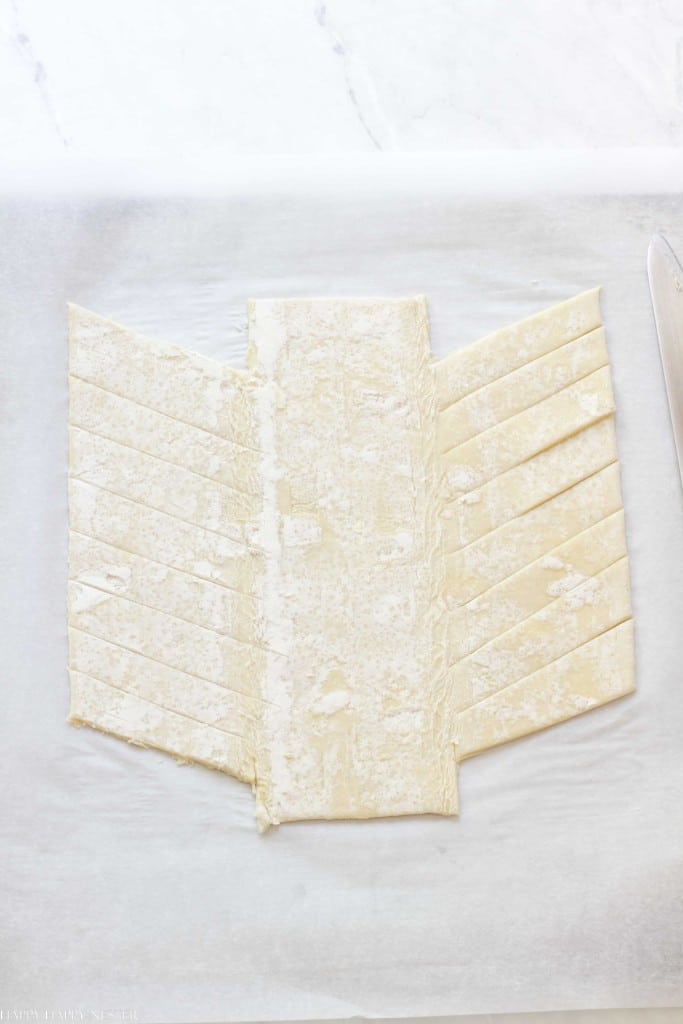
Step 3 – Cut Side Braids
Cut the sides with about one-inch wide strips. The angled cuts should start from the middle panel and go to the outside edge. Make sure they are all going in the same direction.
I try and make the same amount of braids on each side, but sometimes I lose count and make it unbalanced. But don’t worry if this happens since puff pastry is so forgiving! I found that this dough makes mistakes and always looks ok!

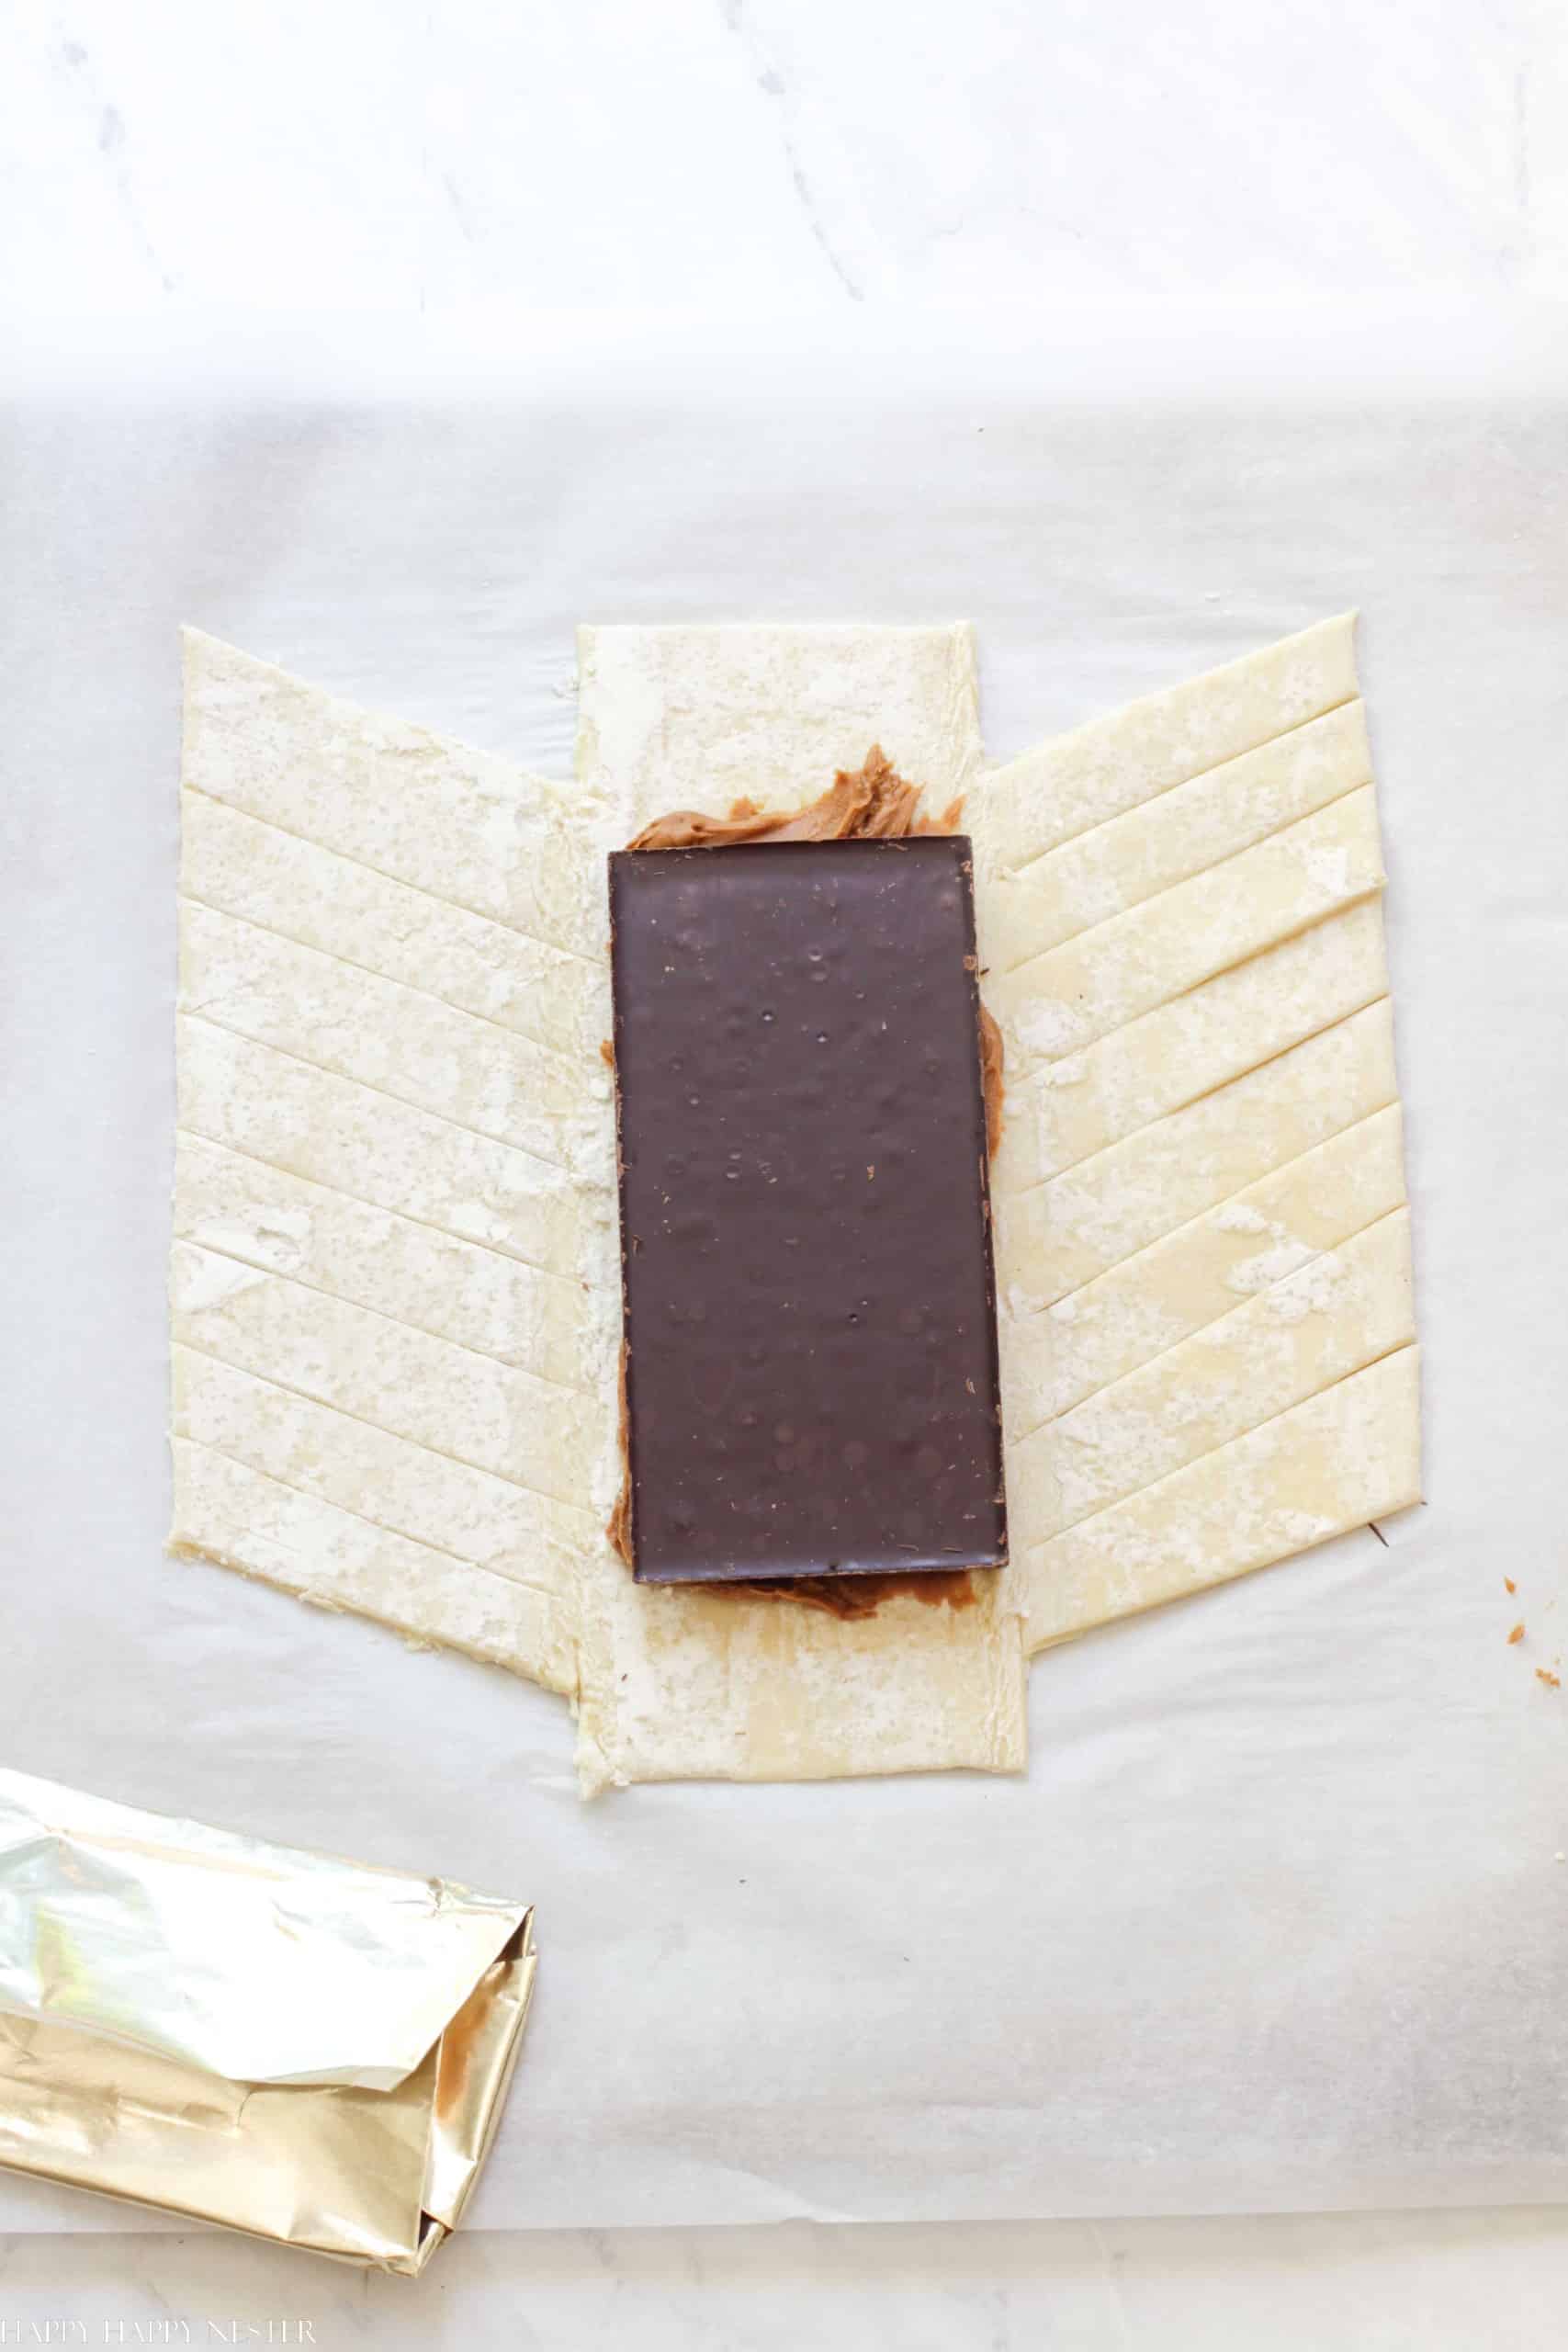
Step 4 – Place Filling in the Middle
Spread a thick layer of Biscoff Cookie Butter in the middle panel leaving the tabs empty. Then place the chocolate bar on top of the cookie butter.
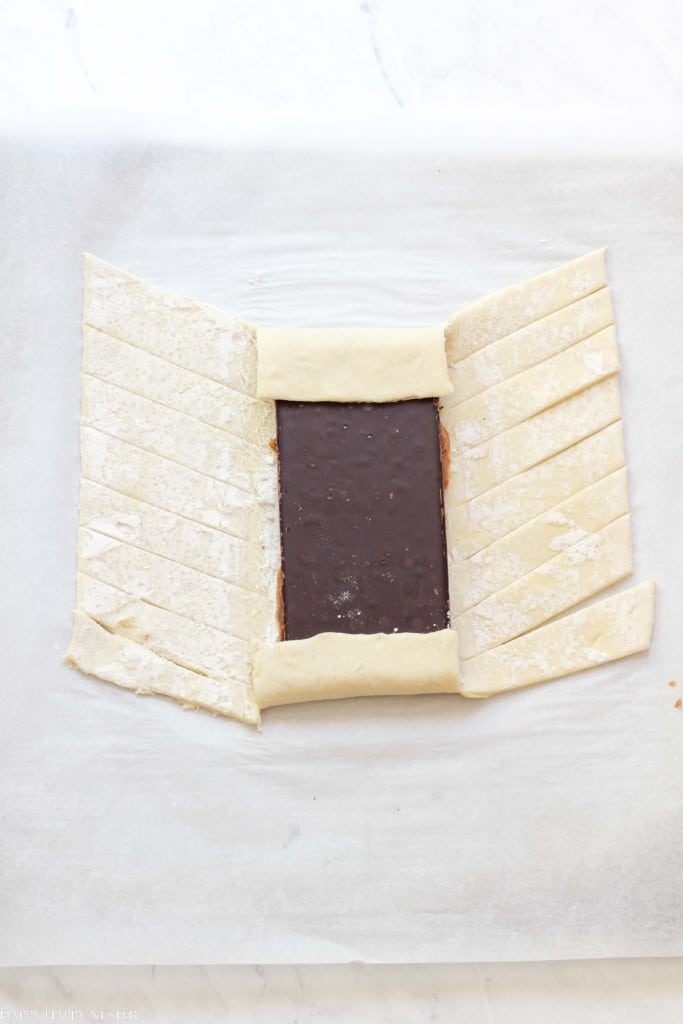
Step 5 – Fold Over Tabs
Fold over the bottom and top dough tabs of your pastry onto the chocolate bar. I found the dough sometimes doesn’t like to stick to the chocolate. So you can place a tiny dab of cookie butter on the chocolate. If you don’t want to use the cookie butter as glue, you can also press the dough into the chocolate.
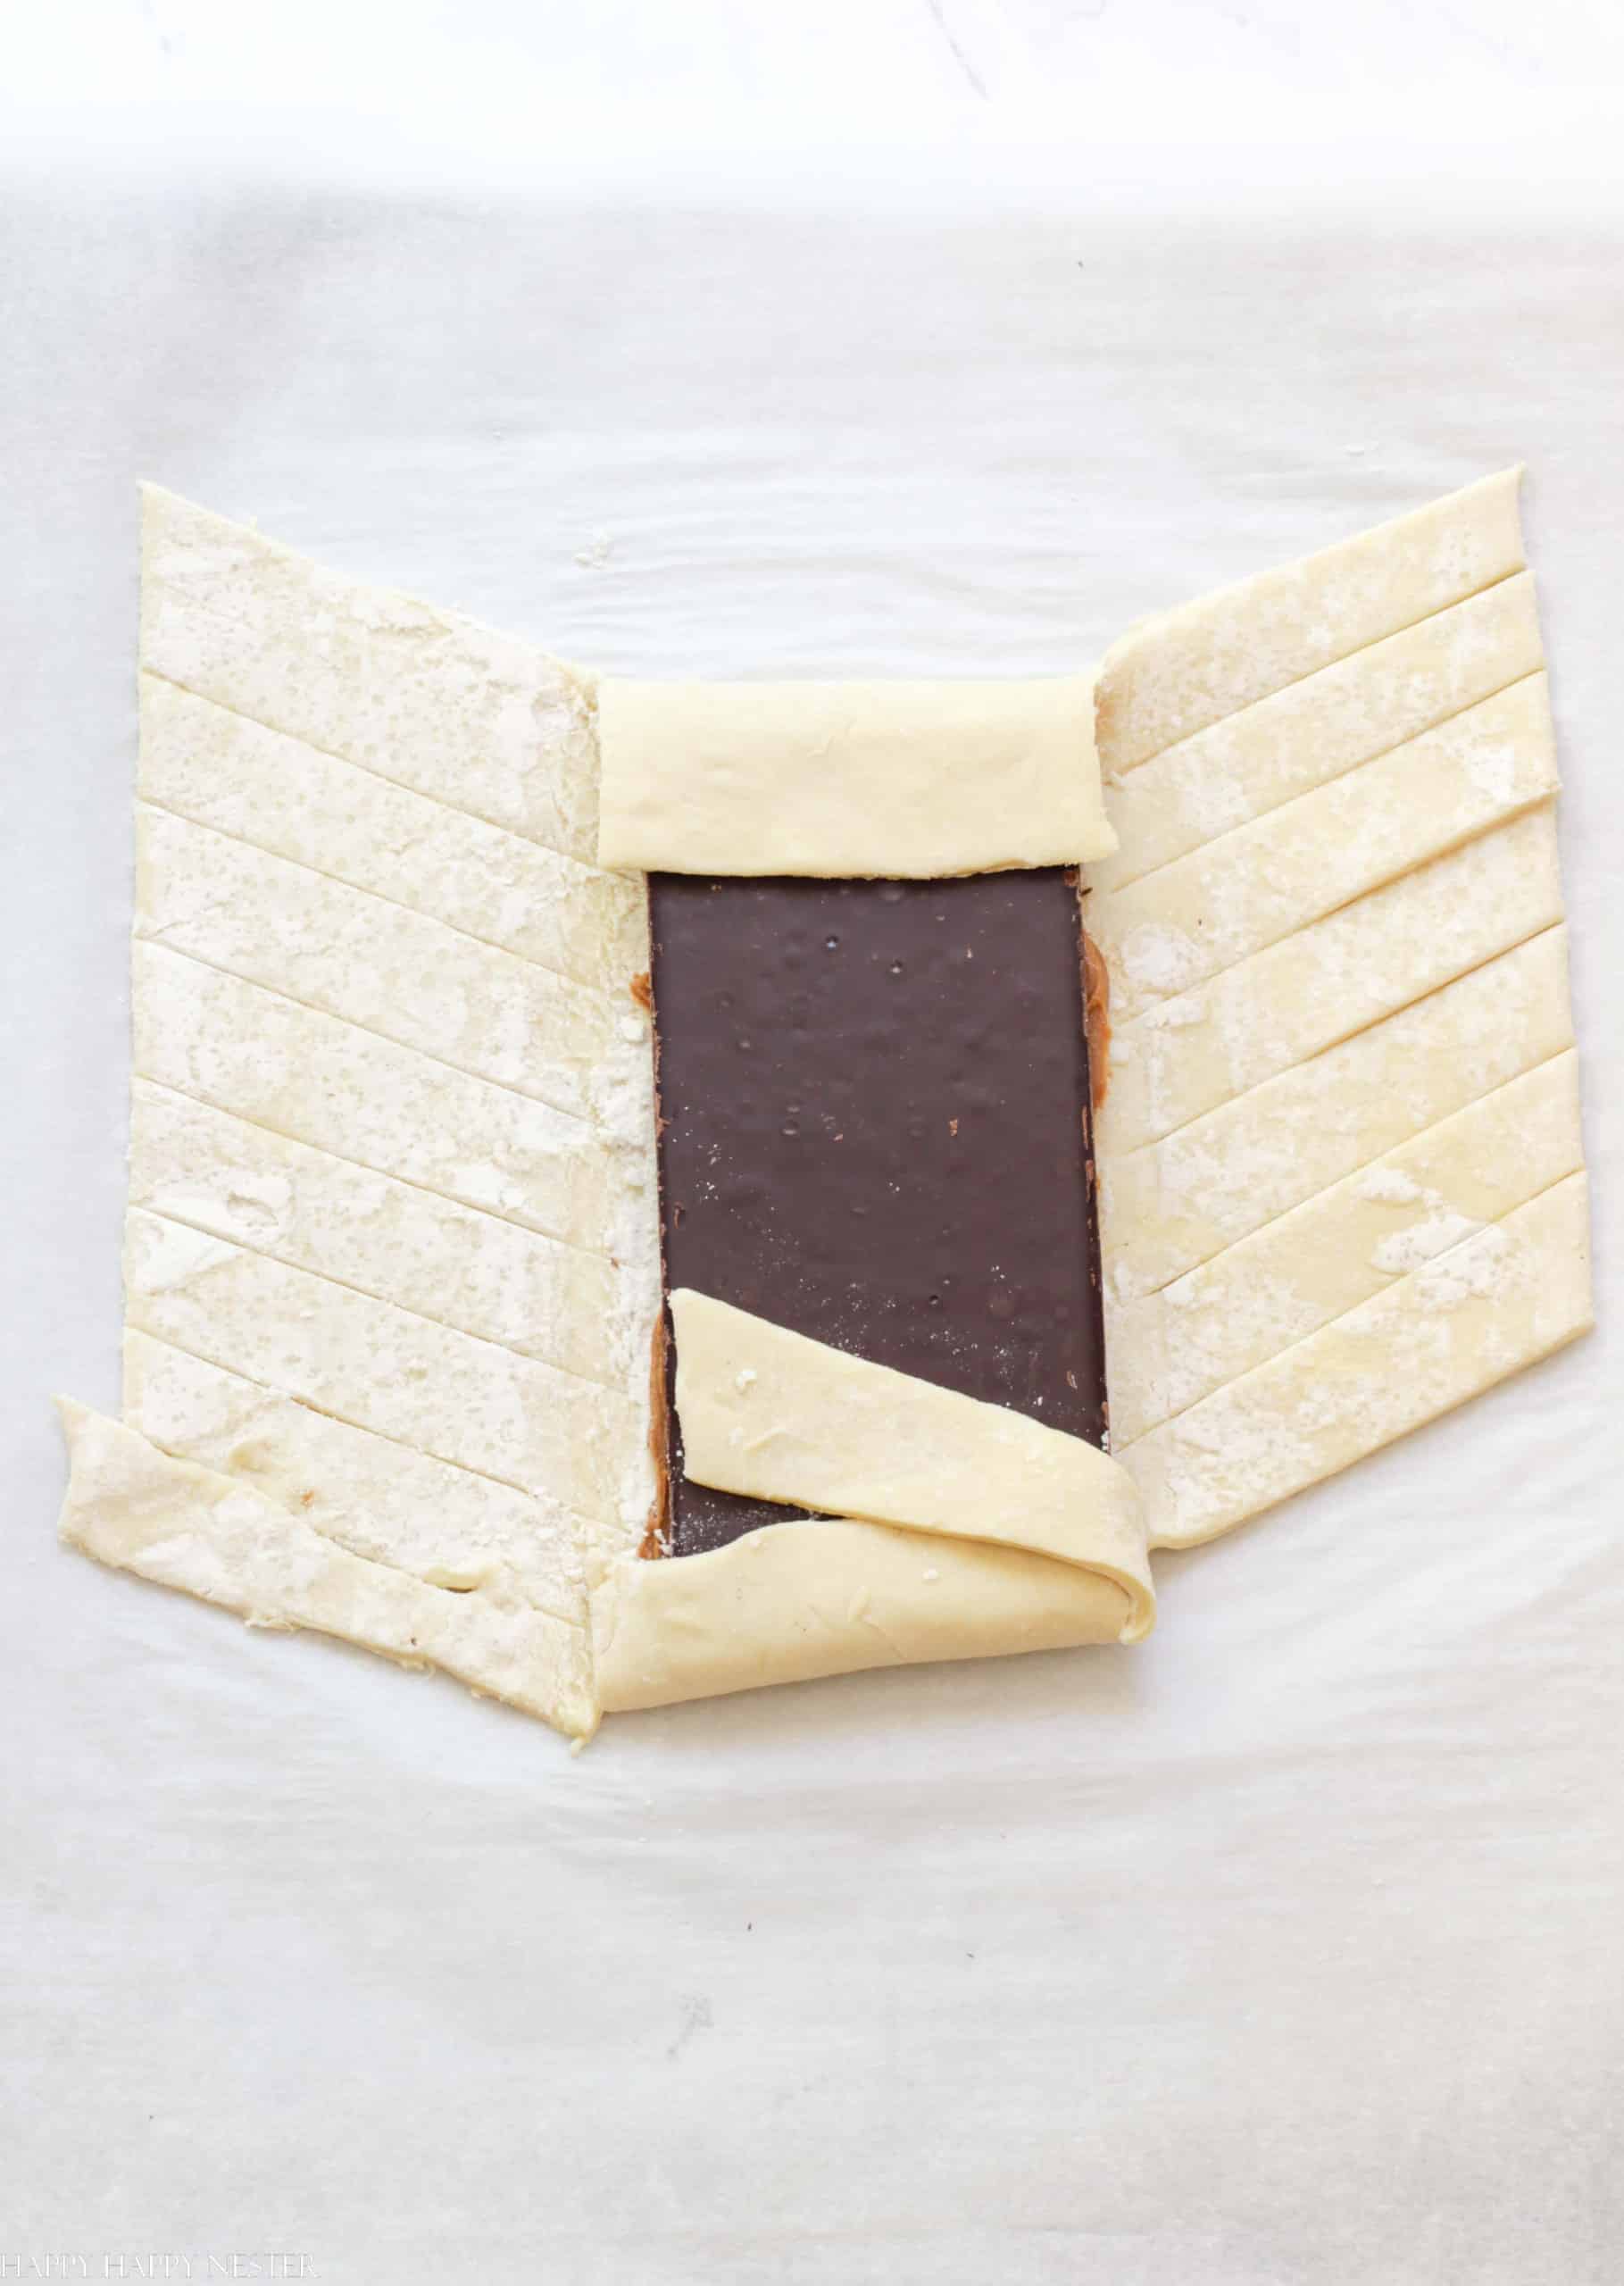
Step 6 – Braid the Dough
Start braiding at the bottom by crossing a dough strip over the middle. Then cross the other side strip so that it overlaps the first one. Next, alternate with the other side’s side’s cross it over the middle. Continue up the pastry until you reach the top.
I added a little water to the bottom side of the last braid and pinched it to the pastry. The water acts as a glue dough.
Helpful Baking Tips!
How to Thaw Puff Pastry
Transfer from the freezer: Take the puff pastry out of the freezer and remove any packaging or wrapping. It’s best to thaw only the amount of pastry you plan to use, as refreezing thawed puff pastry is not recommended.
Refrigerator thawing: The recommended method for thawing puff pastry is in the refrigerator. Place the frozen puff pastry on a plate or baking sheet and cover it loosely with plastic wrap or place it in a sealed plastic bag. Allow it to thaw in the refrigerator for several hours or overnight. The cold, controlled environment of the refrigerator ensures a gradual thaw, which helps preserve the texture and quality of the pastry.
Room temperature thawing (if needed): If you’re short on time, you can thaw the puff pastry at room temperature, but it’s not the ideal method. Place the frozen pastry on a plate or baking sheet and leave it at room temperature for about 30-45 minutes or until it is pliable and no longer frozen. Be cautious not to leave it out for too long, as puff pastry contains perishable ingredients like butter and may become too soft or start to spoil if left at room temperature for an extended period.
Handle with care: Once the puff pastry is thawed, handle it gently to avoid compressing the layers. Be careful not to stretch or tear the pastry while working with it.
Unfortunately, the thawing process can’t be hurried unless you microwave it. But, if you try and open the dough while it’s still cold, it will crack. Yeah, I know, since I do have an impatient side of me, and I’ve experienced it cracking on one occasion.
So, plan your dessert baking with plenty of time to thaw.
FAQs
What is puff pastry called in France?
In France, puff pastry is called “pâte feuilletée.” The term “pâte feuilletée” translates to “leafed dough” or “leaf pastry” in English, referring to the multiple layers that create the flaky texture of the pastry.
Pâte feuilletée is widely used in French cuisine for a variety of sweet and savory dishes, including classic pastries like croissants, pain au chocolat, and vol-au-vents. It is an essential component in many traditional French recipes and is highly regarded for its light and delicate texture.
What’s The Difference Between Puff Pastry and Filo Dough
Puff pastry and filo dough are both types of dough used in baking, but they have some key differences in terms of their ingredients, preparation, and texture.
- Ingredients: Puff pastry is made with a basic dough consisting of flour, water, and butter. The dough is rolled out and then layered with butter, which creates distinct layers when baked, resulting in a flaky texture. Filo dough, also known as phyllo dough, is made with flour, water, and a small amount of oil or vinegar. The dough is rolled out extremely thin and stretched to create multiple layers.
- Preparation: Puff pastry requires a process called “laminating.” This involves rolling out the dough, placing a layer of butter on top, folding and rolling it again, and repeating the process multiple times to create numerous layers. The dough is then chilled before being used in various recipes. Filo dough, on the other hand, involves rolling out the dough as thinly as possible and then carefully layering the sheets together.
- Texture: Puff pastry, as its name suggests, puffs up dramatically during baking due to the water content in the dough turning into steam. This results in a light, airy, flaky texture with distinct layers. In contrast, filo dough remains relatively thin and crispy after baking, with delicate layers that shatter when you bite into it.
- Usage: Puff pastry is often used for making pastries, such as croissants, danishes, and turnovers. It can also be used as a crust for savory dishes like pot pies. Filo dough is commonly used in Mediterranean and Middle Eastern cuisines to make dishes like baklava, spanakopita (spinach pie), and various savory pastries.
Phyllo dough of filo is a Greek term for leaf. It has superfine thin layers with almost no fat. Usually, bakers brush melted butter in between phyllo dough sheets. Thus, unlike puff pastry, it doesn’t have the rich light buttery taste of puff pastry.
Can I Store The Baked Pastry on My Counter Top?
It depends on the specific type of pastry and the ambient conditions in your kitchen. Generally, pastries with high-fat content, such as puff pastry, tend to be more perishable and are best stored in the refrigerator to maintain their freshness.
If you have freshly baked puff pastries or other pastries that contain perishable fillings like cream or custard, it’s advisable to store them in the refrigerator. Place them in an airtight container or wrap them tightly with plastic wrap to prevent them from drying out or absorbing any odors from the surroundings.
And this recipe has chocolate and Biscoff, and since it doesn’t have a creamy filling, I store it in an air-tight container or a Ziploc bag for the first day. Then later, I would recommend you keep it in the refrigerator.
Can I Make This Dessert Ahead of Time?
Yes, but if you want it at its best, you’ll want to serve it a couple of minutes after it’s baked. But if you can’t serve it right away, this dessert is still pretty tasty at room temperature.
How to Braid Puff Pastry
Think of your dough as a rectangle divided into three vertical panels. The middle panel will hold the chocolate and cookie butter filling, and the other two side panels are the braids that will cover the filling.
Chocolate Puff Pastry
Ingredients
- 1 sheet puff pastry
- 1 chocolate bar I love the 3 ounce chocolate bar filled with caramel from Trader Joes
- ½ cup Biscoff Cookie Butter can use less or more of cookie butter
Instructions
- Preheat oven at 400°
- Unwrap the frozen dough on a baking sheet lined with parchement paper. Allow the dough to thaw for 30-40 minutes.
- You'll want to create 1-inch tabs on the bottom and top of the pastry. To make these tabs cut on the two folds at the bottom and top of the dough. These cuts will be about an inch long.
- Next, trim off a triangle shape from these cuts on both the top and bottom corners.
- Cut the sides with about one-inch wide strips. The angled cuts should start from the middle panel and go to the outside edge. Make sure they are all going in the same direction.
- I try and make the same amount of braids on each side, but sometimes I lose count and make it unbalanced. But, don't worry if this happens since puff pastry is so forgiving! I found that this dough makes mistakes always look ok!
- Spread a thick layer of Biscoff Cookie Butter in the middle panel leaving the tabs empty. Then place the chocolate bar on top of the cookie butter.
- Fold over the bottom and top dough tabs of your pastry onto the chocolate bar. I found the dough sometimes doesn't like to stick to the chocolate. So you can place a tiny dab of cookie butter on the chocolate. If you don't want to use the cookie butter as glue, you can also press the dough into the chocolate.
- Start braiding at the bottom by crossing a dough strip over the middle. Then cross the other side strip so that it overlaps the first one. Next, alternate with the other side’s side's cross it over the middle. Continue up the pastry until you reach the top.
- I added a little water to the bottom side of the last braid and pinched it to the pastry. The water acts as a glue dough.
- Bake in oven for 10 – 15 minutes until golden.
Nutrition
Why You’re Going to Love This Chocolate Pastry!
- Chocolate puff pastry with Biscoff cookie butter is undeniably a delightful combination that many people find incredibly delicious. There are a few reasons why this pairing is so good.
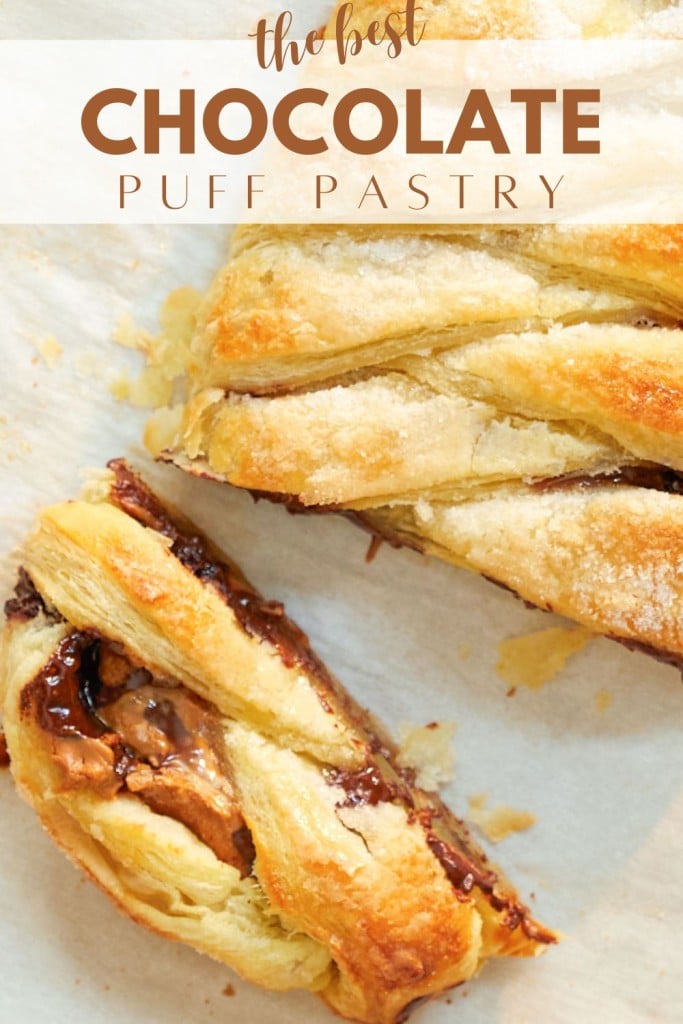
- Flavors: The rich, indulgent taste of chocolate complements the spiced, caramelized flavor of Biscoff cookie butter exceptionally well. The smooth and creamy texture of the cookie butter adds an extra layer of decadence to the flaky, buttery pastry.
- Texture: The contrast in textures is also a major factor in the appeal of this combination. The crisp and flaky layers of the chocolate puff pastry create a wonderful contrast with the creamy and spreadable consistency of the Biscoff cookie butter. When you take a bite, you get a delightful mix of textures that adds to the overall enjoyment.
- Sweetness: Both chocolate and Biscoff cookie butter have a pleasant level of sweetness that complements each other harmoniously. The chocolate brings its own inherent sweetness, while the cookie butter provides a distinct sweetness with its caramelized, spiced flavors. Together, they create a balanced and satisfying sweetness that is not overpowering.
- Unique flavors: Biscoff cookie butter, made from crushed Biscoff cookies, offers a unique and addictive taste that is slightly spiced, reminiscent of cinnamon and gingerbread. When combined with the rich cocoa flavor of the chocolate pastry, it creates a flavor that is both familiar and exciting.
Chocolate and pastry are a delightful combination that can satisfy any sweet tooth.
Thanks so much for your visit to this chocolate puff pastry post! I love creating more recipes for you, and I hope you’ll come back to see what I’ve made.
I hope you like my puff pastry and chocolate recipe and have a chance to make it soon!
Happy Baking!


- Red and White Christmas Tree - July 9, 2026
- Tori Karaage Don (Japanese Chicken) - July 2, 2026
- Fluffy Japanese Pancake Recipe (Souffle) - June 24, 2026


")
Debbie
Oh Janine, I just loved your chocolate puff pastry recipe. How yummy!! My husband is a chocoholic and I am going to make this recipe for him, hopefully today. Thank you so much!!
Janine Waite
Hi Debbie,
I’m so glad you’re going to try making this easy recipe! I must say that the Trader Joe’s chocolate bar with caramel and sea salt was the best! If you can’t find the exact chocolate, get one with caramel. The added gooeyness is best!
Sharon
Happy Saturday, Janine! I, too, am one who loves anything to do with home.
My husband is going to love this recipe. He is French and loves the Chocolat du pain pastries we enjoy at our French bakery. I’m thrilled to now have this recipe so I can make it with homemade love anytime I want. I just need to know how long I bake it for and what the oven temperature should be.
Thank you, Janine … I hope you have an inspirational day.
Warmly, Sharon
Janine Waite
Hi Sharon,
You’re so kind to leave a comment! I’m so happy you want to try the recipe.
I thought for sure that I included the recipe card in the post, but I guess I spaced writing it! I just added it as well as the time and bake temperature. I hope you like this simple yet yummy dessert.
Take care and thanks again for writing me!