• Skip to main content
  • Skip to header right navigation
  • Skip to site footer
  • About
  • Contact
  • Boutique of the Week
    • Facebook
    • Instagram
    • Pinterest
    • Twitter

Happy Happy Nester

Weekly Inspiration for Your Nest

  • Recipes
    • Appetizers
    • Breakfast/Brunch
    • Desserts
    • Dinners
    • Drinks
  • Crafts
  • Decor
  • Shop
    • Fall Decor
    • Kitchen
    • Pillows
    • Holiday Decor
  • Amazon Store
  • Recipes
    • Appetizers
    • Breakfast/Brunch
    • Desserts
    • Dinners
    • Drinks
    • Snacks
  • Crafts
  • Decor
  • Shop
    • Fall Decor
    • Kitchen Favorites
    • Pillows
    • Holiday Decor
  • Saturday Chitchat
  • Boutique of the Week
  • About
  • Contact
  • Facebook
  • Instagram
  • Pinterest
  • Twitter

See What’s Trending…

Cakes

Cookies

Dinners

Wreaths

Drinks

Home › Crafts › Easy Pink Rose Wreath Tutorial

Easy Pink Rose Wreath Tutorial

Crafts Decor
By Janine Waite · Published on Mar 4, 2022
Affiliate Disclosure: This Post May Contain Affiliate Links.

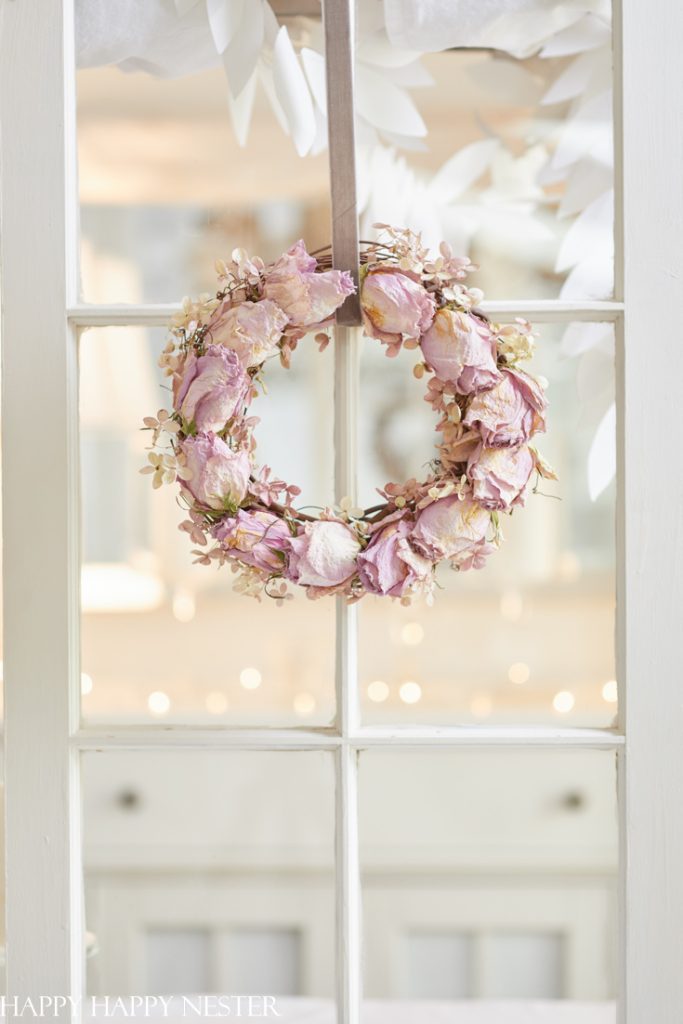
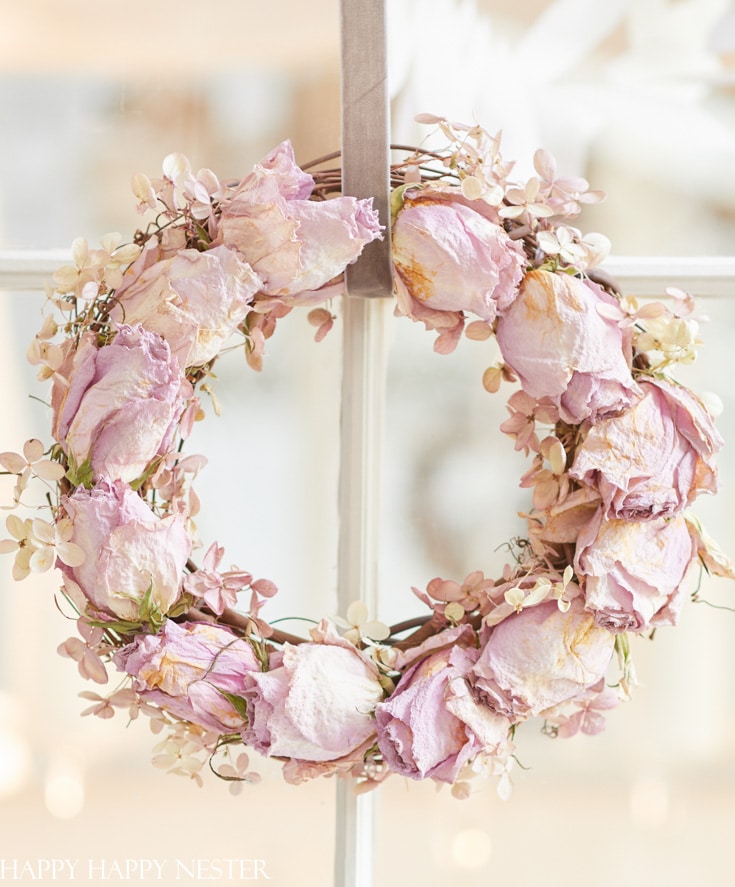
This Easy Pink Rose Wreath is natural, dainty, and pretty. It only takes a few minutes to create, and it’s pretty inexpensive. I dried my store-bought roses and added a few homegrown hydrangea blossoms to the grapevine wreath. The results are a homemade romantic rose wreath that looks gorgeous on a windowpane, wall, door, or mantel.

dried hydrangea and rose wreath
Photo: My Photography

If you have some roses and don’t want to throw them out, make sure to check out this tutorial. This post includes step-by-step instructions on quickly transforming a grapevine wreath into a floral decoration.

As some of you already know, I adore wreaths. I have quite a collection of them over here on the blog:

  • Cute Bunny Tail Wreath
  • How to Make a Paper Rosette Wreath
  • White Tulip Wreath

Over the last year or so, I always dry my roses. Since quarantining, I never quite know when or if I’ll be able to buy fresh roses.

It’s so funny since a few years ago. So it made sense to use my dried roses to create a vintage-style wreath with them. This pink rose wreath would be called a shabby chic style wreath. Today, that term is no longer around, so I’m not sure the best terminology for this project.

Whatever the style, I still love this romantic rose wreath that was so easy to create.

easy pink rose wreath tutorial
Photo: My Photography

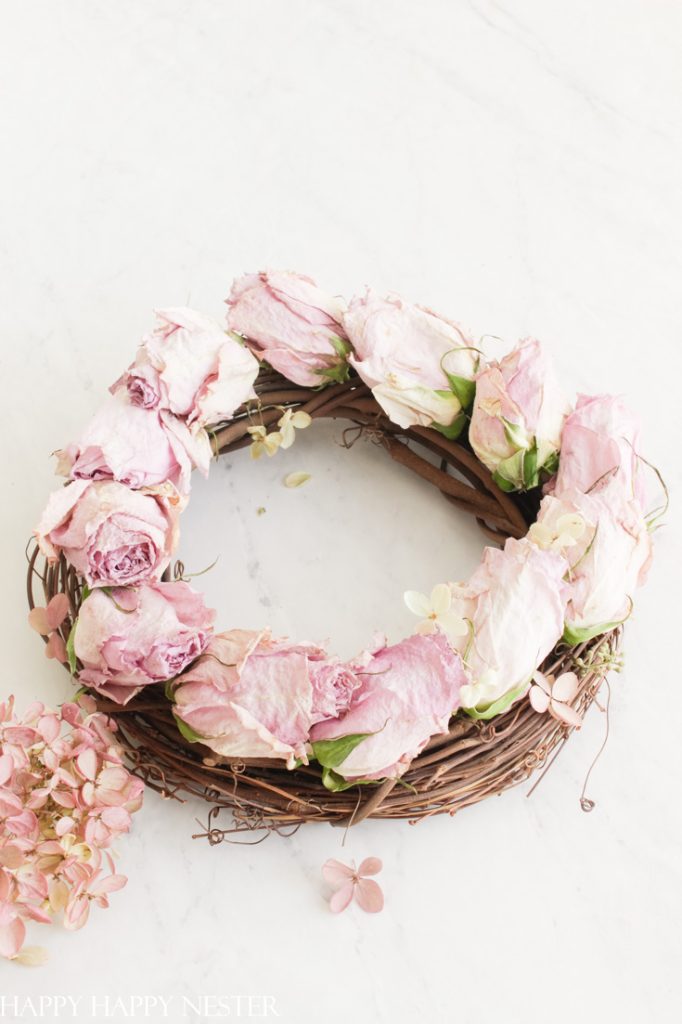
And while designing this wreath, I felt that it needed a dainty flower to lighten the feel. So, I added tiny blossoms from my dried hydrangea flowers. The little touch of flowers adds the perfect delicate touch I wanted.

dried hydrangeas and roses

The Supplies You’ll Need For Your Pink Rose Wreath

*The following post contains affiliate links

  • Dozen Roses
  • 1 Dried Hydrangea Blossom
  • Grapevine Wreath
  • Glue Gun
  • Ribbon to Hang Roses

How to Make a this Wreath

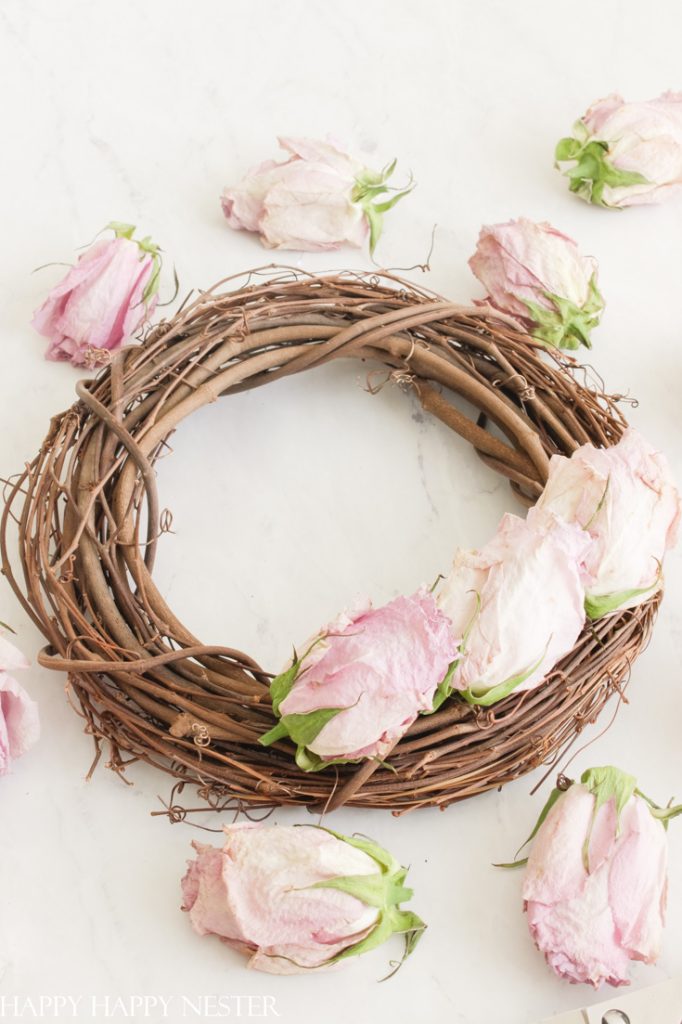
First, you want to gather your supplies needed (scroll up to see the list) and plug in the glue gun. 
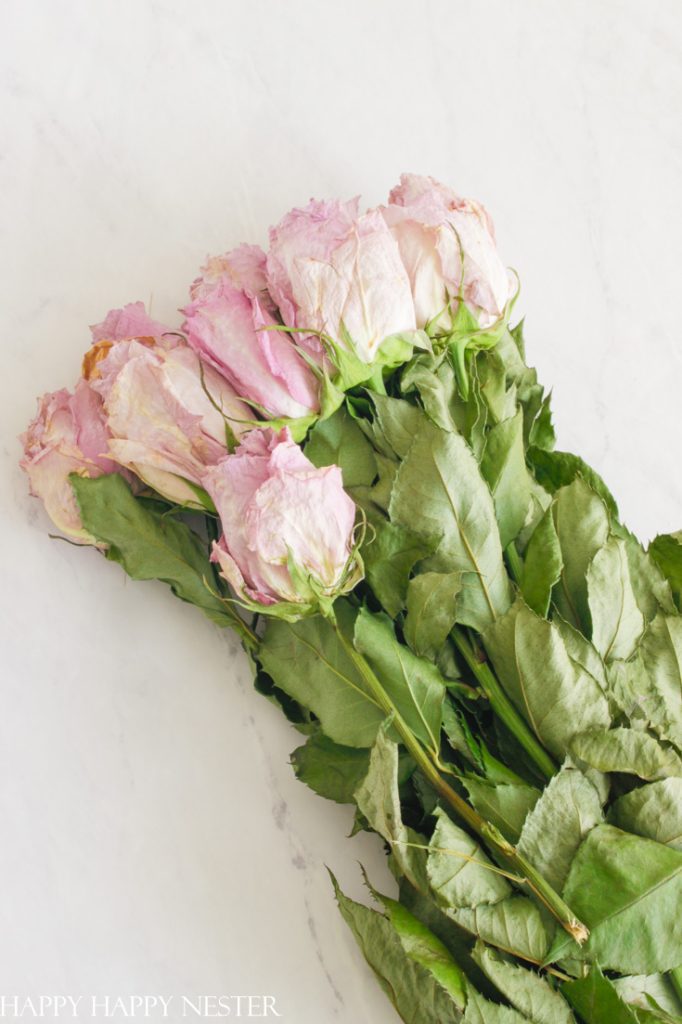
dried flower wreath

Step 1 – Dry Roses

How to Make a Rose Wreath

Once your roses have been drying for 2-3 weeks, it’s now time to start the easy pink rose wreath tutorial. You can find the details on how to dry your flowers down below.
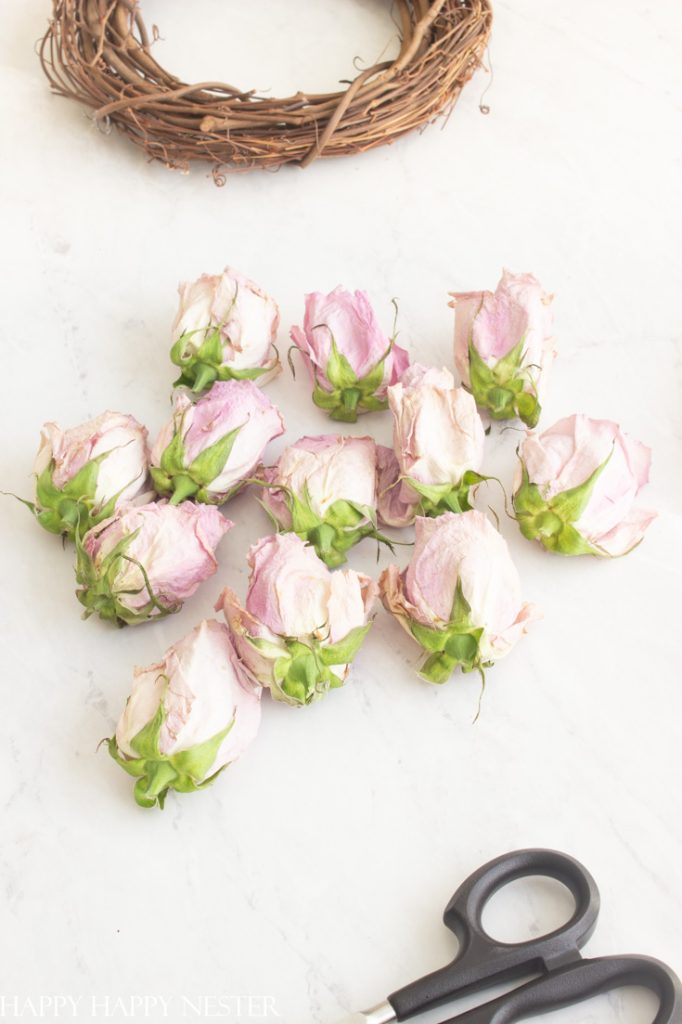
flower wreath diy

Step 2 – Cut Stems

Next, you want to trim the stem off of each rose like pictured above.

dried roses

Step 3 – Glue Rose Blossoms and Hydrangeas to Wreath

I like symmetry, so I positioned the roses all pointing in the same way. Start with your first rose, and then glue the next one on top of it. I like working clockwise, but you can work counterclockwise as well.

Step 4 – Add a Ribbon

I bought a pretty pewter color velvet ribbon for my wreath. I felt that the neutral taupe color went well with the antique rose color. I knew that I wanted a subtle look when choosing a ribbon.

easy pink rose wreath tutorial
Photo: My Photography

How to Dry Roses

Here is a simple way to dry roses to make this easy pink rose wreath tutorial easier. 

First, tie the bottom of the stems together with a string. 

Next, hang the roses upside down in a dark, dry place like a closet to preserve the color. I tied my stems to a clothes hanger and then hung the roses in my craft closet.  

After about 2-3 weeks, they are dry and ready to use.


A wreath adds so much warmth and beauty to a home. This pink rose wreath is lovely to create when you have a dozen roses that you want to preserve.

It’s even better if the roses are from an important event. Preserving them on a wreath brings means so much more!

Happy Crafting!

Cheers,

signature
pin it button
easy pink rose wreath tutorial pin
  • Author
  • Recent Posts
Janine Waite
Follow me
Janine Waite
I named my blog Happy Happy Nester because I love everything related to the home. I’ve always enjoyed decorating my surroundings. Get cozy and stay for a bit, thanks for visiting!
Janine Waite
Follow me
Latest posts by Janine Waite (see all)
  • How to Make a Tender Juicy Steak - May 8, 2025
  • My Favorite Flower Crafts - May 3, 2025
  • Easy Corkboard Placemats DIY - May 2, 2025

You May Also Like

  • valentine’s day heart
    DIY Heart Wreath Tutorial
  • fall wreaths
    Easy Fall Wreath Ideas DIY
  • paper rosette wreath diy
    How to Make a Paper Rosette Wreath
  • FeltFlowerWreath
    DIY Felt Flower Wreath: Hydrangeas & Anemones

Sharing This!

  • Facebook
  • Twitter
  • Email

Reader Interactions

Leave a Reply Cancel reply

Your email address will not be published. Required fields are marked *

Recipe Rating


Sidebar

Janine the Nester

Hello from the Nester

We love everything related to home, so get cozy and stay for a bit. Thanks for visiting our blog. Learn More...

Reader Favorites

The Best Crunchy Crispy Chocolate Chip Cookie

This Italian Cream Cake has a pumpkin cream cheese frosting that makes this a winning combination. This dessert is perfect for the holidays.

Italian Cream Cake with a Twist of Pumpkin

French Apple Custard Tart with Puff Pastry

DIY Paper Flowers Tutorial (Tissue Paper)

Upcycling Tin Cans with Scrapbooking Paper

How to Make a Paper Flower Wreath DIY

Popular Categories

  • Cakes
  • Cookies
  • Dinners
  • Wreaths
  • Organizing

Join Our Newsletter

Join our mailing list to receive the latest news and updates from our team.

You have Successfully Subscribed!

AFFILIATE DISCLOSURE:
I am grateful to be of service and bring you content free of charge. In order to do this, please note that when you click links and purchase items, in most (not all) cases, I will receive a referral commission. Your support in purchasing through these links enables me to keep my design and customization prices ridiculously low and empower more people worldwide to blog with less worry and less hassle.
Happy Happy Nester is a participant in the Amazon Services LLC Associates Program, an affiliate advertising program designed to provide a means for sites to earn advertising fees by advertising and linking to amazon.com.
Thank you! :)
-Happy Happy Nester

Our Guide

Join Our Newsletter

Join our mailing list to receive the latest news and updates from our team.

You have Successfully Subscribed!

  • Facebook
  • Instagram
  • Pinterest
  • Twitter

Recipes

Appetizers
Breakfast/Brunch
Desserts
Dinners
Drinks

Crafts & Decor

DIY
Gardening
Holiday
Wreaths

About

About The Nester
Contact
Privacy Policy

Copyright © 2025 · Happy Happy Nester by Janine Waite · Privacy Policy

↑ BACK TO TOP