
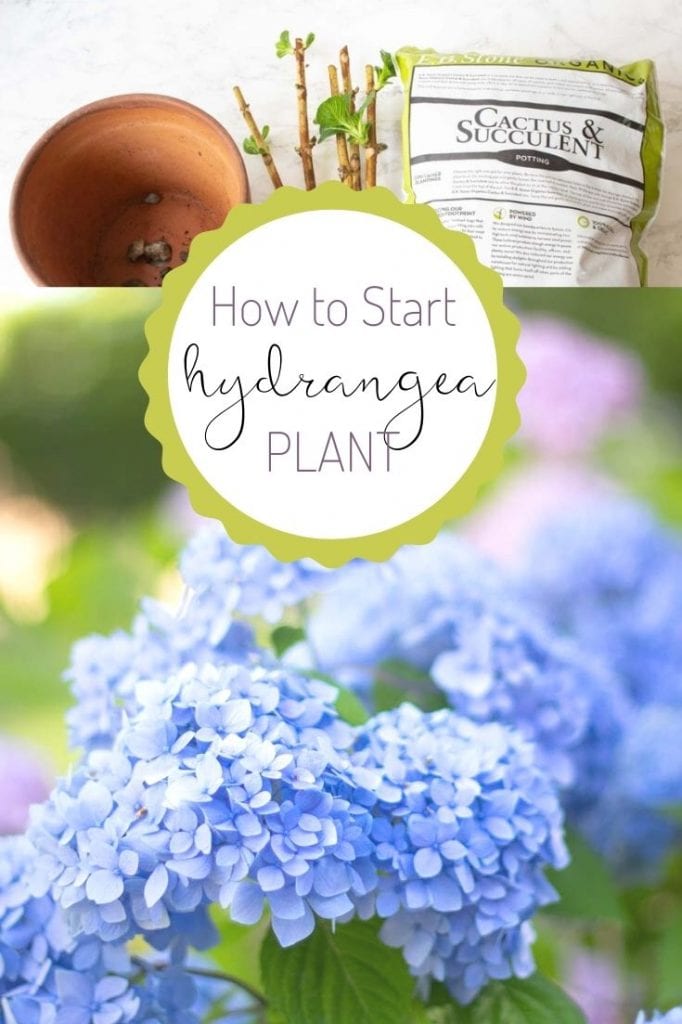
How to Start a Hydrangea Plant from cut flowers has been on my gardening bucket list for about a year. I was pleasantly surprised to see the results of the little experiment I conducted last winter.
Our little experiment started in January. And then the stem cuttings were planted in the spring of the following year. We divided up the hydrangea stems into two batches, water and dirt rooting. The results were quite fascinating.
So, my interest in how to start a hydrangea plant began when a woman I spoke to shared that most of the hydrangeas in her garden were starts from mature bushes. She believed that her plants got a headstart from the established bushes that she took cuttings from.
I was so intrigued by this notion and I remember my mom propagating plants in our backyard. Well, this planted the seed (no pun intended), and I wanted to give it a try.
Our Little Gardening Experiment
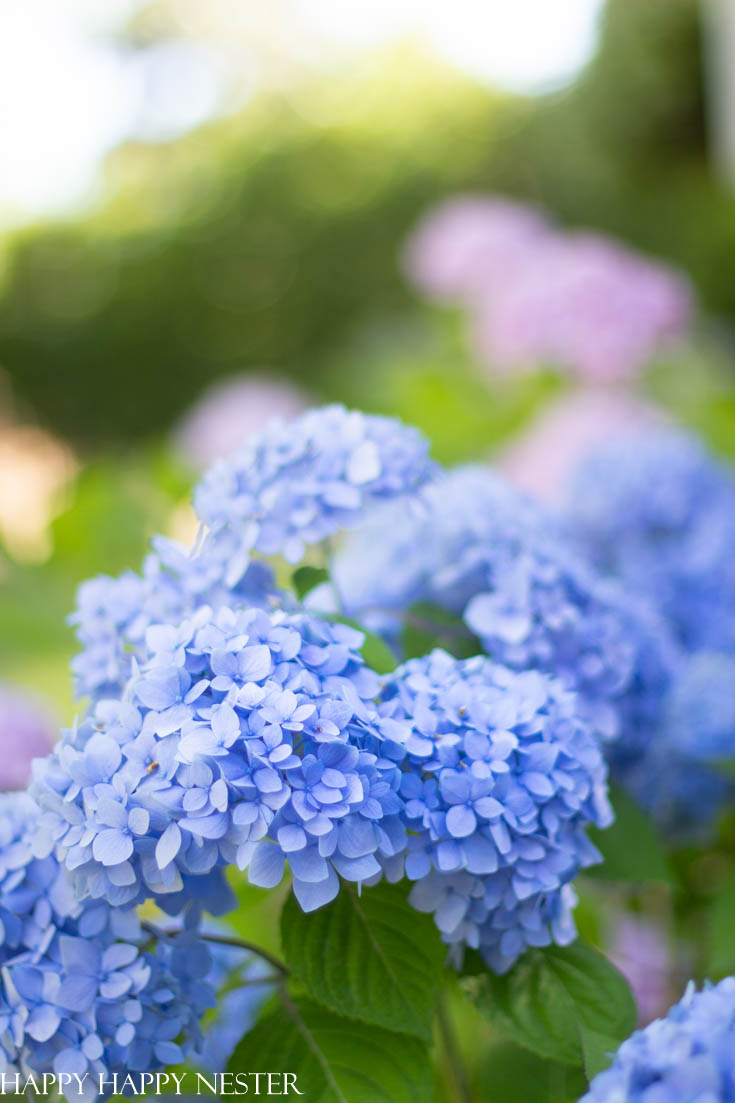
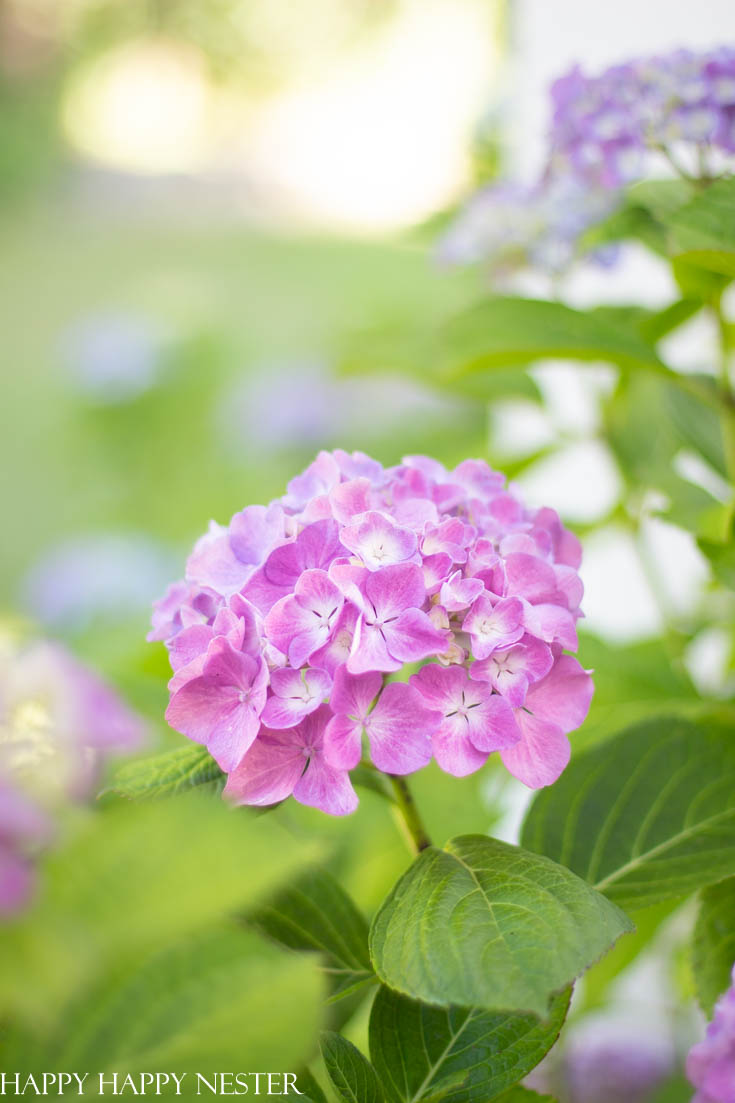
In the late fall or early winter, I bought some gorgeous hydrangeas flowers (you can see them in the above holiday night tour photoshoot) at our local Farmer’s Market.
Unlike the ones you get at the grocery stores, these blossoms had super long stems, and I ended up cutting a fair amount off. Well, there sat the excess branches on the kitchen counter.
I didn’t have the heart to compost them since the idea to propagate them nagged at me. So, I saved them and decided to try reproducing them.
Of course, the little experiment we embarked on is nothing that you’ll find in a Google search.
Ok, if you search how to start a hydrangea plant, most of the sources suggest taking cuttings from a live bush. And they also mention not to use the stems with blossoms. So, already, I’m doing two things wrong in regards to this whole gardening process.
Yes, my husband and I went rogue and did our own thing.
Yes, the non-gardeners with no experience in propagating decided to try a little experiment. We would place half the stems in a glass of water and the other bunch in potting soil.
The bunch that sat in the water looked lush, and we had leaves and lots of new buds, life looked promising for our little sticks. But, once we planted our babies, we quickly found out that their roots were weak and not strong enough to make it out in our garden.
A worker at our local nursery had warned me that this would likely happen. You see, cuttings that start in water develop weaker rooting systems and usually don’t do well when planted.
He also said that probably three out of my five stems in the soil would succeed. Oh boy, was he so right? It was like he knew my future with my hydrangea propagating adventure.
![]()
Here is what I learned from our little gardening experiment.
*The following post contains affiliate links
How to Start a Hydrangea Plant From a Flower Stem
Leave it to me to do something incorrectly and have success!
The Supplies You’ll Need to Propagate
1 Hydrangea Flower Stem
Cactus and Succulent Potting Soil
Little rocks
How to pot your plant
1. Trim the Stem
Count the leaf buds on your stem and trim them just below the third or fourth set of leaves. If you pick a stem from your hydrangea plant, select a branch that doesn’t have a flower bud on it. I will have to try this since I did the opposite of these instructions.
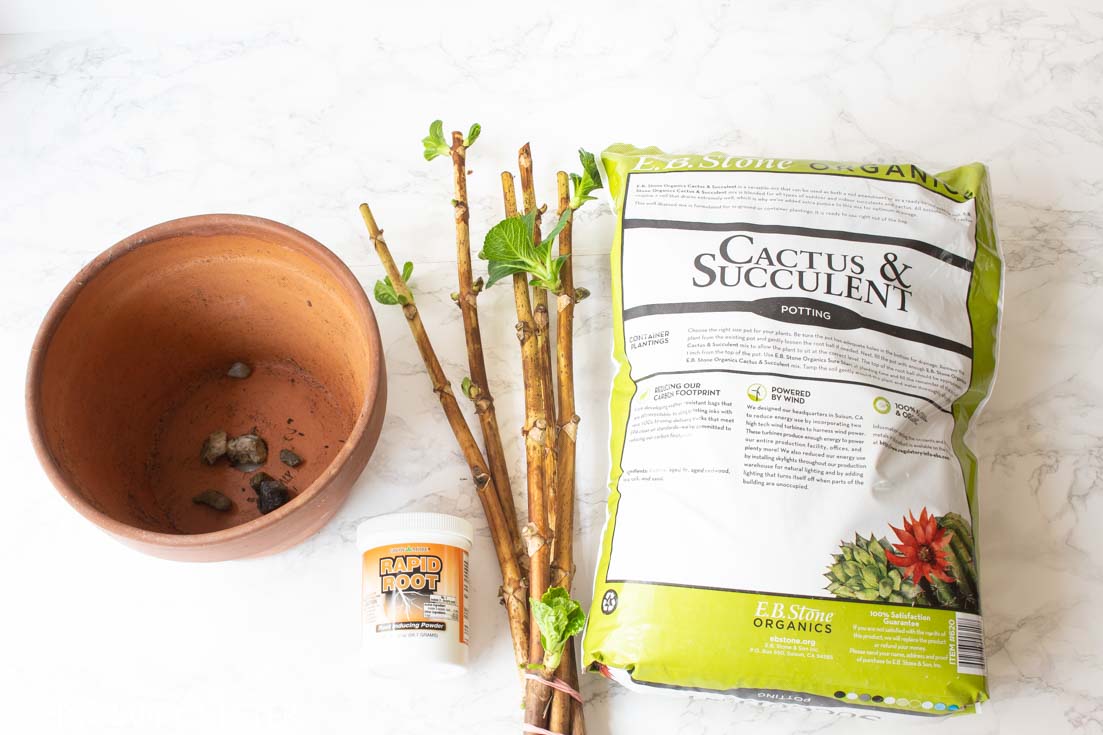
2. Use Cactus and Succulent Potting Soil
The nursery guy suggested that I plant my stems in a Cactus and Succulent potting soil. I think the reason is that this dirt has good drainage that the sand and perlite provide.
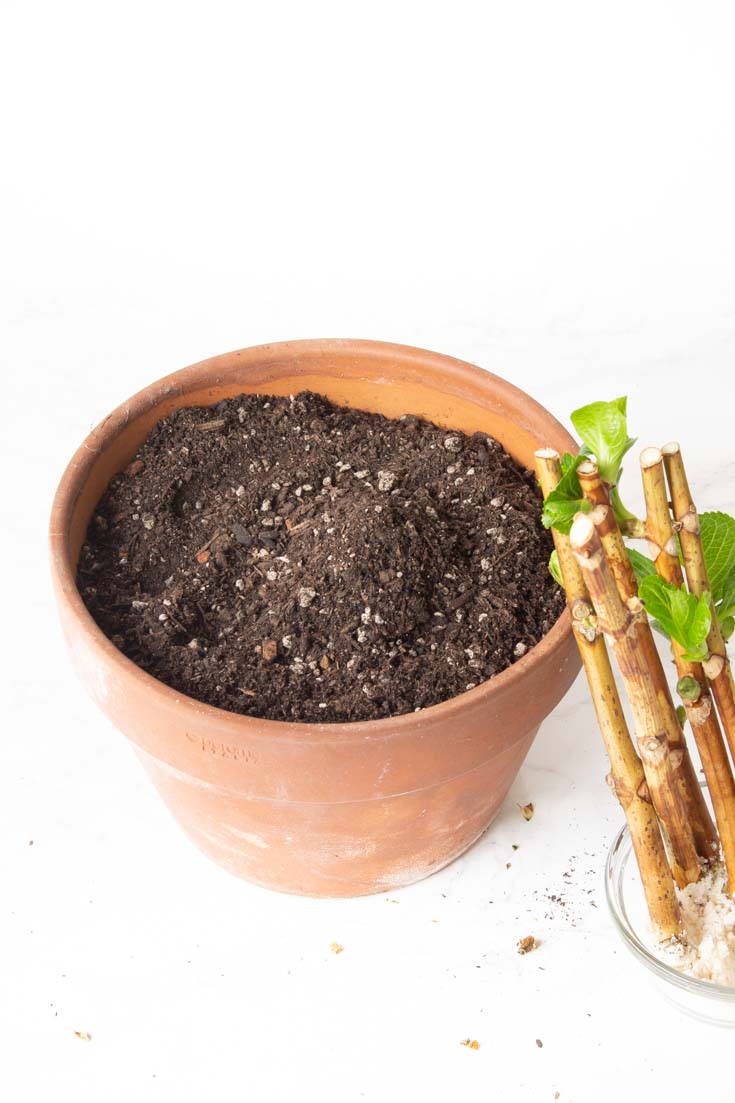
3. Prep the Container
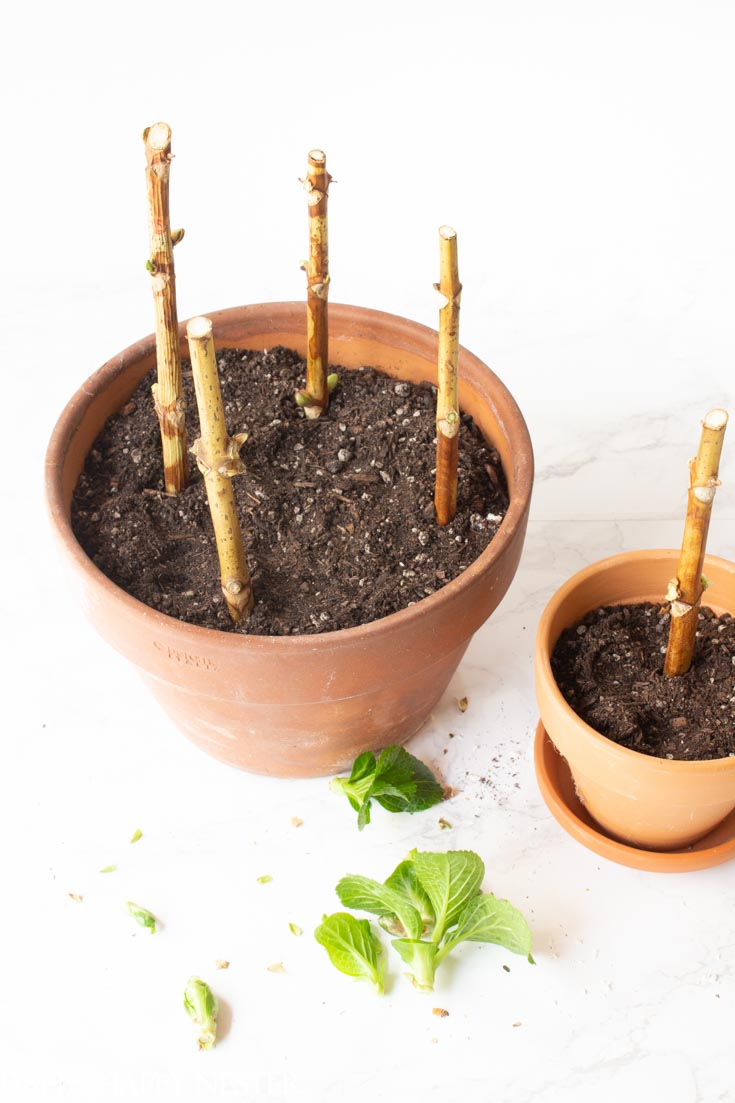
I placed a layer of small rocks on the bottom of the pot so that there is good drainage. We planted four branches in this one 12 inch pot.
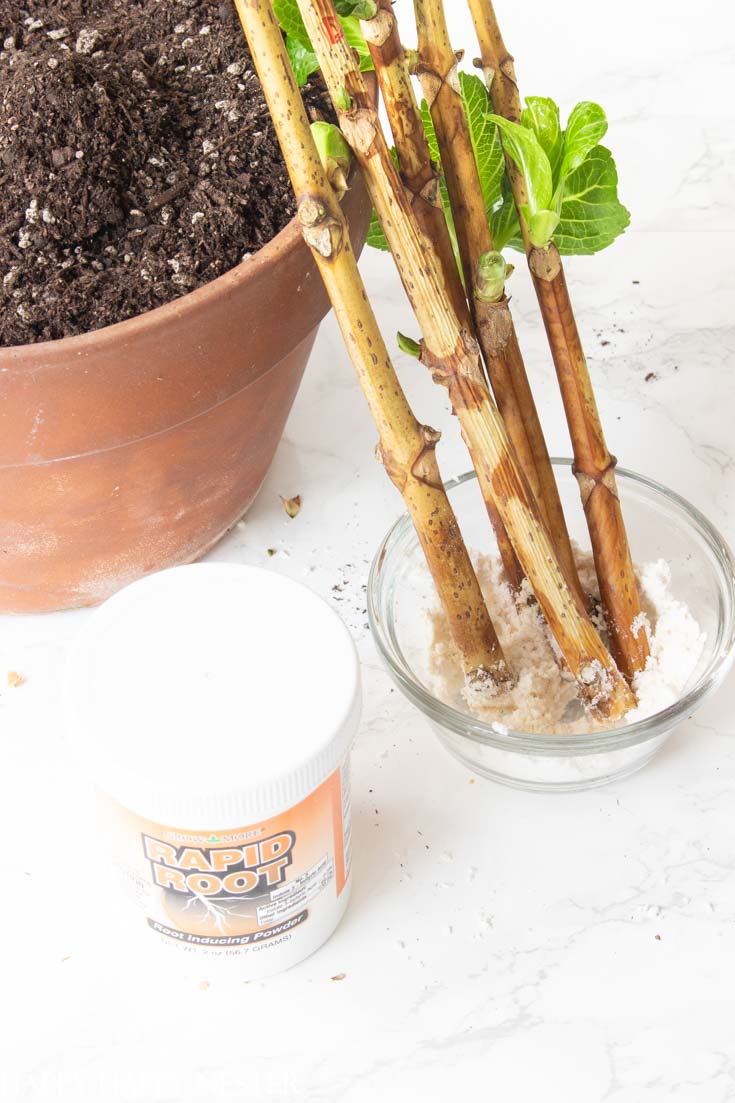
4. Add Rooting Powder to the Stems
Coat the bottom of your stems in Rooting Powder. The rooting hormone, Indole-3-butyric acid, is similar to the hormone found in plants that promote roots.
When I placed them in the potting soil, I poked a hole in the soil and set the stem in it, that way the rooting powder stays on the stem and doesn’t come out in the dirt. You can place the stick in the soil without the powder, and it will probably do fine. I did see a few gardeners on the internet do it this way when I researched, how to start a hydrangea plant.
5. Prune the Stems
I then took off the beautiful leaves so that the plant’s energy would all go into the roots. It was hard to remove these hardy leaves, but I finally did trim them off.
6. Water the Plants
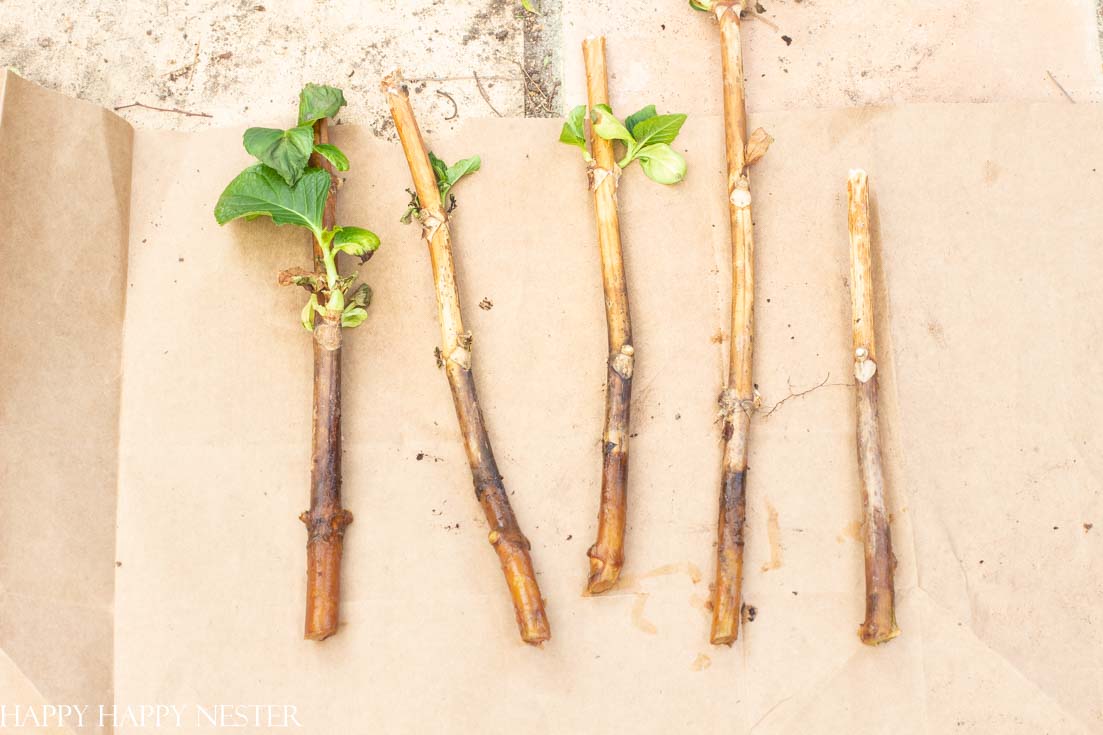
I placed our pots near our kitchen sink, so I would remember to water them. I saw a gardener took a plastic water bottle and cut a hole in the bottom. Then he placed it over the stem and created a little greenhouse for the plant. Since it was winter, I just made sure the dirt was always on the moist side. And this photo was taken after eight weeks of indoor growing time.
When is the Best Time to Plant?
We potted our stems on January 14th and they were ready to plant in the spring. So, on March 13th, our weather started to warm, and so we plopped these little plants in our yard. According to gardening tips on the internet, the best time to plant hydrangeas is in the fall, followed by spring. I prefer to plant in the spring since it gives new plants a great head start.
How to Transplant the Stems into the Ground
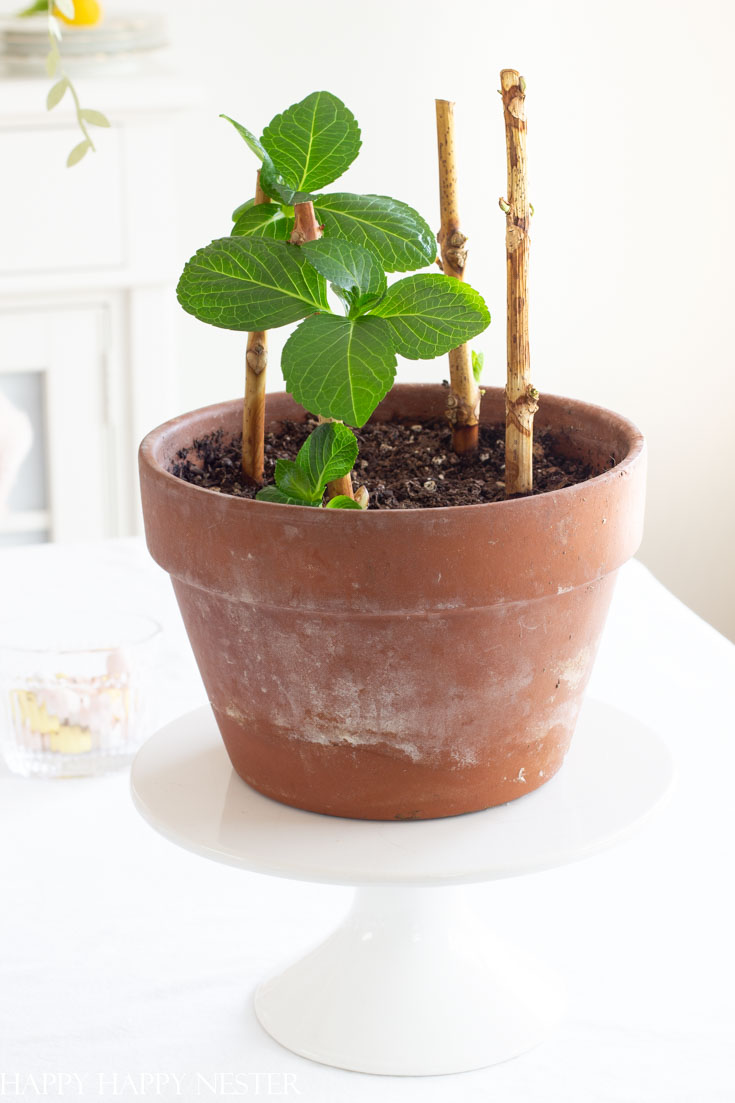
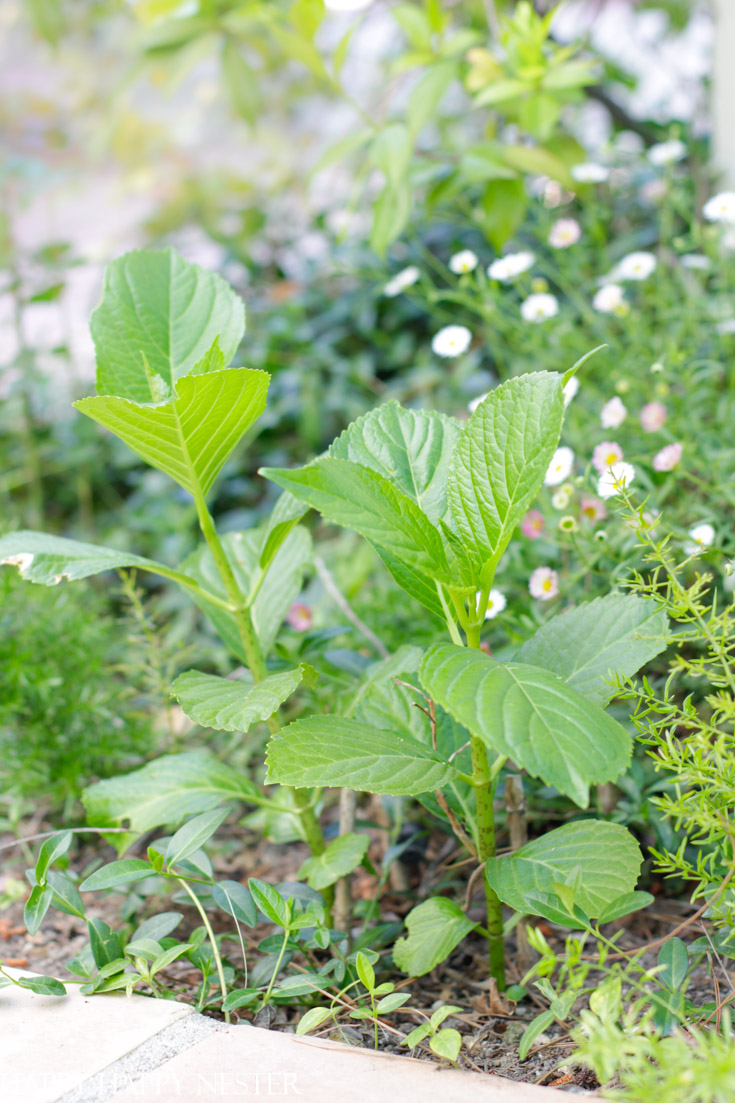
Earlier this spring our plants were ready to plant in our yard. Here is what our plants looked like before transferring them to our garden.
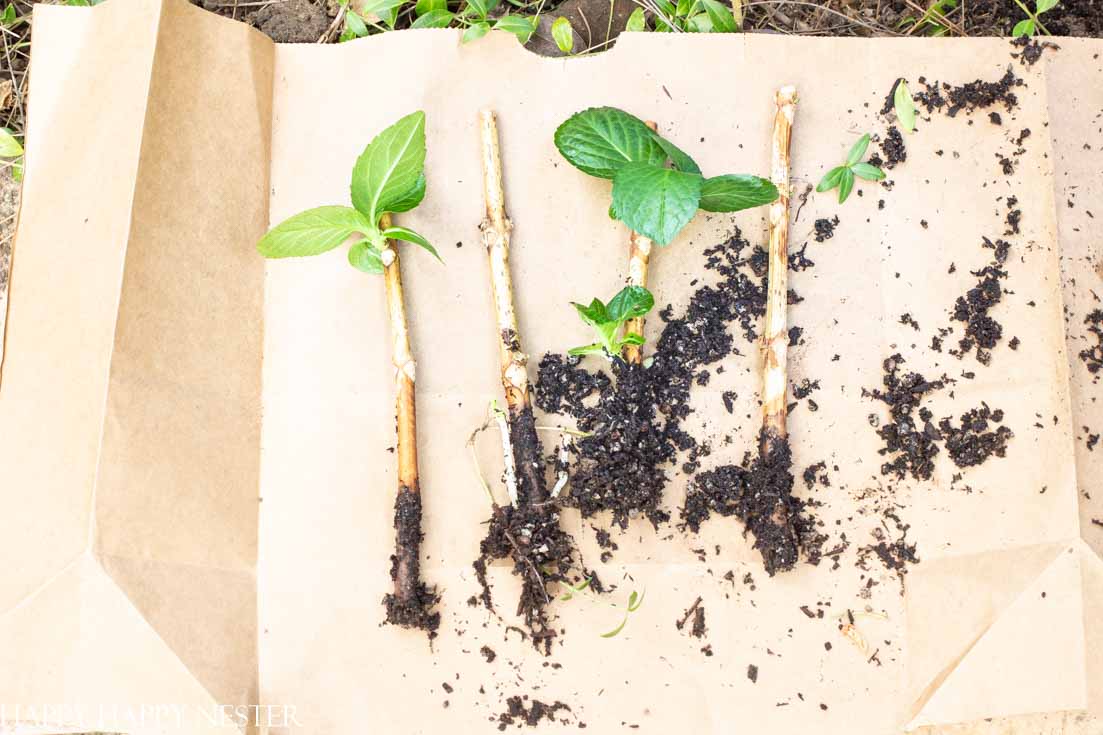
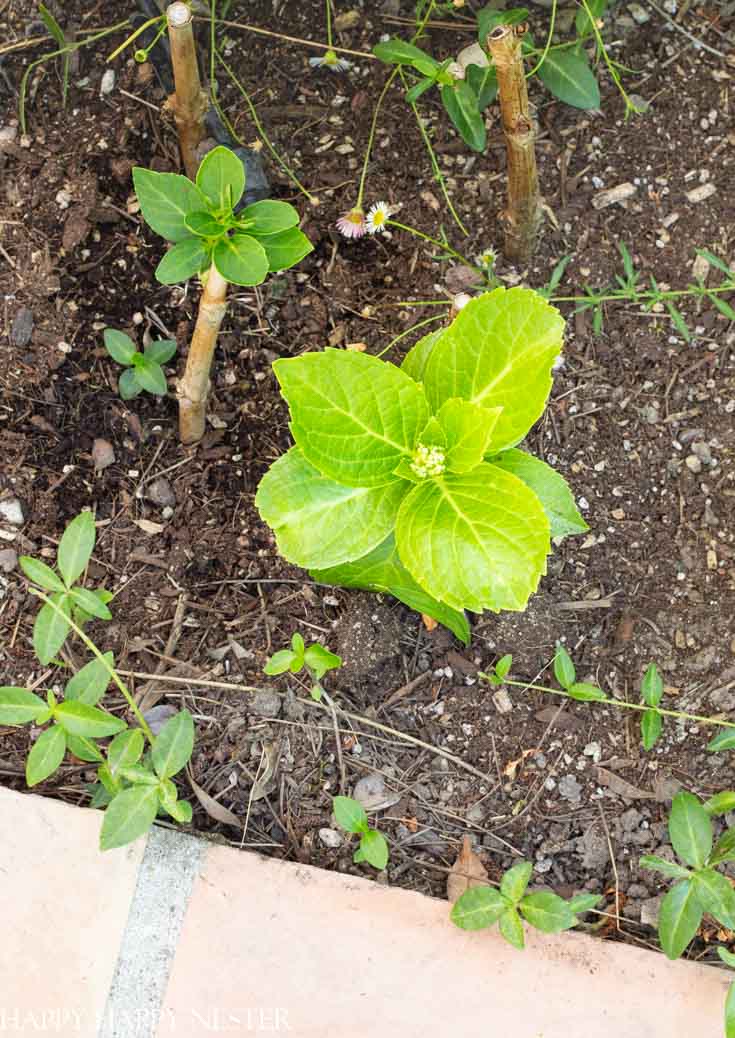
These roots are from planting hydrangeas in the dirt. As you can see, they have healthy leaves and a fair amount of roots.
These roots are from placing hydrangeas in a glass of water. You can see that the leaves did well, but there aren’t a whole heck of a lot of roots happening.
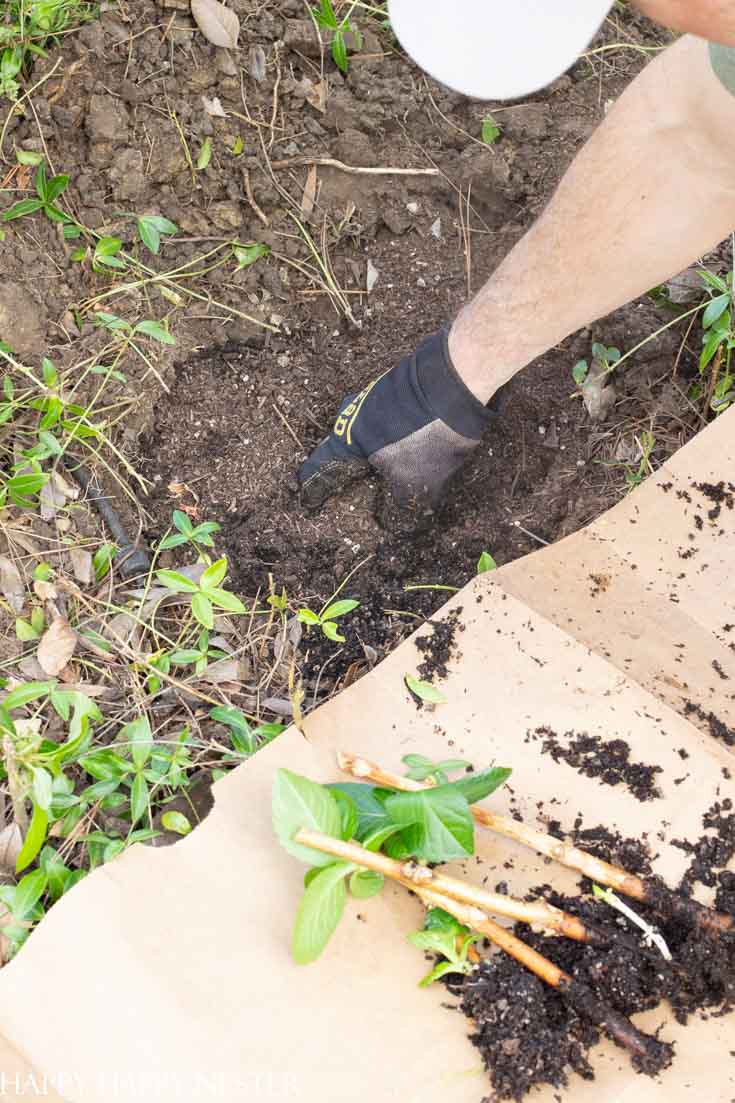
So we got to work, and my husband planted them while I took photos. He dug a hole and then placed a mixture of mulch and potting soil.
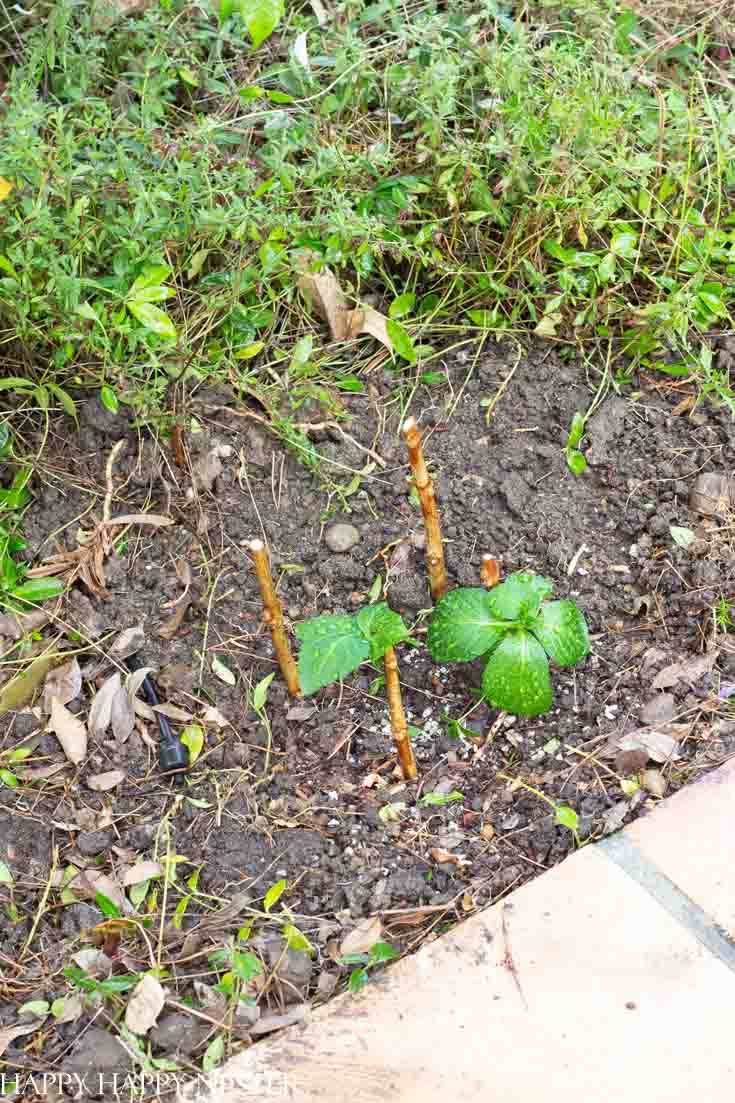
With any new tender plant, the slugs enjoyed their first leaves. I ended up sprinkling them with Sluggo a couple of times, and that kept those destructive pests away from our hydrangeas.
Here is the latest update of our happy hydrangea, see the cute blossom in the middle? Hooray for happy plants.
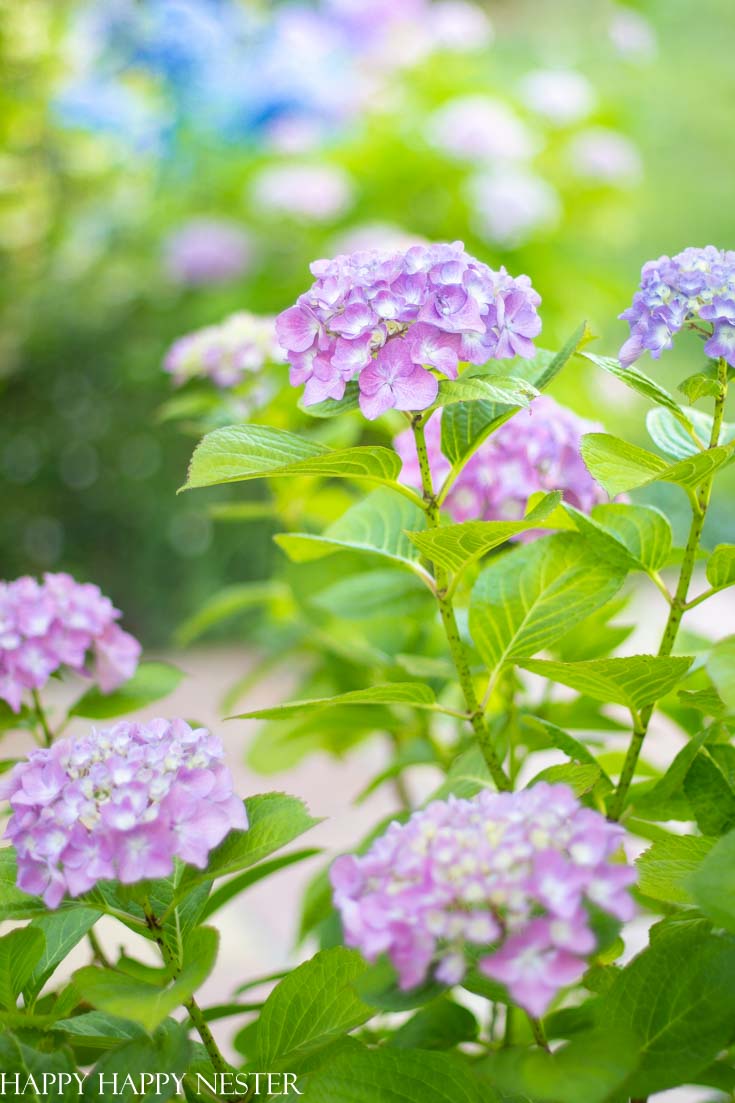
These two hydrangeas are my start pupils. Here is an update on their status. A year later and they’re thriving as you can see. I didn’t see blossoms forming but that can happen in the next couple of weeks. They form buds down in the bottom interior of the top leaves. I will give them a dose of fertilizer to help them along.
So, if you are patient and don’t mind have a few plants not survive then this is a great project for you. I figure I bought the flowers, why not get a cheap bonus plant out of them.
I know I don’t post a lot of gardening over here, but my husband and I do a fair amount of work in our yard. I do have these posts which you might find interesting:
So, here’s to how to start a hydrangea plant and gardening projects. We are all are pretty stuck at home because of the virus, so now is the time to get busy in the yard.
You might like these other gardening posts:
Cheers,


- Lazy Saturday Morning Breakfast Ideas - July 18, 2026
- Lemon Blueberry Crumble (With Creamy Mascarpone) - July 16, 2026
- Red and White Christmas Tree - July 9, 2026


@lemongrovelane
Love this idea! My hydrangea are almost ready to bloom – can’t wait! Do you know if this would work for a fiddle leaf?
happyhappynester
I’m not sure, but give it a try. Just make sure you place it in potting soil instead of water! Good luck.
Annie Diamond
Janine! I’ve always known about this from friends that say they’ve had great success and have tons of hydrangeas on their property, but until today…I had not really given it a lot of thought! I’m now going to try it! Thanks for the inspiration!
happyhappynester
Ah, this makes me so happy! I’m waiting for my next blooms for spring!
Amanda Campbell
This is so awesome! I’m going to try it!!
Ashley Stringfellow
Wow! I had no idea you could start a hydrangea from the stems! So cool
happyhappynester
I know it is the coolest thing, and now I have a few new plants!
Chris Egan
Well done Janine – happyhappynester.com
….always been one to ‘branch out’ and ‘nip thing in the bud’…sorry can’t help myself but only today I’ve done the very same.
My story, we’ll Barbara and Kevin just sold their 🏠 and we are each residents in a care home in Yass NSW.
Barbara told me of the beautiful Hydrangea shrubs she will be leaving behind, showing me a big bunch of flowers in her room
…So, waisting no time had her son and daughter, whilst moving the last of their furniture out from the home, to pick a good few stems(no flowers) for me to trim to use in as soil based cuttings(I used a seed raising mix and added the extra…to open the soil and used a liquid propagation gel)….the real only difference was I left a few trimmed leave on each stem. This is just the first week in 2021 around 4.00 pm AEST. Into square pots watered and added a slow release fertilizer spike ‘too boot’ and grouped together in a protected area, from strong wind and rain in the small garden area here, for them to do their magic.
No, I hadn’t left out Kevin he’s the master waterer with watering can in hand and pokes the finger in every other day to check their not getting to dry…. And so we wait – the story ends…no just this chapter, a little more later-on when the ‘proof’s-in-the-preverbial-pudding’ and say by summer’s end a number of new healthy Hydrangea shrubs, in our new garden, for Barbara and Kevin to remember a beautiful past and a new home sweet home…bye from me now till later-on and more HappyHappy Gardenings…enjoy
…You have a wonderful blog, lots more for me to explore!
(Sorry 😔 couldn’t see where to add some pics for you to share… I’ll set up our own page and sent you the link soon with each of my steps taken in our little story)
Cheers Chris (Cj)
😎
happyhappynester
Hi Chris,
Thanks so much for your lovely story! I bet their hydrangeas are gorgeous. My mom always started plants this way, so it was fun to give them a try. I’m happy you are trying your luck with some mature plants. You can email me your photos at [email protected] . Thanks so much for sharing your story!
By the way, I noticed you signed up for The Nester’s Circle. Let me know if you need any help getting into the group. I just sent you the welcome email. Please don’t hesitate to reach out to me for help.