
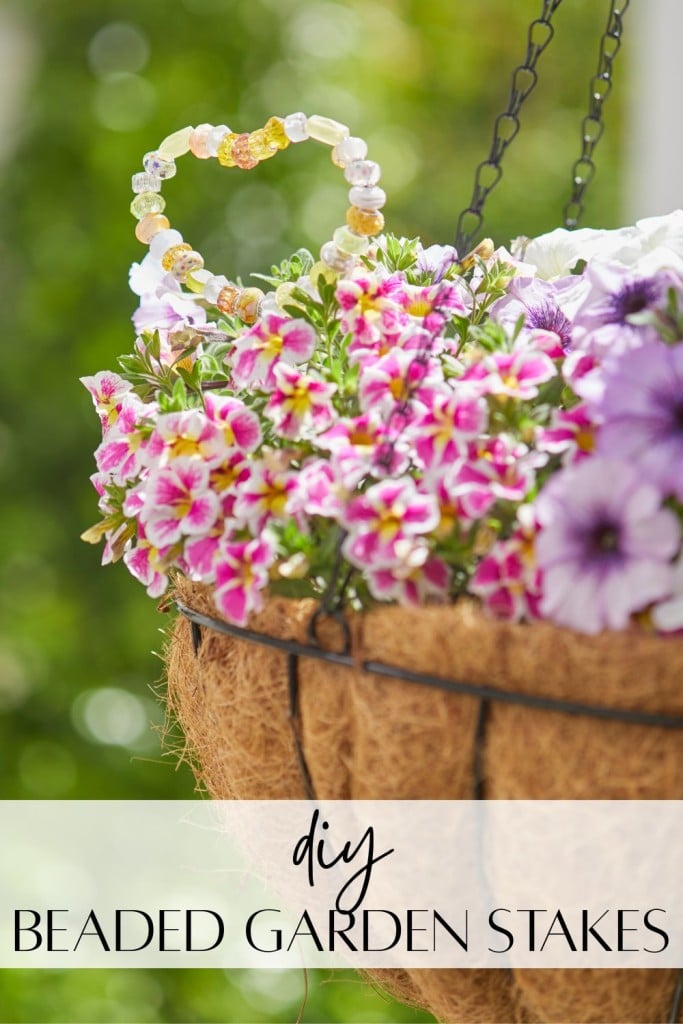
Looking for a fun and simple garden stakes DIY project? These adorable Beaded Garden Stakes DIY are the perfect way to add a pop of color and personality to your garden! Best of all, they’re incredibly easy to make with just three basic supplies: wire, colorful beads, and a wire cutter tool. Whether you’re sprucing up your outdoor planters or adding charm to your vegetable beds, these handmade garden stakes are a quick and creative project that make perfect gifts for your gardening friends!
A friend first introduced me to these charming beaded garden stakes DIY. She had collected beads over the years and created one as a thoughtful gift. The moment I saw it, I knew I had to make my own! They add such a playful touch to any garden and also make wonderful gifts for the garden lovers in your life.
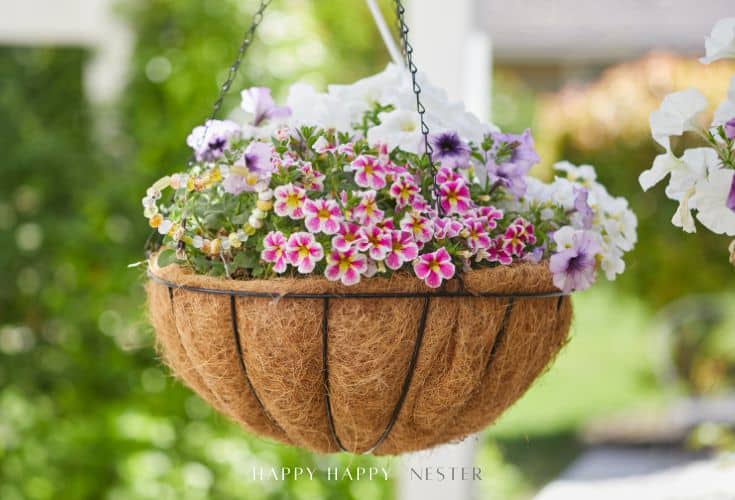
I love how these add a little sparkle and charm to my flower pots! Every time the sun hits them, they catch the light, making the whole garden feel a little more magical. It’s such a simple touch, but it makes a big impact. I hope you enjoy this fun and easy garden craft as much as I do—it’s the perfect way to add personality to your outdoor space.
Why You’ll Love This Garden Stakes DIY Project
Quick and Easy Craft
You don’t need any fancy tools or special skills to create these beaded garden stakes. It’s a fun project you can finish in under an hour, making it perfect for a relaxed afternoon craft session.
Adds Color and Charm to Your Garden
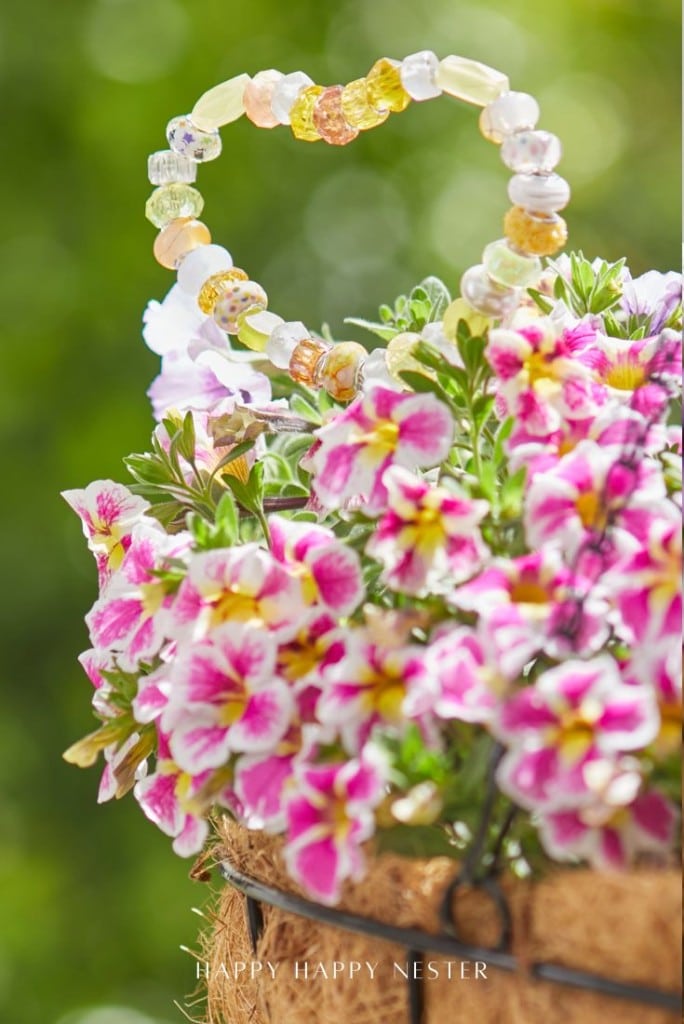
These colorful beads catch the sunlight and instantly brighten up flower pots, garden beds, or even window boxes. The heart shape adds a sweet, personal touch that makes your outdoor space feel extra special.
Perfect for Gifting or Personalizing Outdoor Spaces
Handmade garden stakes make thoughtful gifts for friends, family, or anyone who loves spending time in their garden. You can customize the colors and shapes to match different personalities, making each one unique and meaningful.
Supplies You’ll Need
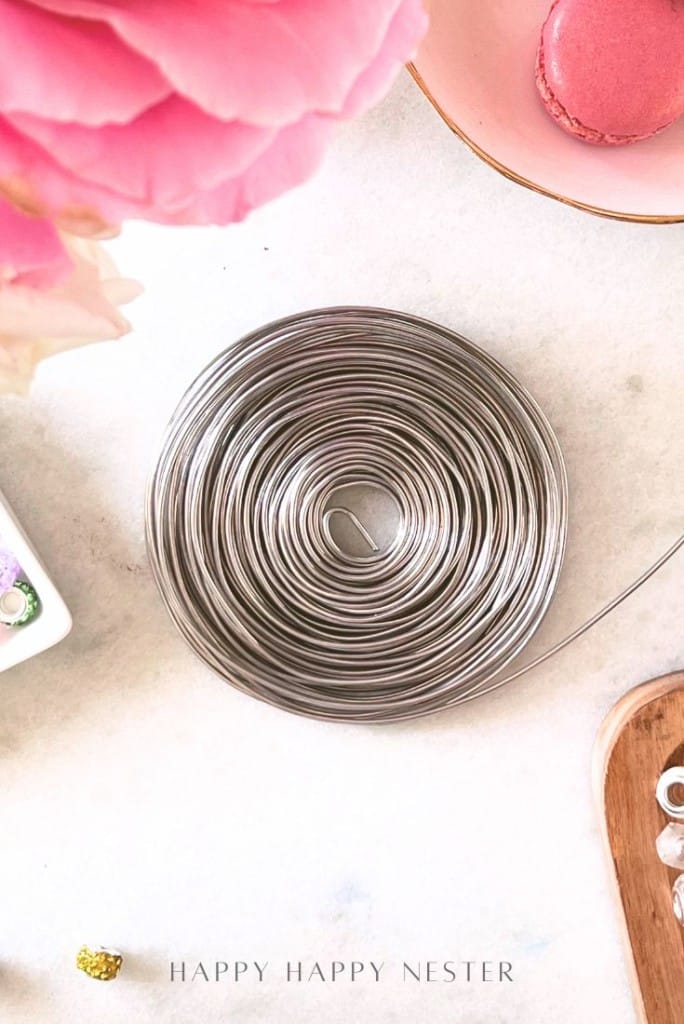
Wire
You’ll want a flexible but sturdy wire that can be bent into shapes without snapping. A medium-gauge craft wire works best for holding the beads securely and keeping your heart shape intact.
Beads
Choose colorful beads that are durable enough for outdoor weather, like glass, acrylic, or ceramic. Mixing sizes and colors makes each garden stake pop with even more personality.
Wire Cutter Tool
A wire cutter tool is essential for trimming your wire cleanly and safely. It also helps you avoid bending or damaging the wire when you’re working on your heart shape.
Optional: Pliers
Pliers come in handy when you need to twist or tighten the ends of your wire neatly. They also help shape smaller curves if you want more intricate designs like spirals or loops.
How to Make a Heart-Shaped Beaded Garden Stake
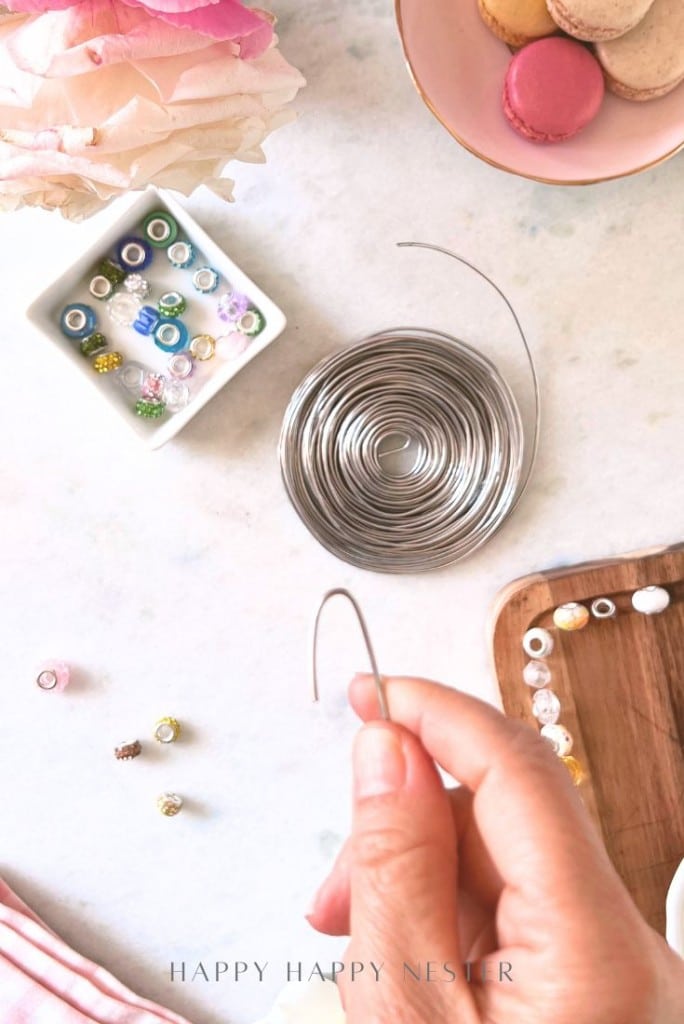
Step 1 – Cut Your Wire to Size
Start by cutting a piece of wire about 36 inches long, depending on how big you want your heart to be. It’s better to cut a little extra since you can always trim it down later. You can place a hook on one end so the beads don’t fall off the wire.
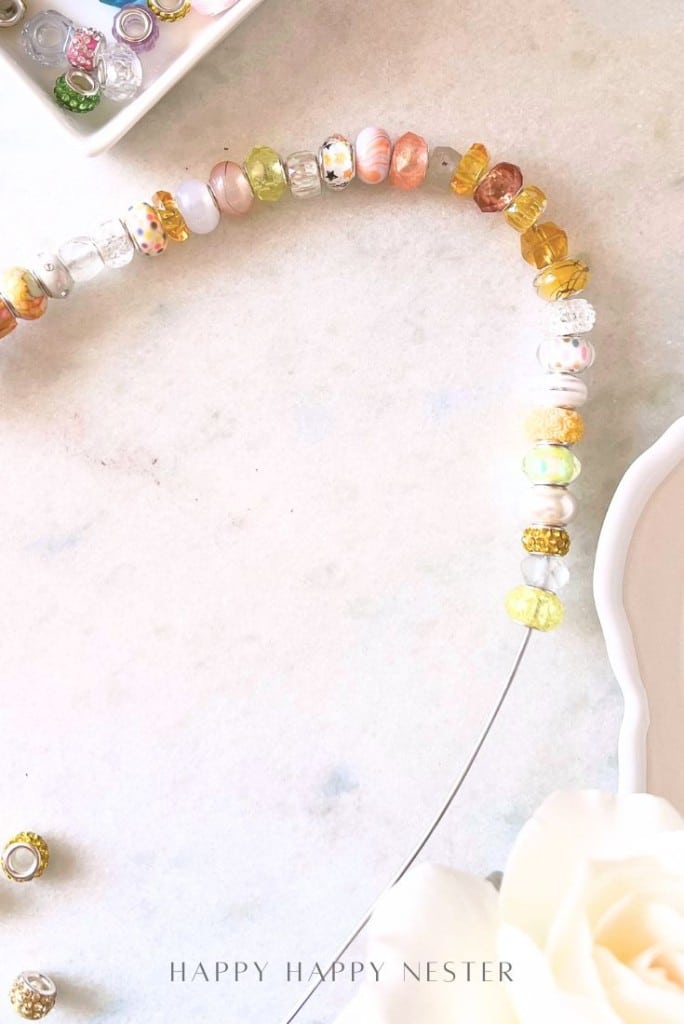
Step 2 – Add Beads to the Wire
Slide your beads onto the wire, mixing colors, sizes, and textures as you go. Leave bare wire at each end so you have room to secure the ends later.
Mix and Match Bead Colors and Sizes
Have fun with your bead choices—layer small and large beads for a playful, eclectic vibe. You can stick with one color family or go bold with a rainbow of shades!
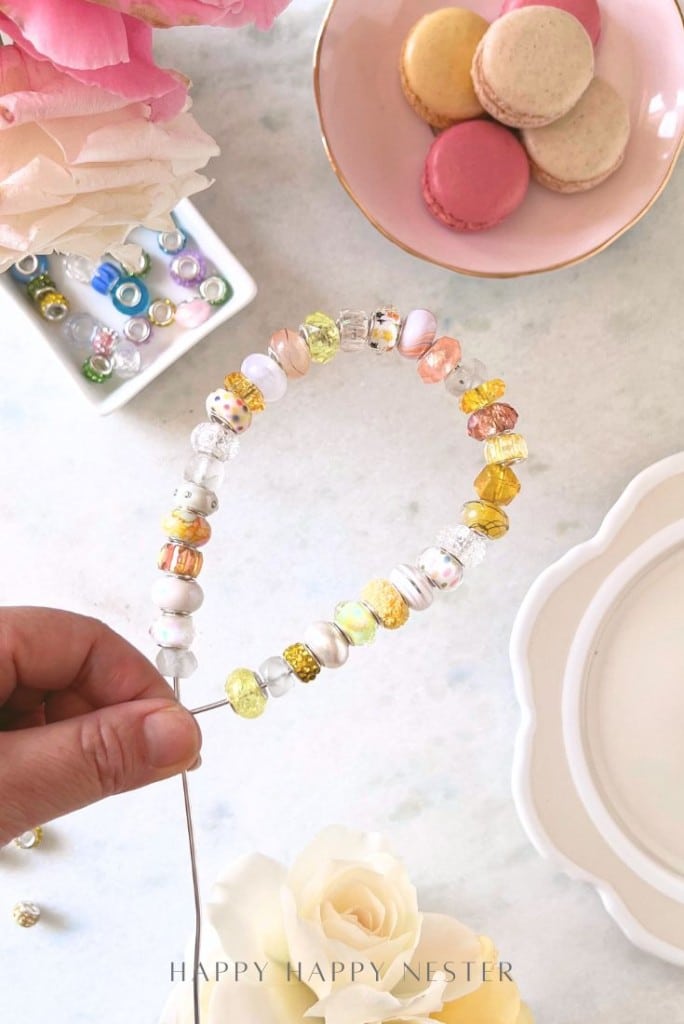
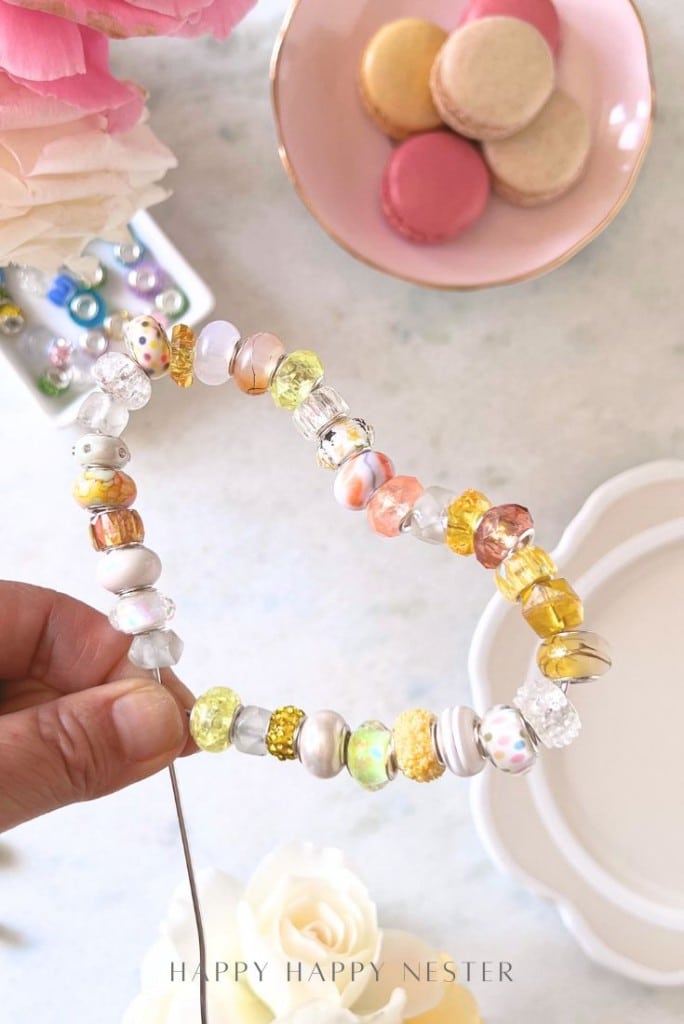
Step 3 – Shape the Wire into a Heart
Gently bend the wire into a heart shape by first creating an oval shape and then shaping the ends into soft, curved tops that form rounded arches. You don’t need it to be perfect—those little handmade curves add charm!
Tips for Getting a Symmetrical Heart Shape
Use a marker or a small bowl as a guide to curve the tops evenly for a more polished look. If one side looks wonky, just adjust it slowly with your fingers until it feels balanced.
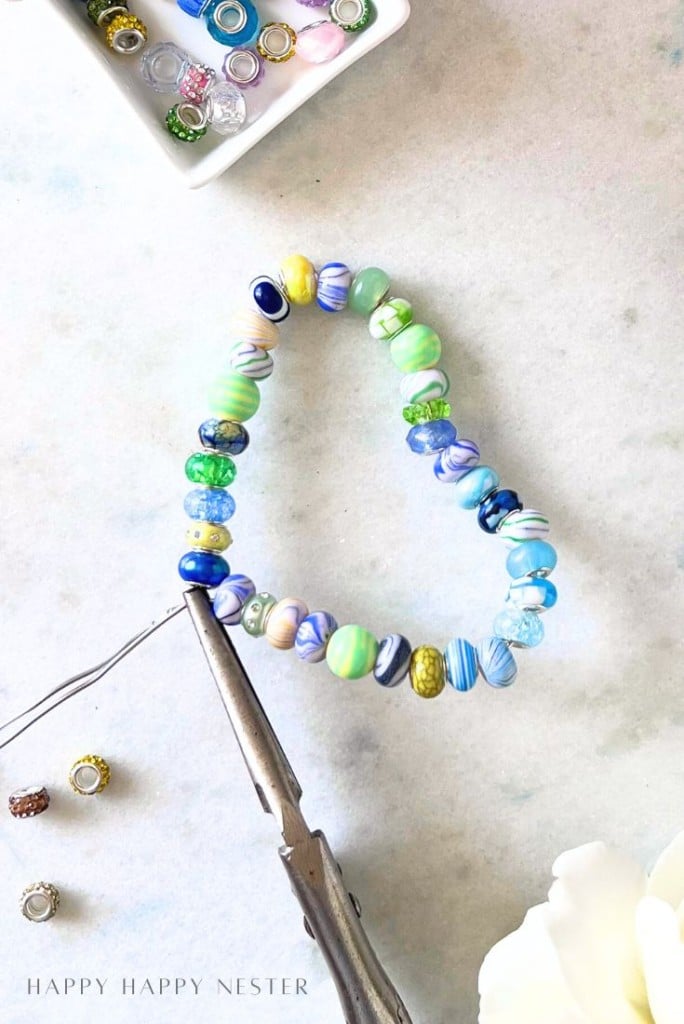
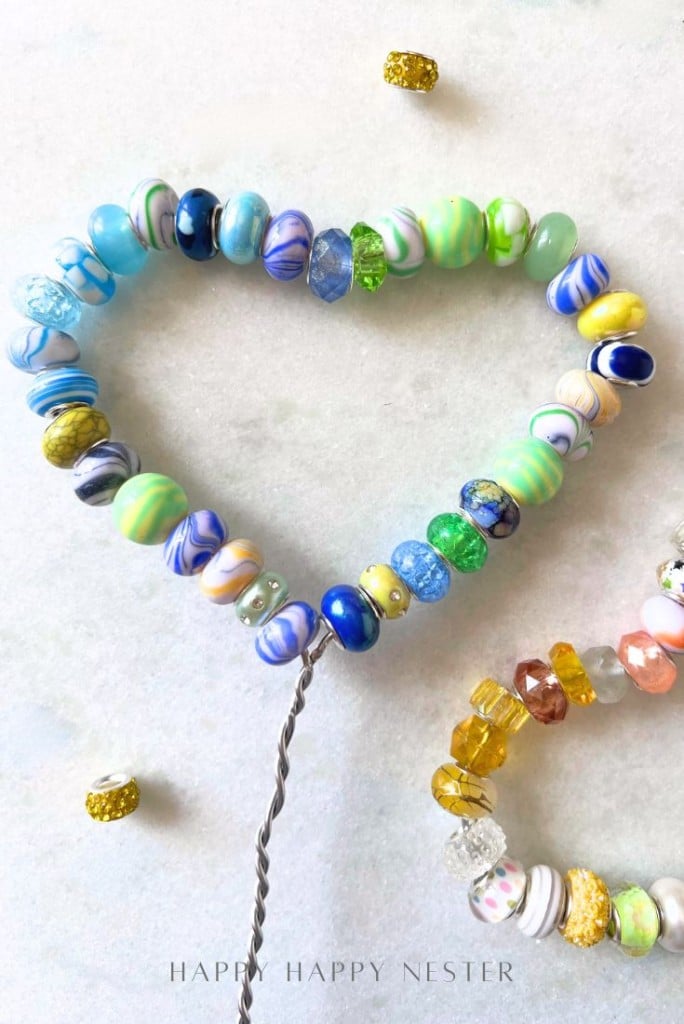
Step 4 – Secure the Ends
Once all your beads are in place, secure the bottom of the heart with vice grips or a pliers. Then twist the ends of the wire together tightly to hold everything securely. I wrapped one of the wires around the other until the stake was all twisted evenly. Snip off any extra wire with your cutters.
Twist the Ends Neatly for a Clean Finish
Use pliers if needed to get a tight, clean twist that won’t poke out. A neat finish not only looks better but also keeps your garden stake safer to handle.
Step 5 – Insert Into a Plant Pot or Garden Bed
Push the bottom of the heart stake firmly into the soil wherever you want a pop of color. They look especially cute tucked into potted herbs, flower beds, or even along garden paths!
Design Variations to Try
Other Fun Shapes Besides a Heart
If you want to mix things up, try shaping your wire into flowers, stars, or spirals for a different look. These playful shapes are just as easy to make and can add a whimsical touch to your garden.
Themed Color Palettes
Choose bead colors to match the seasons—pastels for spring, bold and bright colors for summer, or deep jewel tones for fall. You can even coordinate your stakes with the flowers and plants already growing in your garden for a beautiful, pulled-together look.
Tips for Making Your Garden Stakes Last Longer
Choosing the Right Type of Wire
Look for wire that’s rust-resistant, like aluminum or stainless steel, especially if your stakes will be outside year-round. A good quality wire holds its shape better and won’t corrode with weather changes.
Using Weather-Resistant Beads
Stick with glass, ceramic, or coated acrylic beads that can handle rain and sun without fading or cracking. Avoid wooden beads unless you plan to use them indoors or in covered areas.
Protecting Your Stakes from the Elements
If you live in a rainy or humid area, you can spray your finished stake with a clear sealant for extra protection. This helps preserve the colors and keeps your garden art looking fresh for seasons to come.


Frequently Asked Questions
It’s best to use weather-resistant beads like glass, acrylic, or ceramic so they hold up well outside. Wooden or paper beads may swell or fade when exposed to moisture.
Flexible craft wire like aluminum or stainless steel works great because it bends easily but still holds its shape. Avoid super thin wire—it can be too flimsy and may not support the beads well.
Most garden stakes look nice at 18 to 36 inches tall, but you can go shorter for small pots or taller for garden beds. Just make sure there’s enough length to anchor them into the soil securely.
With outdoor exposure, some fading might happen over time, especially with lower-quality beads. Using glass or UV-resistant acrylic beads can help your colors stay bright longer.
More DIY Garden Projects You’ll Love
Planter Markers for the Garden
Planter Markers for Gardens are like little lifesavers for veggie and herb gardens, especially if you’re into cooking. You know, being able to tell your oregano from your thyme is a big deal in our kitchen. My husband’s always mixing them up. But now, with these markers, he’ll finally be able to gather the right herbs for his cooking projects.
How to Make Suncatchers
Learn how to make suncatchers in this tutorial. It’s such a fun craft for adults and kids. All you need are a few materials, and in just a few minutes, you’ll have a fun homemade suncatcher to hang on your wall or window.
Flower Garden Decor Ideas and More
Explore these Flower Garden Decor Ideas and more to learn how to grow, maintain, and care for gorgeous blooms and greens! Today, I wanted to discuss one of my favorite things: flower garden decor. Now, let’s explore some decor ideas that enchant your flower garden. I could talk about this for hours, honestly. So, I think it’s time to share some of the best tips and tricks for your gardens and flower spaces.

Making your own heart-shaped beaded garden stake is such a fun way to bring a handmade touch to your outdoor space. It’s simple, joyful, and a great excuse to sit down and craft something pretty for your plants.
Whether you’re gifting one to a friend or brightening up your garden bed, this beaded garden stakes DIY is sure to make you smile every time you see it. I loved creating mine in a heart shape—it feels like a little love note tucked into the soil.
Happy Crafting!
Cheers,

Photo Credits: MyPhotography.com
Blogger’s Best Mother’s Day DIY Gift Ideas
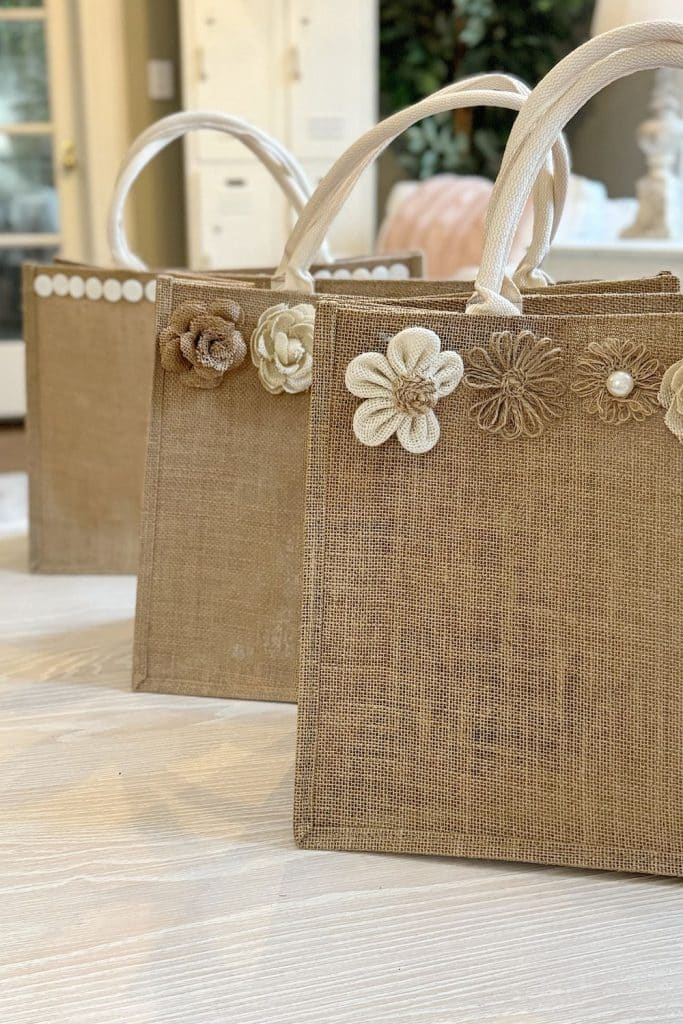
Cute Tote Bags for Mother’s Day | My 100 Year Old Home
Mother’s Day is approaching quickly, and if you’re anything like me, you’re looking for something thoughtful, unique, and practical to gift to the special moms in your life. Cute tote bags are the best gift!
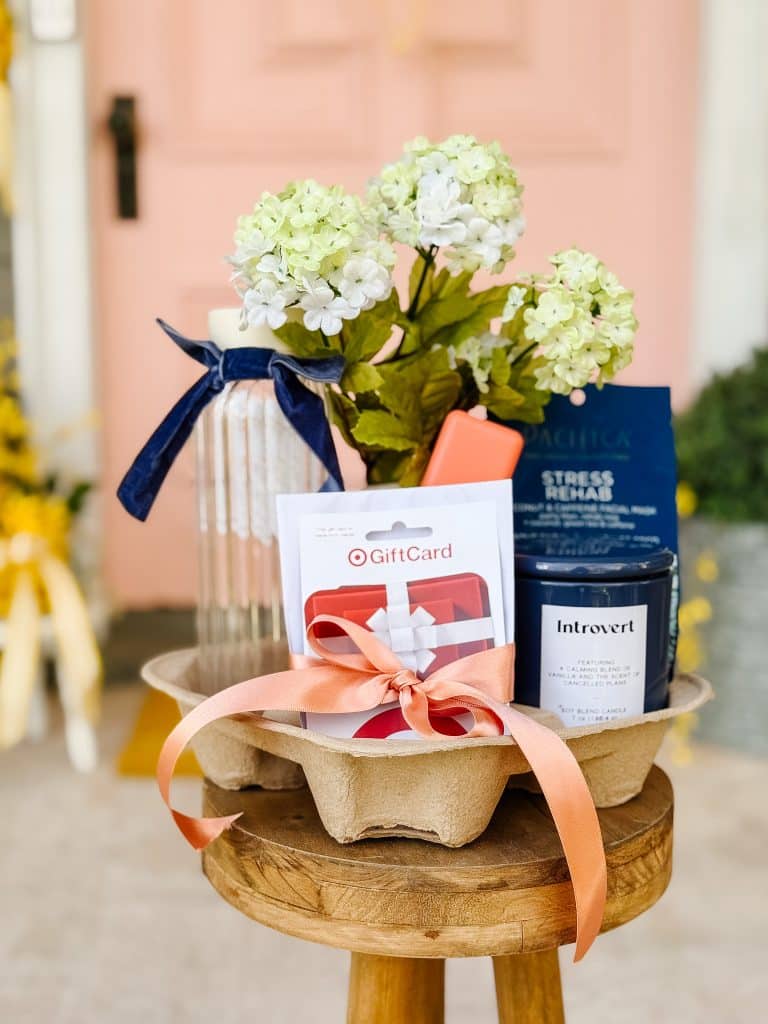
Mother’s Day Cup Holder Gift Basket | Tatertots and Jello
Transform a simple drink carrier into a delightful Mother’s Day gift basket by filling each cup slot with thoughtful little surprises for the moms, grandmas, and mom friends who fill your life with love.
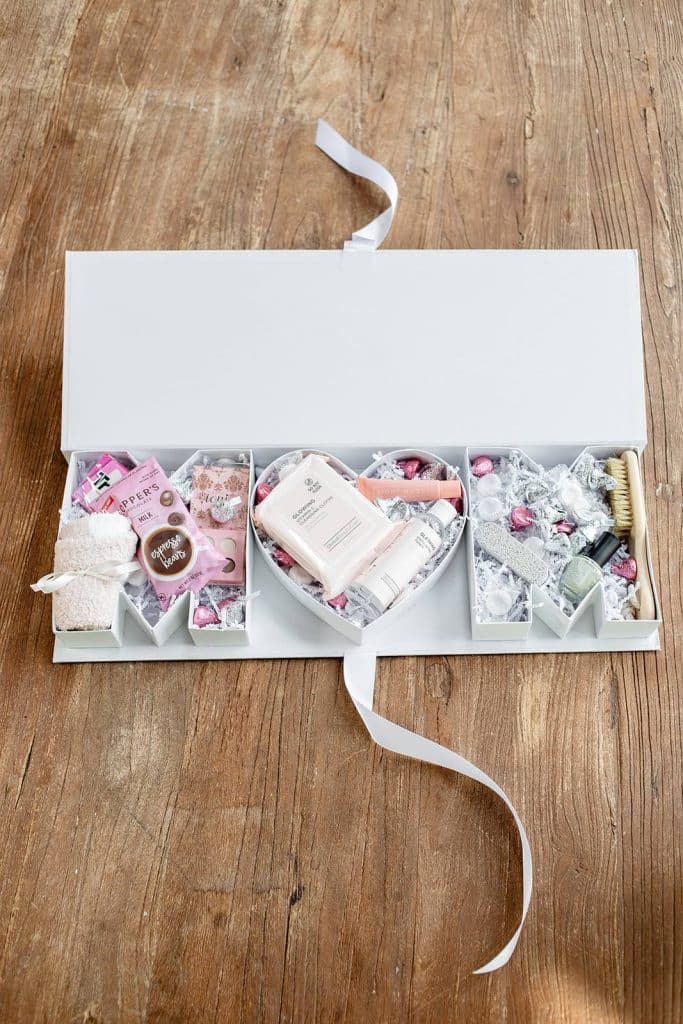
DIY Mother’s Day Gift Box | My Sweet Savannah
Create a personalized DIY Mother’s Day gift box using a fillable ‘MOM’ cardboard box. Fill it with your mom’s favorite goodies like chocolates, beauty products, and tea for a thoughtful and custom gift she’ll love.
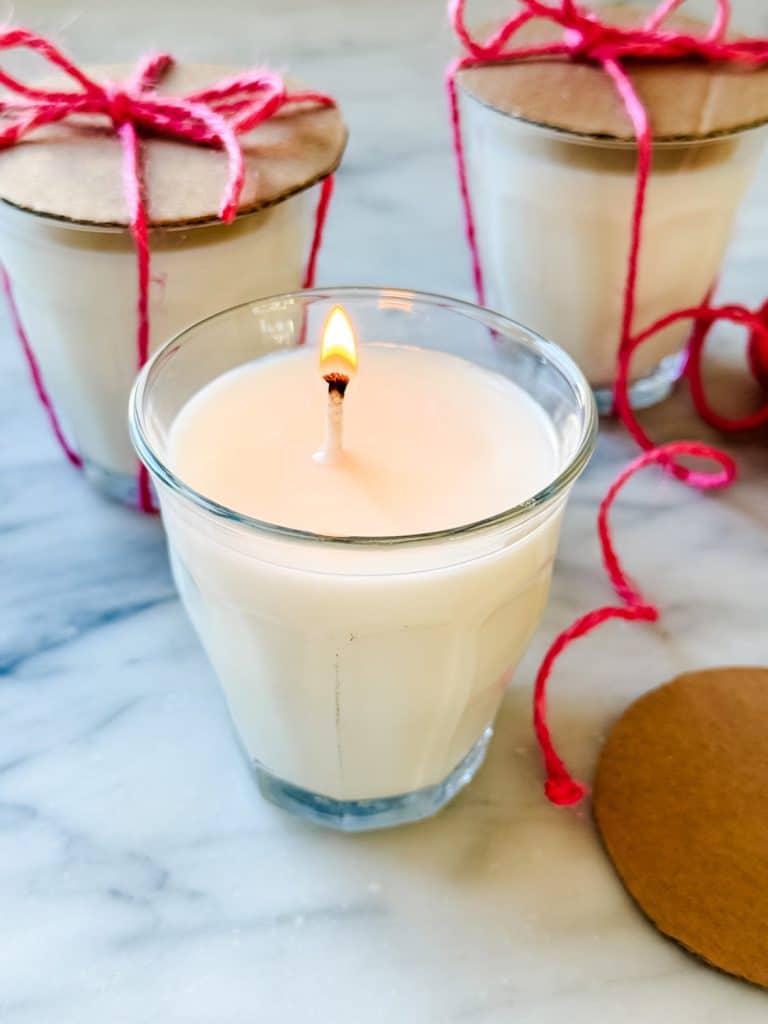
Making candles together for Mother’s Day | Most Lovely Things
Make candles together for Mother’s Day.


- Ginger Beer Mocktail Recipe - May 28, 2026
- Outdoor Tables and Chairs - May 27, 2026
- Oyster Shell Wreath DIY - May 21, 2026


Annie Diamond
Janine, your beaded garden stakes are so pretty! Like jewelry for your planters!