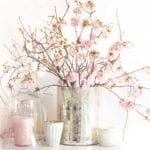
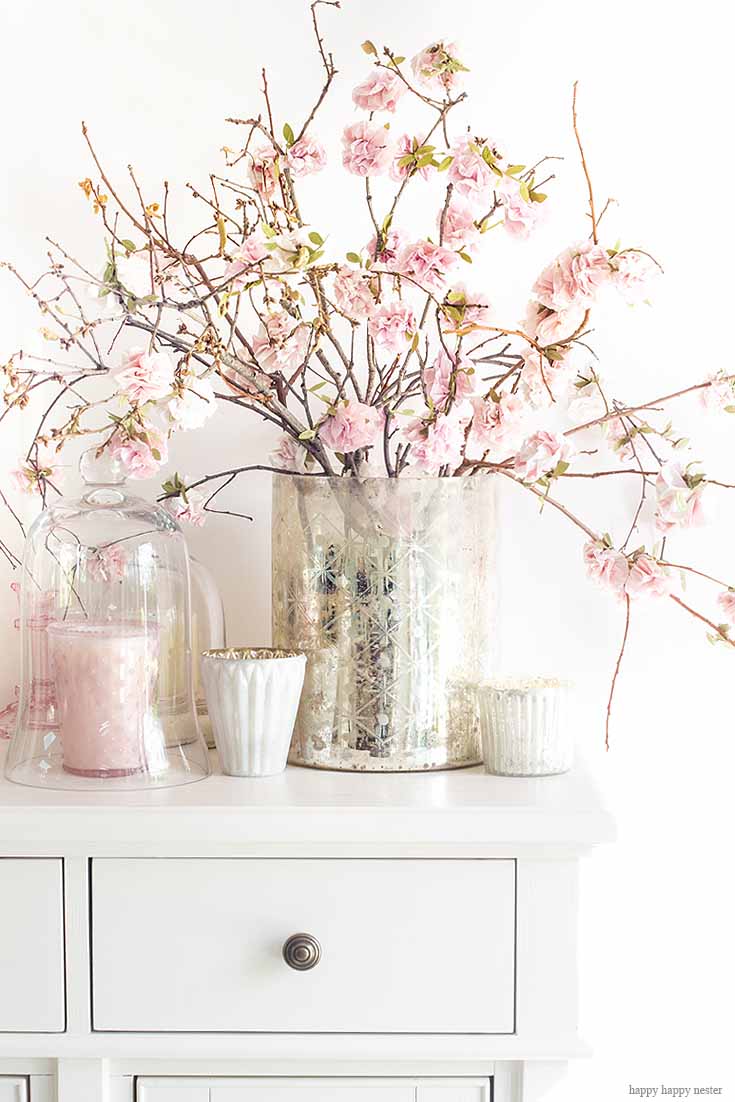
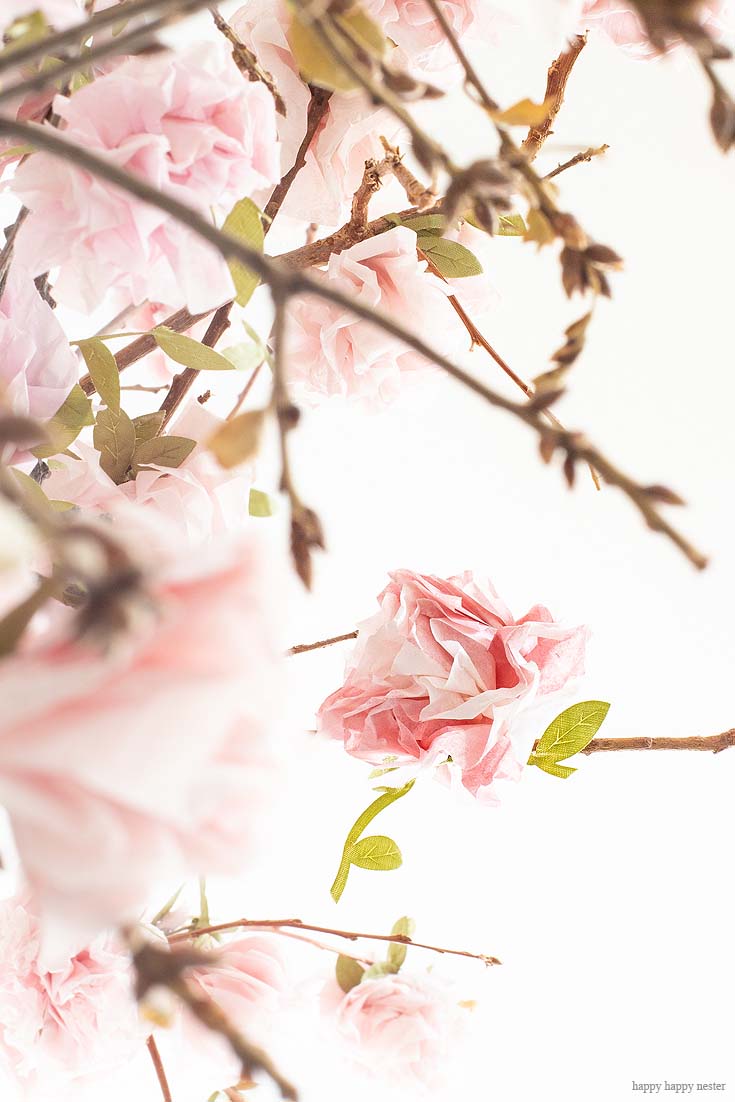
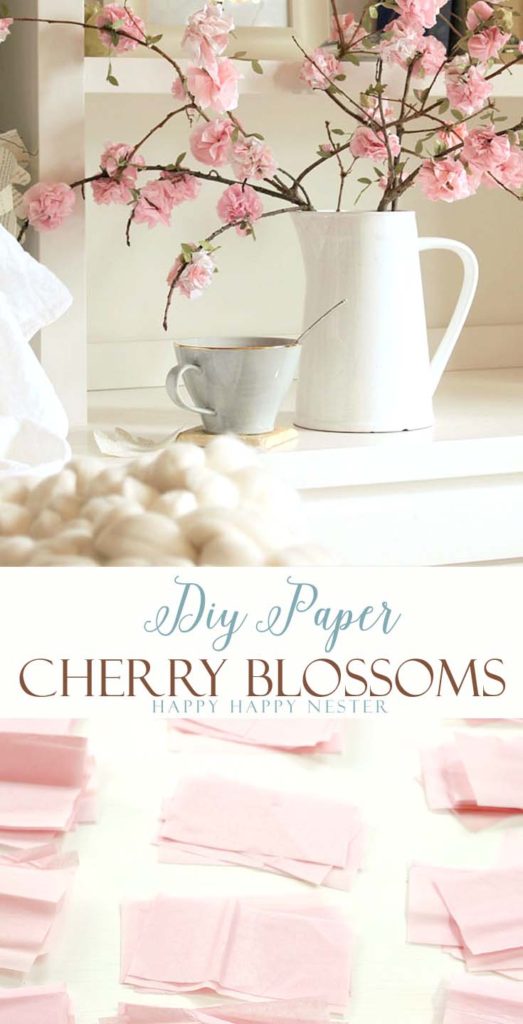
This Paper Flowers Tutorial is the Happy Craft for this week! Cherry blossoms are my favorite, and so I decided to try making some with tissue paper.
So if you love spring blossoms in your home, then you’ll like this paper project at home!
Every spring, I buy the store-bought branches that promise to sprout beautiful flowers. I’m not sure what I’m doing wrong, but only disappointment ensues. Is there a trick is to get them to blossom?
Paper Flowers Tutorial
Inspired by our spring blossom, I decided to make my own cherry blossoms branches. For this project, I rounded up a couple of branches on my walk. Are you like me and can’t pass up twigs, pinecones, shells, rocks, etc.? My poor husband is so patient with me when we hike.
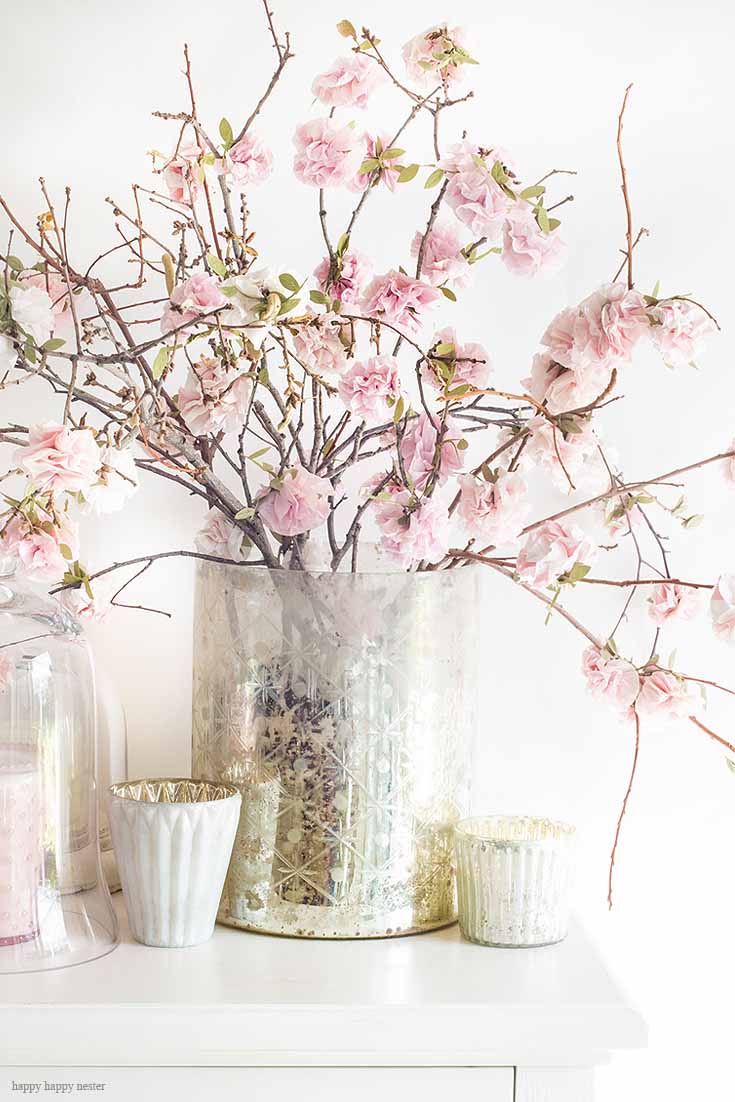
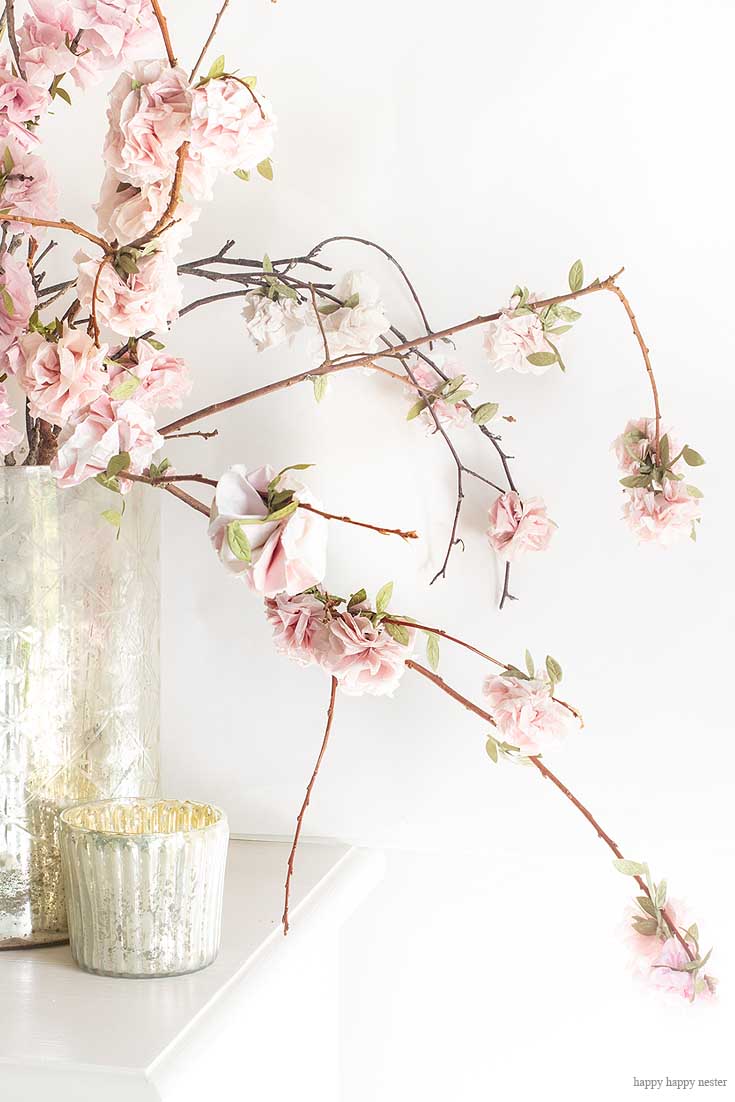
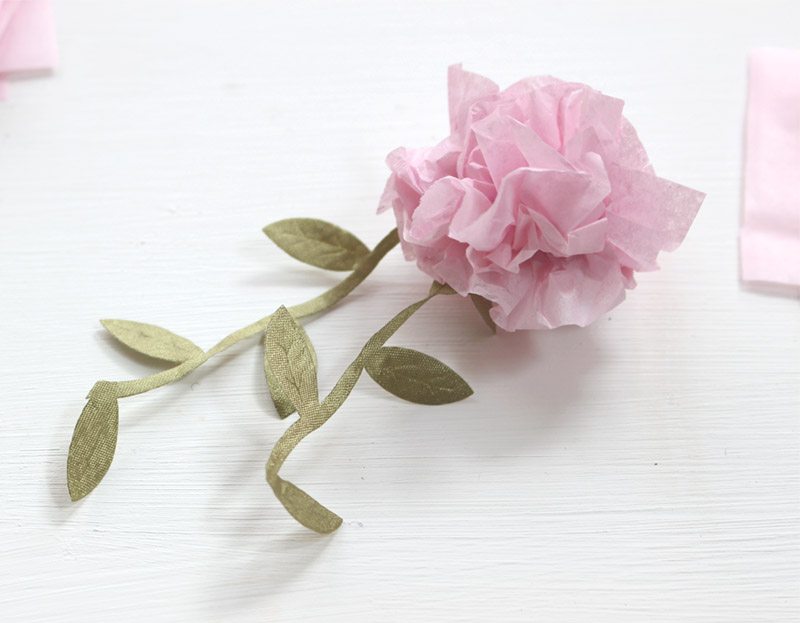
What I love about this version of paper flowers is that I attached them to real twigs. So, not only is this easier, the real branches make the flowers look more realistic. If you make them, your friends and family will think that they are the real deal!
But before we start the project, let me answer some questions you make have.
Frequently Asked Questions:
What kind of paper do I need to make paper flowers?
There are quite a few ways to make paper flowers. Some of the papers used are cardstock, crepe paper, scrapbooking paper, and tissue paper. These cherry blossoms are made of tissue paper.
What can I use as a stem for paper flowers?
These paper flowers are attached to a real branch which makes this project easy. Each tissue paper flower has a leaf ribbon that holds it together. And you’ll take that ribbon and tie it to the branch with a knot. You can also place a dab of glue on the paper flower to attach them to the twigs.
What kind of branches should I use for the stems?
Instead of using a single branch with a thick stem, I like the wispy ones. I especially like to use the ones that have lots of shoots. The twigs on the branches the more places to add flowers. Cherry blossoms fill the tree with their gorgeous flowers. So, to imitate their natural state, the more small branches, the better!
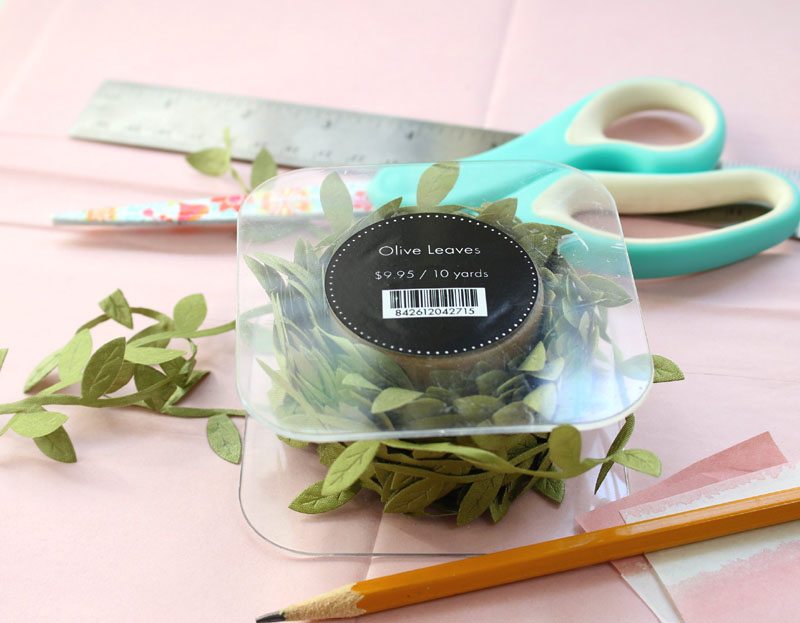
Do I need to use the Olive Leaf Ribbon?
I love this ribbon since it adds a bit of spring green and leaves—so no need to make paper leaves if you use this pretty ribbon. Shortcuts to DIY paper flowers are always a good thing.
Paper Flowers Tutorial
*This post contains affiliate links
Supplies
1 branch
Blush color tissue paper sheets
A roll of green Leaf Ribbon (10 yards) (30 yards)
Glue gun and glue sticks
Scissors
Ruler
Pencil
Directions
1. Clean leaves off branches.

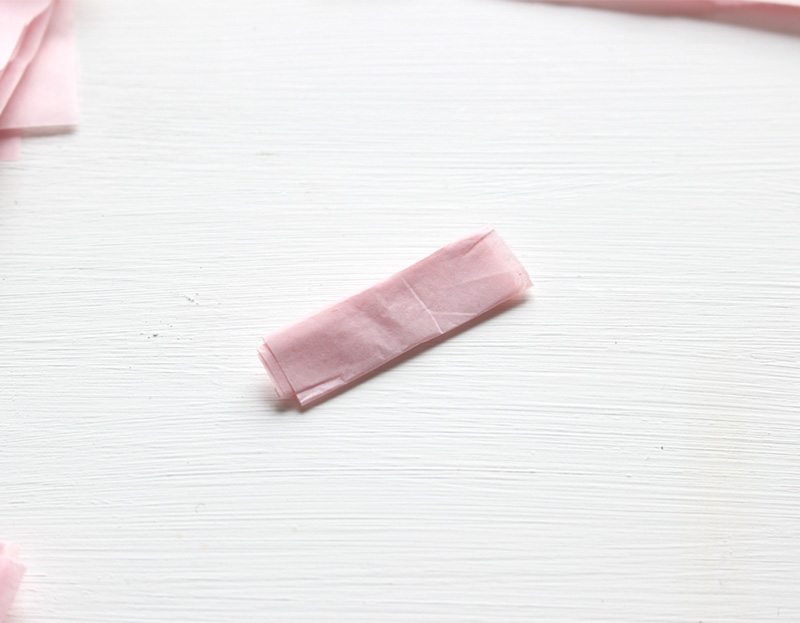
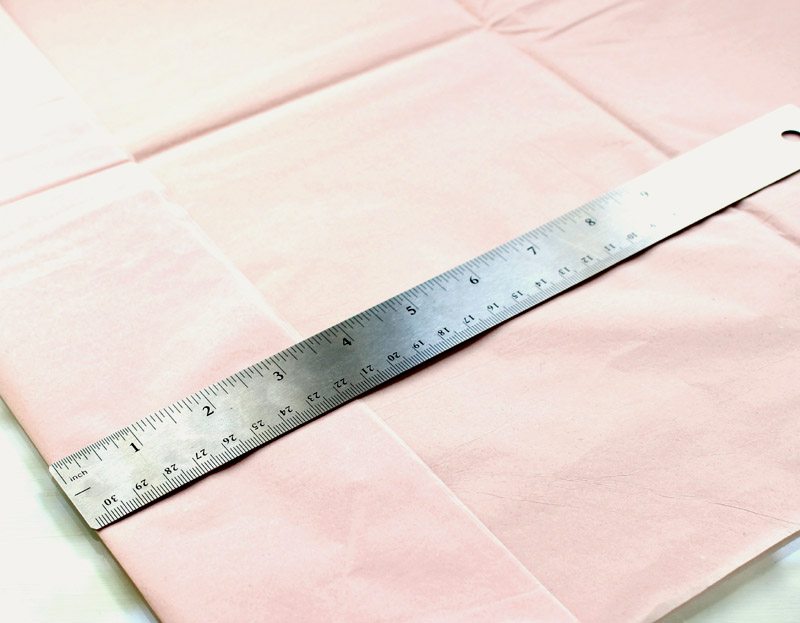
2. Measure and outline tissue paper into 2 1/2″ x 3″ strips. Layer tissue paper and cut out 15 pieces at a time. Look below for my tips to cut your paper more efficiently.
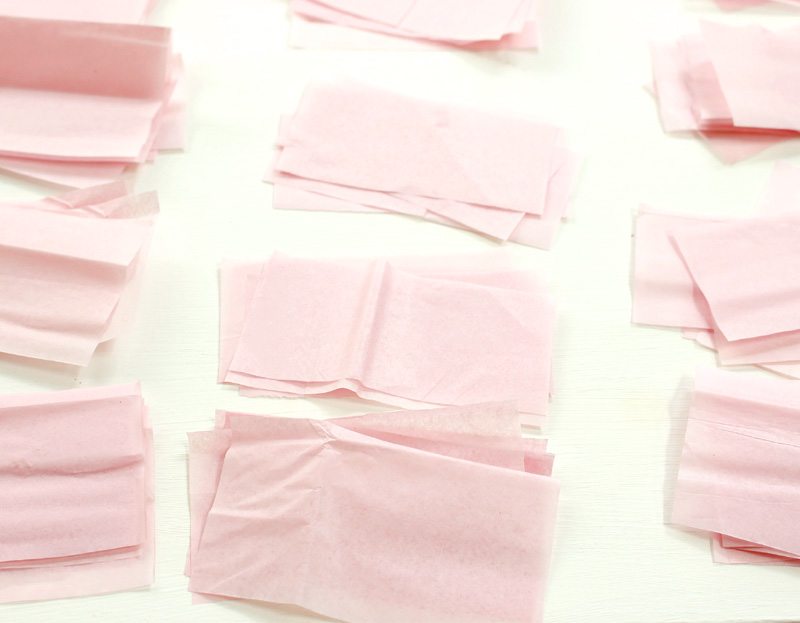
3. Create stacks of 5 pieces of tissue paper per pile.
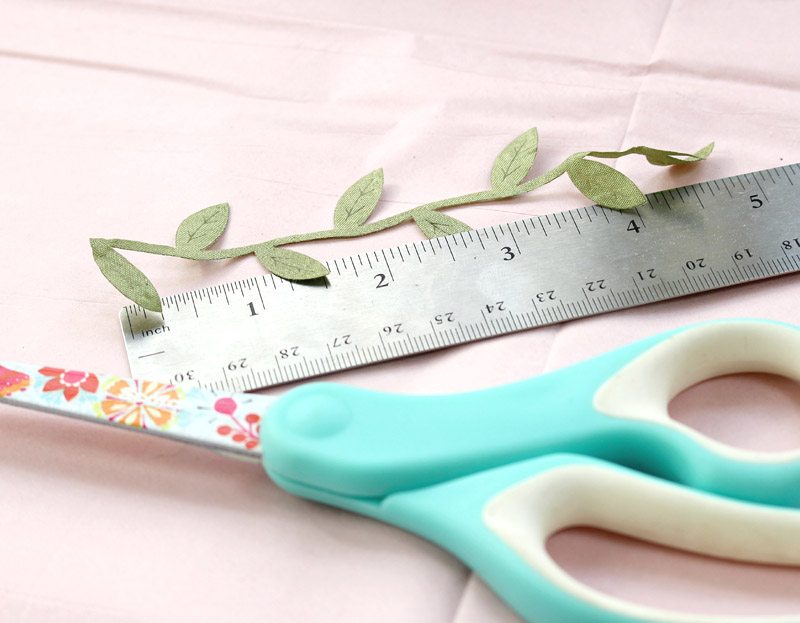
4. Cut leaf ribbon into 5-inch lengths.
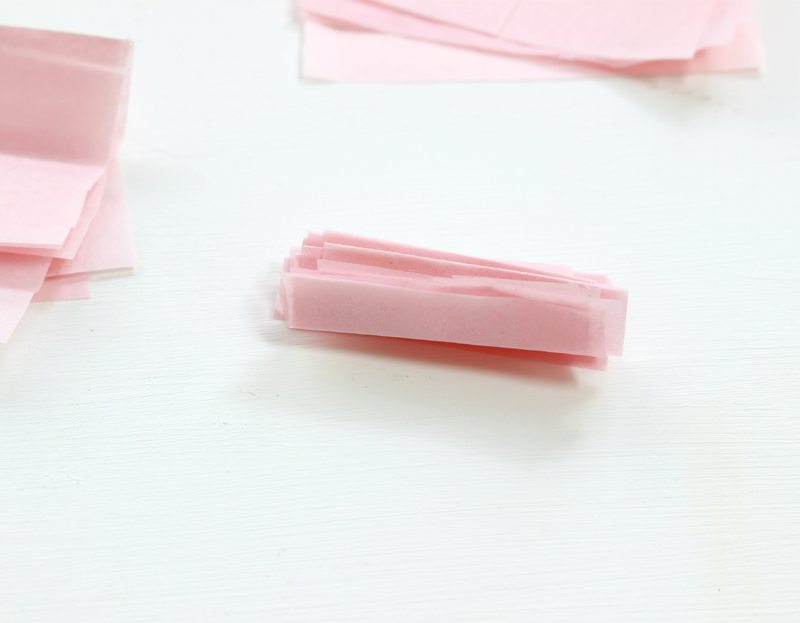
5. Next, with a pile of paper (5 tissues), fold the tissue in 1/4 inch increments as shown. It should resemble a fan.
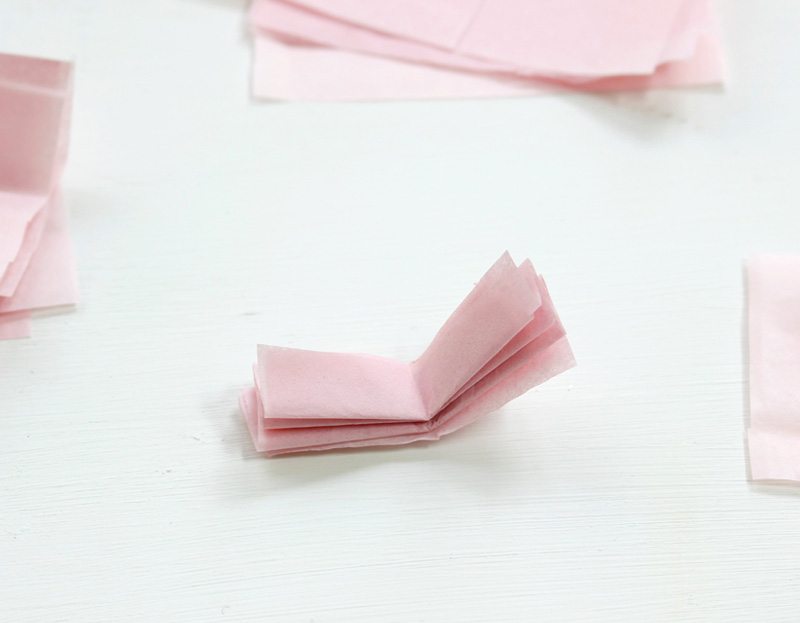
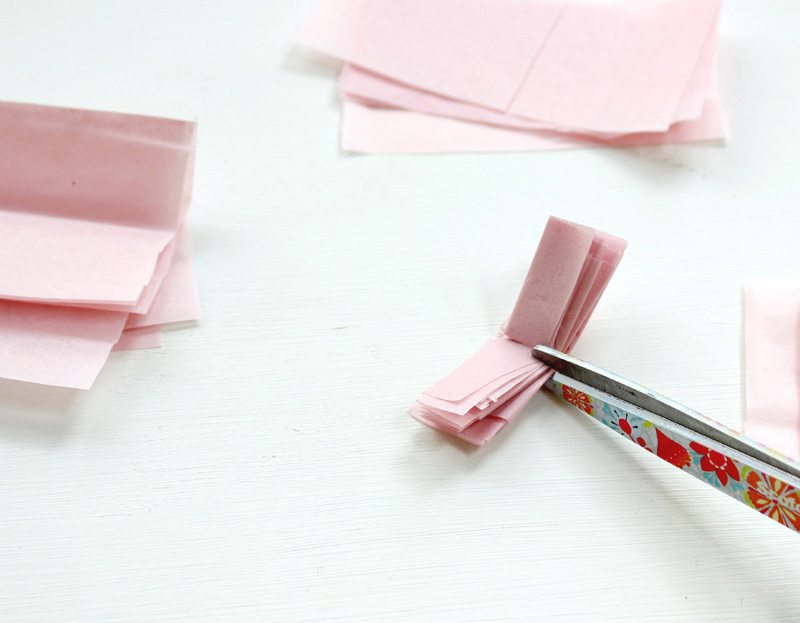
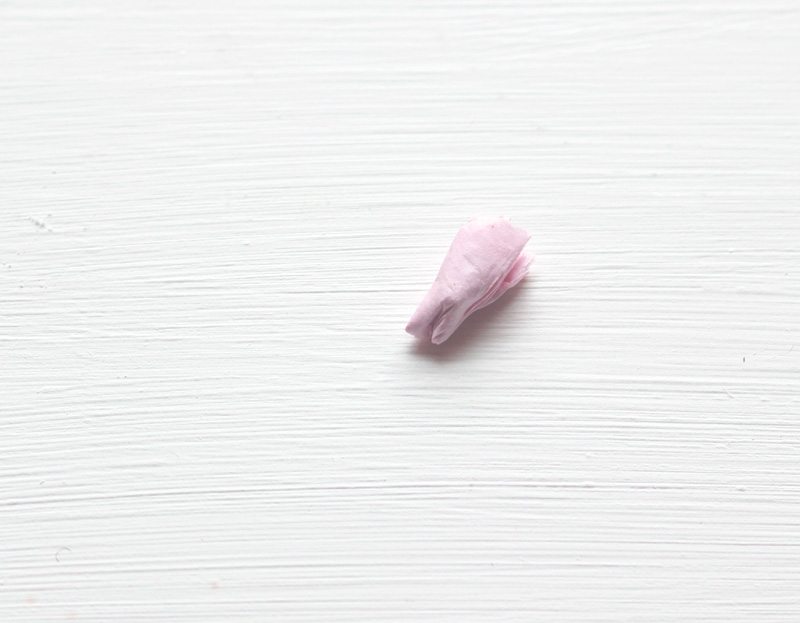
7. Fold the paper in half and cut super small slits on both sides of the paper. Be careful not to cut the slit through to the other side.
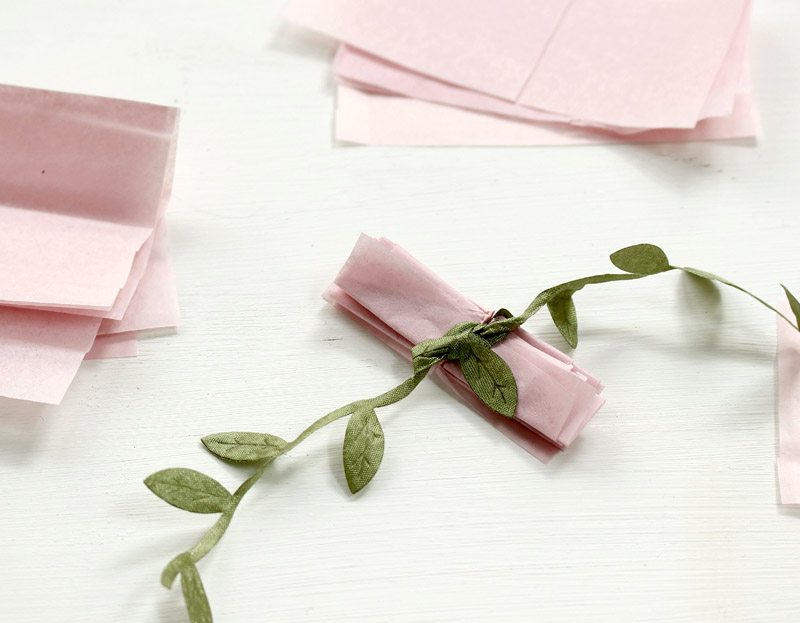
8. Place the ribbon in the slits and make a knot. You want it somewhat tight, but be careful since this ribbon is a bit fragile.
9. Now unfold each layer of tissue paper to create the flower.
10. Attach the paper flowers to the branch with the ribbon.
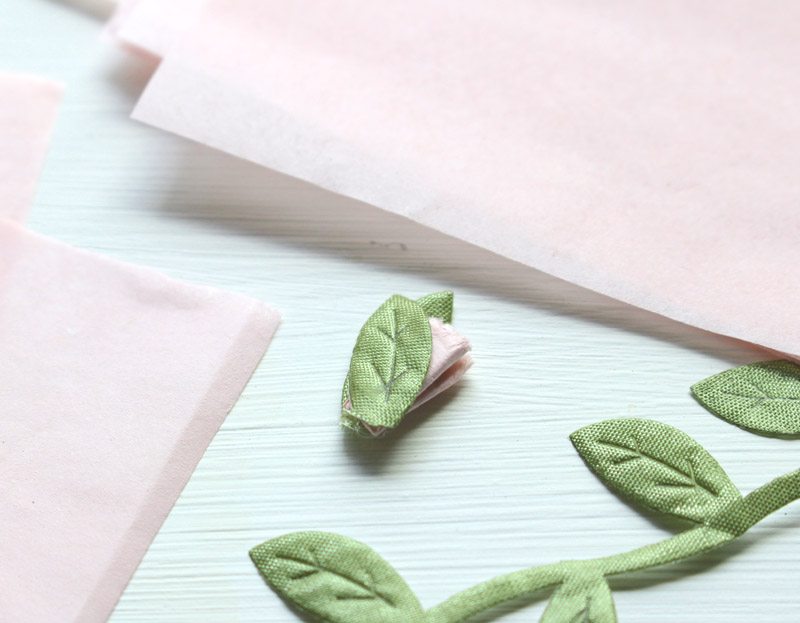
Instructions for the Flower Buds
1. Cut small pieces of tissue paper and fold.
2. Fold in half and pinch the bottom.
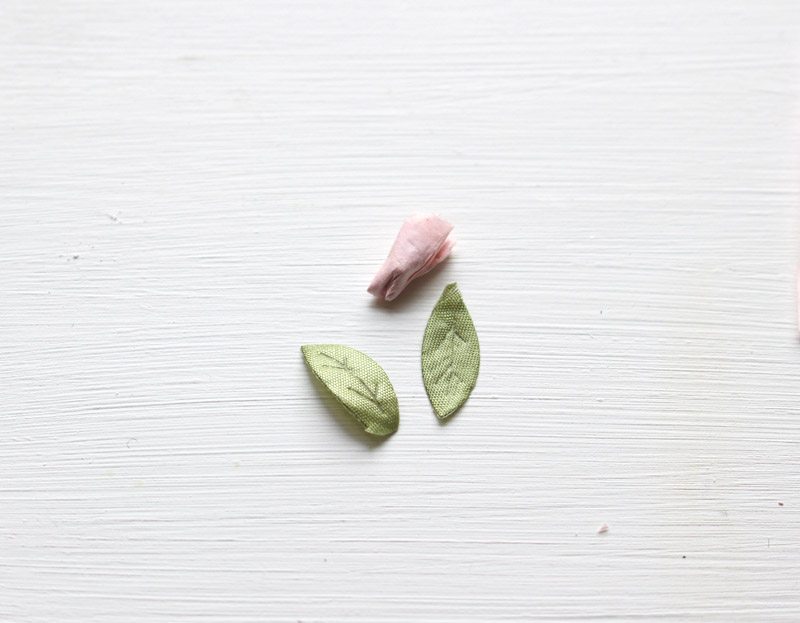
2. Trim two leaves off the ribbon.
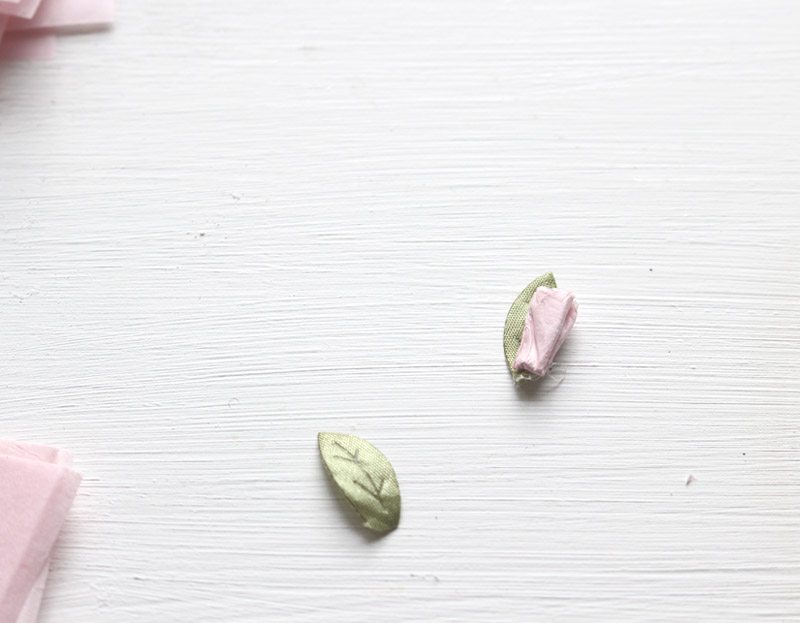
3. Glue the tissue bud to the leaf and then glue another on top.
4. Glue bud to the branch.
An efficient way to cut and fold your paper for creating tissue paper flowers.
I found a few shortcuts to cutting the paper for your tissue paper flowers.
1. Measure off 2″ x 3 1/2″ size rectangle with a ruler and pencil.
2. Next, fold the paper in 3 1/2 installments and proceed to fold the whole sheet as shown.
3. Cut on all the folds. It would be best if you had a couple of paper strips that are 3 1/2″ in width.
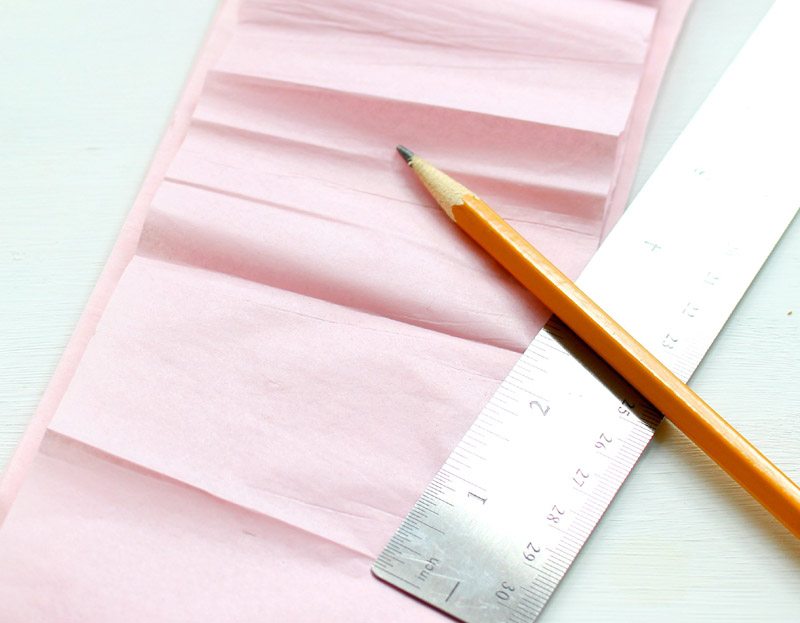
4. Next, measure off 2″ on your strips of paper and draw a line. Then fold the whole sheet like pictured above.
5. Then line up all your papers in a stack and place your folded sheet on top as a template. Now, cut on the folds.
6. All your papers now should be ready to go and be folded in the next step.

That’s it, you have completed my paper flowers tutorial, and now you have some blossoms that will last forever. Create a spot that will show off your masterpiece. If your branch happens to break, no worries, remove the blooms and reattach them to a new branch.
If you like paper projects, here are more tutorials:
I’m super-duper happy that my luck is turning around, and my thumb is starting to turn green. This project is an excellent resource for paper flowers for a wedding. The sky is the limit. I hope you enjoyed this tutorial on how to make paper flowers at home.
Happy Crafting!
Cheers,


- Cherry Blossom Cookie Recipe - April 3, 2026
- Amazon Simple Porch Decor - April 1, 2026
- Recipes For Springtime - March 28, 2026


Claire
Cherry blossom is my favourite and this is awesome, pinning for later. A definite future project!
Toni
Those are beautiful, I’ll have to give those a try so I can enjoy the spring buds we have in our backyard all year long!
robin Rue
Those are so cute. I have never seen these before. Love them 🙂
Joely Smith
WOW! Had I ONLY seen the photos I would not have known they were paper! I LOVE THEM! I also do love cherry blossom! No need to water, they never die, and they look fantastic! Thanks for this DIY tutorial!
Jennifer Gilbert
I will have to try making these gorgeous cherry blossoms with my daughter! It looks impressive, although your directions are so clear and easy to follow.
Tamara
these are so beautiful Janine! I’m all about this DIY project!
Amy Jones
Holy!! I wish I was this crafty and talented. I would totally mess this up hahaha but it’s truly beautiful what you achieved
Sarah-Louise Bailey
I can’t believe that I can definitely do it. Looks hard when you see the flowers on the base but I was surprised that it is just a pile of pink tissue that was crumpled.
Karlyn Cruz
I still can’t believe they are just paper flower, They are really perfect and my eyes are fooled. haha
Victoria Heckstall
You are so crafty! The flowers are amazingly beautiful. I will try doing that and i hope to get the same result..
Nellwyn
These are so pretty! I always forget to water plants or change the water in my vases of cut flowers so this DIY is perfect for me!
Vibeke Johannessen
Wow, this is amazing. Cherry blossoms are my favourite. I would love to try this out. The only thing is that I struggle to be patient enough to create this kind of crafts xD
x
Amber Myers
Oh my gosh, how gorgeous! I will have to show my daughter this. I can see her making these for her room.
Bethany Stout
Oh wow, I didn’t even realize these were paper flowers they look so real. Very well done, so pretty. Thanks for he DIY step by step guide.
Dhemz
wow, that’s really cute and pretty! At first glance, they don’t look like paper at all. I would love to try this for sure. Thanks for sharing!
Wendy Polisi
Wow! I never realized that it was made from papers, it looks like a real one!
Elizabeth O.
I think this is really awesome! I love the paper flowers, i didn’t even notice that they were made of paper until you posted a close up shot. The end result is just beautiful.
Jay Simms
Oh those are so cute and look realistic! My daughters would love to make these as a weekend craft.
happyhappynester
Your daughters will like making these and they will be super cute in their bedrooms! Happy Crafting and thanks so much for your sweet comment!
Fatima Torres
These are beautiful! I love how easy you make it seem. I’ll have to take a good look at this when we move into our home. Hopefully in less than 4 months! 🙂 I’d love to add some paper flowers to our home
happyhappynester
Fatima,
Congrats on your new home! These paper flowers are so easy to make and they brighten a room up instantly. They are super cheap to make and you just need to find a branch from an obliging tree! Happy Crafting and moving!
Donna
Aside from the clever craft idea I just really really enjoyed looking at this article!!! The colours and photos are so pretty!!! I reckon I may give this a go. Thx!
Sam @ Raggedy Bits
These turned out so beautiful Janine! You are so clever with your paper crafts!!
Kathleen
Thanks for this tutorial, Janine! I’m super excited to try these!
xo
Kathleen
Linda at Mixed Kreations
These turned out so pretty, and they look real. Your tutorial makes them look pretty easy to make. They look really nice in the white pitcher.