Drip Irrigation For Plants in Pots is the way to go. Once you set up your whole system, you won’t have to worry about your hanging plants. If you have everything set in your sprinkler system, your plants will be watered without you having to do anything.
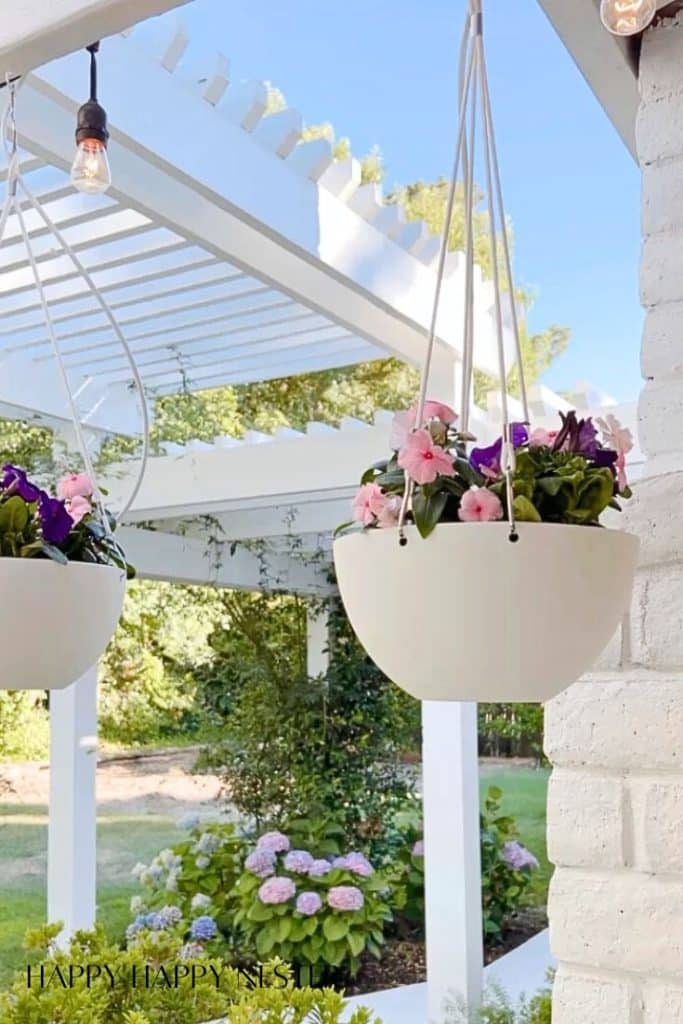
If you want pretty hanging flowers this summer, make sure to set up an irrigation system. Allow it to water your plants while you’re on vacation or busy with summer activities.
My husband is the master of our sprinkler system, but that hasn’t been the case when we bought this house. We had sprinklers in our Seattle home, but we rarely turned it on since the weather is so mild in the summer.
Now that we have a yard that needs automatic sprinklers, he has the whole system down. So, when I asked to have a drip line going to some potted plants, he had no problem installing it! And we thought it would be nice to share his project over here.
Advantages to Drip Irrigation for Potted Plants
- Efficiency: Drip irrigation ensures water goes directly to the roots, minimizing wastage.
- Conservation: It conserves water by reducing evaporation and runoff.
- Uniformity: Provides consistent moisture distribution across all plants.
- Convenience: Requires less frequent watering, saving time and effort.
- Healthier Plants: Helps prevent overwatering, reducing the risk of root rot and other diseases.
- Versatility: Suitable for various pot sizes and plant types, including hanging baskets.
- Aesthetic: Concealed tubing maintains the visual appeal of hanging plants without visible watering apparatus.
Drip Irrigation Step-By-Step Instructions


Supplies You’ll Need
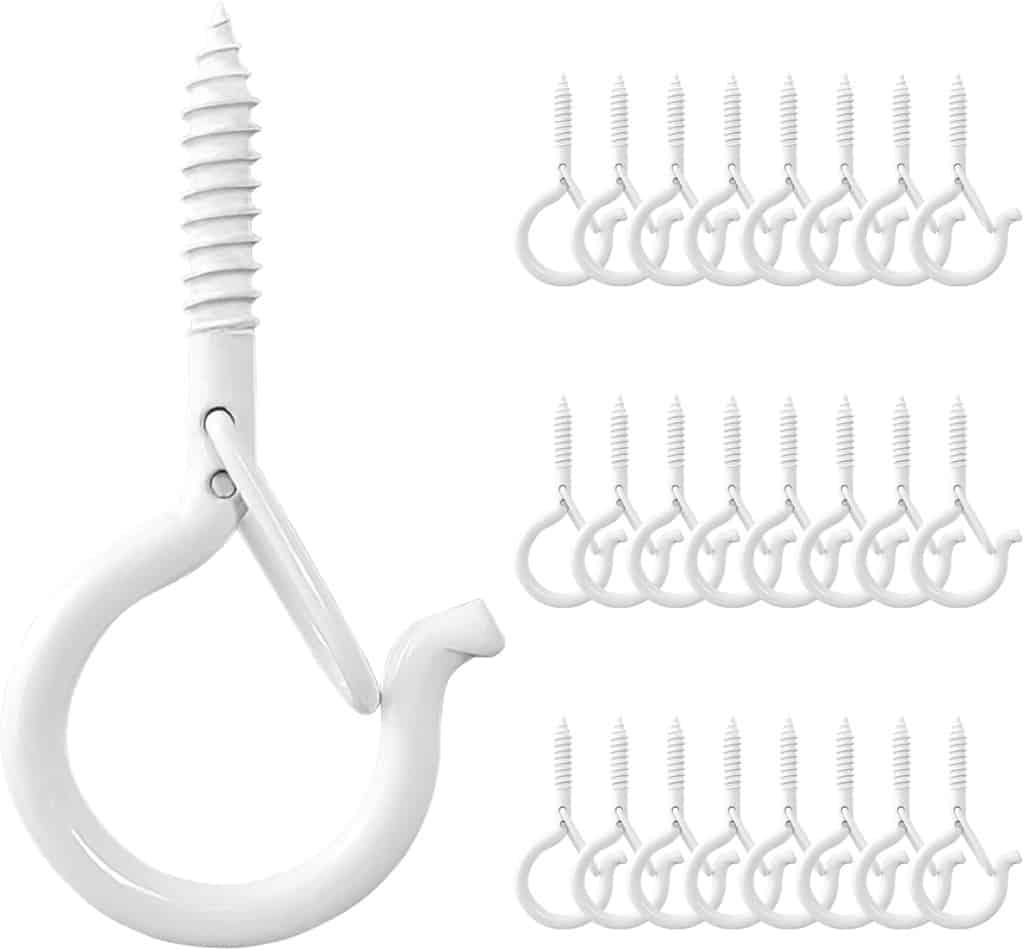
Closed Hook (ideally use rust resistant hooks)
Drill Bit
Plastic 1/4 inch White Irrigation Tubing (we used white but it comes in black as well)
Irrigation Cutter (Cut N’ Punch Multifunctional Tool)
Drip Irrigation Emitters with Lock (I know in the photos my husband used a different emitter, but these are attached to a stake making them a great choice)
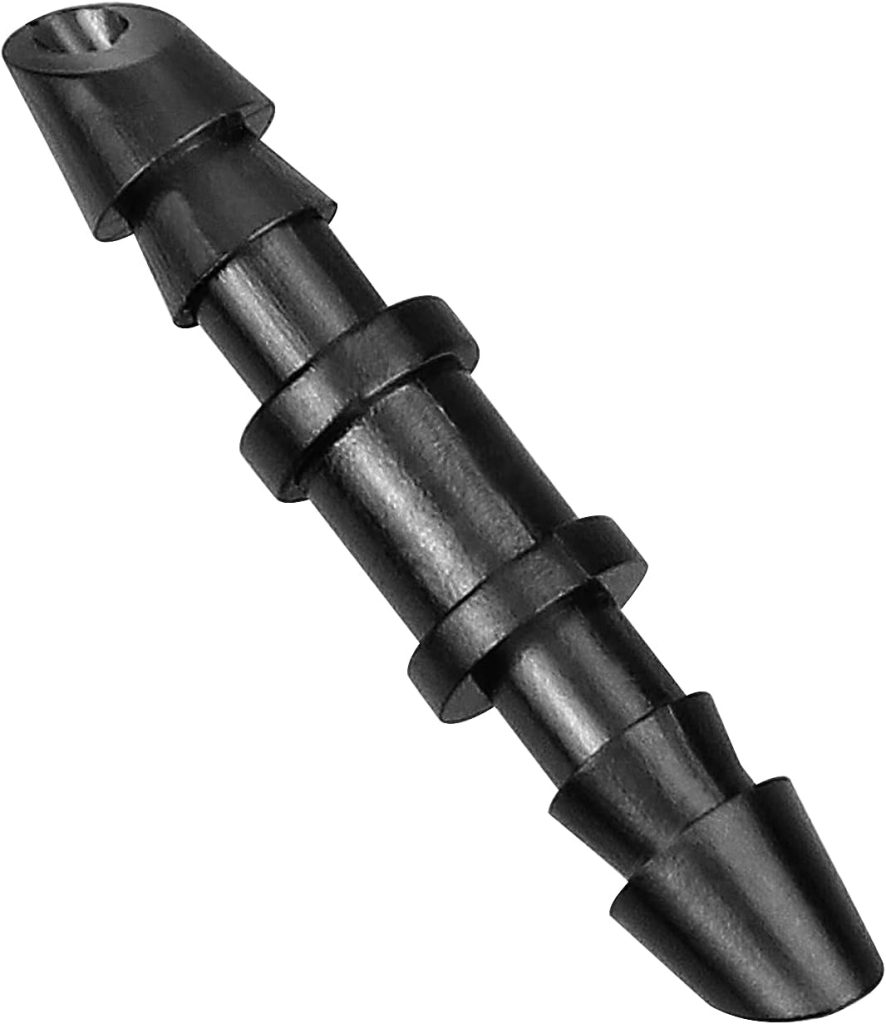
Drip Irrigation 1/4” Barbed Coupling Fittings
S
Instructions
This assumes that you have 5/8 inch tubing to insert your 1/4 inch drip irrigation tubing into.
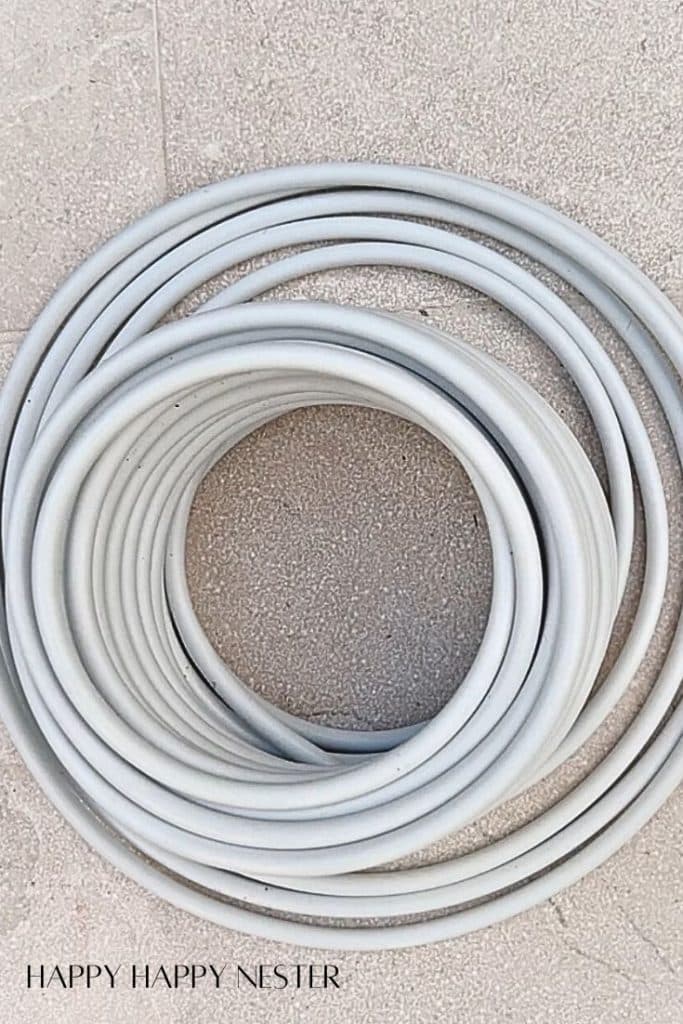
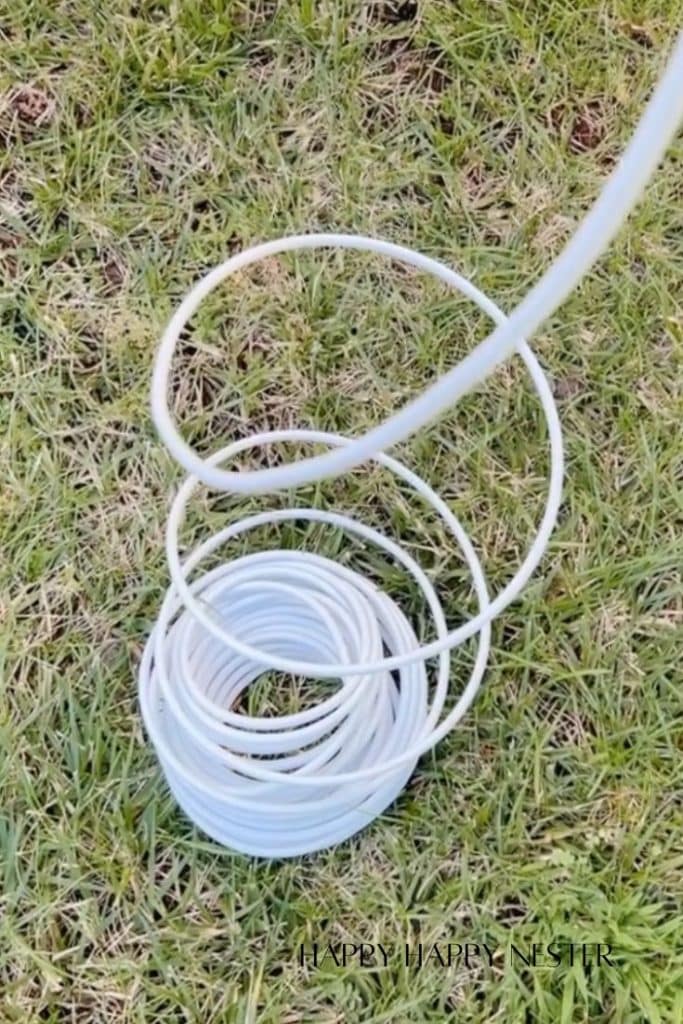
Step 1 – Straighten Drip Tubing
The tubing arrives coiled and needs to be unraveled. On the installation day, place the tubing in the sun to warm it up; this makes it easier to straighten.
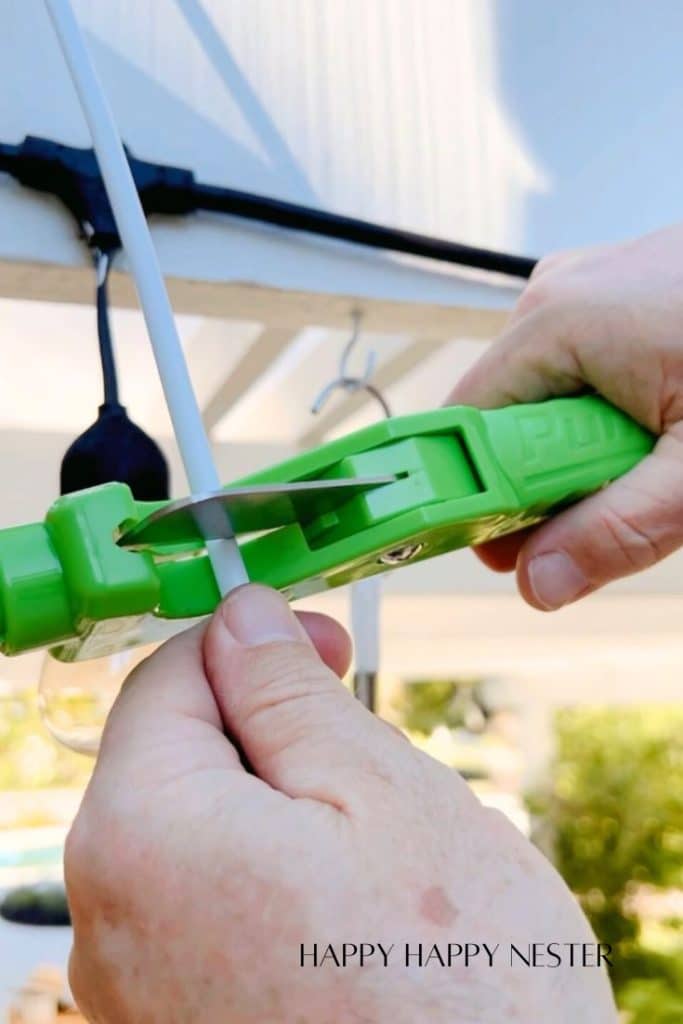
Step 2 – Measure Tubing You’ll Need
Measure the tubing’s length from the nearest 5/8 inch sprinkler tubing to the hanging pot, considering any connections you’ll make to secure the tubing. Use a pen to mark where you need to trim the tubing, then cut it using your irrigation cutter tool.
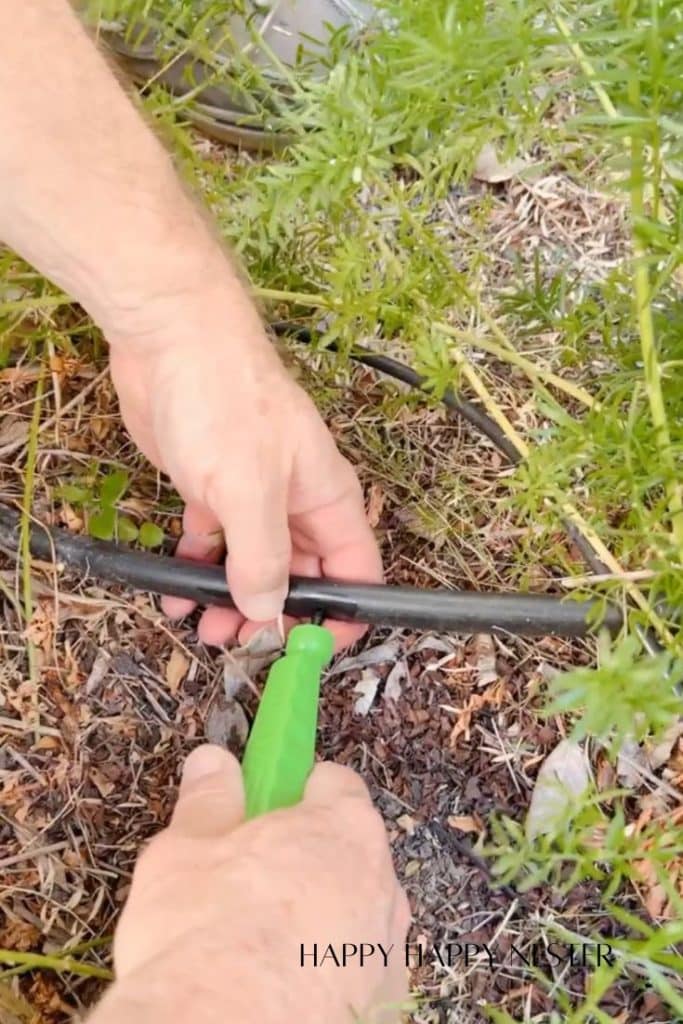
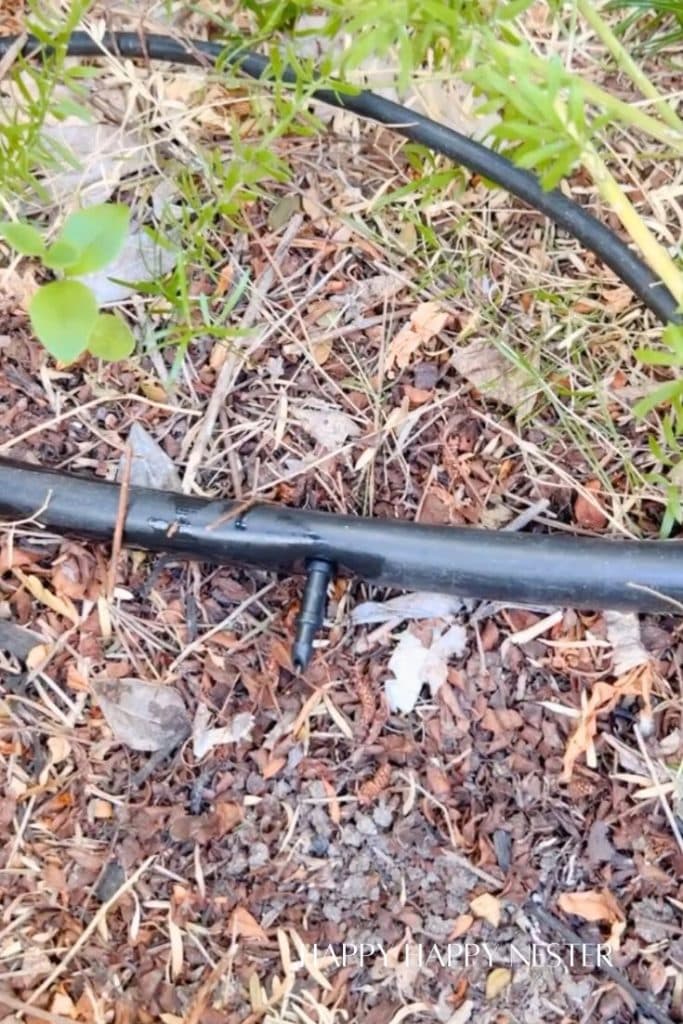
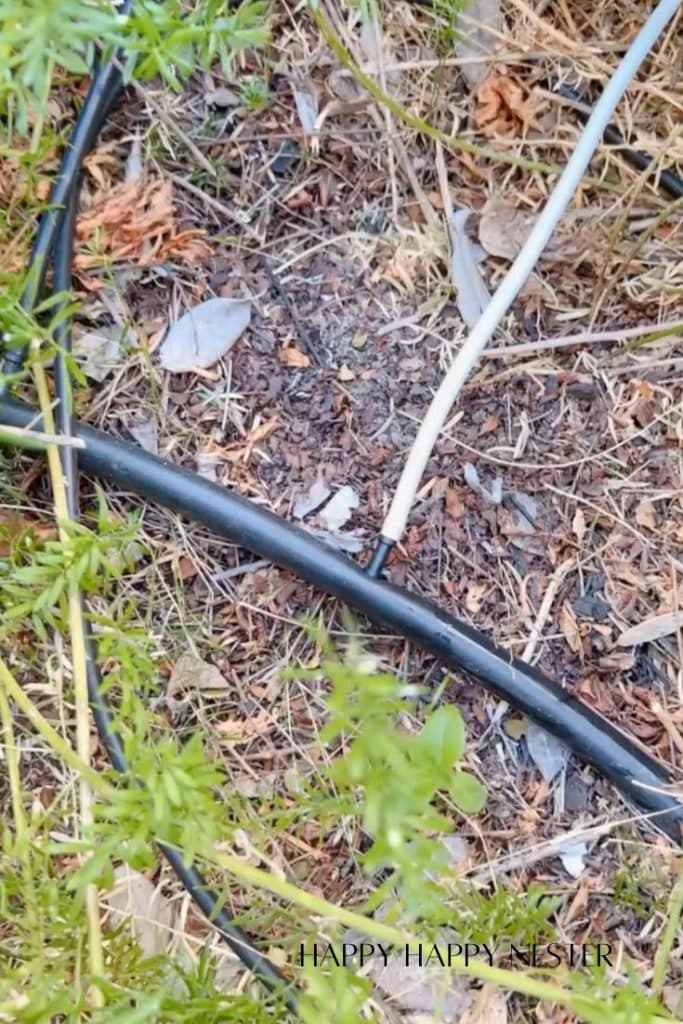
Step 3 – Attach Tubing to the Nearest 5/8 Sprinkler Tubing
Using your irrigation tool, punch a hole in the 5/8″ tubing (note that one end of the tool has a hole puncher). Then, with your irrigation cutter tool, use the hole on the back of the tool to secure the coupling on to ir, and insert it into the hole you created. Finally, place your 1/4 inch tubing over the exposed end of the coupler.

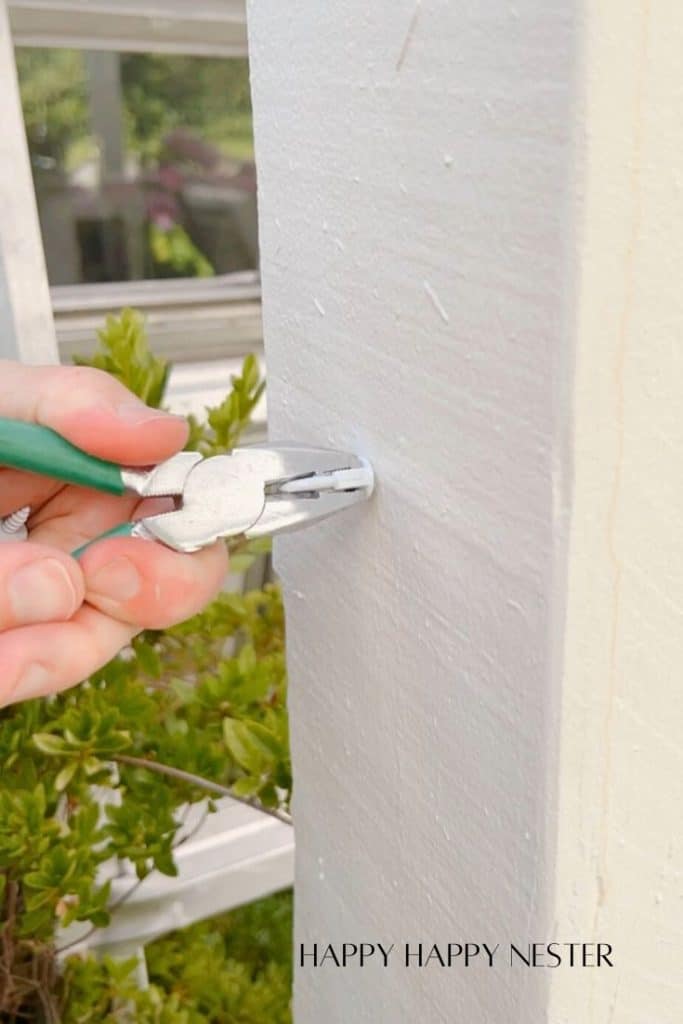
Step 4 – Create a Path of Tubing to Your Hanging Planter
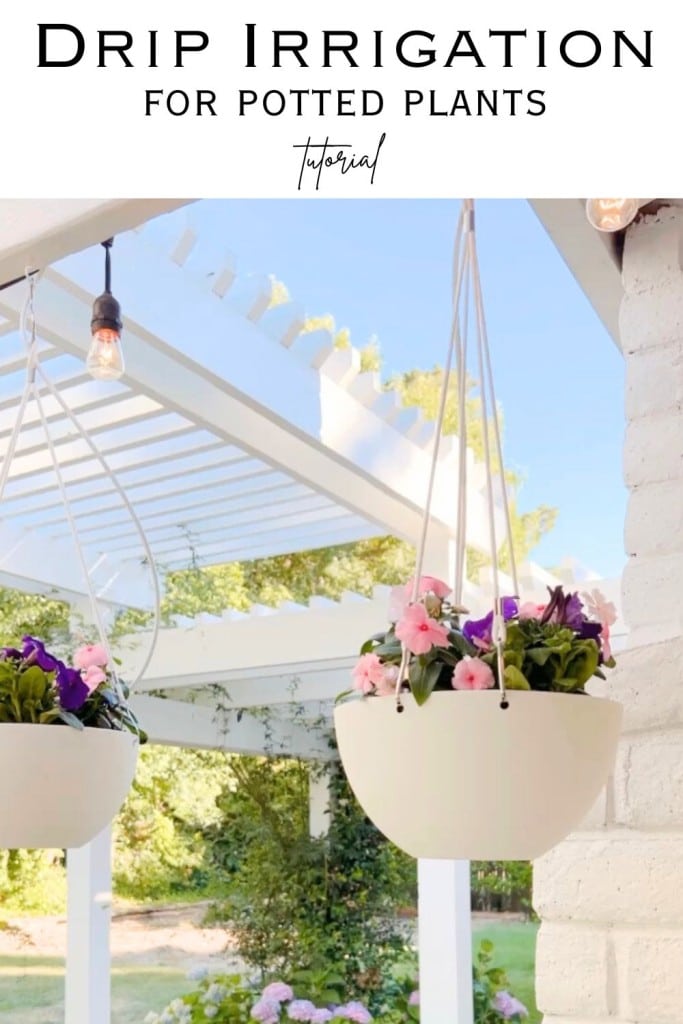
Secure your tubing to any landscaping feature; in our case, we opted for our patio post. My husband drilled holes into the post and installed white hooks to support the tubing. These hooks have a special latch designed to secure the tubing in place.
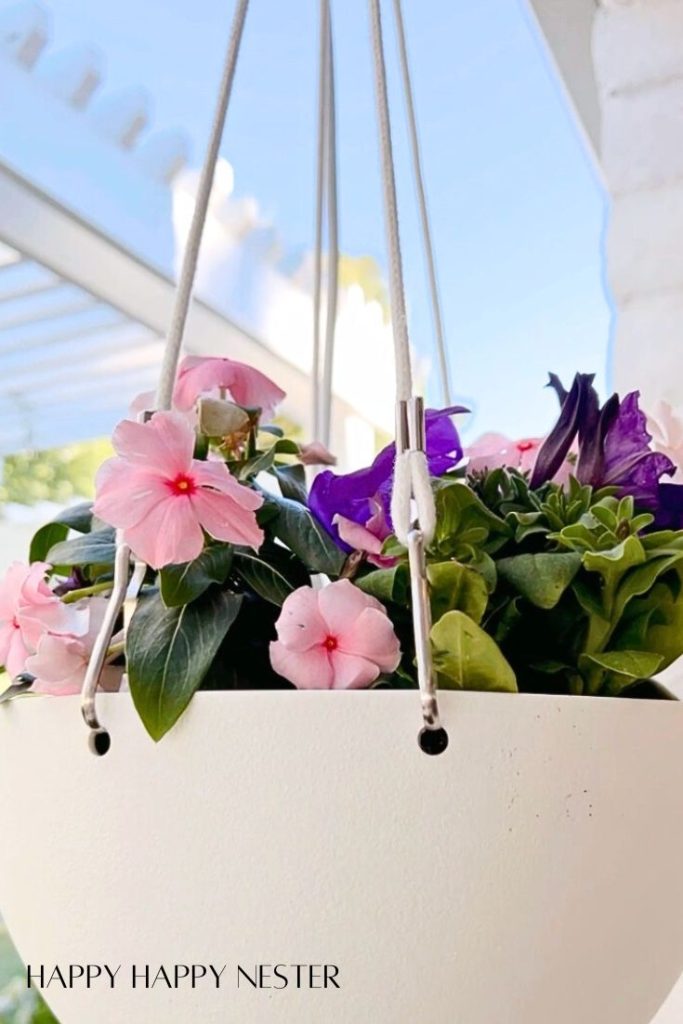
Step 5 – Guide Tubing to Planter
Thread the tubing through the planter, starting from the top, and weave it through the threads of the hanging pots.
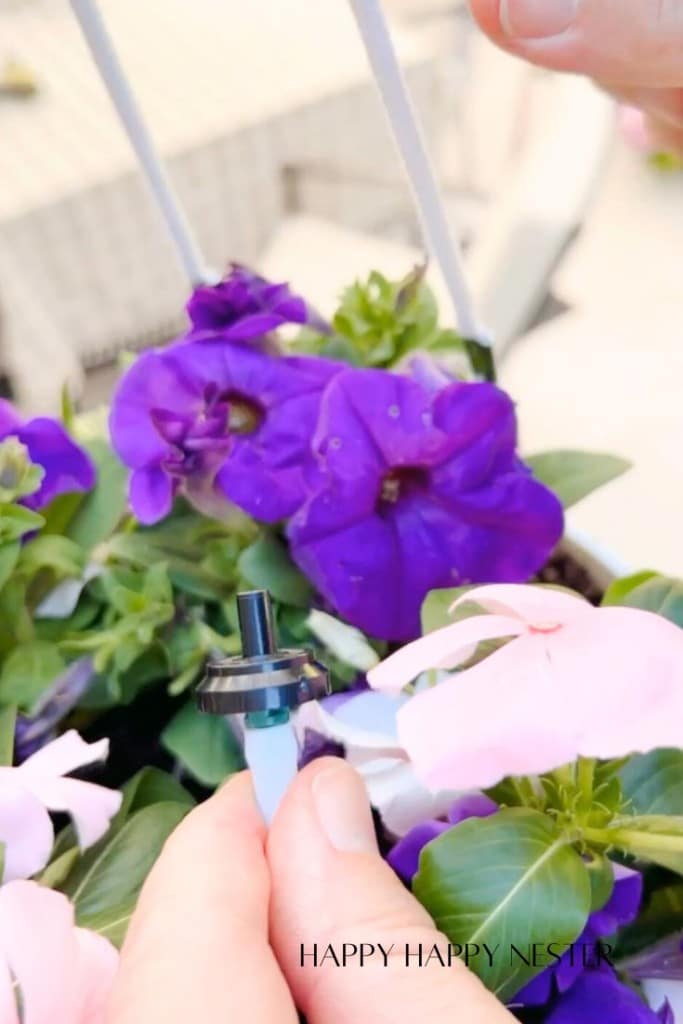
Step 6 – Attach an Drip Irrigation Emitter
Attach an emitter (mounted on a stake) to the end of the tubing inside the planter. Secure the stake into the soil at the center of the pot.
Step 7 – Adjust the Water Spray
Fine-tune the spray to a trickle; our pots retain water as there’s no drainage at the bottom. Therefore, we’ve adjusted the flow to a drip. Additionally, we’ve set the watering schedule to run for four minutes daily, keeping our plants happy.
Thanks so much for stopping by my drip irrigation for plants in pots DIY. My husband always encourages me to share his projects; I love that he does so many of them.
We have added a few of his projects, and here is a short list of them.
- How to Hang Outdoor String Lights
- How to Start a Hydrangea Plant
- How to Plant a Rose Bush in the Garden
u
Here’s yet another way to add irrigation to potted plants. We did this on our pots on our front porch.
Thanks a bunch for checking out my DIY drip irrigation for potted plants. I’m always grateful for my husband’s encouragement to share his projects, and I love how he’s always tackling new ones.
Happy putting in your garden!
Cheers,


- Mochi Recipe: How to Make Easy Homemade Mochi - June 18, 2026
- Strawberry Oreo Cheesecake Recipe with Oreo Cookie Crust - June 15, 2026
- Ai Kitchen Remodel - June 12, 2026


Leave a Reply