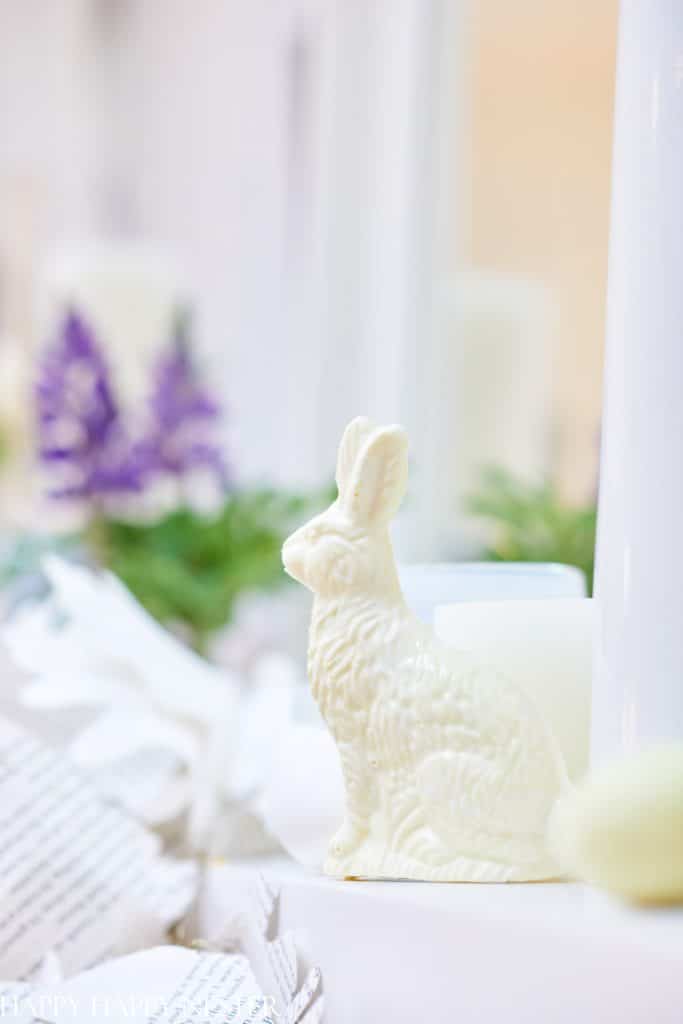
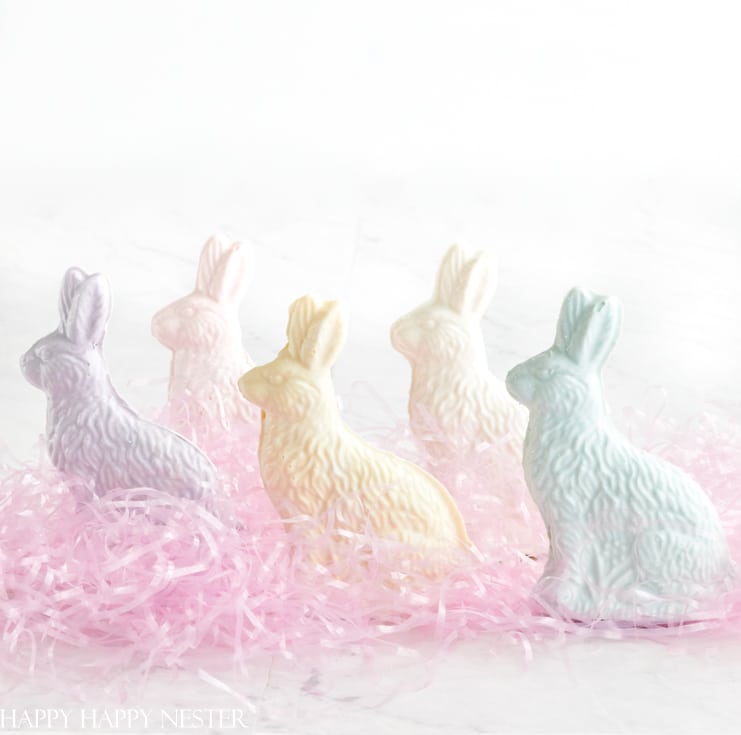
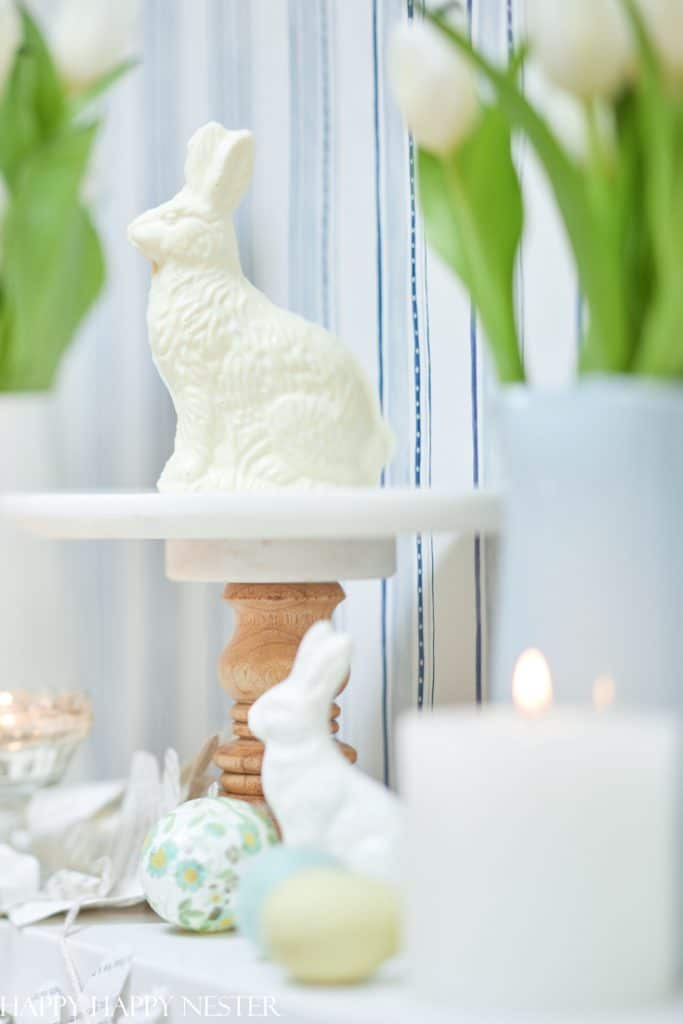
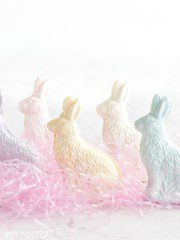
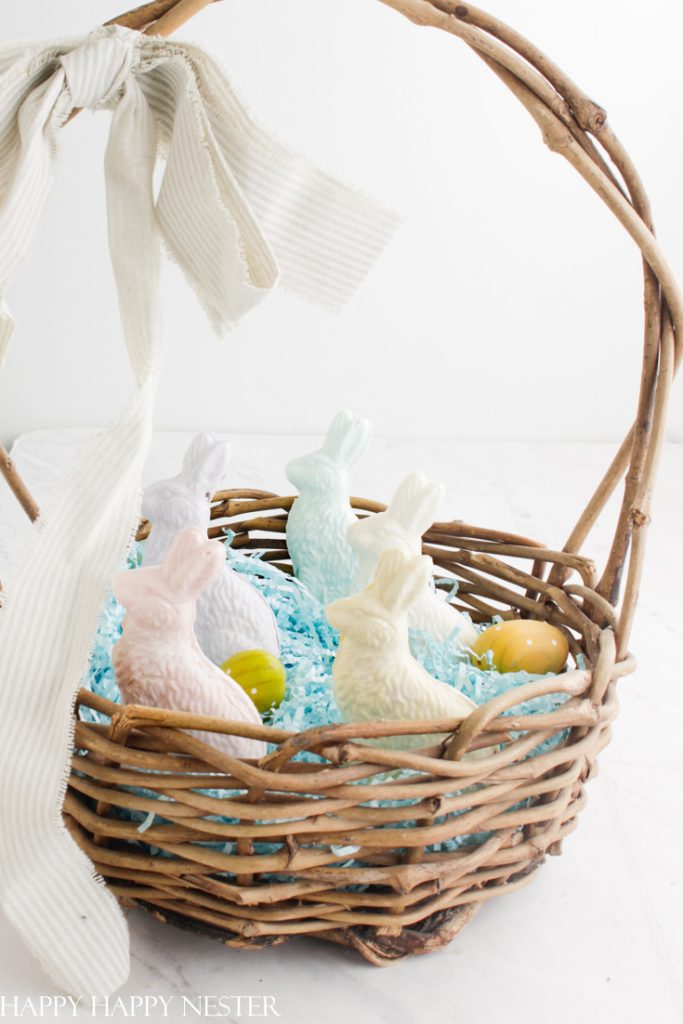
I’ve always wanted to learn How to Make a Homemade Chocolate Bunny. And now that I found the best melting chocolate, I’m having a blast creating lots of fun colored chocolate bunnies. I’m using these adorable bunnies in my Easter decorating this year.
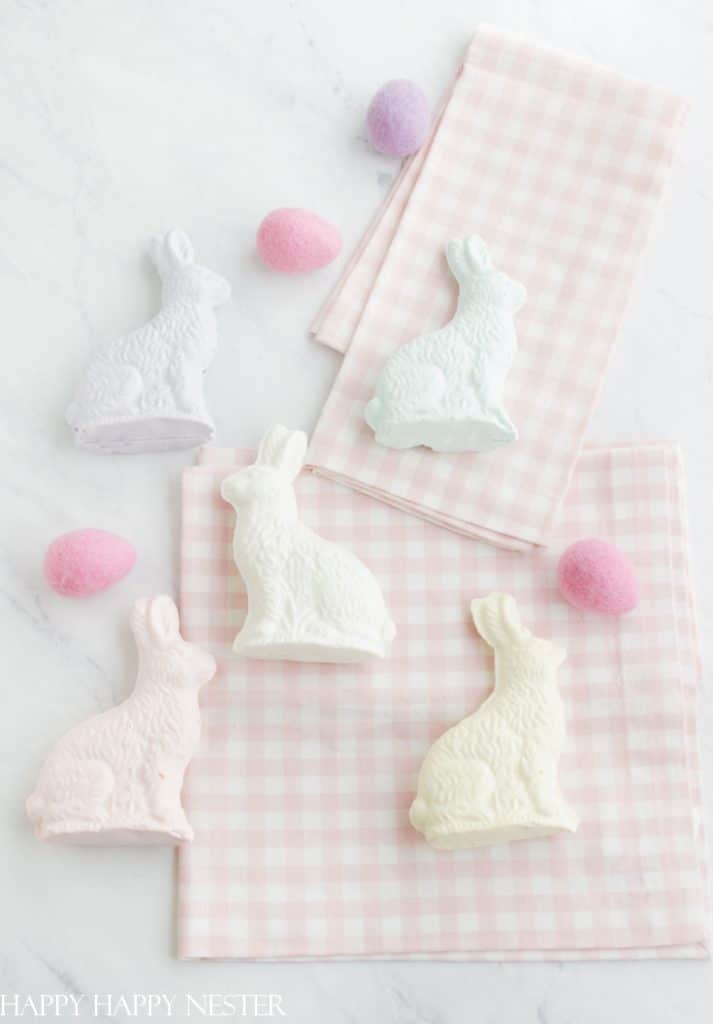
Over the last couple of months, I’m obsessed with making chocolate hearts, bunnies, and more. So when my daughter suggested that I make some Easter chocolate bunnies, I jumped on the idea. I love that I can make whatever color bunnies I want. I use super white melting chocolate for my base.
In this post, I’ll share all that I learned in my journey into making endless amounts of chocolate Easter bunnies! 🙂
But before we dive into this tutorial, you might want to check out some of my other fun Easter projects:
Also, I would like to mention that this Easter bunny post is part of a beautiful blog hop. You can find the other projects down below!
Ok, let’s take a look at my latest chocolate obsession!
Here’s Why You’ll Like Making A Homemade Bunny!
- You can make lots of different colored chocolate bunnies
- It’s so inexpensive to make a bunny
- It’s easy to make
- You can make a lot of them
- If you know how to make bunnies then you can make Easter eggs and more!
Supplies You’ll Need for This Bunny Project
*The following contains affiliate links
Melting Chocolate (Super White) *
- the 7 oz canisters of Wilton Candy Melts are the perfect amount to fill my bunny mold. When I measured out 7 oz of the Wilton from my bigger bag, it wasn’t quite enough. So, I feel like if you use 8 oz of chocolate meltaways you should have enough chocolate.
The Best Melting Chocolate to Use
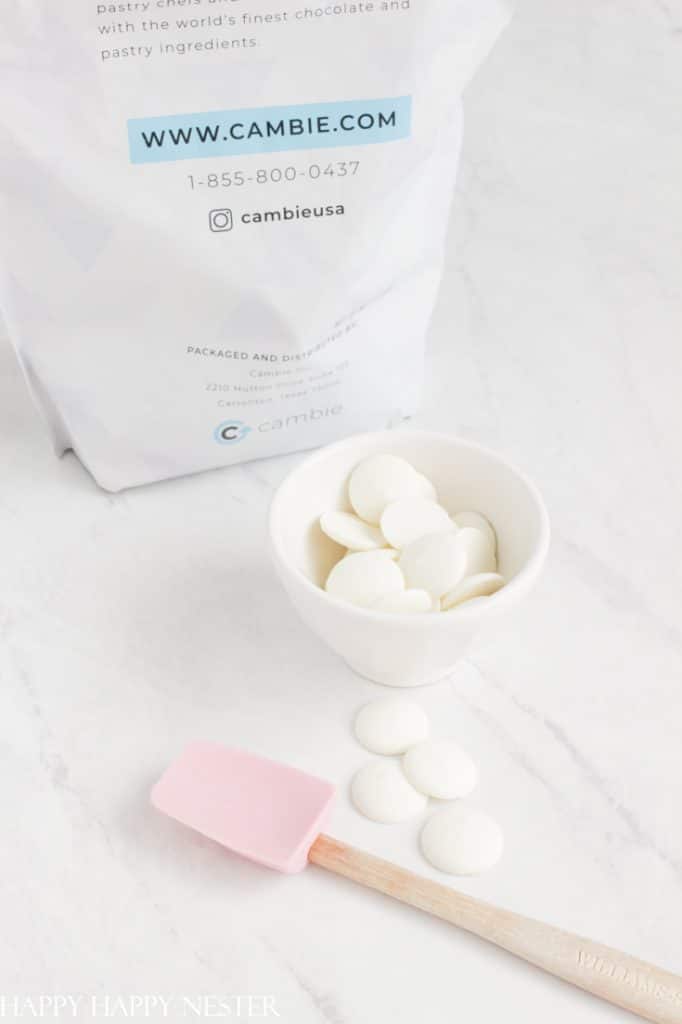
After many years of struggling with Wilton Meltaway chocolates, I finally found Merckens.
I’ve used Merckens and Wilton, and I found a few important things about melting these chocolates.
Melting Chocolate in the Microwave
- Add Shortening: Incorporate a small amount of vegetable shortening into the chocolates before melting to help them achieve a smoother consistency and prevent them from seizing in the microwave.
- Use a Microwave-Safe Bowl: Ensure the bowl is microwave-safe to prevent any potential hazards or uneven heating.
- Microwave in Short Intervals: Heat the chocolates in short bursts of 15-20 seconds, stirring between intervals to prevent overheating.
- Stir Frequently: Stir the chocolates thoroughly after each heating interval to distribute the heat evenly and avoid hot spots.
- Stop Heating Before Fully Melted: Remove the chocolates from the microwave when small chunks remain, as the residual heat will continue melting them as you stir.
- Be Cautious with High-Power Settings: Avoid using high-power settings on the microwave, which can quickly overheat and burn the chocolates.
- Use Fresh Chocolate: Opt for fresh, high-quality chocolate for the best melting results, as older chocolate may have a drier texture and be more prone to seizing in the microwave.
The Best Way to Melt Chocolate in a Double Boiler
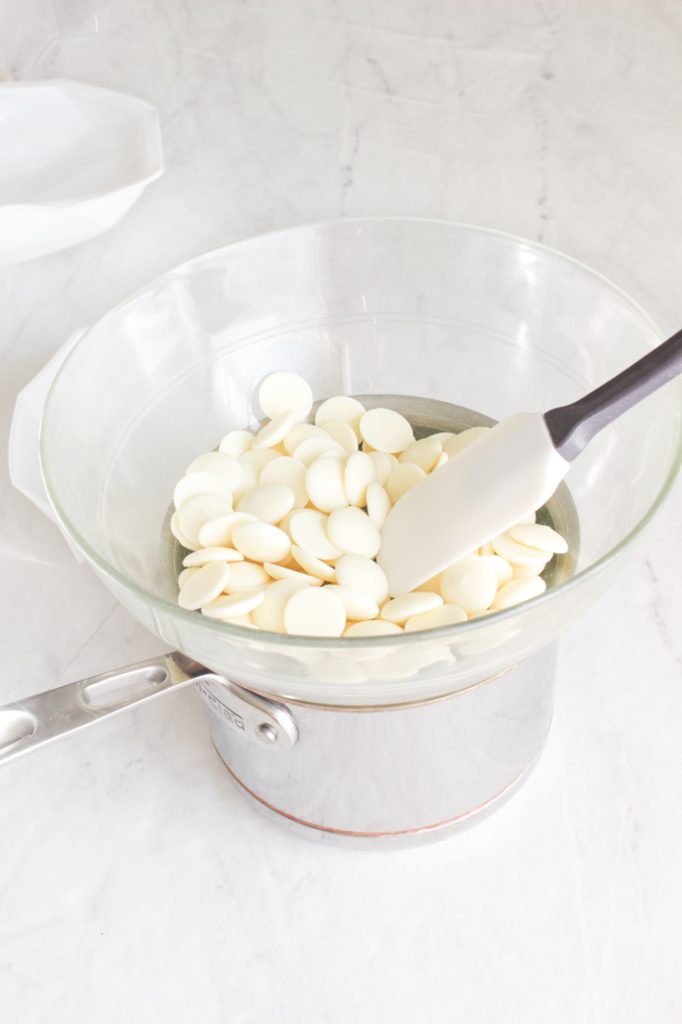
I shied away from melting chocolate since my past experiences with Wilton Chocolate Meltaways were horrible. Then I found Merckens chocolate online, and I’m in love with this fabulous chocolate.
It is easy to work with and melts so nicely.
I place it in a heat-proof bowl and put the bowl on top of a pan of water. Once the water begins to boil, I turn the flame down to medium to low heat and stir the chocolate thoroughly. The whole process only takes a couple of minutes.
Step-by-Step Chocolate Bunny Tutorial
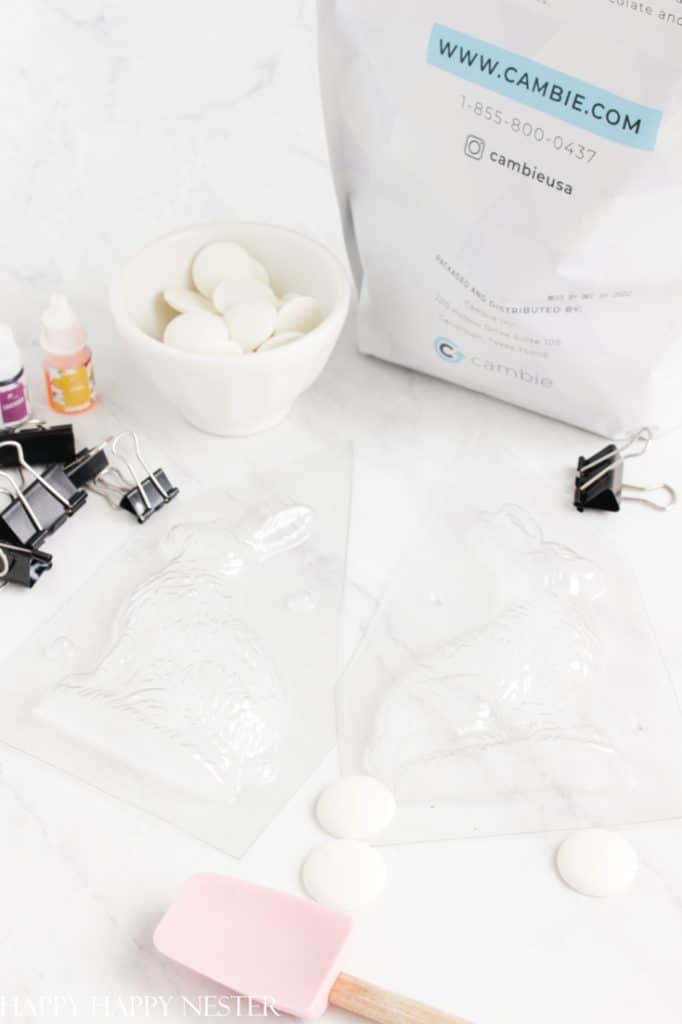
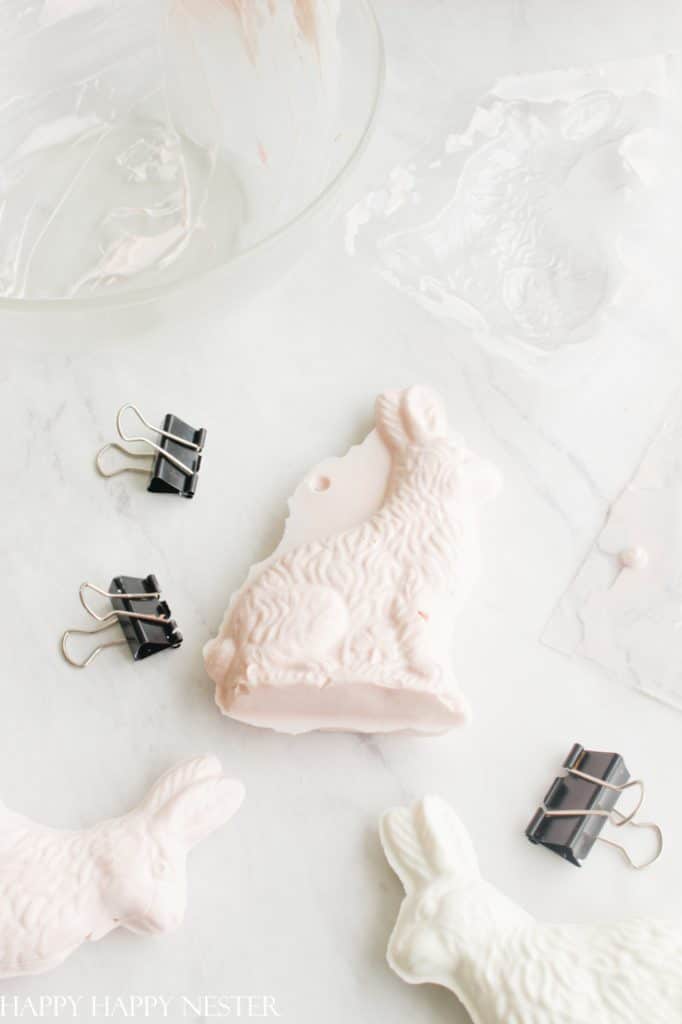
Step 1 – Trim the Mold
I don’t think my mold came with instructions, but I figured it out quickly with a little bit of deduction. You want to trim the mold so that you’ll be able to place clips close to the bunny. But don’t trim too closely and accidentally cut the rabbit.
Step 2 – Melt Chocolate and Fill Molds
Now here’s where the plastic molds come in handy. Once you melt your chocolate, use a small rubber spatula and place the chocolate in the molds. While you place the chocolate in the mold, look underneath and see how the chocolate is filling the mold. At this point, you’ll see any air bubbles that have formed. So take your spatula or toothpick and push the chocolate to get rid of the air pockets.
Make sure to work quickly since you have 7-10 minutes before the chocolate hardens.
I’ve discovered that it’s better to spread the chocolate beyond the edges of the rabbit. That way, you make sure there are holes along the seams.
A
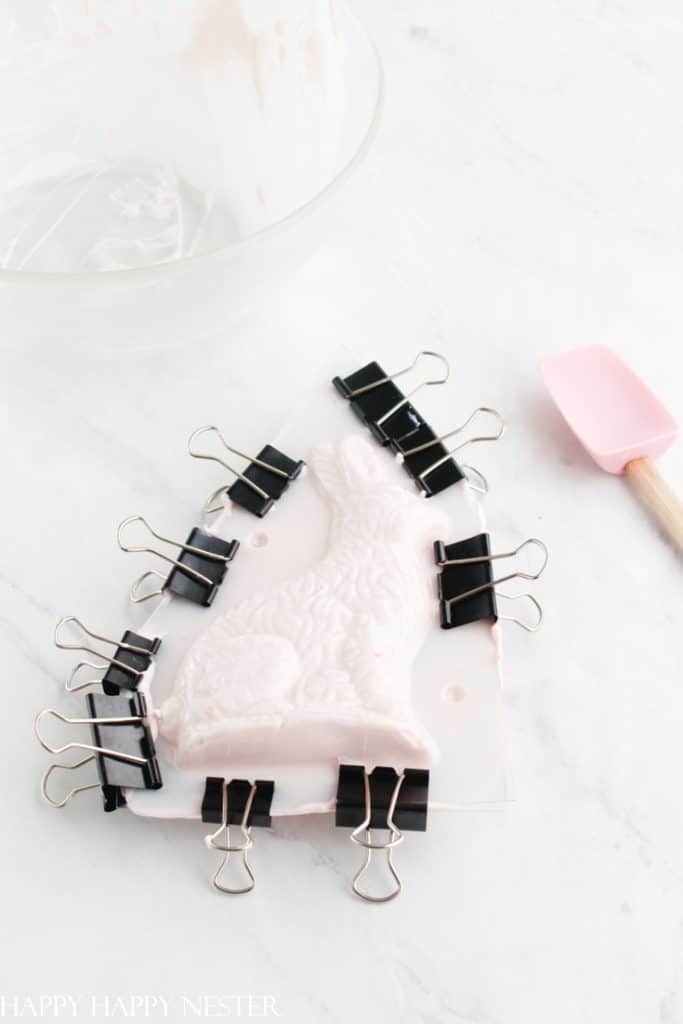
Step 3 – Clip Molds
Once you fill both molds with chocolate, line up the molds using the round points on the mold. These bumps help align the molds. Next, you’ll want to attach the metal clips to the sides of the molds to keep them in place and close up any gaps in the molds. There is a bit of leeway, so check to ensure the molds are in place.
Step 4 – Room Temperature Chocolate
Ok, here’s the thing about my experience with cooling chocolate. The first couple of bunnies, I placed them in the freezer. The results were that the chocolate cracked. I placed it in the refrigerator for about 45 minutes until the bunny was not warm to touch. This method didn’t crack the chocolate at all.
But, you can cool on your counter for at least three hours for the best results.
Once the bunny is out of the mold, clean off the extra chocolate.
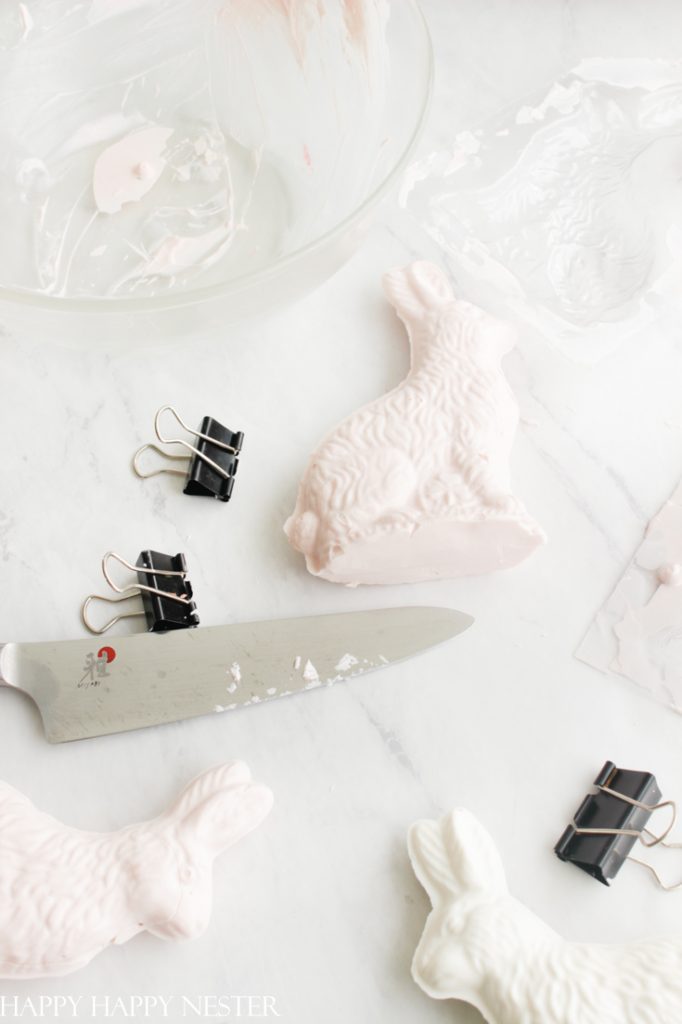
Step 5 – Scrape Off the Bottom of the Bunny
You’ll get a bit of extra chocolate on the bottom of the bunny, so take a flat knife and trim off the excess. Once you have it smooth, the bunny will stand up straight.
Homemade Chocolate Bunny
Ingredients
- 8 oz chocolate Melting chocolate
- 1 tbsp shortening
- food coloring
Instructions
- My mold did not come with instructions, but I figured it out quickly with some deductions. You want to trim the mold to place clips close to the bunny. But don’t trim too closely and accidentally cut the rabbit.
Double Broiler Method
- Place about three inches of water in a medium to a small pan.
- Next, place a heat-proof bowl with chocolate meltaways and place the bowl on top of the pan. Make sure to use one that is bigger than the pan. You can add a tablespoon of shortening to the chocolate. This prevents hardening and creates a smooth chocolate.
- Bring water to a boil and place the melting chocolate in the bowl.
- Once the water is boiling, turn the heat down to medium to low. Mix chocolate thoroughly.
- Add the food coloring before the chocolate is fully melted and mix well.
Microwave Method
- Place chocolate in a microwave-safe bowl. Add a tablespoon of shortening to the chocolate.
- Microwave in 30-second intervals and stir thoroughly. Set your microwave to a defrost setting if you have a low power setting.
- Remove the chocolates from the microwave when small chunks remain, as the residual heat will continue melting them as you stir.
Filling Chocolate Molds
- Make sure to work quickly since you have 7-10 minutes before the chocolate hardens.
- Fill both chocolate molds to the top. Make sure to look underneath the mold to see air pockets. If there are, use a knife or toothpick to remove the bubbles.
- Spread the chocolate beyond the edges of the rabbit. That way, you make sure there are holes along the seams.
- Make sure your bunny's edges line up especially on the bottom section.
- Place the chocolate-filled molds together and clip the edges to all the sides.
- Let the chocolate cool on your kitchen counter for two or more hours.
- Place the mold in the refrigerator for 45 minutes if you like.
- Once the chocolate is no longer warm to the touch, take off clips and gently pull the mold off in sections. You'll see the chocolate lift from the mold. Work your way around the bunny until it lifts clean of the mold.
- Lift the bunny out of the mold carefully and trim off excess chocolate.
- Trim the bottom of the bunny so that the surface is flat. The bunny will stand if you trimmed it well.
Nutrition
A Few Tips About Making a Chocolate Bunny
Should I Make a Hollow or Solid Bunny?
I tried making both a hollow and solid bunny. The hollow ones ended up cracking since I think they are more fragile. So I highly recommend making a solid chocolate bunny.
How Do You Make Sure The Chocolate Won’t Crack?
First off, don’t freeze the chocolate to cool it down. It needs to cool naturally at room temperature.
Also, when filling the molds with the melted chocolate, work quickly so that when you bring them together, the chocolate molds together. You see, my first bunnies, I took my time filling the molds, and the chocolate cooled down enough so that it didn’t set together and it cracked later.
Is a Plastic Chocolate Mold Ok to Use?
I like the plastic molds since I can see the air pockets. This clear view wouldn’t be possible if I used a silicone or metal mold.
I always wanted to buy one of the fabulous vintage chocolate molds, but I have to say that my little inexpensive plastic mold works great.
I hope you have a chance to make an adorable homemade chocolate bunny! After making about eight of them, I finally figured out the best method for using plastic chocolate molds.
It feels so awesome to overcome my fear of working with chocolate!
Make sure to check out my friend’s Easter decor projects.
Cheers,

8 Easter Decor Ideas for Your Home!
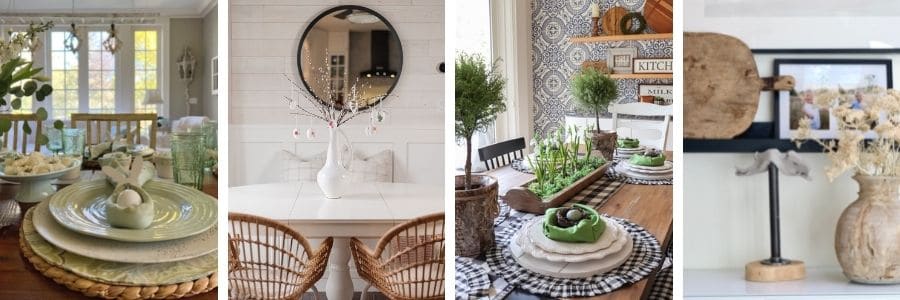
A Pretty Table with Easter Decor | My 100 Year Old Home
Dried Floral Easter Egg Tree | The DIY Mommy
How to Make Fast & Easy Easter Decorations | The Design Twins
DIY Clay Rabbit | My Sweet Savannah
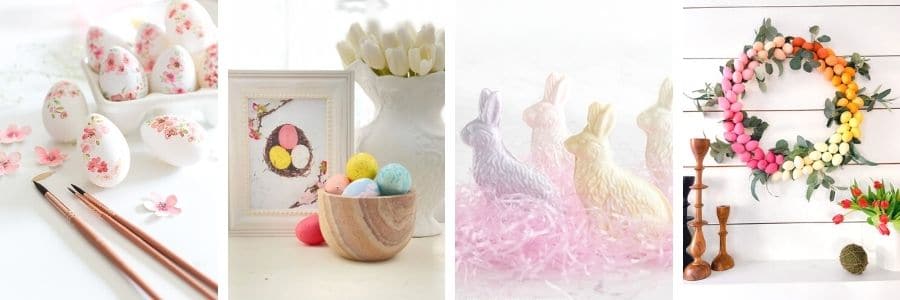
Handpainted Watercolor Easter Eggs | Craftberry Bush
Free Printable Easter Egg Art | The Happy Housie
How to Make a Homemade Chocolate Bunny | Happy Happy Nester
Ombre Easter Egg Wreath | Tatertots and Jello


- My Favorite Cakes - July 5, 2025
- Outdoor Tables and Chairs - July 2, 2025
- My Favorite Floral Desserts - June 28, 2025


Renae
These are absolutely adorable! I love them. Brilliant. I would love it if you could share this on The Fabulous Friday Link Party this Friday. You can find the link on my website. Hugs to you.
Arita Droog
Hi! If you are using a clear mold like you are you can see when the chocolate is ready. There will be no hazy spots. Also, make sure you ‘polish” the mold before pouring in the chocolate. Use a non-abrasive fabric like an old worn-out tea towel or tee shirt. using a paper towel is handy but will scratch your mold. When making a hollow bunny fill one half of the mold 3/4 full with melted chocolate. then place empty half on top and clip as you did, then just roll the mold around until all inner surfaces are covered. Keep turning the mold until you can’t feel the chocolate moving anymore, then let set until cool and unmold. If you are not sure then let it sit in the fridge for 5 minutes and then unmold. Make sure to look for those hazy spots.Most of all be patient!
Have fun
happyhappynester
Happy Wednesday Arita Droog! Thank you so much for your instructive feedback! It always makes me happy to know people are so involved in baking like yourself, happy baking my friend!
Colleen
These are cute, but I’m not understanding how you close your bunny mold with melted chocolate in each side without it running all over the place?
happyhappynester
Good afternoon Colleen! To answer your question, I fill the bunny mold all the way to the top, and yes, melted chocolate does leak out but you can always wipe up the excess chocolate. So, in the end the melted chocolate on each side will run all over the place but don’t worry, that’s normal.
Arita
Only fill half the mold with melted chocolate then place the other empty half on top and paper clip together. Rotate the mold to let the chocolate cover all insides. Continue to rotate and roll the mold until you can not feel the chocolate moving. (It will feel heavier where there is more chocolate)
If you want a solid bunny then fill each half, let it cool. Then when solid gently remove from the mold. With a sharp knife, trim edges so that the 2 flat surfaces are level. Then using some melted chocolate as glue, ‘glue’ the two sides together. Let it set, then trim any oozed chocolate from the edges.
happyhappynester
Hello Arita! Thank you so much for your input 🙂 It’s always nice to discover a new technique to make such a delicious treat. I hope you enjoyed the recipe, stay tuned for more spring desserts!
Colleen
Ohh., ok..I understand your explanation. Thankyou!
Arita
I like to learn things too!